Yes, gel nail polish absolutely needs UV light (or LED light) to cure properly. Unlike traditional polish that air dries, gel polish contains special photoinitiators that react only when exposed to specific wavelengths of light. This light energy triggers a chemical process called polymerization, transforming the liquid gel into a hard, durable, and chip-resistant coating on your nails, providing that signature long-lasting shine.
Does Gel Nail Polish Need Uv Light?
Are you a fan of gorgeous, long-lasting manicures that stay chip-free for weeks? Then chances are you’ve either indulged in or at least admired the magic of gel nail polish. It’s become a salon staple and a home beauty favorite, promising a durable, high-gloss finish that traditional polish simply can’t match. But as popular as it is, one question consistently pops up for both beginners and seasoned nail enthusiasts: “Does gel nail polish need UV light?”
It’s a really common point of confusion, and for good reason! We’re all used to regular nail polish, which dries simply by exposing it to the air. You paint, you wait, maybe you blow on it a bit, and eventually, it hardens. So, it’s natural to assume that gel polish might work the same way. However, if you’ve ever tried to air-dry gel polish, you’ve probably ended up with a sticky, gooey mess that never seems to set. This immediately tells you that something fundamental is different about how gel polish works.
The short answer to our big question is a resounding yes. Gel nail polish absolutely needs a special kind of light to cure – specifically, UV light or its close cousin, LED light. But understanding *why* it needs light, what kind of light, and how it all works will not only make your at-home gel manicures more successful but also help you appreciate the clever science behind this fantastic nail innovation. Let’s dive in and demystify the world of gel nails and their essential light source.
Key Takeaways
- Gel Polish Requires Light: Gel nail polish does not air-dry; it cures through a chemical reaction triggered by specific wavelengths of UV or LED light.
- UV vs. LED Lamps: Both UV and LED lamps effectively cure gel polish. LED lamps are generally faster and have a longer bulb life, while UV lamps are often more universal for different gel brands.
- Photoinitiators are Key: The magic behind gel polish lies in “photoinitiators,” chemicals that react to light, causing the gel to harden (polymerize).
- No Curing, No Durability: Without proper light exposure, gel polish will remain a sticky, liquid state and will not achieve its intended strength, shine, or longevity.
- Skin Safety Considerations: While occasional use is considered low risk, it’s wise to take precautions like applying sunscreen or wearing fingerless gloves to protect the skin on your hands from UV exposure during the curing process.
- Application Matters: For a successful gel manicure, always apply thin coats and ensure each layer is fully cured under the lamp according to the product’s instructions.
- Not All Gels Are Alike: Always check your gel polish brand’s instructions for recommended lamp type and curing times, as formulations can vary.
Quick Answers to Common Questions
Does gel nail polish dry in the air?
No, gel nail polish does not air-dry. It requires specific wavelengths of UV or LED light to cure and harden through a chemical process called polymerization.
Can I use a regular nail lamp for gel polish?
You need a lamp specifically designed for gel polish, which emits UV or LED light. A regular “drying” fan or traditional light source will not work as they do not provide the necessary wavelengths for curing.
What happens if gel polish doesn’t fully cure?
If gel polish doesn’t fully cure, it will remain sticky and soft, prone to smudging, chipping, and peeling. It won’t achieve its intended hardness, shine, or durability.
Are LED lamps better than UV lamps for gel polish?
LED lamps are generally faster and have a longer bulb life than traditional UV lamps. Most modern gel polishes are compatible with LED (or dual UV/LED) lamps, making them a popular and efficient choice.
Is sunlight enough to cure gel polish?
While sunlight contains UV rays, its intensity and consistency are too variable to properly and reliably cure gel polish. Using a dedicated UV or LED lamp ensures a controlled and effective curing process.
📑 Table of Contents
What Exactly *Is* Gel Nail Polish?
Before we get too deep into the light requirements, let’s first understand what gel nail polish actually is. It’s not just a fancier version of regular polish; it’s a completely different chemical formulation. Traditional nail polish is essentially a solvent-based paint that hardens as the solvents evaporate into the air. Gel polish, on the other hand, is a type of acrylic polymer that requires a chemical reaction, not just air exposure, to solidify.
The Science Behind the Shine
At its core, gel nail polish is made up of a mix of acrylic monomers and oligomers. Think of these as tiny building blocks. What makes gel polish unique are special ingredients called “photoinitiators.” These photoinitiators are extremely sensitive to certain wavelengths of light. When exposed to the correct light source – either UV or LED – they absorb that energy and kickstart a chemical chain reaction. This process is called polymerization, where those tiny monomers and oligomers link together, forming long, strong polymer chains. This transformation is what turns the liquid gel into a solid, durable, and shiny coating on your nails. It’s a bit like baking a cake; you have all the liquid ingredients, but you need heat to turn them into a solid, edible treat. Gel polish needs light to “bake” it into a hard finish.
Not Your Grandma’s Polish
The distinct chemical composition is why you can’t just swap gel polish for traditional polish and expect the same results without a lamp. If you leave gel polish out in the open air, it will stay in its liquid, sticky state indefinitely (or until dust and lint inevitably stick to it!). It simply doesn’t contain the volatile solvents that evaporate to “dry” traditional polish. This fundamental difference is crucial to understanding why a light source is non-negotiable for a successful gel manicure. This also explains why gel polish bottles are opaque; they need to protect the sensitive photoinitiators inside from accidental exposure to ambient light, which could start the curing process prematurely and ruin the product.
The Role of UV Light in Gel Polish Curing
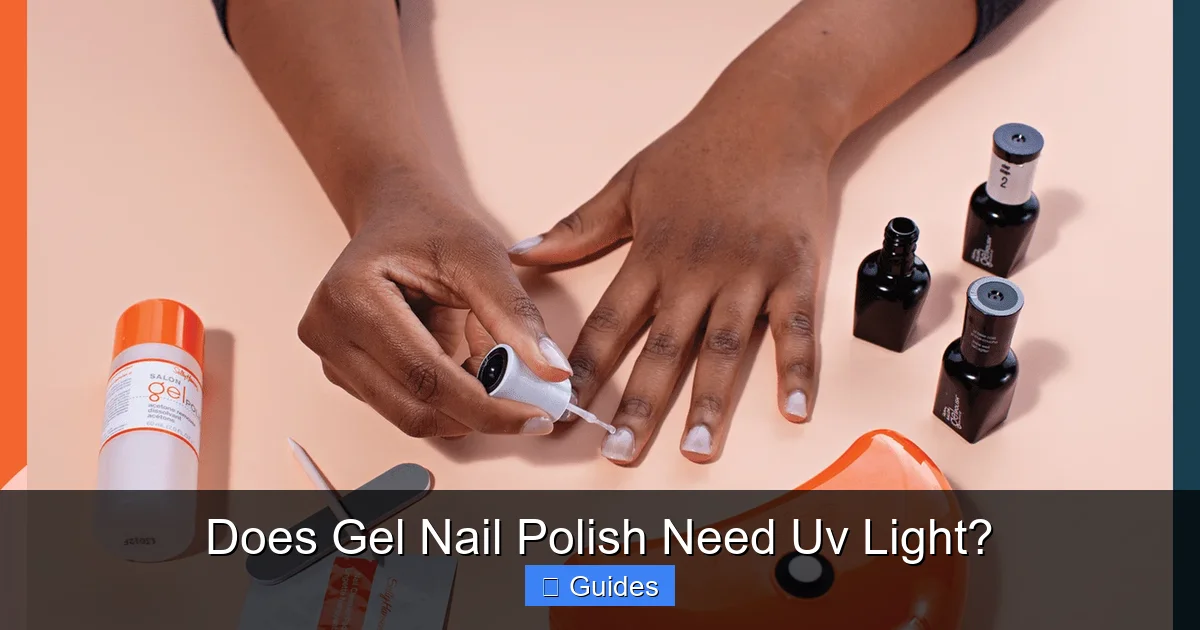
Visual guide about Does Gel Nail Polish Need Uv Light?
Image source: people.com
Now that we know gel polish needs light, let’s talk about the specific type of light and how it makes the magic happen. When we say “UV light,” we’re referring to ultraviolet light, which is a segment of the electromagnetic spectrum beyond visible light. Both dedicated UV lamps and LED lamps (Light Emitting Diode) are used for curing gel polish, and while they might seem different, they both emit specific wavelengths of light necessary for the polymerization process.
Understanding UV vs. LED
Initially, all gel polishes were designed to cure under traditional UV lamps. These lamps use fluorescent bulbs that emit a broad spectrum of UV-A light. As technology advanced, LED lamps entered the market. LED lamps work by emitting a narrower, more concentrated band of UV light, typically at a higher wavelength (around 395-405 nm) than older UV lamps. This difference in wavelength is important because some gel polish formulations are optimized to cure faster and more efficiently under LED light, while others might still require the broader spectrum of a traditional UV lamp. It’s always a good idea to check the specific gel polish bottle; it will usually state whether it’s “UV,” “LED,” or “UV/LED” compatible.
How Curing Works
When you place your hand, coated with gel polish, inside a UV or LED lamp, the photoinitiators in the gel absorb the light energy. This energy causes them to become highly reactive. These activated photoinitiators then collide with the monomers and oligomers, initiating the chain reaction we discussed earlier. The more monomers and oligomers that link together, the harder and more rigid the gel becomes.
The curing process isn’t instantaneous. It usually takes anywhere from 30 seconds to 2 minutes per coat, depending on the lamp’s power and the gel polish formulation. During this time, the gel transforms from a fluid state to a resilient, solid layer. If a coat isn’t fully cured, it will remain soft, sticky (beyond the normal “tacky layer” which is different), and prone to peeling, chipping, or smudging. Proper curing is the key to achieving the legendary longevity and durability that gel manicures are known for.
Can Gel Polish Cure Without a UV (or LED) Lamp?
This is a straightforward question with an equally straightforward answer: No, gel polish cannot cure without a UV or LED lamp. There’s no workaround for this fundamental requirement. Trying to air-dry gel polish will only lead to frustration and a wasted product.
Why Air Drying Doesn’t Work
As we’ve established, gel polish relies on a chemical reaction, polymerization, triggered by specific light wavelengths. Air drying is a physical process where solvents evaporate. Since gel polish formulations are designed to *not* evaporate, and to rely solely on photoinitiation, leaving it exposed to air won’t do anything to harden it. You’ll simply have a wet, sticky layer that will pick up every bit of lint and dust it encounters, making your manicure a disaster. If you’ve ever tried to let it air dry, you’ll know this messy reality firsthand!
The “Sunlight” Myth
Some people wonder if natural sunlight, which contains UV rays, could be used to cure gel polish. While technically sunlight *does* contain UV-A and UV-B rays, it’s not a reliable or effective method for curing gel polish for several reasons:
- Inconsistent Intensity: The intensity of UV light in natural sunlight varies greatly depending on the time of day, weather, season, and your location. This makes it impossible to control the curing process accurately.
- Uncontrolled Exposure: Your nails would be exposed to a broad spectrum of light, including visible light and potentially harmful UV-B, for an unknown duration. This could lead to uneven curing, poor adhesion, and potentially more skin damage than controlled lamp exposure.
- impractical: Imagine trying to sit perfectly still in direct sunlight for several minutes per coat, ensuring even exposure to all nails, without moving or getting shadows. It’s just not practical for a clean, consistent manicure.
So, while sunlight does contain the necessary UV spectrum, the lack of control and consistent intensity makes it an unsuitable substitute for a dedicated curing lamp. Stick to the lamps designed for the job for the best and safest results.
Choosing the Right Lamp: UV vs. LED
If you’re looking to do gel manicures at home, investing in a good curing lamp is essential. But with “UV” and “LED” lamps widely available, how do you choose? Both types have their pros and cons.
UV Lamps: The Original Curers
UV lamps use traditional fluorescent bulbs that emit a broader spectrum of UV-A light.
- Pros:
- Generally more affordable to purchase initially.
- Often compatible with a wider range of gel polish brands, especially older formulations that were specifically developed for UV light.
- Bulbs are replaceable, which can extend the life of the lamp unit itself.
- Cons:
- Slower curing times, typically 1-2 minutes per coat.
- Bulbs need to be replaced every 6-12 months (or after a certain number of hours) as their UV output diminishes, affecting curing efficiency.
- Emit a broader spectrum of UV-A light, which some people prefer to minimize due to skin exposure concerns (though the risk is low with proper use).
LED Lamps: The Faster, Newer Option
LED lamps use Light Emitting Diodes that emit a narrower, more targeted spectrum of UV light, usually at higher wavelengths (around 395-405 nm).
- Pros:
- Significantly faster curing times, often 30-60 seconds per coat. This saves a lot of time!
- LED bulbs last much longer, often tens of thousands of hours, meaning you’ll rarely, if ever, need to replace them.
- More energy-efficient than UV lamps.
- Emit a narrower UV spectrum, specifically targeting the photoinitiators found in most modern gel polishes.
- Cons:
- Can be more expensive upfront.
- May not cure all older “UV-only” gel polishes, though most modern gel polishes are “UV/LED compatible.” Always check your polish brand’s label.
Our Recommendation: For most people getting into at-home gel manicures today, an LED lamp (or a dual UV/LED lamp) is the best choice. They are faster, more efficient, and require less maintenance. Just make sure the gel polishes you plan to use are compatible with LED curing. A “dual” lamp that combines both UV and LED technology is also an excellent option, offering the best of both worlds and ensuring compatibility with virtually any gel product.
Important Safety Considerations
Regardless of whether you choose a UV or LED lamp, a common concern is the effect of UV exposure on the skin. While the amount of UV exposure during a typical gel manicure is relatively low and considered safe by dermatological consensus for occasional use, it’s wise to take precautions, especially if you get gel manicures frequently or have sensitive skin.
- Sunscreen: Apply broad-spectrum sunscreen (SPF 30+) to your hands about 20 minutes before your manicure.
- Fingerless Gloves: You can purchase special UV-protective, fingerless gloves that shield your hands while leaving your nails exposed for curing.
- Limit Exposure: Follow the recommended curing times for your polish and lamp. Don’t over-cure your nails unnecessarily.
- Hydrate: Keep the skin on your hands well-moisturized, especially after a manicure.
Remember, the goal is beautiful nails, and being mindful of your skin health is part of that process.
Tips for a Perfect Gel Manicure at Home
Now that you understand the crucial role of UV/LED light, let’s look at some practical tips to ensure your gel manicure is salon-worthy, whether you’re at home or getting it done professionally.
Prep is Key
The longevity of your gel manicure starts long before the first coat of polish. Proper nail preparation is absolutely essential for good adhesion and preventing chips or lifting.
- Clean Nails: Start with clean, dry nails. Remove any old polish completely.
- Push Back Cuticles: Gently push back your cuticles. Never cut live cuticle tissue.
- Buff Lightly: Lightly buff the surface of your nail plate to remove shine and create a slightly textured surface for the base coat to adhere to. Don’t over-buff; you don’t want to thin your nails.
- Dehydrate: Use a nail dehydrator or rubbing alcohol to remove any oils or residue from the nail surface. This step is critical for proper adhesion.
Skipping these steps is a common reason why gel polish doesn’t last as long as expected.
Thin Coats, Even Cures
This is perhaps one of the most important tips for a successful gel manicure. Unlike traditional polish where you might apply thicker coats for quicker coverage, gel polish thrives on thin layers.
- Apply Thinly: Apply each coat of gel polish (base, color, top coat) as thinly and evenly as possible. Think of it as painting the nail, not glooping it on.
- Cap the Free Edge: Don’t forget to “cap” the free edge of your nail with each coat. This means gently brushing a thin layer of polish along the very tip of your nail. This seals the edge and helps prevent chipping and lifting.
- Cure Each Coat Thoroughly: After each thin coat (base, color 1, color 2, top coat), place your hand fully into the UV or LED lamp and cure for the recommended time. Do *not* try to cure multiple coats at once; it will not work effectively and can lead to under-curing and peeling.
Thin coats ensure that the UV or LED light can penetrate all the way through the polish, allowing the photoinitiators to activate uniformly and cure the entire layer. Thick coats often result in the surface curing, but the deeper layers remaining gooey and uncured, leading to chipping and peeling within days.
Don’t Forget the Top Coat
The top coat isn’t just for shine; it’s a crucial part of the gel system. A good gel top coat seals in your color, adds extra durability, and provides that high-gloss, chip-resistant finish. Just like the other layers, it needs to be cured under the UV or LED lamp. After curing, many gel top coats leave a “tacky inhibition layer.” This sticky residue is normal and not a sign of under-curing. Simply wipe it away with a lint-free wipe soaked in rubbing alcohol or a specialized gel cleanser to reveal the super shiny, hard finish underneath.
Proper Removal Matters
While not directly related to the curing process, improper removal of gel polish can severely damage your natural nails. Never peel, pick, or aggressively file off gel polish. Always soak it off with acetone, gently pushing it away with a wood stick once it’s lifted. Treat your nails with care during removal to keep them healthy for your next stunning gel manicure.
Addressing Common Concerns and Misconceptions
Even with its popularity, gel polish and its curing methods still spark questions and a few myths. Let’s clear some of these up.
Are UV/LED Lamps Safe for Your Skin?
This is one of the most frequently asked questions. Numerous studies and dermatological opinions suggest that the amount of UV exposure from nail lamps is generally low and considered safe for occasional use. The UV-A rays emitted are less damaging than UV-B rays, which are primarily responsible for sunburns and increased skin cancer risk from prolonged, intense sun exposure.
However, if you’re getting gel manicures very frequently (e.g., every week for years), or if you have a pre-existing skin condition, you might want to be extra cautious. The recommended precautions (sunscreen, fingerless gloves) are simple ways to minimize any potential long-term effects. The overall consensus is that the risk is low, but being informed and taking simple steps for protection is always a good idea.
Can You Use “No-Light” Gel Polishes?
You might see products marketed as “no-light gel” or “air-dry gel.” It’s important to understand that these products are typically not true gel polishes in the same sense as the light-cured varieties.
- Dip Powders: These often create a similar durable, long-lasting manicure effect. They use a resin and a powder, which harden when activated by a liquid “activator” rather than light.
- Hybrid Polishes: Some brands offer hybrid polishes that aim for gel-like longevity but claim to air-dry. While they may last longer than traditional polish, they generally won’t offer the same chip-free, weeks-long wear of a true light-cured gel.
- Top Coats: There are “gel-effect” top coats that air dry and give a very shiny, plump finish, mimicking the look of gel. These are simply traditional top coats with a specific formulation.
If a product truly claims to be a “gel polish” and air-dries, it’s not using the same photoinitiator technology and therefore won’t provide the same ultra-durable, rock-hard finish that requires UV or LED light. Always check the ingredients and instructions carefully to avoid disappointment. True gel polish, the kind salons use, needs a lamp.
Maximizing Your Gel Polish Longevity
Beyond the proper curing, a few other things can help your gel manicure last as long as possible:
- Avoid Water Immediately After: While the gel is cured and hard, it’s still a good idea to avoid prolonged hot water exposure (like a long bath or dishwashing without gloves) for the first few hours after your manicure.
- Wear Gloves: When doing household chores, gardening, or anything involving harsh chemicals or prolonged water exposure, wear gloves to protect your manicure (and your hands!).
- Moisturize Regularly: Keep your cuticles and hands hydrated with cuticle oil and hand cream. Healthy nails and skin contribute to a longer-lasting manicure.
- Don’t Pick! Resist the urge to pick or peel at your gel polish if it starts to lift. This will inevitably damage your natural nail underneath.
Following these tips, along with proper prep and curing, will ensure you get the most out of your gel manicure.
Conclusion
So, let’s circle back to our original question: Does gel nail polish need UV light? The answer is a definitive and scientific yes. Without the specific wavelengths of light emitted by a UV or LED lamp, gel nail polish simply cannot undergo the chemical transformation necessary to harden, providing that glossy, durable, and chip-resistant finish we all love. It’s a fundamental part of the gel polish process, not an optional step.
Understanding this vital requirement empowers you to achieve professional-quality gel manicures at home, knowing exactly why each step, especially the curing process, is so important. By choosing the right lamp, properly preparing your nails, applying thin coats, and curing them thoroughly, you can enjoy weeks of beautiful, strong nails. Embrace the science, invest in the right tools, and get ready to flaunt your perfectly polished, perfectly cured gel nails with confidence!
🎥 Related Video: Gel Nails without the UV Lamp?! #nails
📺 Parabell Beauty
Frequently Asked Questions
What is the main difference between gel polish and regular nail polish?
The main difference is their drying mechanism. Regular nail polish air-dries as solvents evaporate, while gel polish requires exposure to UV or LED light to undergo a chemical reaction (polymerization) that hardens it.
Can I cure any gel polish with any UV or LED lamp?
While many modern gel polishes are “UV/LED compatible,” it’s always best to check the specific product instructions. Some older gel formulations might only cure under UV lamps, and some LED lamps might not have the correct wavelength for all gels.
Why is my gel polish still sticky after curing?
Many gel top coats and some color coats leave a “tacky inhibition layer” after curing, which is normal. This sticky residue needs to be wiped away with a lint-free wipe soaked in rubbing alcohol or gel cleanser to reveal the hard, shiny finish.
How long do I need to cure each coat of gel polish?
Curing times vary depending on the specific gel polish brand, the type of lamp (UV or LED), and the lamp’s wattage. Always refer to the manufacturer’s instructions for the recommended curing time for each layer (base, color, top).
Is it safe to use UV lamps for gel nails regularly?
The amount of UV exposure from nail lamps is generally considered low risk for occasional use by dermatological experts. However, for frequent users, applying broad-spectrum sunscreen or wearing UV-protective fingerless gloves can further minimize potential exposure and protect skin health.
Can I use gel polish without a base coat or top coat?
Using a gel base coat and top coat is crucial for a successful gel manicure. The base coat provides adhesion to the natural nail, and the top coat seals the color, adds shine, and provides durability. Skipping them will significantly reduce the longevity and quality of your manicure.