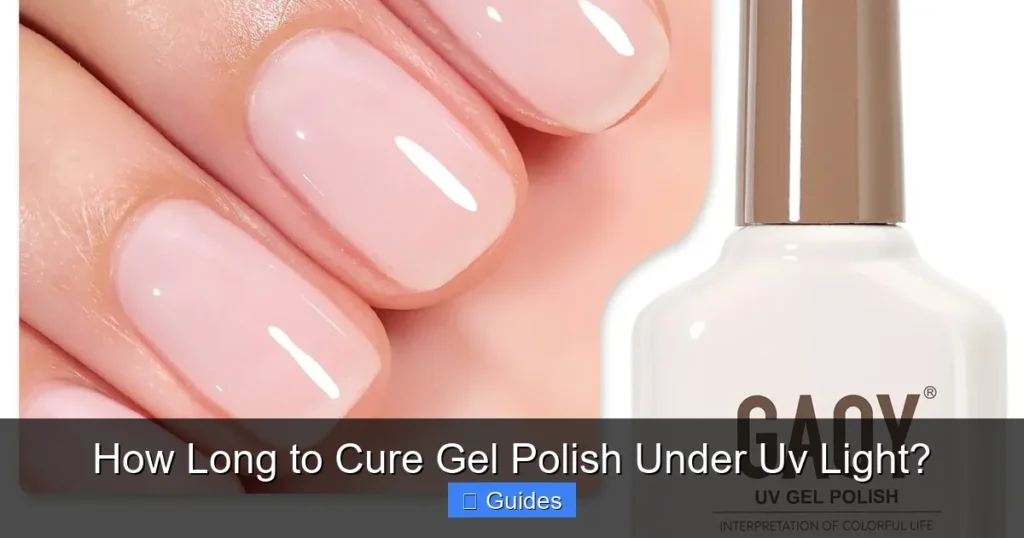
Properly curing gel polish under UV light is essential for a durable, salon-quality manicure, but there’s no single universal answer to “how long.” Cure times vary significantly based on your specific lamp’s wattage, the type and brand of gel polish, the thickness of each coat, and whether you’re using a traditional UV or a more modern LED/dual-spectrum lamp. Always consult your gel polish and lamp manufacturer’s instructions to ensure optimal results and avoid common issues like peeling or chipping.
Welcome, fellow nail enthusiasts! If you’ve ever found yourself staring intently at your nails under a UV lamp, wondering if they’re *truly* done, you’re definitely not alone. The world of gel polish has revolutionized home manicures, offering incredible shine and longevity that traditional polish just can’t match. But with great power comes great responsibility – specifically, the responsibility of proper curing. Getting this step right is absolutely vital for a flawless, durable, and safe gel manicure.
Understanding “how long to cure gel polish under UV light” is arguably the most critical piece of information for anyone doing their own gel nails at home. It’s not just about drying; it’s a chemical process that transforms liquid gel into a hard, protective layer. Get it wrong, and you risk everything from frustrating peeling and chipping to potential allergic reactions. So, let’s dive deep into the science, the tips, and the common pitfalls to ensure your next gel manicure is nothing short of perfect.
Understanding Gel Polish Chemistry and Curing
Before we talk about times, let’s quickly understand what’s happening when you place your hand under that light. Gel polish isn’t like regular nail polish that air-dries. Instead, it relies on a process called “curing” – a chemical reaction initiated by exposure to specific wavelengths of light.
What is “Curing”?
Curing is essentially hardening. Gel polish formulas contain special ingredients called “photoinitiators.” These photoinitiators are extremely sensitive to UV (ultraviolet) light. When they absorb enough light energy, they trigger a rapid polymerization process, causing the liquid gel molecules to link together, forming a strong, solid plastic network. This is what makes your gel polish hard, shiny, and chip-resistant. If this process isn’t completed correctly, your gel won’t reach its full potential.
The Role of Photoinitiators
Different gel polish brands and types (base coat, color, top coat, builder gel) use various photoinitiators, which are optimized to cure under specific light wavelengths and intensities. This is why some gels might cure perfectly under an LED lamp, while others explicitly require a UV lamp, and many modern gels are designed to work with both (often labeled as “UV/LED” compatible). The efficiency of these photoinitiators directly impacts how long you need to cure gel polish under UV light.
UV vs. LED Lamps: The Core Difference
This is where much of the confusion around cure times stems from. Not all nail lamps are created equal! There are primarily two types of lamps used for curing gel polish: UV lamps and LED lamps. Knowing the difference is key to understanding “how long to cure gel polish.”
How UV Lamps Work
Traditional UV lamps typically use fluorescent bulbs that emit a broad spectrum of ultraviolet light, including UVA rays (around 350-400 nanometers). These lamps are the OGs of gel curing and can cure virtually any type of gel polish, as most photoinitiators are designed to respond to these wavelengths.
The downside? UV bulbs degrade over time, meaning their light output weakens, and they need to be replaced regularly (usually every 3-6 months with frequent use, or after about 100-200 hours of operation). If you don’t replace them, you’ll find yourself wondering why your gel isn’t curing properly, even if you’re following the recommended times. Typical cure times under UV lamps range from 60 seconds to 2 minutes per coat.
How LED Lamps Work
LED (Light Emitting Diode) lamps use specific, narrow-spectrum light-emitting diodes, usually in the UVA range (around 385-400 nanometers). They are much faster at curing compatible gel polishes because their light output is more focused and intense. However, because they emit a narrower spectrum of light, not all gel polishes are formulated to cure under LED light. If a gel polish says “UV only,” it won’t cure properly under an LED lamp.
The big advantages of LED lamps are speed (often 30-60 seconds per coat) and longevity. LED bulbs can last for tens of thousands of hours, meaning you rarely, if ever, have to replace them. They also tend to be more energy-efficient.
Dual-Spectrum Lamps
Many modern lamps on the market today are “dual-spectrum” or “UV/LED” lamps. These lamps combine both UV and LED technologies, emitting a wider range of wavelengths (typically 365nm + 405nm). This makes them compatible with virtually all gel polishes available, offering the best of both worlds: faster curing times (similar to LED) and universal compatibility. If you’re buying a new lamp, a dual-spectrum model is often the best choice for versatility.
Factors Influencing Cure Time
So, if there’s no single answer to “how long to cure gel polish under UV light,” what *does* affect it? Several factors come into play, and understanding them will help you achieve consistent, professional-looking results.
Lamp Wattage and Bulb Condition
A higher wattage lamp *generally* means a more powerful output and potentially faster cure times, assuming all other factors are equal. However, wattage isn’t the only indicator of efficiency. The number and placement of bulbs, and the lamp’s internal design (e.g., reflective interiors), also play a role. Crucially, for UV lamps, the age and condition of the bulbs are paramount. Old, weakened bulbs will require longer cure times, or worse, may not cure the gel fully at all.
Gel Polish Pigmentation and Brand
Not all gel polishes are created equal!
- Pigmentation: Darker or highly pigmented gel polishes (like black, dark blue, or white) often require slightly longer cure times than sheer or lightly colored gels. This is because the pigment can block some of the UV light from reaching the photoinitiators at the bottom layers of the polish.
- Brand Formulations: Each brand formulates its gels differently, using various photoinitiators and concentrations. This is why one brand’s base coat might cure in 30 seconds, while another’s requires 60 seconds. Always check the specific brand’s recommendations.
Coat Thickness
This is perhaps one of the most common mistakes DIYers make. Applying thick coats of gel polish is a recipe for disaster. Only the top layer of a thick coat will be fully exposed to the UV light, causing it to cure and harden while the bottom layer remains liquid or tacky. This leads to:
- Poor adhesion and premature lifting/peeling.
- A soft, gummy, or wrinkly finish.
- Increased risk of developing gel allergies due to prolonged skin contact with uncured product.
Always apply gel polish in thin, even layers. If you want more opacity, apply two or three thin coats, curing each one fully.
Nail Plate Size and Hand Placement
Sounds trivial, but it’s important! If your nails aren’t positioned correctly under the lamp, some areas (like the thumbs or side walls) might not receive enough light. Make sure your entire hand, especially your thumbs, is centered and fully exposed to the light during the curing process. Many lamps have specific thumb rests or suggest curing thumbs separately for optimal results.
Environmental Factors
While less critical than the other factors, extreme temperatures can slightly affect cure times. Working in a very cold room might slow down the chemical reaction slightly, while a very warm room could theoretically speed it up. Aim for a comfortable, room-temperature environment for your gel applications.
Recommended Cure Times: A General Guide
While you *must* always refer to the specific instructions from your gel polish brand and lamp manufacturer, here’s a general guideline for how long to cure gel polish under UV light (and LED) for common gel types.
* Traditional UV Lamp (36W or higher):
* Base Coat: 60-90 seconds
* Color Coats: 60-120 seconds per thin coat (darker colors closer to 120s)
* Top Coat: 120 seconds
* Builder Gels/Hard Gels: 120-180 seconds
* LED Lamp or Dual-Spectrum UV/LED Lamp (24W or higher):
* Base Coat: 30 seconds
* Color Coats: 30-60 seconds per thin coat (darker colors closer to 60s)
* Top Coat: 60 seconds
* Builder Gels/Hard Gels: 60-90 seconds
**Important Note on the “Sticky Layer”:** After curing, gel polish often leaves a sticky, tacky residue. This is perfectly normal and is called the “inhibition layer.” It’s a byproduct of the curing process and is crucial for subsequent layers of gel to adhere properly. **Do not wipe this layer off until after the final top coat has been fully cured.** Once your top coat is cured, you can wipe the sticky layer with a lint-free wipe soaked in 99% isopropyl alcohol (rubbing alcohol) or a specialized gel cleanser to reveal the ultimate shine.
Common Curing Mistakes and How to Avoid Them
Making mistakes is part of learning, but some curing errors can seriously undermine your manicure. Let’s look at the most common ones.
Under-Curing
This is the most frequent issue. Under-cured gel will feel soft, gummy, or excessively tacky even after wiping the inhibition layer. It won’t have the desired hard, durable finish.
* **Consequences:** Weak adhesion, chipping, peeling, dullness, and a higher risk of developing contact dermatitis or allergies because uncured product is still active and in contact with your skin.
* **How to Avoid:** Always follow recommended cure times. Ensure your lamp bulbs are new enough (for UV) and your coats are thin.
Over-Curing
While less common with modern gels, over-curing can occur, especially if you leave your nails under the light for excessively long periods (e.g., 5-10 minutes per coat when only 30-60 seconds are needed).
* **Consequences:** The gel can become brittle, leading to premature cracking or lifting. In some cases, colors might fade slightly, or the polish can become difficult to remove.
* **How to Avoid:** Stick to the manufacturer’s recommended times. More isn’t always better!
Uneven Curing
This happens when parts of your nail aren’t fully exposed to the light.
* **Consequences:** Parts of the gel might peel, lift, or remain soft, while other areas are perfectly cured.
* **How to Avoid:** Ensure proper hand and finger placement under the lamp. Cure thumbs separately if your lamp design makes it difficult to position them correctly with the other fingers. Make sure your nails are centered.
Not Reading the Instructions
This might seem obvious, but it’s often overlooked. Each gel polish brand and lamp model can have slightly different specifications.
* **Consequences:** Inconsistent results, wasted product, and frustration.
* **How to Avoid:** Take a few moments to read the instructions for both your gel polish and your lamp. They are there for a reason!
Tips for a Perfect, Long-Lasting Gel Manicure
Beyond knowing “how long to cure gel polish under UV light,” here are some extra tips to elevate your at-home gel game.
Prep is Key
A proper nail prep is the foundation of any long-lasting gel manicure. This includes pushing back and trimming cuticles, gently buffing the nail plate to remove shine (creating a surface for the gel to adhere to), cleaning with a dehydrator/nail cleanser, and applying a primer if recommended. Don’t skip these steps!
Thin Coats Are Your Best Friend
We can’t stress this enough. Thin, even coats cure properly and prevent issues like wrinkling, peeling, and thickness. It’s better to apply three thin coats than two thick ones.
Replace Your Bulbs (for UV Lamps)
If you’re using a traditional UV lamp, mark your calendar! UV bulbs lose their intensity over time, even if they still light up. For regular at-home use, replacing them every 3-6 months is a good rule of thumb. If you do nails frequently, you might need to replace them more often. LED lamps generally don’t require bulb replacement.
Invest in a Quality Lamp
A cheap, low-wattage lamp might seem like a good deal, but it can lead to endless curing problems. A quality lamp (24W or higher for LED/dual, 36W or higher for UV) with good reviews and proper bulb placement is a worthwhile investment that will save you headaches in the long run. Look for lamps with reflective interiors for even light distribution.
Clean the Sticky Layer Properly
After your final top coat is cured, use a clean, lint-free wipe saturated with 99% isopropyl alcohol or a dedicated gel cleanser to remove the tacky inhibition layer. Use a fresh side of the wipe for each nail to prevent spreading the sticky residue. This step reveals the high-gloss finish of your gel manicure.
Conclusion
Mastering the art of “how long to cure gel polish under UV light” might seem a bit daunting at first, with all the variables involved. But by understanding the science behind gel curing, knowing the difference between lamp types, paying attention to your gel polish brand’s specific instructions, and applying your gel in thin, even coats, you’re well on your way to achieving consistently beautiful, durable, and healthy gel manicures at home. So go forth, cure with confidence, and enjoy your stunning, chip-free nails!
Key Takeaways
- No Universal Time: There isn’t one standard “how long to cure gel polish under UV light” because times vary based on lamp type, wattage, gel polish brand, and coat thickness.
- UV vs. LED: Traditional UV lamps typically require longer cure times (often 1-2 minutes per coat) compared to LED or dual-spectrum lamps (often 30-60 seconds per coat) due to different light wavelengths.
- Read Instructions: Always follow the specific curing instructions provided by both your gel polish brand and your UV/LED lamp manufacturer for best results.
- Thin Coats are Key: Applying thin, even coats of gel polish is crucial for proper curing. Thick coats may not cure all the way through, leading to peeling and other issues.
- Lamp Maintenance Matters: UV bulbs degrade over time and need regular replacement (typically every 3-6 months with regular use) to maintain effective curing power. LED bulbs generally last much longer.
- Under-curing Risks: Insufficient curing can lead to a sticky, soft manicure, poor adhesion, chipping, peeling, and potential skin sensitivities or allergies.
- Over-curing Concerns: While less common than under-curing, over-curing can make gel brittle, cause color fading, or lead to product lifting. Stick to recommended times.
Quick Answers to Common Questions
Question 1?
Is it better to over-cure or under-cure gel polish?
Answer 1?
It’s better to slightly over-cure than to under-cure. Under-curing is more problematic, leading to peeling, chipping, and potential skin sensitivities. However, the best approach is to cure for the recommended time, avoiding both extremes.
Question 2?
Why is my gel polish still sticky after curing?
Answer 2?
The sticky layer, known as the inhibition layer, is a normal byproduct of the gel curing process. It should only be wiped off after the final top coat has been fully cured, using isopropyl alcohol or a gel cleanser.
Question 3?
Can I use an LED lamp for UV-only gel polish?
Answer 3?
No, “UV-only” gel polishes are formulated with photoinitiators that respond specifically to the broader spectrum of light emitted by traditional UV lamps. An LED lamp, with its narrower light spectrum, will not properly cure these gels.
Question 4?
How often should I replace the bulbs in my UV nail lamp?
Answer 4?
For optimal performance and proper curing, UV lamp bulbs should generally be replaced every 3-6 months with regular at-home use, or after about 100-200 hours of operation, as their effectiveness diminishes over time.
Question 5?
What happens if I don’t cure my gel polish long enough?
Answer 5?
If you don’t cure your gel polish long enough (under-curing), it will remain soft, gummy, and prone to chipping or peeling quickly. It also increases the risk of developing allergies to uncured gel product.
🎥 Related Video: How to cure gel in the lamp 💡 And how NOT TO 😁
📺 Nailcou
Frequently Asked Questions
How do I know if my gel polish is fully cured?
A fully cured gel polish layer should feel hard, not tacky, after you’ve wiped off the sticky inhibition layer (if it’s the final coat). It should not wrinkle, shrink, or smudge when gently touched, and should have a durable, shiny finish.
Can I cure gel polish with a regular lamp or sunlight?
No, regular lamps (like desk lamps or household lights) do not emit the specific UV wavelengths required to cure gel polish. While sunlight contains UV, its intensity is inconsistent and uncontrolled, making it unsuitable for proper and safe gel curing, often leading to under-curing and skin exposure risks.
Does lamp wattage affect cure time?
Yes, lamp wattage is a significant factor. Generally, higher wattage lamps (both UV and LED) tend to cure gel polish faster due to their increased light intensity. However, the quality and design of the lamp, along with the gel polish formulation, also play crucial roles.
Why is my gel polish peeling after just a few days?
Premature peeling often indicates improper nail preparation, under-curing of one or more gel layers, applying coats that are too thick, or not capping the free edge of the nail with polish. Ensure your nails are clean, dry, and properly buffed before application, and always cure each thin layer thoroughly.
Is it safe to cure gel polish under UV light?
When used as directed, professional UV and LED nail lamps are generally considered safe. However, like any UV exposure, prolonged and unprotected exposure carries risks. Many experts recommend applying sunscreen to your hands or wearing UV-protective gloves during gel applications to minimize direct skin exposure.
Can I mix different brands of gel polish and lamps?
While many “UV/LED” compatible gels will work with various dual-spectrum lamps, it’s generally recommended to use a base coat, color, and top coat from the same brand, and to pair them with a lamp that meets the brand’s specifications. Mixing brands can sometimes lead to compatibility issues, affecting cure times and overall durability.