Achieving a durable, salon-quality manicure with nail stickers and UV light at home is surprisingly simple. These semi-cured gel strips harden under UV/LED light, providing chip-free wear for weeks. Proper nail preparation, precise application, and thorough curing are key to a flawless finish. The process is quick, clean, and delivers impressive results, making it a favorite for DIY nail enthusiasts.
Ever dreamed of sporting a professional-looking, chip-free manicure without the salon price tag or the time commitment? If so, you’re in for a treat! The world of DIY nails has been revolutionized by an incredible innovation: nail stickers that cure under UV light. These aren’t your grandma’s peel-and-stick decals; we’re talking about semi-cured gel polish in a convenient sticker form, designed to give you weeks of vibrant, glossy, salon-quality nails right from your living room.
For many, the thought of doing gel nails at home can feel a bit daunting. There’s mixing, painting, potential messes, and the fear of uneven coats. But imagine skipping all that and simply applying a sticker that transforms into a hard, durable gel manicure with the flick of a switch. That’s the magic we’re diving into today! This guide will walk you through everything you need to know about how to use nail stickers with UV light, turning you into a home manicure pro in no time.
Whether you’re new to the world of gel polish or just looking for a simpler, faster way to achieve stunning nails, using nail stickers with UV light is a game-changer. We’ll cover what these stickers are, the essential tools you’ll need, a detailed step-by-step application process, pro tips for flawless results, and even how to safely remove them. Get ready to unleash your inner nail artist and enjoy beautiful, long-lasting nails that look like they just came from the salon!
Key Takeaways
- Understanding UV Nail Stickers: These are semi-cured gel polish strips that require a UV or LED lamp to fully harden and adhere, providing exceptional durability and shine.
- Essential Tools for Success: You’ll need your chosen UV nail stickers, a UV/LED lamp, nail file, buffer, cuticle pusher, alcohol wipes, and optionally a gel top coat for best results.
- Thorough Nail Preparation is Crucial: Clean, buffed, and dehydrated nails create the perfect base, preventing lifting and ensuring long-lasting wear for your nail stickers.
- Precise Application and Smoothing: Select the correct sticker size (slightly smaller is better), apply carefully from cuticle to tip, and smooth out any air bubbles to avoid bumps or premature peeling.
- The Importance of UV Curing: Curing under a UV/LED lamp is vital to activate and harden the gel in the stickers. Follow the recommended curing times for the specific product to ensure full adhesion and durability.
- Finishing with a Top Coat and Proper Aftercare: A gel top coat adds extra protection and shine, requiring a final cure. Gentle removal methods and post-manicure nail hydration are key for maintaining healthy nails.
Quick Answers to Common Questions
Can I use regular nail stickers with UV light?
No, regular nail stickers are not designed to cure under UV light. They are typically adhesive decals that do not contain gel polish ingredients and will not harden or gain durability from UV exposure.
How long do UV nail stickers last?
When applied correctly and fully cured, UV nail stickers can last anywhere from 10 days to 3 weeks, often comparable to a professional gel manicure.
Do I need a base coat with UV nail stickers?
Most UV nail stickers are designed to be applied directly to a clean, prepped nail without a base coat. However, some brands might recommend or offer a specific base coat for enhanced adhesion; always check the product instructions.
Can I apply a regular nail polish top coat over UV nail stickers?
While you technically could, it’s highly recommended to use a gel top coat that also cures under UV/LED light. A regular top coat won’t provide the same level of protection or shine and won’t contribute to the overall durability of the gel manicure.
Are UV nail stickers safe for my nails?
Yes, when applied and removed correctly, UV nail stickers are generally considered safe for your nails. The key is proper preparation (avoiding harsh buffing) and gentle removal without aggressive peeling or tearing, which can damage the nail plate.
📑 Table of Contents
1. Understanding UV Nail Stickers: The Magic Behind the Manicure
Before we jump into the “how-to,” let’s demystify what these incredible products are and why they work so well. It’s important to understand the basics of UV nail stickers so you can appreciate their power and longevity.
What Exactly Are UV Nail Stickers?
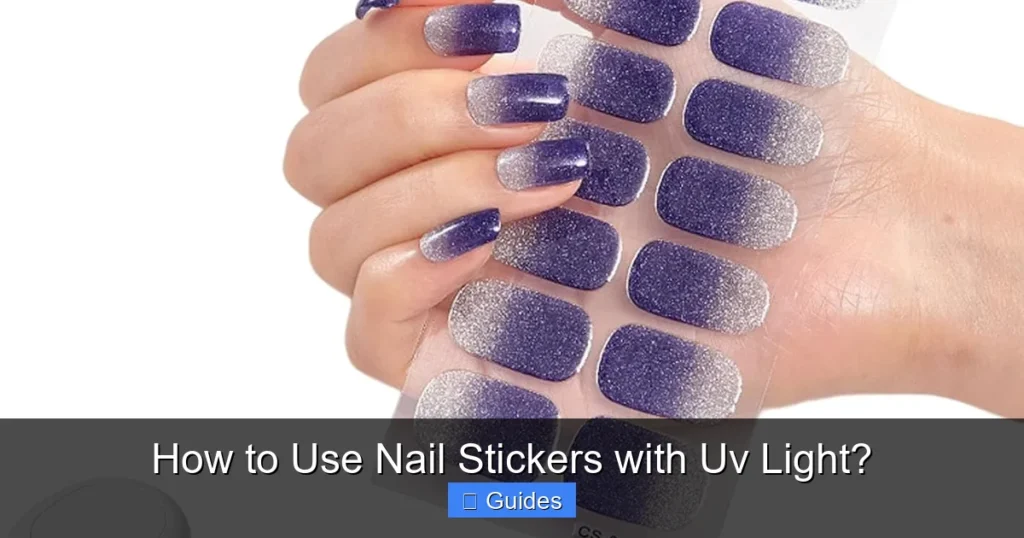
UV nail stickers, often called semi-cured gel nail strips, are essentially gel nail polish that has been partially cured into a flexible sticker form. They come in various colors, patterns, and designs, offering endless possibilities for your nail art. Unlike traditional nail polish strips that are just adhesive designs, UV nail stickers contain real gel polish ingredients. This means they offer the same benefits as a salon gel manicure: incredible durability, high shine, and chip resistance.
When you take them out of their packaging, they are soft and pliable, allowing for easy application onto your nail bed. They’re sticky enough to adhere well but remain flexible until they meet their partner in crime: the UV or LED light.
Why UV Light is Essential: Activating the Gel
Here’s where the “UV” in “UV nail stickers” becomes crucial. These stickers contain photoinitiators – special ingredients that react to ultraviolet (UV) light. When exposed to a UV or LED lamp, these photoinitiators trigger a chemical reaction that fully cures, or hardens, the gel polish. This process transforms the soft, pliable sticker into a solid, protective layer on your nails. Think of it like baking a cake – the ingredients are ready, but they need heat to transform into their final, delicious form.
Without the UV light, the nail stickers would remain semi-cured, making them prone to peeling, creasing, and not lasting very long. The UV light is what locks in the color, shine, and durability, ensuring your manicure lasts for weeks, often exceeding the wear time of traditional nail polish and even some liquid gel applications.
Benefits Over Traditional Polish or Regular Stickers
- Unmatched Durability: Fully cured UV nail stickers are incredibly strong and chip-resistant, lasting up to 2-3 weeks.
- High Gloss Shine: They offer a beautiful, high-gloss finish that doesn’t dull over time.
- Quick & Clean Application: No messy liquid polish, no drying time between coats, and far less risk of smudges during application.
- Easy Removal: While durable, they are generally easier to remove than traditional salon gel manicures, often involving gentle peeling or soaking.
- Cost-Effective: Much cheaper than regular salon visits for gel manicures.
- Less Damaging: When applied and removed correctly, they tend to be less harsh on your natural nails compared to extensive filing or harsh chemicals.
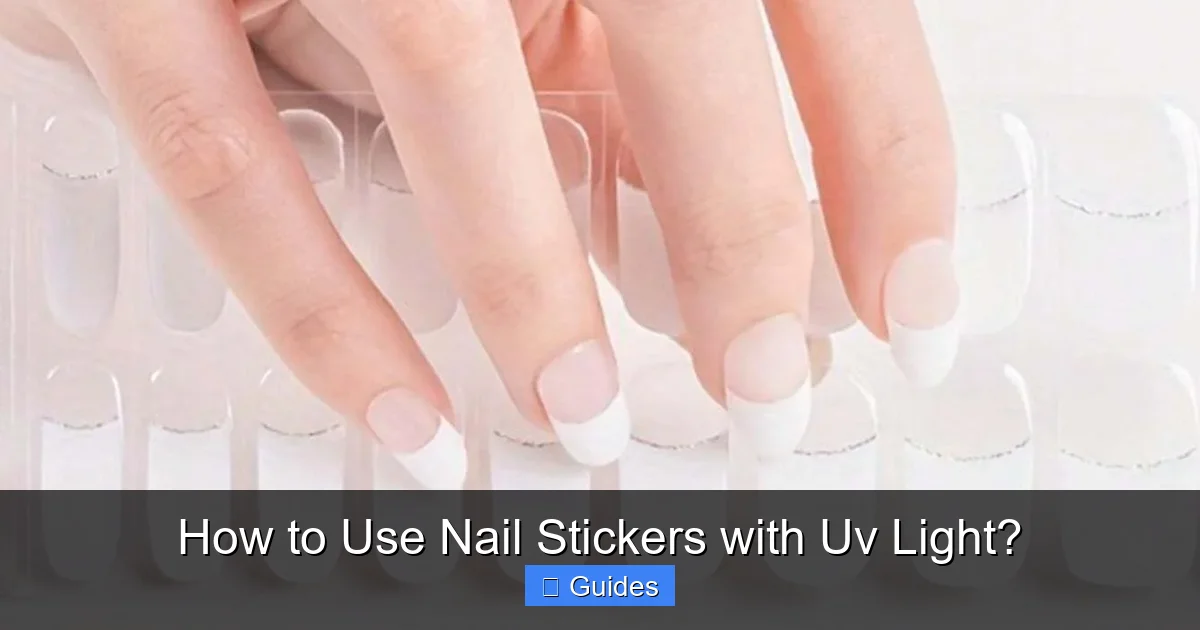
2. Gathering Your Essential Toolkit: What You’ll Need
To successfully use nail stickers with UV light, you’ll need a few key items. Think of this as preparing your mini home salon. Having everything ready before you start makes the process smooth and enjoyable.
Visual guide about How to Use Nail Stickers with Uv Light?
Image source: img.ltwebstatic.com
The Star of the Show: Your UV/LED Lamp
This is non-negotiable! You’ll need a good quality UV or LED nail lamp. Both types work by emitting UV light to cure the gel. LED lamps are generally faster and often preferred, but a UV lamp works just as well. Look for a lamp with at least 24-48 watts for efficient curing. Make sure it has a timer setting (usually 30, 60, 90, or 120 seconds).
Your Chosen UV Nail Stickers
Of course, you’ll need the star product itself! There are many brands available online and in beauty stores. Explore different colors, patterns, and finishes. Ensure they are specifically marketed as “semi-cured gel nail strips” or “UV nail wraps” to guarantee they require UV light to cure.
Nail Prep Essentials
- Nail File: To shape your nails and create a smooth edge.
- Nail Buffer: To gently rough up the nail surface for better adhesion.
- Cuticle Pusher: A metal or orange wood stick to push back cuticles.
- Nail Clippers/Small Scissors: For trimming the excess sticker after application.
- Alcohol Wipes or Isopropyl Alcohol with Lint-Free Pads: Essential for dehydrating the nail plate and removing oils.
Application Aids
- Tweezers: Can be helpful for precise handling and placement of the stickers.
- Orange Wood Stick or Silicone Pusher: To smooth out the stickers and press down edges.
Optional but Recommended for Extra Longevity and Shine
- Gel Top Coat (Clear): A good quality no-wipe gel top coat can add extra shine, protection, and extend the life of your manicure even further. This will also require curing under your UV/LED lamp.
- Nail Oil: For hydrating your cuticles after your manicure is complete.
3. Step-by-Step Guide to Applying UV Nail Stickers Flawlessly
Now for the fun part! Follow these steps carefully to ensure a beautiful, long-lasting manicure with your UV nail stickers.
Preparing Your Nails for Success: The Foundation
This is arguably the most crucial step. Proper preparation prevents lifting and ensures maximum wear time. Do not skip this!
- Clean Your Nails: Start with clean, dry hands. Remove any old nail polish using an acetone-free remover.
- Shape and File: File your nails to your desired shape. Gently buff the entire nail surface with a fine-grit buffer. This creates a slightly rough surface for the sticker to adhere to, which is key when you want to use nail stickers with UV light effectively.
- Push Back Cuticles: Gently push back your cuticles using a cuticle pusher. This prevents the sticker from adhering to skin, which would cause lifting. You can very carefully trim any hangnails, but avoid cutting cuticles.
- Dehydrate and Cleanse: This is critical! Wipe each nail thoroughly with an alcohol wipe or a lint-free pad soaked in isopropyl alcohol. This removes all natural oils, dust, and debris. Clean nails are absolutely essential for strong adhesion. Allow them to air dry completely.
Selecting and Sizing Your Stickers: A Perfect Match
Finding the right size is important for a smooth application and professional look.
- Choose the Right Size: Lay the sticker strips over your nails to find the best fit. The sticker should ideally be slightly smaller than your nail width, leaving a tiny gap around the edges (especially at the sidewalls). A sticker that’s too large and touches your skin or cuticles will lift.
- Carefully Peel: Using tweezers or your finger, gently peel the selected sticker from its backing. Avoid touching the adhesive side with your fingers as much as possible to prevent transferring oils.
Precise Application: Laying Down Your Design
This step requires a steady hand, but don’t worry, these stickers are forgiving.
- Apply from Cuticle: Place the rounded edge of the sticker just above your cuticle, leaving a very tiny gap. Do not place it directly on your cuticle or skin.
- Smooth Towards the Tip: Gently press the sticker onto your nail, smoothing it from the cuticle area towards the free edge. Use your finger, an orange wood stick, or a silicone pusher to firmly press down and smooth out any wrinkles or air bubbles, working from the center outwards. Ensure all edges are firmly adhered.
Trimming and Filing the Excess: Shaping Your Style
Once the sticker is smoothly applied, it’s time to neaten things up.
- Rough Trim (Optional): If the sticker is very long, you can use small nail scissors or clippers to roughly trim the excess, leaving a small overhang.
- File Downwards: Hold a nail file almost perpendicular to your nail, with the file underneath the excess sticker. Gently file in a downward motion, away from the nail bed, to remove the overhang. Filing downwards helps create a clean edge and prevents lifting. Be careful not to file horizontally across the sticker, as this can cause tearing or damage.
- Repeat for All Nails: Apply and trim/file all your nails one hand at a time.
The Crucial UV Curing Process: Activating the Gel
This is where your manicure becomes permanent! Knowing how to use nail stickers with UV light for proper curing is key to their durability.
- Place Hand in Lamp: Carefully place your hand (or one finger at a time, depending on your lamp) into your UV or LED lamp.
- Cure According to Instructions: Refer to the instructions provided with your specific brand of UV nail stickers. Most require 60-120 seconds under an LED lamp or 120 seconds under a UV lamp per hand. Ensure all nails receive even light exposure. For a truly strong finish, some people prefer to do two curing cycles.
- Check for Hardness: After curing, the stickers should feel completely hard and smooth. If they feel soft or flexible, cure them again.
Applying a Top Coat (Optional but Recommended): The Finishing Touch
A gel top coat is your secret weapon for extra shine and protection.
- Apply Top Coat: If desired, apply a thin, even layer of a no-wipe gel top coat over each cured nail sticker. Cap the free edge (run the brush along the very tip of your nail) to seal everything in.
- Cure Top Coat: Place your hand back in the UV/LED lamp and cure the top coat according to its specific instructions (usually 30-60 seconds for LED, 120 seconds for UV).
The Sticky Layer (Inhibition Layer) and Final Clean-Up
Some gel top coats leave a sticky “inhibition layer” after curing. If you used a no-wipe top coat, you can skip this. If not:
- Wipe with Alcohol: Lightly wipe each nail with an alcohol wipe or lint-free pad soaked in isopropyl alcohol to remove the sticky layer. This reveals the true shine of your manicure.
4. Pro Tips for a Salon-Quality, Long-Lasting Manicure
To ensure your UV nail stickers last as long as possible and look their absolute best, here are some insider tips.
Don’t Rush the Prep: The Foundation of Longevity
We can’t stress this enough! The longevity of your UV nail stickers hinges on how well you prepare your natural nails. Spend extra time cleaning, buffing, pushing back cuticles, and especially dehydrating. Any oils, dust, or moisture left on the nail plate will act as a barrier and cause the stickers to lift prematurely. Treat your nail prep like you’re preparing a canvas for a masterpiece.
Size Matters: When in Doubt, Go Smaller
Always err on the side of choosing a sticker that is slightly smaller than your nail width. If a sticker overlaps onto your skin or cuticles, it will create a natural lifting point. This is because your skin produces oils, and the sticker won’t adhere properly to it. A tiny gap around the edges is far better than a sticker that’s too wide.
Smooth Operator: Air Bubbles are the Enemy
Take your time when smoothing down the sticker. Work from the cuticle area towards the free edge, pressing firmly to eliminate any air bubbles or wrinkles. Air trapped underneath the sticker can lead to lifting, snags, and a less durable finish. An orange wood stick or a dedicated silicone pusher can be invaluable for this step, helping you achieve a perfectly flat, bubble-free surface.
Double-Check Your Cure: No Under-Curing Allowed
Under-curing is a common mistake when you use nail stickers with UV light. Ensure your nails are exposed to the UV/LED lamp for the full recommended time, and even consider an extra 30-60 seconds, especially if your lamp has lower wattage. If the gel isn’t fully cured, it will remain soft, susceptible to damage, and can even cause skin sensitivities. Fully cured gel should feel hard and smooth to the touch.
Seal the Deal with a Top Coat: Extra Protection and Shine
While many UV nail stickers boast a glossy finish on their own, applying a good quality gel top coat can significantly enhance their longevity and shine. It provides an extra layer of protection against chipping and wear, making your manicure last even longer. Remember to cap the free edge with the top coat to seal in the tips of your nails, which are often the first to show wear.
Avoid Water Immediately After: Give It Time to Set
After your final cure, try to avoid soaking your hands in hot water or engaging in heavy-duty chores for at least a few hours. Although the gel is cured, giving it a bit more time to fully settle and bond can further ensure its longevity. Think of it as allowing a freshly painted wall to completely dry before touching it.
Handle with Care: Extend Your Manicure’s Life
Even with durable UV nail stickers, being mindful of your hands can help extend your manicure. Wear gloves when doing dishes or cleaning with harsh chemicals. Avoid using your nails as tools to pick or pry things open. Gentle care goes a long way in keeping your manicure looking pristine.
5. Removal and Aftercare: Keeping Your Nails Healthy
When it’s time for a change, knowing how to properly remove your UV nail stickers is just as important as putting them on. Gentle removal prevents damage to your natural nails.
Gentle Removal Techniques
The beauty of many UV nail stickers is their relatively easy removal compared to traditional salon gel. Most can be gently peeled off, but always follow the manufacturer’s instructions for your specific brand.
- Loosen the Edge: Use an orange wood stick or a cuticle pusher to gently lift a corner of the sticker, usually starting from the cuticle area or a side edge.
- Gentle Peel or Roll: Slowly and carefully peel the sticker away from your nail. Some brands recommend a “roll” method where you gently roll the sticker back on itself. If you encounter resistance, do not rip or pull aggressively.
- Soak (If Needed): If a sticker is particularly stubborn, you might need to soak your nails in warm, soapy water for a few minutes, or in a small amount of acetone-free nail polish remover (if recommended by the brand) to loosen the adhesive. Then try gently pushing and peeling again.
- Remove Residue: After removal, you might have a tiny bit of sticky residue. This can usually be wiped away with an alcohol pad or a bit of nail polish remover.
Never aggressively peel or force the stickers off, as this can strip layers of your natural nail and cause damage.
Post-Manicure Nail Care: Rejuvenate Your Nails
After removing your stickers, it’s a good idea to give your nails some TLC.
- Moisturize: Apply a nourishing cuticle oil to your cuticles and gently massage it into your nail beds. This helps rehydrate and strengthen your nails.
- Hand Cream: Follow up with a good quality hand cream to keep your skin soft and supple.
- Give Nails a Break (Optional): If your nails feel a bit dry or brittle after consecutive manicures, consider giving them a few days or a week to breathe before applying your next set of UV nail stickers. This allows your natural nails to recover and rehydrate.
Conclusion
There you have it – a comprehensive guide on how to use nail stickers with UV light to achieve stunning, durable, and professional-looking manicures right from the comfort of your home! These semi-cured gel strips are a fantastic alternative to traditional liquid gel polishes, offering convenience, speed, and incredible longevity.
Remember, the secret to a flawless finish lies in thorough nail preparation, careful application, and most importantly, sufficient curing under your UV/LED lamp. With a little practice and the tips shared in this article, you’ll be creating envy-inducing nail art in no time. So, gather your tools, choose your favorite design, and get ready to enjoy weeks of beautiful, chip-free nails. Happy DIY-ing!
🎥 Related Video: loves 💖 Army Green | Gel Nail Stickers
📺 Uvnailz
loves Army Green | Gel Nail Stickers.
Frequently Asked Questions
What’s the difference between UV and LED lamps for curing nail stickers?
Both UV and LED lamps emit ultraviolet light to cure gel nail stickers, making them harden. LED lamps typically cure much faster (often 30-60 seconds) compared to traditional UV lamps (usually 120 seconds), but both are effective. Always check the sticker’s instructions for the recommended curing time and lamp type.
Why are my UV nail stickers lifting at the edges?
Lifting typically occurs due to insufficient nail preparation (oils or debris on the nail), choosing a sticker size that’s too large and touches the skin, or incomplete curing. Ensure your nails are clean and dehydrated, size your stickers correctly, and cure them thoroughly under your UV/LED lamp.
Can I reuse UV nail stickers?
No, UV nail stickers are single-use. Once they are cured onto your nails, the gel hardens, and they cannot be removed and reapplied. Attempting to do so would compromise their adhesive and structural integrity.
Do I need to clean my nails after curing UV nail stickers?
If you used a “no-wipe” gel top coat, no further cleaning is needed. However, if your top coat or the stickers themselves leave a sticky “inhibition layer” after curing, wipe your nails with an alcohol wipe or cleanser to reveal the full shine and non-tacky finish.
How do I make my UV nail stickers last longer?
To maximize longevity, ensure meticulous nail prep, choose stickers that don’t touch your skin, smooth out all bubbles, fully cure the stickers (and any gel top coat), and avoid soaking hands or harsh chemicals immediately after application. A gel top coat also significantly extends wear time.
What if I don’t have a UV/LED lamp? Can I still use these stickers?
No, you absolutely need a UV or LED lamp to use these specific types of nail stickers. They are made of semi-cured gel polish that requires ultraviolet light to fully harden and adhere properly. Without the lamp, they will remain flexible, won’t last, and won’t offer the promised durability and shine.