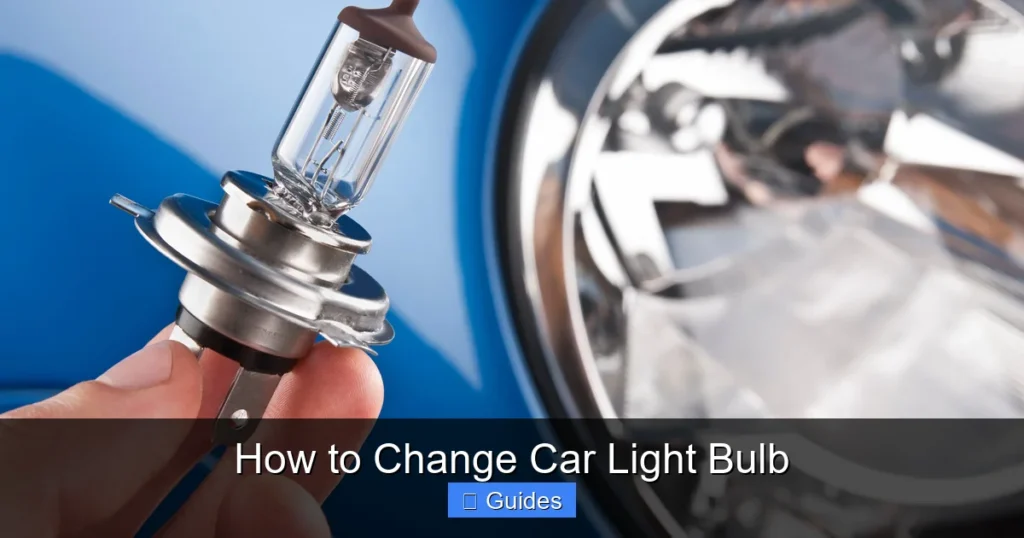
Don’t let a burnt-out bulb dim your drive or your wallet! Learning how to change car light bulbs is a straightforward DIY task that can save you a trip to the mechanic and keep your vehicle road-legal and safe. This comprehensive guide walks you through everything from identifying the right bulb to detailed steps for replacing headlights, taillights, and turn signals, empowering you to tackle this common car maintenance chore with confidence.
Welcome, fellow car enthusiast and DIY adventurer! Have you ever noticed that one of your car’s lights is out? Maybe it’s a dim headlight, a non-blinking turn signal, or a brake light that’s decided to take an early retirement. It’s a common issue, and while it might seem intimidating at first, learning how to change car light bulb is one of the most practical and satisfying car maintenance tasks you can master. Not only will it save you money on mechanic fees, but it’s also crucial for your safety and the safety of others on the road.
Driving with a burnt-out light isn’t just an inconvenience; it can be dangerous and even illegal. A faulty headlight reduces your visibility, especially at night or in bad weather. A broken taillight or turn signal makes it harder for other drivers to anticipate your moves, increasing the risk of accidents. So, taking the initiative to fix these issues promptly is a smart move. And guess what? For most vehicles, changing a light bulb is a straightforward process that doesn’t require specialized tools or extensive automotive knowledge. We’re here to guide you through every step.
In this comprehensive guide, we’ll cover everything you need to know about how to change car light bulb, from identifying the correct replacement to tackling different types of lights like headlights, taillights, and turn signals. We’ll share practical tips, common pitfalls to avoid, and empower you to confidently take on this task. So, roll up your sleeves, grab your owner’s manual, and let’s shed some light on this essential maintenance skill!
Key Takeaways
- Safety First: Always ensure your car is off, cool, and use gloves to protect yourself and the new bulb during replacement.
- Identify the Right Bulb: Consult your car’s owner’s manual or an online bulb guide to find the correct type and size for each specific light (headlight, taillight, etc.).
- Access Varies: Headlight bulbs often require accessing the engine bay, while taillights usually open via the trunk or by removing a lens cover.
- Avoid Touching Glass: Handle new bulbs only by their plastic or metal base, as oils from your skin can cause hot spots and significantly shorten the bulb’s lifespan.
- Test Before Reassembly: Always test the new bulb immediately after installation but before fully reassembling the housing to ensure it’s working correctly.
- Don’t Be Afraid to Ask for Help: If you encounter difficulty, especially with complex modern assemblies, don’t hesitate to consult a professional or watch specific video tutorials for your car model.
Quick Answers to Common Questions
Can I replace my halogen headlights with LED bulbs?
While physically possible in some cases, simply swapping halogen for LED bulbs in a housing designed for halogen can cause issues like poor light beam patterns, blinding other drivers, or not being street legal. It’s often best to use an LED conversion kit specifically designed for your vehicle or stick to the original bulb type.
Why should I avoid touching the glass of a new bulb?
Oils and residues from your skin can transfer to the glass surface of halogen or HID bulbs. When the bulb heats up during operation, these oils create “hot spots” that cause the glass to overheat unevenly, leading to premature failure and a significantly reduced lifespan for the bulb.
What if the new bulb doesn’t light up after I install it?
First, double-check that the bulb is fully seated in its socket and the electrical connector is firmly attached. If it still doesn’t work, ensure you have the correct bulb type and check your car’s fuse box for a blown fuse related to that light circuit. If fuses are fine and connections are good, there might be a wiring or socket issue, and professional help might be needed.
Do I need to change both headlights if only one burns out?
It’s generally recommended to change headlight bulbs in pairs. Bulbs typically have similar lifespans, so if one burns out, the other is likely not far behind. Changing both ensures consistent light output, color, and saves you from doing the job again soon.
How do I know what type of bulb my car needs?
The best way to determine the correct bulb type is to consult your car’s owner’s manual, which will list specifications for all exterior lights. Alternatively, you can check the old bulb itself for a printed part number on its base, or use an online bulb finder tool from an auto parts store by entering your car’s year, make, and model.
📑 Table of Contents
Why Your Car Lights Matter & What to Look For
Before we dive into the “how-to,” let’s briefly touch upon why your car’s lighting system is so vital and how to spot a problem. Your car’s lights aren’t just for aesthetics; they are critical safety components.
Different Kinds of Car Lights
Your vehicle is equipped with a variety of lights, each serving a specific purpose:
- Headlights: The most important for night driving, illuminating the road ahead. They usually have high beams and low beams.
- Taillights: Located at the rear, they make your car visible to others from behind.
- Brake Lights: Brighter than taillights, they illuminate when you press the brake pedal, signaling to drivers behind you that you’re slowing down or stopping.
- Turn Signals (Indicators): Located at the front, rear, and sometimes on the side mirrors, they signal your intention to turn or change lanes.
- Daytime Running Lights (DRLs): Found on many newer cars, these automatically turn on when the engine is running to increase visibility during the day.
- Fog Lights: Located low on the front bumper, designed to cut through fog and improve visibility in adverse weather.
- Reverse Lights: White lights at the rear that come on when you put the car in reverse.
- License Plate Lights: Small lights illuminating your rear license plate, often legally required.
While the process for how to change car light bulb can be similar for many of these, the access points and specific bulb types will differ.
Signs You Need a New Bulb
How do you know it’s time to learn how to change car light bulb?
- Dim or Flickering Light: A light that’s noticeably dimmer than its counterpart or flickers intermittently is on its way out.
- No Light At All: The most obvious sign. If a light doesn’t turn on, it’s likely a burnt-out bulb.
- Warning Light on Dashboard: Many modern cars have a dashboard indicator that alerts you to a faulty exterior light.
- Rapid Blinking Turn Signal: If one of your turn signals starts blinking much faster than usual, it’s often an indicator that the corresponding bulb (front or rear) is out. This is a built-in safety feature.
- Visual Inspection: Sometimes, you can actually see the broken filament inside the glass bulb.
Don’t wait until you get pulled over or, worse, get into an accident. Address these issues promptly!
Gathering Your Tools & Identifying the Right Bulb
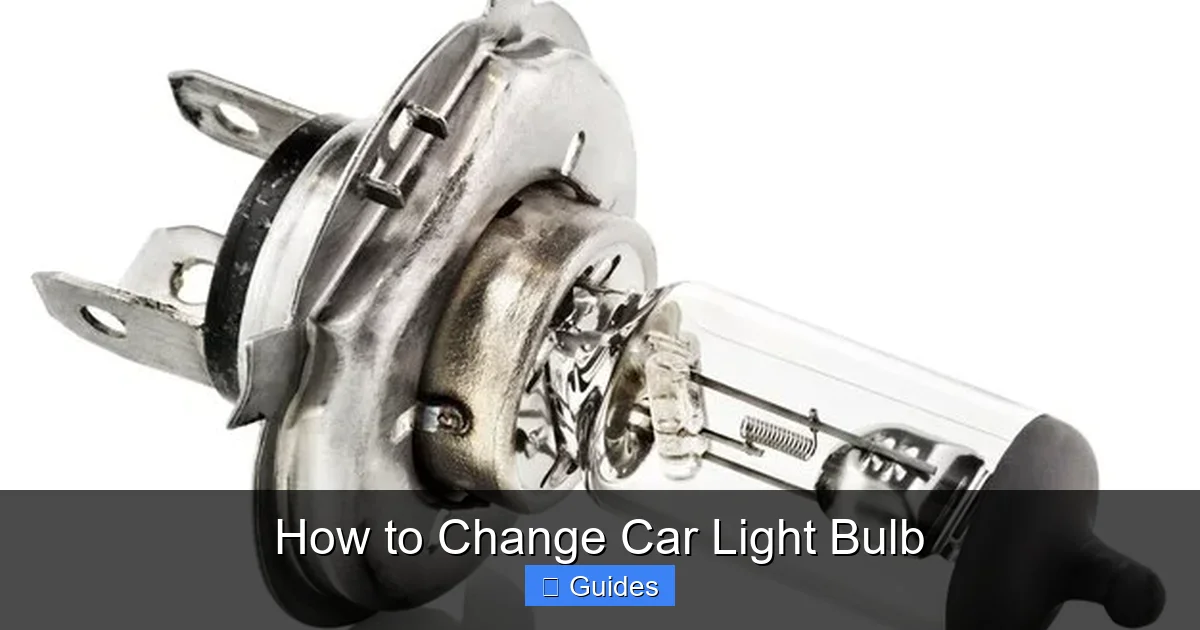
Visual guide about How to Change Car Light Bulb
Image source: img.freepik.com
Preparation is key to a smooth bulb change. Before you even think about how to change car light bulb, make sure you have everything you need.
Essential Tools You’ll Need
The good news is that for most light bulb replacements, you won’t need a whole toolbox full of gadgets. Here’s a basic list:
- Owner’s Manual: Your best friend for identifying bulb types and specific access instructions.
- Replacement Bulb(s): Crucial, of course! More on this in a moment.
- Gloves: Nitrile or latex gloves are essential to prevent oil from your skin from touching the new bulb’s glass. This is vital for bulb longevity.
- Screwdrivers: Philips head and flathead, for removing screws holding lens covers or trim pieces.
- Socket Wrench Set or Pliers: For bolts or clips that might hold headlight assemblies in place.
- Flashlight or Headlamp: Automotive spaces can be dark and cramped.
- Clean Cloth: For wiping away dust or grime.
- Small Tray or Magnetic Dish: To hold screws, clips, or small parts so they don’t get lost.
Finding the Correct Replacement Bulb
This is arguably the most critical step. Using the wrong bulb type can cause electrical issues, poor illumination, or simply won’t fit.
- Consult Your Owner’s Manual: This is the definitive source. Look under the “Maintenance,” “Specifications,” or “Bulb Replacement” section. It will list the specific bulb types (e.g., H7, 9006, 3157, 1157) for each light on your vehicle.
- Check the Old Bulb: If you’ve already removed the old bulb, the bulb number is usually printed on its metal or plastic base.
- Use Online Resources: Websites of auto parts stores (AutoZone, O’Reilly, Advance Auto Parts, Pep Boys, etc.) or dedicated bulb guides (like Sylvania or Philips’ online tools) allow you to input your car’s year, make, and model to find compatible bulbs.
- Types of Bulbs:
- Halogen: The most common type, typically found in older and many mid-range newer cars. They use a filament and gas.
- LED (Light Emitting Diode): Increasingly popular in modern vehicles due to their energy efficiency, brightness, and long lifespan. They often come as sealed units or specific LED replacements.
- HID (High-Intensity Discharge)/Xenon: Brighter and whiter than halogen, often found in luxury or performance vehicles. They use gas ignited by an electrical charge.
Make sure you’re replacing like-for-like, or using a compatible upgrade kit if you’re intentionally changing technology (e.g., from halogen to LED).
Always buy a reputable brand. Cheap, no-name bulbs might save you a few dollars initially but often have a shorter lifespan or poorer light output.
General Steps to Change a Headlight Bulb
Headlights are often the most intimidating, but they follow a general pattern. The precise steps for how to change car light bulb will vary slightly by make and model, but this covers the core process.
Safety First!
Before you do anything:
- Turn Off Your Car: Make sure the engine is off and the key is out of the ignition.
- Let It Cool: Headlight bulbs get very hot. Allow time for them to cool down, especially if they’ve been on recently.
- Engage Parking Brake: Just a good habit for any under-the-hood work.
- Wear Gloves: Protect your hands and, more importantly, the new bulb.
Accessing the Headlight Assembly
This is where vehicle designs vary the most.
- Open the Hood: For front lights like headlights and sometimes turn signals, you’ll generally work from the engine bay.
- Locate the Rear of the Headlight Assembly: Look behind the headlight unit. You’ll often see wires leading to a cap or cover.
- Remove Obstructions (if any): Some cars require you to remove air intake ducts, battery covers, or even loosen the battery itself to gain enough access. Sometimes, the entire headlight assembly might need to be unbolted and partially pulled forward. Consult your owner’s manual or a specific video tutorial for your car model if it seems unusually difficult.
- Remove the Dust Cap/Cover: Many headlight bulbs are protected by a plastic or rubber dust cap. Twist it counter-clockwise or simply pull it off to reveal the bulb’s electrical connector.
Removing the Old Bulb
Once you have access:
- Disconnect the Electrical Connector: This is usually a plastic plug that clips onto the bulb’s base. Squeeze a tab and pull it straight off. Do not yank on the wires.
- Unclip the Retaining Spring/Clamp: Most halogen bulbs are held in place by a metal spring clip or a twist-lock mechanism. Unhook the spring by pushing it in and to the side, or twist the bulb’s base counter-clockwise a quarter turn. Be gentle; these clips can be fragile.
- Carefully Remove the Old Bulb: Pull the old bulb straight out. If it’s a halogen or HID bulb, try not to touch the glass, even if it’s burnt out, as oils can transfer to the assembly.
Installing the New Bulb
This is the reverse of removal, but with extra care.
- Handle with Gloves: Pick up the new bulb ONLY by its plastic or metal base. NEVER touch the glass part of a halogen or HID bulb. The oils from your skin create hot spots when the bulb heats up, leading to premature failure. If you accidentally touch it, wipe it clean with rubbing alcohol and a lint-free cloth.
- Insert the New Bulb: Carefully align the bulb’s tabs or notches with the corresponding slots in the headlight housing. Push it straight in until it’s seated firmly. Ensure it’s correctly oriented (some bulbs can fit multiple ways but only work one way).
- Secure the Retaining Spring/Clamp: Re-engage the metal clip or twist the bulb clockwise until it locks into place. Make sure it feels secure and doesn’t wobble.
- Reconnect the Electrical Connector: Push the electrical connector firmly onto the new bulb’s base until it clicks.
Testing and Reassembling
Almost there!
- Test the Light: Before putting everything back together, turn on your car and check if the new light bulb is working. Test both low and high beams for headlights.
- Replace the Dust Cap: If the light works, replace the dust cap or cover, ensuring a tight seal to protect the bulb from moisture and dirt.
- Reassemble Obstructions: Put back any air ducts, battery covers, or other components you removed.
And that’s how to change car light bulb for your headlights!
Changing Taillights, Brake Lights, and Turn Signals
While the general principles remain the same, accessing these lights usually differs from headlights. For these lights, understanding how to change car light bulb often involves working from the rear of the vehicle.
Access from the Trunk or Undercarriage
Most rear lights are accessed in one of two ways:
- From Inside the Trunk:
- Open your trunk.
- Look for access panels or carpeted sections on the inside wall of the trunk, directly behind the taillight assembly. You might need to peel back carpet or remove a small plastic panel.
- Once exposed, you’ll see wires leading to bulb holders twisted into the taillight assembly.
- From Outside by Removing the Lens Cover:
- Some older cars, or certain models, require you to remove the entire plastic lens cover from the outside of the car.
- Look for screws (often Philips head) around the perimeter of the taillight lens. Carefully unscrew them.
- Gently pry the lens cover away. Be careful not to break any plastic tabs or scratch your paint.
- The bulbs will be visible once the cover is off, usually in twist-in sockets.
Twist, Pull, or Unclip: Different Bulb Bases
Once you’ve gained access, the process for how to change car light bulb for these lights is usually simpler than headlights.
- Identify the Specific Bulb: Taillight assemblies often house multiple bulbs (taillight, brake light, turn signal, reverse light) in one unit. If you’re changing a brake light, make sure you’re pulling out the correct socket. It helps to have someone press the brake pedal while you look to confirm which bulb is out.
- Twist and Pull the Socket: Most of these bulbs are held in a plastic socket that twists (usually counter-clockwise a quarter turn) out of the main housing.
- Remove the Old Bulb from the Socket:
- Wedge-base bulbs (common for smaller lights): Simply pull the bulb straight out of its socket.
- Bayonet-base bulbs (common for brake/taillights): Push the bulb inward slightly, twist it counter-clockwise, and then pull it out.
- Insert the New Bulb:
- Wedge-base: Push the new bulb straight into the socket until it’s snug.
- Bayonet-base: Push the new bulb in, twist clockwise until it locks, and ensure the pins align with the slots.
Again, handle the bulb by its base with gloves.
- Test and Reassemble: Test the light before twisting the socket back into the housing and reassembling any panels or lens covers. Ensure everything is tight and secure.
Tips for a Smooth Bulb Change
A few final pointers will make your experience even better when learning how to change car light bulb.
Don’t Touch the Glass!
We can’t stress this enough, especially for halogen and HID bulbs. Your skin contains oils and residues. When these transfer to the glass of a new bulb, they create “hot spots” when the bulb heats up. These hot spots cause the bulb to overheat unevenly, leading to premature failure and a significantly shortened lifespan. Always use gloves and handle the bulb by its base. If you accidentally touch the glass, wipe it thoroughly with rubbing alcohol and a clean, lint-free cloth before installation.
Take Photos
Modern car assemblies can be intricate. Before you start disconnecting wires or unbolting components, take a few pictures with your phone. These photos can be invaluable references for remembering how everything goes back together, especially the routing of wires or the orientation of clips.
Change in Pairs (for headlights)
If one headlight bulb burns out, its twin on the other side is often not far behind. Since you’re already going through the trouble of accessing the headlight assembly, it’s often a good idea to replace both headlight bulbs at the same time. This ensures consistent light output and saves you from repeating the process shortly after. For other lights like brake lights or turn signals, this isn’t strictly necessary unless you want to maintain identical brightness or color.
Check for Corrosion
When you remove the old bulb, take a quick look at the socket. If you see any signs of corrosion (greenish or white buildup), you can gently clean it with a small brush or electrical contact cleaner. Corrosion can impede electrical flow and cause bulbs to fail prematurely or not light up even if they’re good.
When to Call a Pro
While learning how to change car light bulb is usually a DIY task, there are times when it’s best to call in the professionals:
- Extremely Difficult Access: Some vehicles, particularly luxury models or those with very complex front ends, might require extensive disassembly (like removing bumpers) just to reach a headlight. If it feels too daunting or requires specialized tools you don’t have, a mechanic is a better choice.
- Bulb Not Lighting Up (After Replacement): If you’ve installed a new bulb correctly and it still doesn’t light up, there might be a deeper electrical issue (fuse, wiring, socket problem). This usually warrants professional diagnosis.
- HID/Xenon Bulb Replacement: While you *can* DIY these, they operate at very high voltages and require extra caution. If you’re uncomfortable, a pro can handle it safely.
- Sealed LED Units: Many modern cars use integrated LED lighting units where individual bulbs aren’t replaceable. If the unit fails, the entire assembly might need replacement, which is typically a job for a mechanic.
Conclusion
Congratulations! You now have a solid understanding of how to change car light bulb for most situations. This simple DIY task not only saves you money but also empowers you with basic car maintenance knowledge, keeping you safer on the road. Remember to always prioritize safety, use the correct replacement parts, and don’t be afraid to consult your owner’s manual or online resources for model-specific instructions.
So, the next time a light goes out on your car, you won’t dread a trip to the shop. Instead, you’ll be able to confidently grab your tools, pop the hood or trunk, and get your vehicle shining bright again. Happy driving!
Frequently Asked Questions
What tools are essential for changing a car light bulb?
You’ll typically need a new replacement bulb, gloves to protect the bulb, screwdrivers (Philips and flathead) for fasteners, and potentially a socket wrench set or pliers. A flashlight can also be very helpful for navigating dark engine bays or trunk spaces.
How often should car light bulbs be replaced?
The lifespan of car light bulbs varies greatly by type. Halogen bulbs typically last 500-1,000 hours, while HID bulbs can last 2,000-3,000 hours. LED lights can last much longer, often the lifetime of the vehicle, but individual bulbs may still fail due to vibration or other issues.
Is it expensive to have a mechanic change a car light bulb?
Having a mechanic change a simple bulb can be surprisingly costly due to labor fees, often exceeding the cost of the bulb itself. This is why learning to do it yourself can save a significant amount of money for a relatively straightforward task.
Can I be pulled over for a burnt-out car light bulb?
Yes, driving with a burnt-out headlight, taillight, or turn signal is illegal in most places and can result in a traffic ticket. More importantly, it compromises your safety and the safety of others by reducing your visibility and ability to signal your intentions.
What’s the difference between a wedge-base and a bayonet-base bulb?
A wedge-base bulb has a smooth, glass or plastic base that simply pushes into the socket. A bayonet-base bulb has a metal base with small pins that align with slots in the socket, requiring a push and twist motion to install or remove it.
Where can I find my car’s owner’s manual if I’ve lost it?
Most car manufacturers provide digital copies of their owner’s manuals online, often available for free download from their official website. You can typically search by your vehicle’s year, make, and model to find the relevant manual.