
Changing a ceiling light bulb is a common household task that’s simple to do safely. This guide provides step-by-step instructions, emphasizing safety first by turning off power, identifying your fixture type, and gathering the right tools. You’ll learn how to replace bulbs in various fixtures and troubleshoot common issues, empowering you to illuminate your space with confidence and make your home brighter today.
Picture this: You walk into a room, flip the light switch, and… nothing. Darkness. Your trusty ceiling light bulb has finally decided to call it a day. Don’t worry, we’ve all been there. A burned-out light bulb is one of the most common household nuisances, but it’s also one of the easiest to fix.
You might think changing a ceiling light bulb is a simple task, and it is! However, knowing the right steps can make all the difference. It ensures your safety, prevents damage to your fixture, and gets your room shining bright again in no time. This comprehensive guide will walk you through everything you need to know about how to change a ceiling light bulb, no matter what type of fixture you have. We’ll cover safety, tools, different fixture styles, and even common troubleshooting tips. Let’s get started!
Key Takeaways
- Prioritize Safety: Always turn off the power to the light fixture at the circuit breaker before you start. This prevents electric shock.
- Identify Your Fixture: Different ceiling light fixtures (domes, recessed, track, pendant) have unique ways of accessing and replacing bulbs. Knowing your type simplifies the process.
- Gather the Right Tools: A sturdy ladder or step stool, gloves, eye protection, and cleaning supplies are essential. Match the new bulb’s type, base, and wattage to the old one or the fixture’s specifications.
- Handle with Care: When removing or inserting bulbs, especially halogens or LEDs, avoid touching the glass directly. Oils from your skin can reduce bulb lifespan.
- Clean as You Go: Take advantage of the open fixture to wipe away dust and insects. This improves light output and fixture longevity.
- Troubleshoot Smartly: If the new bulb doesn’t work, re-check the power, ensure the bulb is screwed in properly, and confirm it’s the correct type and wattage for the fixture.
Quick Answers to Common Questions
Can I change a bulb without turning off power at the breaker?
While some people might attempt to do this by just flipping the wall switch, it is highly recommended to turn off the power at the circuit breaker. This completely eliminates the risk of accidental electric shock, ensuring your safety.
What if the bulb breaks while I’m unscrewing it?
If a bulb breaks and leaves the metal base in the socket, immediately turn off the power at the circuit breaker. Then, carefully use needle-nose pliers to grip the edge of the metal base and twist it counter-clockwise to remove it. Never use your bare hands.
How do I know what type of replacement bulb to buy?
The best way is to take the old bulb with you to the store. This allows you to match its base type (e.g., E26, E12, GU10), size, and shape. Also, check the fixture for a maximum wattage rating and ensure your new bulb does not exceed it.
Why is my new bulb not working after I’ve installed it?
First, re-check that the power is on at the breaker. Then, ensure the bulb is screwed in snugly but not overtightened. The bulb itself could be faulty, or there might be an issue with the wall switch or the fixture wiring, which might require professional help.
How often should I clean my light fixtures?
It’s a good practice to clean your light fixtures every time you change a bulb, or at least once or twice a year. Dust and insects can accumulate inside covers, reducing light output and potentially posing a fire hazard if debris builds up on hot bulbs.
📑 Table of Contents
Safety First! Why It’s Non-Negotiable
Before you even think about reaching for that flickering or dead bulb, remember this golden rule: safety always comes first. Working with electricity can be dangerous if you’re not careful. An electric shock is no joke, and it’s easily preventable.
Locating Your Breaker Box and Turning Off Power
Your home’s electrical panel, or breaker box, is usually found in a utility closet, basement, garage, or even a hallway. It’s a metal box with a door, housing rows of switches. Each switch controls a specific circuit in your home, often labeled for different rooms or appliances.
Once you find your breaker box, follow these steps:
- Identify the Correct Breaker: Look for a label that indicates the room or area where the light is located. If your panel isn’t clearly labeled, you might need to do a little detective work. Turn off breakers one by one until the light in question goes out. It’s helpful to have a helper to confirm this, or simply use a small, battery-operated lamp to see while you work.
- Flip the Breaker to “Off”: Once you’ve found the right breaker, firmly flip it to the “off” position. This completely cuts the power to that circuit, making it safe to work on.
- Consider the Main Breaker: If you’re unsure which breaker controls your ceiling light or if your panel isn’t labeled at all, a foolproof method is to turn off the main breaker for your entire home. This will cut all power, ensuring maximum safety, but remember to save any work on computers first!
Double-Checking for Power
Just because you flipped a switch doesn’t mean the power is truly off. Mistakes happen, and labels can be wrong. Always double-check:
- Flip the Light Switch: After turning off the breaker, go back to the room and flip the wall switch for the ceiling light a few times. The light should definitely not come on.
- Use a Non-Contact Voltage Tester: For extra peace of mind, especially if you’re new to this, use a non-contact voltage tester. These handy devices light up or beep when they detect electricity. Briefly touch the tester to the light fixture’s wires (if visible) or even near the bulb socket. If it indicates power, stop immediately and re-check your breaker.
Once you’ve confirmed there’s no power, you’re ready for the next step.
Identifying Your Light Fixture Type
Not all ceiling lights are created equal. The way you access and change a ceiling light bulb depends entirely on the type of fixture you have. Knowing your fixture will save you time and prevent frustration.
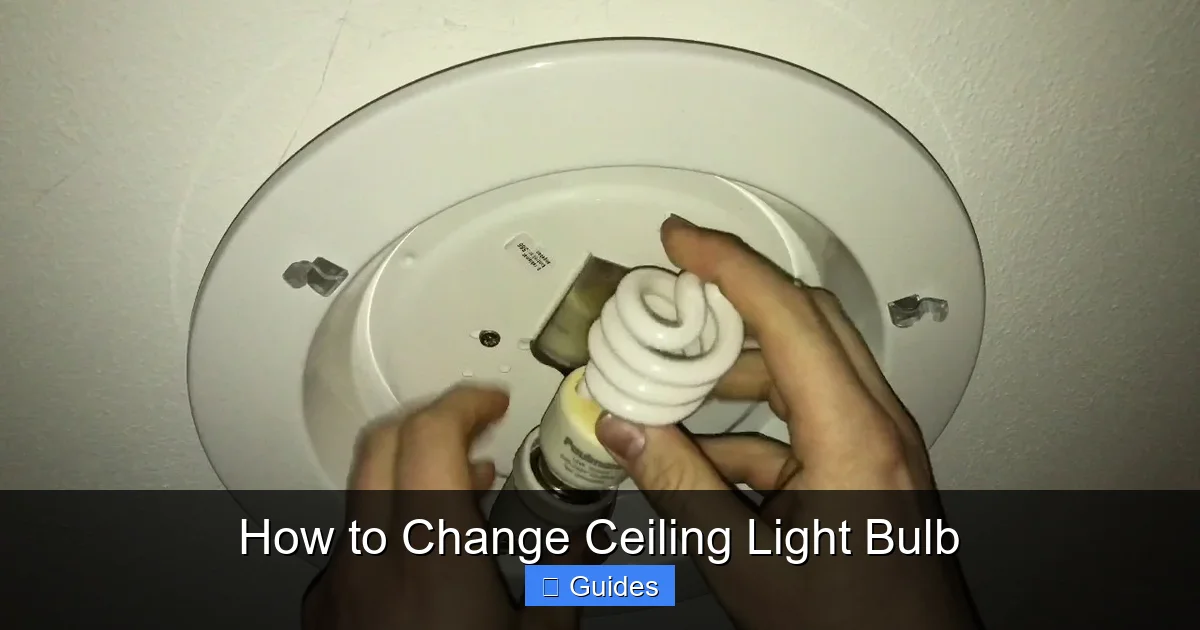
Visual guide about How to Change Ceiling Light Bulb
Image source: i.ytimg.com
Enclosed Dome Lights
These are perhaps the most common ceiling lights. They feature a glass or plastic dome cover attached to the ceiling plate. To access the bulb:
- Twist-Lock Domes: Many domes simply twist counter-clockwise a quarter turn or so to unlock and drop down.
- Screw-On Domes: Some have a threaded collar that you unscrew counter-clockwise at the very bottom of the dome, near the central finial.
- Spring Clip Domes: A few older models might have spring-loaded clips that you gently push inward to release the dome.
- Screwed-In Domes: Some larger, heavier domes are held by decorative screws around the perimeter or at the center. Use a screwdriver to carefully remove these.
Once the cover is off, the bulb is usually a standard screw-in (Edison base) bulb.
Recessed Lighting
Recessed lights are flush with the ceiling, often found in kitchens, hallways, or bathrooms. The bulb sits inside a housing in the ceiling.
- Floodlight/Reflector Bulbs (PAR, BR types): Many simply screw in directly. To remove, grip the bulb firmly and twist counter-clockwise.
- Gimbal/Adjustable Bulbs: These might have a trim ring that needs to be gently pulled down a few inches, revealing spring clips you can squeeze to fully remove the trim and access the bulb. The bulb itself usually screws in or might be a GU10 twist-lock type.
- Spring-Clip Bulbs (MR16, GU10): Smaller bulbs might be held in place by small spring wires or clips. Gently pry these clips away or twist the bulb (for GU10) to release it.
Track Lighting
Track lighting consists of individual light heads attached to a track on the ceiling. Each head can usually be repositioned.
- Spotlight Bulbs (MR16, GU10, PAR16): These bulbs are usually pushed in, twisted, or held by a retaining ring within the individual light head. Look for small tabs to squeeze or twist the bulb housing. Some simply unscrew.
Pendant Lights and Chandeliers
These decorative fixtures hang from the ceiling. The bulbs are often exposed or covered by individual shades or crystals.
- Exposed Bulbs: Most simply screw in or unscrew like a standard bulb.
- Shaded Bulbs: If there’s a shade, it might be held by small screws, clips, or a threaded collar at the base of the bulb socket. Gently remove the shade to access the bulb.
- Candelabra Bulbs: Many chandeliers use smaller, candelabra-base bulbs (E12). These are typically screw-in.
Specialty Bulbs (Fluorescent Tubes, Halogens)
- Fluorescent Tubes: These long tubes usually have pins at each end. To remove, twist the tube about 90 degrees until the pins align with the slots in the fixture, then gently pull down.
- Halogen Bulbs (G4, G9, GU5.3): These small bulbs are often found in puck lights or under-cabinet lighting. They usually push in directly, sometimes with two pins (bi-pin). Be very careful not to touch the glass with bare hands. Use a cloth or gloves.
Gathering Your Tools and Supplies
Having the right gear makes the job easier, safer, and faster. Don’t skip this step!
The Right Ladder or Step Stool
Unless your ceilings are unusually low, you’ll need something to safely reach the fixture. Choose a sturdy step stool or a ladder that allows you to comfortably work at eye level or slightly below the fixture. Never stand on chairs or wobbly furniture!
- Step Stool: Good for standard 8-foot ceilings.
- A-Frame Ladder: Best for higher ceilings or if you need to reach across a wider area. Ensure it’s fully open and stable before climbing.
Gloves and Eye Protection
- Work Gloves: Not just for keeping your hands clean! Gloves provide a better grip, protect your hands from sharp edges (especially with glass covers), and prevent skin oils from getting on new bulbs (which can shorten their life).
- Safety Glasses: Essential! Bits of dust, old insulation, or even a shattered bulb can cause eye injury. Protect your peepers.
New Bulb (Crucial Matchmaking)
This is where many people go wrong. Don’t just grab “a” bulb. You need the right bulb.
- Take the Old Bulb with You: The best way to ensure you buy the correct replacement is to take the old bulb to the store. This helps match the base type (e.g., E26 standard, E12 candelabra, GU10 twist-lock, bi-pin), size, and shape.
- Check Wattage: Your fixture will have a maximum wattage rating (e.g., “Max 60W”). Never exceed this limit. Using a higher wattage bulb can overheat the fixture, melt wiring, and create a fire hazard. If you’re switching to LED, you can often use a much lower wattage LED bulb (e.g., a 9W LED can replace a 60W incandescent) for the same light output.
- Bulb Type (LED, CFL, Incandescent, Halogen): Decide what kind of bulb you want. LEDs are energy-efficient and long-lasting. CFLs are also efficient but take time to warm up. Incandescents are cheap but inefficient. Halogens are bright but hot.
- Color Temperature: Bulbs come in different “color temperatures,” measured in Kelvins (K).
- 2700K-3000K: Warm White (cozy, yellowish light, like traditional incandescent)
- 3500K-4000K: Neutral White (bright, clean, good for kitchens/offices)
- 5000K-6500K: Daylight (bluish-white, energizing, good for task lighting or simulating natural light)
- Dimmability: If your fixture is on a dimmer switch, make sure your new bulb is labeled “dimmable.” Most LEDs require specific dimmable drivers to work properly with a dimmer switch.
Cleaning Supplies (Optional, but Recommended)
- Damp Cloth or Microfiber Towel: Great for wiping down fixture covers and the inside of the fixture.
- Glass Cleaner: If your dome cover is particularly grimy.
- Small Brush or Vacuum Cleaner Attachment: To remove accumulated dust and dead insects from inside the fixture.
The Step-by-Step Process (General Guidelines)
Now that you’re safe and equipped, let’s get that new bulb in!
Step 1: Removing the Old Bulb (and Fixture Cover)
- Position Your Ladder: Place your ladder directly under the fixture, ensuring it’s stable and you can comfortably reach.
- Remove the Fixture Cover (If Applicable):
- For dome lights, gently twist, unscrew, or unclip the cover as you identified earlier. Support the cover with one hand as you remove the last fastener.
- For recessed lights, gently pull down on the trim ring if necessary, or simply access the bulb directly.
- For pendants or chandeliers, remove any individual shades if they block access.
Carefully set the cover aside in a safe place where it won’t break.
- Unscrew the Old Bulb:
- For standard screw-in bulbs, grasp the bulb firmly (with gloves!) and turn it counter-clockwise until it comes free from the socket.
- For push-in or twist-lock bulbs (like halogens or some LEDs), follow the specific removal method for that bulb type. Remember to avoid touching glass with bare hands.
- Inspect the Socket: Briefly check the socket for any signs of damage, corrosion, or burnt areas. If you see any, it might be time to call an electrician.
Step 2: Cleaning the Fixture (If Applicable)
This is the perfect opportunity to give your light fixture a quick refresh:
- Wipe Down the Cover: Use a damp cloth or glass cleaner to remove dust, grime, and dead insects from the inside and outside of the fixture cover. A clean cover lets more light shine through!
- Dust the Fixture Interior: Use a small brush or a vacuum cleaner attachment to carefully remove any dust or debris from inside the fixture’s housing.
Step 3: Inserting the New Bulb
- Handle with Care: Again, use gloves or a cloth, especially for halogen or certain LED bulbs, to avoid transferring skin oils to the glass or delicate components.
- Match the Base: Make sure the new bulb’s base matches the socket type. Don’t force it.
- Screw In/Insert the New Bulb:
- For screw-in bulbs, gently screw the new bulb clockwise into the socket. Turn until it’s snug, but do not overtighten. Overtightening can damage the socket or the bulb’s base.
- For push-in or twist-lock bulbs, follow the specific insertion method for that bulb type. Ensure it’s fully seated.
Step 4: Reassembling the Fixture
- Replace the Fixture Cover: Carefully reattach the fixture cover.
- For dome lights, align it properly and twist, screw, or clip it back into place. Don’t overtighten screws, as glass can crack.
- For recessed lights, push the trim ring back up into the ceiling until it’s flush.
- For pendant or chandelier shades, reattach them gently.
- Clear Your Workspace: Gather your tools, the old bulb, and any cleaning supplies.
- Restore Power: Go back to your circuit breaker box and flip the breaker for that circuit back to the “on” position.
- Test the Light: Return to the room and flip the wall switch. Your room should now be brightly illuminated!
Troubleshooting Common Issues
Sometimes, even after following all the steps, things don’t go perfectly. Here are a few common issues and how to solve them.
Bulb Still Not Working?
- Check the Breaker: Did you accidentally turn off the wrong breaker, or did it trip itself? Ensure the breaker is fully in the “on” position.
- Confirm Power: Double-check with your non-contact voltage tester if you’re comfortable.
- Bulb Seated Correctly: Unscrew the new bulb slightly and then screw it back in, ensuring it’s snug. Sometimes, it just needs a better connection.
- Defective Bulb: It happens! New bulbs can sometimes be faulty. Try another new bulb if you have one on hand.
- Wall Switch Issue: If multiple bulbs on the same switch are out, or if this issue persists with different bulbs, the problem might be with the wall switch itself.
- Fixture Issue: If a known good bulb doesn’t work in the fixture, and the power is definitely on, the fixture itself might be faulty. This usually requires an electrician.
Stuck or Broken Bulb?
If the glass bulb breaks off and leaves the metal base stuck in the socket, do not try to remove it with your fingers. This is extremely dangerous.
- Turn OFF the power at the breaker IMMEDIATELY.
- Use Pliers: With the power off, use needle-nose pliers to carefully grip the edge of the metal base and turn it counter-clockwise until it unscrews.
- Potato Trick (Last Resort): Some people swear by cutting a potato in half, pressing it into the broken glass/metal base, and twisting. Be extremely careful with this method and ensure the power is OFF.
Difficulty Removing Covers?
Sometimes covers can be stiff, painted stuck, or just difficult to grip.
- Gentle Pressure: Apply steady, gentle pressure. Avoid excessive force, which can shatter glass.
- Rubber Gloves: If you’re struggling with grip, rubber dishwashing gloves can provide excellent traction on smooth glass or plastic.
- Tap Gently: For painted-stuck covers, a gentle tap with the heel of your hand around the edge might loosen them.
Conclusion
And there you have it! Changing a ceiling light bulb is a straightforward process once you know the steps and, most importantly, how to prioritize safety. From identifying your specific fixture type to gathering the right tools and troubleshooting common hiccups, you are now equipped with the knowledge to handle this everyday task with confidence.
Remember, a little preparation goes a long way. Always turn off the power, match your new bulb correctly, and take the opportunity to clean your fixture. Not only will your home be brighter, but you’ll also gain a sense of accomplishment by tackling a simple home maintenance task. So go ahead, shine a light on your world – you’ve got this!
Frequently Asked Questions
What’s the most common mistake when changing a light bulb?
The most common mistake is forgetting to turn off the power at the circuit breaker. While flipping the wall switch might seem sufficient, it doesn’t always cut all power to the fixture, leaving a risk of electric shock. Always go to the breaker box for complete safety.
Are all LED bulbs dimmable?
No, not all LED bulbs are dimmable. Dimmable LEDs require specific internal drivers to function properly with dimmer switches. Always check the packaging for a “dimmable” label if you intend to use the bulb with a dimmer switch; otherwise, they may flicker or hum.
How do I dispose of old light bulbs safely?
Incandescent and halogen bulbs can generally be disposed of in regular household trash. However, CFL (compact fluorescent light) bulbs contain small amounts of mercury and should be recycled at designated collection points or household hazardous waste facilities. LED bulbs are usually safe for regular disposal but recycling is encouraged due to electronic components.
Can I use a higher wattage bulb if it fits?
No, never use a bulb with a higher wattage than what is specified on the light fixture (e.g., “Max 60W”). Exceeding the maximum wattage can overheat the fixture’s wiring, melt insulation, damage the socket, and create a serious fire hazard. Always adhere to the fixture’s recommended wattage.
Why do some light bulbs burn out faster than others?
Several factors can cause bulbs to burn out quickly, including voltage fluctuations (power surges), frequent switching on and off, using the wrong wattage bulb for the fixture, vibration, poor contact in the socket, or simply manufacturing defects. High-quality LED bulbs are designed for much longer lifespans than traditional incandescents.
Is it better to use CFLs or LEDs?
For most applications, LEDs (Light Emitting Diodes) are generally better than CFLs (Compact Fluorescent Lights). LEDs are more energy-efficient, last significantly longer, turn on instantly, don’t contain mercury, and offer a wider range of color temperatures and designs. While CFLs were a step up from incandescents, LEDs represent a more advanced and environmentally friendly lighting solution.