
Replacing a recessed light bulb is a simple DIY task that anyone can master with the right guidance. This article provides a comprehensive, friendly step-by-step guide, covering everything from ensuring safety by shutting off power to identifying the correct bulb type and gracefully installing your new light. Say goodbye to dim rooms and confidently tackle your lighting needs!
There’s something wonderfully sleek and modern about recessed lighting. Those subtle, built-in fixtures offer a clean aesthetic, bathing your room in a warm glow without cluttering the ceiling. They’re fantastic for general illumination, accent lighting, or even task lighting in kitchens and offices. But like all good things, they eventually need a little attention – specifically, when a bulb burns out. That moment can feel a bit daunting, especially if you’re used to a simple screw-in lamp, but don’t fret! Learning how to replace a recessed light bulb is an incredibly straightforward DIY project that most homeowners can tackle with ease.
You might be standing there, looking up at a dark spot in your ceiling, wondering if you need to call an electrician or if there’s some secret trick to these mysterious lights. Good news! There’s no secret trick, just a few simple steps and a bit of know-how. This comprehensive guide will walk you through everything you need to know, from ensuring your safety to finding the perfect replacement bulb, and finally, getting that beautiful light shining bright again. We’ll cover different types of bulbs, various trim styles, and some handy tips to make the process smooth and hassle-free. So, let’s roll up our sleeves and get started!
By the end of this article, you’ll be a recessed light bulb replacement pro. You’ll save money on service calls and gain the satisfaction of doing it yourself. Plus, you might even discover an opportunity to upgrade your lighting to more energy-efficient options like LEDs. Ready to bring light back into your life? Let’s dive into the details of how to replace a recessed light bulb safely and effectively.
Key Takeaways
- Safety First: Always turn off the power at the circuit breaker before attempting to replace any recessed light bulb to prevent electrical shock.
- Identify Your Bulb Type: Recessed lighting uses various bulb types (LED, Halogen, Incandescent, CFL) and bases (E26, GU10, Bi-pin). Knowing your current bulb’s specifications is crucial for a proper replacement.
- Tools Are Minimal: You’ll typically only need a ladder, gloves, and sometimes a suction cup or small screwdriver for specific trim or bulb types.
- Accessing the Bulb: Different recessed light trims attach differently (friction clips, torsion springs, screw-in). Understanding how yours works will make removal and reinstallation much easier.
- Handle with Care: When installing new bulbs, especially halogen, avoid touching the glass with bare hands as oils can cause premature failure. Always use gloves or a clean cloth.
- Consider Upgrading to LED: If you’re replacing older incandescent or halogen bulbs, consider switching to LEDs for significantly better energy efficiency, longer lifespan, and often improved light quality.
- Troubleshooting is Simple: Most issues like a new bulb not working can be resolved by checking power, confirming the bulb is screwed in properly, or inspecting the socket.
Quick Answers to Common Questions
How often should I replace recessed light bulbs?
The frequency depends entirely on the bulb type. Incandescent bulbs might need replacing every few months, halogens every year or two, while LED bulbs can last 10-25 years or more, making replacements a rare event.
Can I replace a halogen recessed light bulb with an LED?
Yes, in most cases, you can! Many LED bulbs are designed as direct retrofits for halogen bulbs, often using the same E26 screw-in or GU10 twist-and-lock bases. Just ensure the LED bulb is marked as dimmable if your fixture uses a dimmer switch.
What if the old bulb is stuck or broken in the socket?
First, always ensure the power is completely OFF at the circuit breaker. For a stuck screw-in bulb, try applying a little lubricant around the threads. If the glass breaks, leaving the metal base, use needle-nose pliers or push a raw potato onto the base to twist it out. Always wear gloves and eye protection.
Do I need special tools to remove recessed light trim?
Typically, no special tools are required. Most trims are held by friction clips or torsion springs that you can gently pull down or unhook by hand. A small flat-head screwdriver might be helpful for stubborn clips, but often isn’t necessary.
What’s the difference between lumens and watts for light bulbs?
Watts measure the energy consumed by a bulb, while lumens measure the actual brightness of the light it produces. For modern energy-efficient bulbs like LEDs, lumens are a more important indicator of brightness than watts.
📑 Table of Contents
Safety First: Preparing for Bulb Replacement
Before you even think about touching that recessed light fixture, safety must be your absolute top priority. Working with electricity always carries a risk, but by following a few simple precautions, you can ensure a safe and successful bulb replacement. Think of this as the foundation of learning how to replace a recessed light bulb – without it, everything else is compromised.
Shut Off the Power
This is arguably the most crucial step. Never attempt to replace a recessed light bulb with the power still on. You risk electrical shock, which can be dangerous or even fatal. Head straight to your home’s main electrical panel (often found in a basement, garage, or utility closet). Locate the circuit breaker that controls the room or specific light fixture you’re working on. If your breakers aren’t clearly labeled, you might need to flip switches one by one until the light goes off. A good practice is to have a helper confirm the light is off, or use a non-contact voltage tester to double-check the fixture itself before proceeding. Once identified, flip that breaker to the “OFF” position. For extra safety, consider taping a note to the breaker box saying, “Working on lights – Do Not Turn On!”
Gather Your Tools
The good news is that you won’t need a whole toolbox for this job. Most recessed light bulb replacements require very few tools, if any. Here’s a basic list:
- A sturdy step ladder: Essential for safely reaching overhead fixtures. Make sure it’s stable on a flat surface.
- Work gloves: Not only do they protect your hands from potentially sharp edges or broken glass, but they’re also crucial for handling certain bulb types (like halogen) where oils from your skin can shorten the bulb’s lifespan.
- A small flat-head screwdriver or putty knife (optional): Some recessed light trims are held in place by friction clips or torsion springs that might need a gentle pry to release.
- A suction cup (optional): If your recessed light uses a “reflector” style bulb (like some PAR or BR types) with no exposed edges to grip, a suction cup designed for light bulbs can be a lifesaver.
- Your new replacement bulb(s): Make sure you have the correct type and size (more on this below!).
Allow for Cooling
If the recessed light bulb has recently been on, it will be hot – especially incandescent and halogen bulbs. Attempting to remove a hot bulb can lead to burns or cause the bulb to shatter. Give the bulb ample time to cool down before touching it. Depending on the bulb type, this could be anywhere from a few minutes to half an hour after you’ve shut off the power. Patience here will save you discomfort and potential injury.
Identifying Your Recessed Light Bulb Type
One of the most critical steps in learning how to replace a recessed light bulb successfully is knowing what kind of bulb you’re replacing. Recessed lighting comes in a surprising variety of types, and choosing the wrong replacement can lead to compatibility issues, poor performance, or even damage to the fixture. Don’t worry, it’s easier than it sounds!
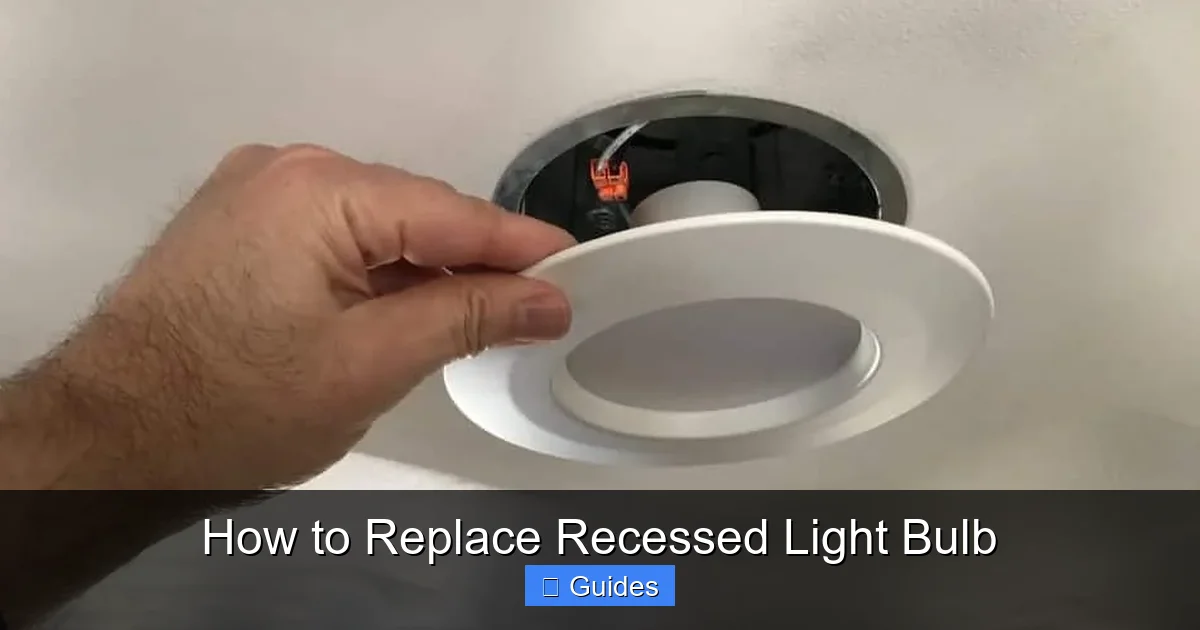
Visual guide about How to Replace Recessed Light Bulb
Image source: lightingtutor.com
Common Bulb Bases (Sockets)
The base is the part of the bulb that screws or plugs into the fixture. Here are the most common types you’ll encounter:
- E26/E27 (Medium Screw Base): This is the classic “standard” screw-in base, just like a regular light bulb. E26 is common in North America, E27 elsewhere. If your recessed light looks like it takes a traditional bulb, this is likely it.
- GU10 (Twist-and-Lock Bi-pin Base): Identified by two short, thick pins at the base. These pins have small “feet” that you push into the socket and then twist clockwise to lock in place. Commonly found in halogen or LED spotlight-style bulbs.
- GU5.3 or GZ4 (Bi-pin or “Pin Base”): These bulbs have two thin pins that simply push straight into the socket. The number after “G” indicates the distance between the pins in millimeters (e.g., 5.3mm for GU5.3). Often used for low-voltage MR16 bulbs.
- E12 (Candelabra Base): A smaller screw-in base, less common for primary recessed lighting but sometimes used for accent or decorative recessed fixtures.
The best way to identify the base is to look at the old bulb once it’s removed. The base type is usually printed on the bulb itself, or you can visually match it.
Bulb Technologies (Types of Light)
Beyond the base, the technology inside the bulb also varies widely:
- Incandescent: The traditional bulb with a filament. They produce warm light but are very inefficient and generate a lot of heat. You’re unlikely to find many new fixtures using these.
- Halogen: An improved incandescent, offering brighter, whiter light and slightly better efficiency. They still run very hot and have a shorter lifespan than modern alternatives. Often use GU10 or MR16 bases.
- Compact Fluorescent Lamps (CFL): Energy-efficient, curly or spiral bulbs. They take a moment to warm up to full brightness and often have a cooler, sometimes greenish, light. Less common in new recessed installations.
- LED (Light Emitting Diode): The current gold standard. Highly energy-efficient, long-lasting, instant-on, and available in a wide range of color temperatures. Many modern recessed lights are “integrated LED” meaning the LED source is built directly into the fixture and not meant to be replaced by itself. However, many older fixtures can be retrofitted with screw-in or twist-and-lock LED bulbs.
If you’re replacing an older incandescent or halogen bulb, considering an LED replacement is an excellent idea for energy savings and longevity. Many LEDs are designed to be “dimmable” but always check for compatibility with your dimmer switch.
Lumens, Watts, and Color Temperature
Once you know the base and type, you’ll also want to match these key specifications:
- Watts (W): For incandescent and halogen, this tells you energy consumption and brightness. For LEDs, focus on lumens instead, as watts only indicate LED power consumption, not equivalent brightness.
- Lumens (lm): This is the true measure of a bulb’s brightness. Aim to match or slightly exceed the lumens of your old bulb for similar illumination. For example, a 60W incandescent bulb produces about 800 lumens.
- Color Temperature (Kelvin – K): This describes the “warmth” or “coolness” of the light.
- 2700K-3000K: Warm white, similar to traditional incandescents, creating a cozy atmosphere.
- 3500K-4000K: Neutral white, good for kitchens, offices, and general task lighting.
- 5000K-6500K: Daylight, bright and crisp, often used in workshops or areas where true color rendering is important.
Try to match the color temperature of other bulbs in the same room for a consistent look.
- Beam Angle: Especially for spotlight-style recessed lights, the beam angle affects how wide or narrow the light spread is. A narrower beam is good for accenting, while a wider beam is better for general illumination.
All of this information is usually printed on the side of the old bulb. Take a picture or write it down once you’ve removed it. This information is your roadmap to finding the perfect new bulb when you need to replace recessed light bulb.
Step-by-Step Guide: How to Remove the Old Bulb
Now that you’re prepped and know what kind of bulb you’re dealing with, it’s time to actually remove the old, burnt-out light source. This is where the practical application of how to replace a recessed light bulb truly begins. Remember, power is OFF, and the bulb is COOL!
Accessing the Bulb (Removing the Trim)
Many recessed lights have a decorative trim piece that covers the can and holds the bulb. You might need to remove or adjust this trim to get to the bulb. There are a few common ways these trims are held in place:
- Friction Clips: These are usually just wire clips or springs that press against the inside of the can. To remove, simply pull down gently but firmly on the trim. It should release with a little resistance. Once it’s down a few inches, you’ll likely see spring clips or torsion springs that hold the trim to the housing. Squeeze these clips together or unhook them from the slots in the can, and the trim will come completely free.
- Torsion Springs: These are V-shaped springs that hook into small brackets inside the recessed can. Gently pull down on the trim, and you’ll see the springs. Unhook them from their brackets, and the trim will come loose.
- Screw-in Trim: Less common, but some trims (especially older or specialized ones) might have small screws holding them in place around the perimeter. Use a small screwdriver to loosen and remove these.
- Self-Contained LED Retrofit Trim: Many modern LED retrofit kits are designed to replace both the bulb and the trim in one unit. They usually have either torsion springs or friction clips and simply pull down and then unplug from the existing socket.
Once the trim is out of the way (or if your fixture doesn’t have a separate trim), you’ll have clear access to the bulb.
Removing Different Bulb Types
The method for removing the bulb depends on its base type:
- E26/E27 (Screw-in): This is the easiest. Simply twist the bulb counter-clockwise to unscrew it from the socket. If it’s a bit stiff, apply firm, even pressure. If it’s stuck, try again gently. If the glass separates from the base, you’ll need pliers to carefully extract the remaining metal base (ensure power is OFF and use insulated pliers).
- GU10 (Twist-and-Lock): Push the bulb firmly upwards into the socket, then twist it counter-clockwise about a quarter turn until it releases. Then, pull it straight down.
- GU5.3 / GZ4 (Bi-pin Push-in): Gently pull the bulb straight down from the socket. It should slide out easily. Avoid twisting, as this can bend the delicate pins.
- PAR/BR/MR-style bulbs (with no exposed edges): These are often smooth and difficult to grip. This is where your suction cup comes in handy. Press the suction cup firmly onto the face of the bulb until it creates a seal. Then, use the suction cup to twist (for screw-in) or pull/twist (for GU10) the bulb out.
Always hold the bulb by its base or a section of the glass that isn’t too delicate. If the bulb feels stuck or fragile, take your time and be gentle to avoid shattering it.
Dealing with Stuck or Broken Bulbs
Sometimes, despite your best efforts, a bulb can be stubborn. If a screw-in bulb is stuck, try spraying a little WD-40 or similar lubricant around the threads, let it sit for a few minutes, then try again (only if the bulb is completely cool and power is off!). If a screw-in bulb breaks, leaving the metal base in the socket, first ensure the power is OFF! Then, use needle-nose pliers or a potato (push it onto the broken base to create a grip) to carefully twist the remaining base out counter-clockwise. Always wear protective gloves and eyewear when dealing with broken glass.
Step-by-Step Guide: How to Install the New Bulb
With the old, defunct bulb safely removed, you’re halfway there! Now comes the satisfying part: installing your brand-new, gleaming replacement. This section will guide you through the process of how to replace a recessed light bulb with its shiny successor, ensuring a perfect fit and bright illumination.
Inspecting the Socket
Before you insert the new bulb, take a moment to inspect the socket and the inside of the recessed can. Look for any signs of damage, corrosion, or loose wires. If you see anything concerning, like melted plastic or frayed wires, it’s best to consult a qualified electrician. For screw-in sockets (E26), ensure the small metal tab at the bottom of the socket is slightly raised to make good contact with the new bulb. If it’s flattened, you can gently pry it up a bit with a non-conductive tool (like a plastic pick or the tip of a wooden skewer) – again, only with the power OFF!
Inserting the Bulb Correctly
Just like removal, the installation method depends on the bulb base:
- E26/E27 (Screw-in): Align the threads of the new bulb with the socket. Gently screw the bulb in clockwise until it’s snug. Do not overtighten, as this can damage the socket or make future removal difficult. Hand-tight is sufficient.
- GU10 (Twist-and-Lock): Align the two pins on the bulb with the slots in the socket. Push the bulb firmly upwards into the socket, then twist it clockwise about a quarter turn until it locks securely into place. You should feel a slight click or resistance indicating it’s seated properly.
- GU5.3 / GZ4 (Bi-pin Push-in): Carefully align the two thin pins with the holes in the socket. Gently push the bulb straight into the socket until it’s fully seated. Do not force it or twist it, as the pins are fragile.
A Critical Tip for Halogen Bulbs: If you’re installing a new halogen bulb, always wear gloves or use a clean cloth to handle it. The oils from your skin can create “hot spots” on the glass surface, leading to premature bulb failure. Handle the bulb by its base or with a protective barrier, then remove the gloves/cloth once it’s securely in place.
For reflector-style bulbs that require a suction cup for removal, you can often use the same suction cup to help guide and push the new bulb into place, especially if it’s high up.
Reattaching the Trim
Once the new bulb is firmly in place, it’s time to reattach the trim (if you removed one). Reverse the steps you took for removal:
- Friction Clips/Torsion Springs: Hook the springs or clips back into their respective slots or brackets inside the recessed can. Once secured, gently push the trim upwards until it sits flush against the ceiling.
- Screw-in Trim: Align the trim with the screw holes and reinsert and tighten the screws.
Ensure the trim is sitting evenly and securely against the ceiling. It should look neat and finished.
Testing the New Bulb
With everything securely in place, it’s time for the moment of truth! Head back to your electrical panel and flip the circuit breaker back to the “ON” position. Return to the room and turn on the light switch. If you’ve followed all the steps correctly, your new recessed light bulb should illuminate brightly, banishing that dark spot and restoring your room’s ambiance. If it doesn’t light up, don’t panic! Check the troubleshooting section below.
Troubleshooting Common Issues and Pro Tips
Even with the best instructions on how to replace a recessed light bulb, sometimes things don’t go perfectly. Here are some common issues you might encounter and some professional tips to make your life easier and your bulbs last longer.
Bulb Not Lighting Up
This is the most common frustration after replacing a bulb. Don’t worry, it’s usually a simple fix:
- Is the Power On? Double-check the circuit breaker and the wall switch. It sounds obvious, but it’s often overlooked.
- Is the Bulb Seated Correctly? Turn off the power again, then carefully re-seat the bulb. For screw-in bulbs, tighten it a little more (but don’t overtighten). For twist-and-lock or push-in bulbs, ensure they are fully inserted and locked.
- Is the Bulb Faulty? Sometimes, you just get a dud. Try another new bulb if you have one handy.
- Inspect the Socket: With the power OFF, look inside the socket. For E26/E27 bases, ensure the small metal tab at the bottom of the socket is making good contact with the bulb’s base. Gently pry it up if it’s flat. For pin-type sockets, ensure the pins aren’t bent or damaged.
- Fixture Issue: If multiple bulbs in the same fixture or circuit aren’t working (and they’re not controlled by the same switch), there might be a wiring issue within the fixture or a loose connection elsewhere. This is when it’s best to call an electrician.
Dimming Problems
If your new bulb flickers, hums, or doesn’t dim properly, especially after upgrading to LED, consider these points:
- Dimmer Compatibility: Not all LED bulbs are compatible with all dimmer switches, especially older ones designed for incandescent bulbs. Look for “dimmable” on the LED bulb’s packaging, and ideally, choose a bulb that explicitly states compatibility with “LED dimmers” or “universal dimmers.” Sometimes replacing an old dimmer switch with a new LED-compatible one solves the problem.
- Minimum Load: Some older dimmers require a minimum wattage to operate correctly. If you’ve replaced several high-wattage incandescents with very low-wattage LEDs, the total load might be below the dimmer’s minimum, causing flickering.
Extending Bulb Life
Want to reduce how often you need to replace recessed light bulb? Here are some tips:
- Choose LEDs: They inherently last much longer than traditional bulbs – often 15-25 times longer!
- Avoid Over-tightening: When screwing in bulbs, over-tightening can damage the socket or the bulb’s base, leading to premature failure. Snug is enough.
- Handle with Care: As mentioned, avoid touching halogen bulbs with bare hands. Also, rough handling can damage the delicate filaments or electronics inside any bulb.
- Check for Voltage Issues: While rare for a single bulb, consistent premature failure across multiple fixtures might indicate voltage fluctuations in your home, which an electrician can diagnose.
Upgrading to LED
When you need to replace recessed light bulb, it’s the perfect opportunity to upgrade to LED technology. Here’s why and how:
- Energy Savings: LEDs use significantly less electricity, saving you money on your utility bills.
- Longevity: LEDs last for years, sometimes decades, meaning far fewer replacements.
- Less Heat: LEDs produce much less heat than incandescents or halogens, making your home cooler and potentially reducing air conditioning costs.
- Variety: LEDs come in a vast array of color temperatures, brightness levels, and beam angles, offering more flexibility in lighting design.
- Retrofit Options: Many LED bulbs are designed as direct replacements for older incandescent or halogen bulbs (e.g., screw-in E26 LEDs, GU10 LEDs, or full LED retrofit kits that replace the entire trim).
Before upgrading, check the “IC-rated” (Insulation Contact) status of your recessed can. Most modern LED bulbs are fine, but ensure the bulb you choose is rated for enclosed fixtures if your recessed can is sealed, especially if it’s surrounded by insulation. This ensures proper heat dissipation for the LED.
Learning how to replace a recessed light bulb is a simple skill that empowers you to keep your home bright and inviting. With these tips, you’re now equipped to tackle most common lighting challenges in your home.
Conclusion
And there you have it! From the moment you notice a dark spot on your ceiling to the satisfying glow of a brand-new bulb, you now possess all the knowledge needed on how to replace a recessed light bulb. We’ve covered crucial safety steps, demystified different bulb types and bases, and provided clear, actionable instructions for both removing the old and installing the new. We’ve even given you some handy troubleshooting tips and reasons to consider an LED upgrade.
This common household task doesn’t need to be intimidating. By taking a few minutes to prepare and following these simple guidelines, you can confidently maintain your home’s recessed lighting, save money on professional services, and enjoy a consistently well-lit living space. So, the next time a recessed light dims, you’ll know exactly what to do. Grab your ladder, shut off the power, and get ready to shine!
🎥 Related Video: HOW TO REMOVE AND REPLACE A RECESSED LED CEILING LIGHT
📺 ETPC EPIC TIME PASS CHANNEL
GET THESE LIGHTS HERE FROM AMAZON: https://amzn.to/3A5kSw4 FIND THE LATEST RECESSED LED LIGHTING OPTIONS …
Frequently Asked Questions
How do I know what size replacement bulb to buy?
The easiest way to determine the correct size is to look at the existing bulb once you’ve safely removed it. Key information like wattage, lumens, color temperature (Kelvin), and the bulb’s base type (e.g., E26, GU10) is usually printed directly on the bulb. Take a photo or write down these details before heading to the store.
Is it safe to touch a recessed light bulb with my bare hands?
While generally safe for LED and incandescent bulbs, it’s best to avoid touching halogen bulbs with bare hands. Oils from your skin can create hot spots on the glass, leading to premature failure. Always use gloves or a clean cloth when handling halogen bulbs.
My new LED bulb is flickering in my recessed light fixture. What’s wrong?
Flickering with LED bulbs is often a compatibility issue with older dimmer switches. Many traditional dimmers designed for incandescent bulbs are not suitable for the low wattage of LEDs. Consider replacing your dimmer with an LED-compatible or “universal” dimmer switch to resolve this problem.
Can I use any LED bulb in my recessed light fixture?
While many LED bulbs are designed as direct replacements, it’s important to check a few things. Ensure the LED bulb’s base matches your fixture (e.g., E26, GU10), check if your fixture is “IC-rated” (Insulation Contact) for bulbs that produce heat if you’re replacing with higher-wattage LEDs, and verify if the LED bulb is dimmable if you have a dimmer switch.
What if the recessed light fixture itself is faulty, not just the bulb?
If you’ve tried a new bulb and confirmed it’s working elsewhere, and the fixture still doesn’t light up, the issue might be with the fixture’s wiring or internal components. In such cases, or if you notice melted wires, burning smells, or continuous tripping of a circuit breaker, it’s safest to contact a qualified electrician to inspect and repair or replace the fixture.
Are recessed lights difficult to install initially?
Installing new recessed light fixtures involves working with your home’s electrical wiring, cutting holes in the ceiling, and ensuring proper insulation contact. While a skilled DIYer might tackle it, it’s generally a more complex task than bulb replacement and often best left to a professional electrician to ensure safety and code compliance.