
This comprehensive guide teaches you how to screw in a light bulb the right way, ensuring safety and longevity for your lighting. From disconnecting power and selecting the perfect bulb to the step-by-step installation and troubleshooting common issues, you’ll gain the confidence to brighten any room effectively. Master this essential household task with ease and care, always prioritizing safety and proper technique.
How to Screw in a Light Bulb
We’ve all been there: a room suddenly plunges into darkness, and the culprit is a burnt-out light bulb. It seems like such a simple task, right? Just twist out the old one, twist in the new one, and *poof* – let there be light! While the basic motion of unscrewing and screwing is straightforward, there’s actually a bit more to learning how to screw in a light bulb safely and effectively than meets the eye.
Think about it: have you ever had a new bulb flicker, burn out too quickly, or worse, found yourself struggling with a stuck one? These little frustrations often stem from overlooking some basic steps and best practices. This guide is designed to walk you through everything you need to know, from preparing your workspace and choosing the right bulb to the exact technique for screwing it in, troubleshooting common issues, and even how to dispose of your old bulbs responsibly. So, let’s shed some light on this everyday household chore and turn you into a light bulb changing pro!
Key Takeaways
- Safety First: Always disconnect power at the switch or breaker and allow the bulb to cool before handling to prevent electrical shock or burns.
- Choose Wisely: Select the correct bulb type (LED, CFL, incandescent), base size, and wattage/lumens for your fixture to ensure compatibility and desired light output.
- Gentle Removal: When unscrewing an old bulb, turn it counter-clockwise carefully. If it’s stuck, use gloves or a rubber grip, but never force it excessively.
- Proper Installation: Screw in the new bulb clockwise until it’s snug, but never overtighten. Overtightening can damage the bulb or the fixture’s socket.
- Inspect the Socket: Before installing a new bulb, quickly check the socket for debris or corrosion. Gently clean it if necessary, ensuring power is off.
- Troubleshooting Tips: If a new bulb doesn’t work, re-check power, inspect the bulb and socket connection, and ensure the bulb is fully screwed in but not too tight.
- Responsible Disposal: Dispose of old bulbs, especially CFLs, according to local recycling guidelines due to their mercury content. LEDs and incandescents are generally safer to discard.
Quick Answers to Common Questions
Question 1?
What’s the most important safety step when changing a light bulb?
Answer 1?
The most important safety step is always to turn off the power to the fixture at your home’s electrical breaker box, not just the wall switch. This ensures no electricity is flowing, preventing electrical shocks.
Question 2?
How do I know what type of light bulb to buy?
Answer 2?
Check the base of your old bulb (e.g., E26 for standard screw-in) and note the lumens (for brightness) and color temperature (e.g., 2700K for warm white). Also, consider the bulb type (LED, CFL, incandescent) and if it needs to be dimmable for your fixture.
Question 3?
What should I do if the bulb is stuck and won’t unscrew?
Answer 3?
First, ensure the power is off and the bulb is cool. Then, try using a rubber glove, a rubber jar opener, or a specialized bulb remover tool to get a better grip. Gently twist counter-clockwise without excessive force.
Question 4?
Why shouldn’t I overtighten a light bulb?
Answer 4?
Overtightening can damage the threads inside the light fixture’s socket, making it difficult for future bulbs to connect properly. It can also crack the bulb’s base or make it extremely hard to remove later.
Question 5?
How do I dispose of old CFL (Compact Fluorescent Lamp) bulbs?
Answer 5?
CFL bulbs contain mercury and should never be thrown in regular trash. They must be recycled properly at designated collection points, such as local hardware stores, municipal recycling centers, or specific hazardous waste disposal sites.
📑 Table of Contents
- Why Learning the ‘Right Way’ Matters More Than You Think
- Safety First: Preparing for a Successful Bulb Change
- Choosing Your Light Bulb: A Bright Decision
- The Step-by-Step Guide: How to Screw In a Light Bulb Like a Pro
- Troubleshooting and Advanced Tips for Light Bulb Success
- Beyond Installation: Recycling and Maintenance
- Conclusion
Why Learning the ‘Right Way’ Matters More Than You Think
You might be thinking, “It’s just a light bulb, how complicated can it be?” And you’re right, it’s not brain surgery. However, knowing how to screw in a light bulb correctly isn’t just about getting light; it’s about safety, the longevity of your bulbs, and protecting your fixtures. Rushing the process or using incorrect methods can lead to surprising problems down the line.
Beyond the Basics: Safety and Efficiency
The most crucial reason to learn the proper technique for how to screw in a light bulb is safety. Electricity is no joke, and a casual approach can lead to electrical shocks, burns, or even fires. By taking a few extra moments to ensure the power is off and the bulb is cool, you prevent unnecessary risks to yourself and your home. Beyond safety, proper installation also ensures your bulbs perform at their best. A poorly installed bulb might flicker, have a shorter lifespan, or simply not work, wasting your money and time. Learning how to screw in a light bulb correctly means less frustration and more reliable illumination.
Common Mistakes to Avoid
Many people make similar mistakes when changing a light bulb. One of the most frequent is not turning off the power, which puts you at risk of shock. Another is handling a hot bulb directly, which can cause severe burns. Overtightening a bulb is also a common error; it can strip the socket, make future removal difficult, and even cause the bulb to break in your hand. Conversely, not tightening it enough can lead to flickering or intermittent light. This guide will help you sidestep these pitfalls, ensuring that every time you need to screw in a light bulb, it’s a smooth and safe process.
Safety First: Preparing for a Successful Bulb Change
Visual guide about How to Screw in a Light Bulb
Image source: shuntool.com
Before you even think about touching that burnt-out bulb, safety must be your top priority. This isn’t just a recommendation; it’s a non-negotiable step that protects you from potential hazards. Taking a moment to prepare properly can prevent accidents and make the entire process of how to screw in a light bulb much easier.
Disconnecting the Power: Your Most Important Step
This is *the* golden rule when figuring out how to screw in a light bulb: always turn off the power. Don’t rely solely on the wall switch. While turning off the switch will usually cut the current to the fixture, an experienced electrician knows that wiring can sometimes be quirky or faulty, leaving the socket still live. The safest method is to turn off the power at your home’s electrical breaker box.
Locate your electrical panel, which is often in a basement, garage, or utility closet. Find the breaker switch that controls the room or specific fixture where you’ll be working. If your breakers aren’t labeled, you might need to do a little detective work by flipping them one by one until the light (or other appliance in that room) goes out. Once you’ve identified it, flip the breaker to the “OFF” position. This ensures no electricity is flowing to the fixture, making it completely safe to remove and screw in a light bulb.
Allowing the Bulb to Cool Down
Many types of light bulbs, especially traditional incandescent and halogen bulbs, get incredibly hot when in use. Even some older CFLs can generate significant heat. Trying to remove a hot bulb can lead to a nasty burn. After you’ve turned off the power, give the bulb at least 5-10 minutes (or longer for very high-wattage bulbs) to cool down before touching it. You can gently test the temperature with the back of your hand before gripping it fully. If it’s still warm, wait a bit longer. Patience here prevents painful burns and allows you to safely screw in a light bulb.
Ensuring a Stable and Safe Workspace
Reaching a ceiling fixture often requires a step stool or a ladder. Never stand on a shaky chair, an unstable box, or anything that isn’t specifically designed to provide a secure elevated platform. Ensure your stool or ladder is placed on a flat, level surface and is fully extended or locked into place. If you’re using a ladder, have someone spot you if possible. Clear any clutter from the area below to prevent tripping hazards. Having a clear, stable workspace is crucial for safely accomplishing the task of how to screw in a light bulb. You don’t want to lose your balance while holding a glass bulb!
Choosing Your Light Bulb: A Bright Decision
Before you even start twisting, you need to make sure you have the right replacement bulb. With so many options available today, simply grabbing “a light bulb” might not cut it. Choosing the correct bulb is a key part of knowing how to screw in a light bulb successfully, ensuring compatibility, efficiency, and the desired ambiance for your space.
Understanding Bulb Types: Incandescent, CFL, LED
- Incandescent Bulbs: These are the traditional bulbs that have been around for over a century. They’re affordable but highly inefficient, converting most of their energy into heat rather than light. They’re being phased out in many regions.
- CFL (Compact Fluorescent Lamp) Bulbs: More efficient than incandescents, CFLs use less energy and last longer. However, they contain a small amount of mercury, require special disposal, and sometimes take a moment to reach full brightness.
- LED (Light Emitting Diode) Bulbs: The current champion of efficiency and longevity. LEDs use very little energy, last for years (sometimes decades), and come in a wide range of brightness and color temperatures. While they might have a higher upfront cost, their energy savings and lifespan more than make up for it. When you decide to screw in a light bulb, an LED is almost always the best choice for new installations.
Matching the Base and Shape
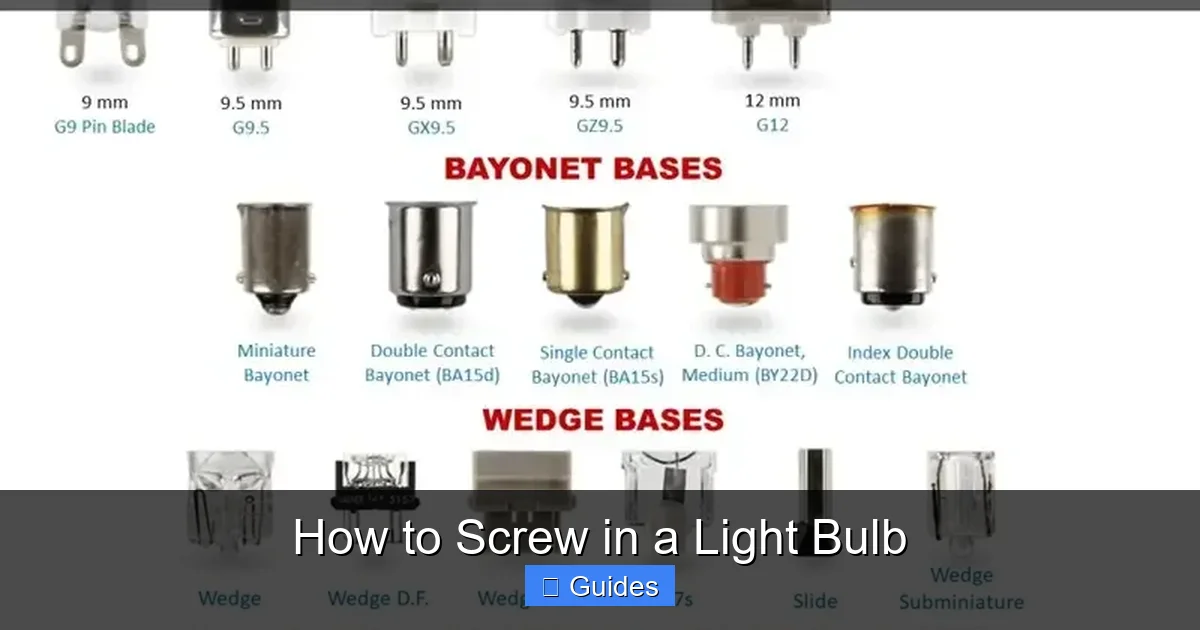
This is critical for compatibility. Light bulbs come with various base types that need to match your fixture’s socket. The most common in North America is the standard “E26” screw-in base (often just called a “medium” base). Smaller candelabra bases are “E12”, and larger mogul bases are “E39”. Always check the base of your old bulb or the fixture itself to ensure you buy the correct replacement.
Beyond the base, consider the bulb’s shape and size. Some fixtures have limited space, so a decorative globe bulb might not fit where a standard A19 shape once was. Make sure the new bulb physically fits within any lampshade or enclosure. This ensures you can smoothly screw in a light bulb without obstruction.
Lumens, Watts, and Color Temperature
Gone are the days when you just looked for wattage. While wattage tells you how much energy a bulb consumes, lumens tell you how much light it produces. For instance, a 60-watt incandescent bulb produces about 800 lumens. An LED bulb might achieve 800 lumens using only 9-10 watts! Always match lumens to the brightness you desire.
Color temperature is measured in Kelvins (K) and describes the “warmth” or “coolness” of the light.
- 2700K – 3000K: Warm white, similar to traditional incandescents, good for living rooms and bedrooms.
- 3500K – 4000K: Neutral white, good for kitchens, offices, and bathrooms.
- 5000K – 6500K: Daylight, bright and crisp, ideal for task lighting, garages, or basements.
Consider the ambiance you want to create when choosing your color temperature.
Smart Bulbs: The Future of Lighting
Smart bulbs offer features like dimming, color changing, and scheduling, all controllable via an app or voice assistant. They typically connect via Wi-Fi or Bluetooth. If you’re looking to upgrade your home’s intelligence, learning how to screw in a light bulb that’s smart is just as easy as a regular LED, but it opens up a world of control. Just ensure they are compatible with your existing smart home ecosystem if you have one.
The Step-by-Step Guide: How to Screw In a Light Bulb Like a Pro
Now that you’ve prepared your workspace and selected the perfect bulb, it’s time for the main event: actually screwing in a light bulb. This process is straightforward, but paying attention to the details will ensure a smooth, safe, and effective installation.
Removing the Old Bulb (If Applicable)
Assuming you’ve followed the safety steps (power off, bulb cool), it’s time to take out the old bulb.
- Grip the Bulb: Gently but firmly grip the glass part of the bulb. If it’s a standard shape, your hand should fit around it comfortably. If it’s a specialty bulb (like a floodlight or chandelier bulb), adjust your grip as needed.
- Turn Counter-Clockwise: Twist the bulb gently to the left (counter-clockwise). Most bulbs will unscrew easily after a few turns.
- Troubleshooting a Stuck Bulb: If the bulb is stuck, do not force it. Sometimes, using a rubber glove or a specialized rubber grip can give you better traction. If it’s still stuck, or if the glass part breaks off leaving the base in the socket, stop and refer to the troubleshooting section below. Safety is paramount when you learn how to screw in a light bulb.
- Remove and Set Aside: Once loose, continue twisting until the bulb comes free from the socket. Carefully place it somewhere it won’t roll or break, ready for proper disposal.
Inspecting the Socket
With the old bulb removed, take a moment to look inside the socket.
- Check for Debris: Is there any dust, rust, or remnants of the old bulb? Use a dry cloth or a soft brush to gently clear away any loose debris. Never use anything metallic or wet.
- Inspect the Tab: Inside the bottom of the socket, you’ll see a small metal tab. This tab makes contact with the bottom of the bulb to complete the circuit. Sometimes, this tab can get flattened, leading to a poor connection. If it looks flat, you can *very gently* (and only with the power absolutely OFF) pry it up slightly with a small non-conductive tool (like a plastic pick or the tip of a wooden skewer) to ensure it makes good contact with the new bulb. Be extremely careful not to bend it too far, or it might break.
Inserting the New Bulb: The Gentle Twist
Now for the exciting part – screwing in a light bulb that actually works!
- Hold the New Bulb: Hold the new bulb by its base, or by the glass/plastic part if it’s a standard shape, ensuring your hands are clean and dry. Avoid touching the metal screw-in base of the bulb directly if possible, as oils from your skin can sometimes affect its longevity or create hotspots.
- Align with the Socket: Carefully align the threaded base of the bulb with the threads inside the socket. You should be able to feel it slot into place.
- Turn Clockwise: Begin turning the bulb clockwise (to the right). Twist gently. You should feel the threads engage smoothly. Do not force it. If it resists, unscrew it slightly, re-align, and try again.
- Tighten Until Snug (But Not Overtight): Continue screwing until the bulb feels snug. This means it’s firmly seated and making good contact. Stop immediately when you feel resistance. Overtightening is a common mistake that can strip the socket threads, make the bulb incredibly difficult to remove later, or even crack the bulb’s base. Just snug is enough to securely screw in a light bulb.
Testing Your New Light
Once the bulb is securely in place:
- Restore Power: Go back to your electrical panel and flip the breaker for that circuit back to the “ON” position.
- Flip the Switch: Return to the fixture and flip the wall switch or lamp switch to the “ON” position.
- Enjoy the Light! If everything was done correctly, your new light bulb should illuminate your space beautifully.
Congratulations, you’ve successfully learned how to screw in a light bulb!
Troubleshooting and Advanced Tips for Light Bulb Success
Sometimes, even when you follow all the steps to screw in a light bulb, things don’t go exactly as planned. Don’t worry, many common issues have simple solutions. Here are some troubleshooting tips and advanced considerations to keep in mind.
What if the Bulb is Stuck?
A stuck bulb can be frustrating. Over time, heat and corrosion can fuse the bulb base to the socket threads.
- Use a Rubber Grip: For a bulb that won’t budge, try using a rubber glove, a rubber jar opener, or a specialized bulb remover tool. The extra grip often provides enough leverage.
- If the Glass Breaks: This is a more serious situation. If the glass bulb breaks, leaving the metal base still screwed into the socket, do not touch the metal base with your bare hands. First, ensure the power is absolutely, unequivocally off at the breaker. Then, you can use pliers (preferably needle-nose pliers) to carefully grip the metal rim of the base and twist it counter-clockwise. Be extremely gentle and avoid touching the socket’s interior. If you’re unsure or uncomfortable, call an electrician. This is the one time you might regret learning how to screw in a light bulb on your own.
Dealing with a Flickering Light
A flickering light is usually a sign of a poor connection.
- Check Tightness: First, ensure the bulb is screwed in snugly, but not overtightened.
- Inspect the Socket Tab: With the power off, check the metal tab at the bottom of the socket again. Gently bend it up slightly to ensure it makes solid contact with the bulb.
- Test Another Bulb: If flickering persists, try a different bulb (one you know works) in the same socket. If the new bulb also flickers, the problem might be with the fixture, wiring, or dimmer switch.
The Importance of Not Overtightening
We mentioned this before, but it bears repeating. When you screw in a light bulb, tightening it too much is a common rookie mistake.
- Socket Damage: Overtightening can strip the threads inside the socket, making it impossible for future bulbs to seat correctly.
- Bulb Damage: It can also crack the bulb’s glass or base, making it unsafe and prone to premature failure.
- Difficulty in Removal: An overtightened bulb can become incredibly difficult to remove later, leading to the stuck bulb scenario discussed above.
Aim for snug, not strained. A gentle touch is key when you screw in a light bulb.
Special Fixtures and Considerations
- Recessed Lighting: These often use specific bulb types (e.g., BR, PAR shapes) designed to fit flush. Ensure your replacement matches the size and shape.
- Enclosed Fixtures: Some fixtures are fully enclosed. Always check the manufacturer’s recommendations for bulb type. Using a bulb that generates too much heat in an enclosed fixture can shorten its life or even create a fire hazard. LEDs are generally safer for enclosed fixtures due to their lower heat output.
- Dimmers: If your fixture is on a dimmer switch, make sure your new bulb is “dimmable.” Most incandescent and halogen bulbs are dimmable, but many CFLs are not, and only specific LEDs are. Using a non-dimmable bulb on a dimmer can cause flickering, buzzing, or damage to the bulb/dimmer.
Beyond Installation: Recycling and Maintenance
Knowing how to screw in a light bulb isn’t just about getting the new one in; it’s also about responsibly managing the old one and ensuring your lighting system remains in good working order.
Responsible Disposal of Old Bulbs
How you dispose of your old bulb depends on its type:
- Incandescent and Halogen Bulbs: These can generally be disposed of in your regular household trash, as they don’t contain hazardous materials. However, check local guidelines, as some areas prefer them to be recycled with glass.
- CFL Bulbs: Due to their mercury content, CFLs should *never* be thrown directly into household trash. They need to be recycled properly. Many hardware stores (like Home Depot or Lowe’s), municipal recycling centers, and even some big-box retailers offer free CFL recycling programs. Look up local hazardous waste disposal sites or special collection events.
- LED Bulbs: While they don’t contain mercury, LEDs do contain electronic components. Many communities prefer them to be recycled as e-waste. Check with your local recycling facility or special electronics recycling programs.
Proper disposal is an important part of the overall process of how to screw in a light bulb.
Keeping Your Fixtures Clean
Over time, dust, dirt, and even dead insects can accumulate inside light fixtures, especially those that are open or have decorative shades. This buildup can reduce light output and, in some cases, even pose a minor fire hazard with older, hotter bulbs.
- Regular Cleaning: With the power off, periodically wipe down the inside and outside of your light fixtures with a dry or slightly damp cloth. For glass shades, use a mild glass cleaner.
- Inspect Wiring: When cleaning, take a quick glance at the wiring leading to the socket. Look for any frayed wires, exposed insulation, or signs of overheating. If you spot anything concerning, call a qualified electrician.
When to Call a Professional
While knowing how to screw in a light bulb is a basic skill, there are times when it’s best to call in an expert:
- Persistent Problems: If a new bulb still doesn’t work, flickers, or blows out quickly, even after trying multiple bulbs and checking the socket tab, the problem might be with the fixture itself, the wiring, or the circuit.
- Damaged Socket: If the socket looks cracked, corroded beyond simple cleaning, or if the metal tab breaks off, it’s safer to have an electrician replace the socket or fixture.
- Electrical Issues: Any signs of sparking, burning smells, or circuit breakers tripping repeatedly after a bulb change indicate a more serious electrical issue that requires professional attention.
Conclusion
Changing a light bulb might seem like the simplest of household tasks, but as we’ve explored, there’s a proper, safe, and efficient way to do it. From the crucial step of turning off the power and allowing the old bulb to cool, to carefully selecting the right replacement and gently screwing it into place, each step plays a vital role in ensuring your lighting works perfectly and safely.
Now that you know how to screw in a light bulb with confidence, you’re not just swapping out a burnt-out bulb; you’re taking control of your home’s safety and efficiency. Embrace these simple techniques, and you’ll find yourself brightening your living spaces with ease, avoiding common pitfalls, and extending the life of your bulbs and fixtures. Go forth and illuminate, safely and smartly!
Frequently Asked Questions
How often should I change my light bulbs?
The lifespan of a light bulb varies significantly by type. Incandescent bulbs typically last 750-1,000 hours, CFLs around 8,000-10,000 hours, and LEDs can last 25,000-50,000 hours or more. You should change them when they burn out or when their light output noticeably diminishes.
Can I use any light bulb in any fixture?
No, not necessarily. You need to match the bulb’s base type (e.g., E26, E12) to the fixture’s socket. You also need to consider the bulb’s wattage/lumens, especially with older fixtures that might have a maximum wattage rating to prevent overheating. Furthermore, some enclosed fixtures require specific bulb types, typically LEDs, that don’t generate excessive heat.
What does “color temperature” mean for light bulbs?
Color temperature, measured in Kelvins (K), describes the visual appearance of the light. Lower Kelvin numbers (e.g., 2700K-3000K) produce a “warm white” light, similar to traditional incandescent bulbs, which is cozy. Higher Kelvin numbers (e.g., 5000K-6500K) produce a “daylight” or “cool white” light, which is brighter and more stimulating.
My new LED bulb is flickering. What could be wrong?
Flickering in an LED bulb often indicates a compatibility issue with your dimmer switch (if you have one and the bulb isn’t dimmable or is incompatible), a loose connection in the socket, or faulty wiring in the fixture. Ensure the bulb is screwed in snugly, check the socket’s metal tab, and confirm the bulb is compatible with any dimmer you might be using.
Is it okay to touch a light bulb with bare hands?
While generally safe for LED and CFL bulbs, it’s best to avoid touching halogen or traditional incandescent bulbs with bare hands, especially when they are new or when inserting them. The oils from your skin can create hot spots on the glass, potentially shortening the bulb’s lifespan or causing it to shatter prematurely.
When should I consider calling an electrician for a light bulb issue?
You should call an electrician if you experience persistent issues like new bulbs repeatedly failing, flickering that isn’t resolved by changing the bulb or tightening connections, burning smells, or if the circuit breaker consistently trips after installing a new bulb. These symptoms could indicate a more serious electrical problem within the fixture or wiring that requires professional attention.