Seeing a dashboard bulb warning light can be concerning, but often it signals a simple issue like a burnt-out bulb or an electrical glitch. This guide provides comprehensive steps on how to turn off bulb warning light, covering everything from basic visual inspections and DIY replacements to understanding CAN-bus systems for LED upgrades. You’ll learn effective troubleshooting methods to identify the root cause and restore your vehicle’s lighting system, ensuring both safety and peace of mind on the road.
There’s nothing quite like the feeling of hitting the open road, wind in your hair, music just right. That blissful moment can quickly be interrupted, however, by a small, illuminated symbol on your dashboard: the dreaded bulb warning light. This seemingly innocuous icon can instantly shift your focus from enjoying the drive to wondering, “What’s wrong now?” and more importantly, “How do I turn off bulb warning light?”
Many drivers experience this common issue, and while it might seem alarming, it’s often a sign of something relatively simple to diagnose and fix. Your car’s sophisticated electrical system is constantly monitoring its various components, and the lighting system is no exception. When it detects an inconsistency in the electrical resistance or a complete circuit break within a bulb, it triggers this warning to let you know there’s a problem that needs attention.
Ignoring a bulb warning light isn’t just an annoyance; it can be a safety hazard and, in many places, a legal issue. Properly functioning lights are crucial for visibility, signaling your intentions to other drivers, and ensuring your car meets road safety standards. This comprehensive guide will walk you through everything you need to know about understanding, troubleshooting, and ultimately how to turn off bulb warning light, restoring peace of mind to your driving experience.
Key Takeaways
- Understand the Warning: The bulb warning light is a safety feature indicating an issue with your vehicle’s exterior lighting, which could be anything from a burnt-out bulb to an electrical fault.
- Start with Visual Inspection: The first and most common step to turn off bulb warning light is to visually check all exterior bulbs (headlights, brake lights, turn signals, reverse, license plate, fog lights) for burnt-out filaments.
- Check for Common Causes: Besides burnt-out bulbs, the light can be triggered by incorrect bulb types (especially aftermarket LEDs without CAN-bus decoders), corroded connections, faulty wiring, or a blown fuse.
- DIY Fixes are Often Possible: Replacing a burnt-out bulb, cleaning corroded contacts, or installing load resistors for aftermarket LEDs are common, relatively simple fixes that can help you turn off bulb warning light.
- When to Consider Professional Help: If basic troubleshooting doesn’t work, or if you suspect more complex electrical issues, a faulty control module, or damaged wiring, it’s best to consult a qualified mechanic.
- Preventive Maintenance is Key: Regular checks of all your vehicle’s lights, using correct bulb types, and ensuring proper installation can help prevent the bulb warning light from appearing in the first place.
Quick Answers to Common Questions
Can a dirty bulb cause the warning light?
While a very dirty bulb might reduce light output, it’s highly unlikely to trigger the bulb warning light directly. The warning system detects electrical resistance changes, not light intensity. A dirty socket or corroded contacts, however, can create resistance issues that trigger the light.
Will the bulb warning light turn off on its own after replacing a bulb?
Yes, in most cases, once the faulty bulb is replaced with a correct, functioning one, the car’s system will detect the correct resistance and the bulb warning light should turn off automatically within a few driving cycles or immediately upon starting the car.
Is it safe to drive with the bulb warning light on?
It depends on which light is out. Driving without a headlight or brake light is dangerous and illegal. If it’s a license plate light or a side marker, it might be less immediately hazardous but still needs addressing. It’s always safest to identify and fix the issue promptly.
Why does my bulb warning light come on only when I use a specific light (e.g., turn signal)?
If the light only appears when you activate a specific function, it strongly indicates that the problem lies within that particular circuit. For example, if it appears only when you signal left, check the left front and rear turn signal bulbs and their connections.
Can a low car battery cause a bulb warning light?
A severely low car battery can cause various electrical gremlins, including inconsistent voltage to lighting systems, which might theoretically trigger a warning. However, it’s less common than a direct bulb or wiring fault, and usually, other warning lights related to battery or charging would also appear.
📑 Table of Contents
- Understanding Your Car’s Bulb Warning Light System
- Common Culprits: Why Your Bulb Warning Light is On
- Your First Steps: Basic Troubleshooting at Home
- DIY Fixes for Common Bulb Warning Light Issues
- When It’s More Than Just a Bulb: Deeper Diagnostics
- Resetting Your Car’s System (Use with Caution!)
- Preventive Measures to Keep the Light Off
- Conclusion
Understanding Your Car’s Bulb Warning Light System
Before diving into how to turn off bulb warning light, let’s understand why it’s there in the first place. Modern vehicles are equipped with complex electrical monitoring systems, often referred to as a CAN-bus (Controller Area Network) system in many contemporary cars. This system constantly checks the electrical resistance of each bulb in your exterior lighting setup.
What the Light Signifies and Common Icons
The bulb warning light typically looks like a light bulb with an exclamation mark inside it, or sometimes a symbol depicting headlights or tail lights with an “X” or “!” mark. Its primary purpose is to alert you to a fault in your car’s exterior lighting. This isn’t just about convenience; it’s a critical safety feature. Think about it: brake lights, turn signals, and headlights are vital for communicating with other drivers and seeing in the dark. A malfunctioning bulb compromises these functions, increasing the risk of accidents.
When the system detects a significant deviation in resistance (like an open circuit when a bulb burns out, or an incorrect resistance from a mismatched bulb), it interprets this as a fault and illuminates the warning light on your dashboard. This system helps you proactively address issues before they become serious safety concerns.
Initial Reaction: Don’t Panic, But Address It
It’s natural to feel a pang of concern when a new warning light appears. However, with the bulb warning light, panic is usually unnecessary. It’s rarely indicative of an immediate, catastrophic failure. What it does mean is that you need to take action relatively soon. Driving with non-functioning lights can be dangerous, especially at night or in adverse weather, and it can also lead to a traffic ticket. So, the first step is to acknowledge the light and commit to investigating the issue promptly to figure out how to turn off bulb warning light.
Common Culprits: Why Your Bulb Warning Light is On
The good news is that most reasons for a bulb warning light are quite common and often simple to fix. Identifying the root cause is the first crucial step in learning how to turn off bulb warning light.
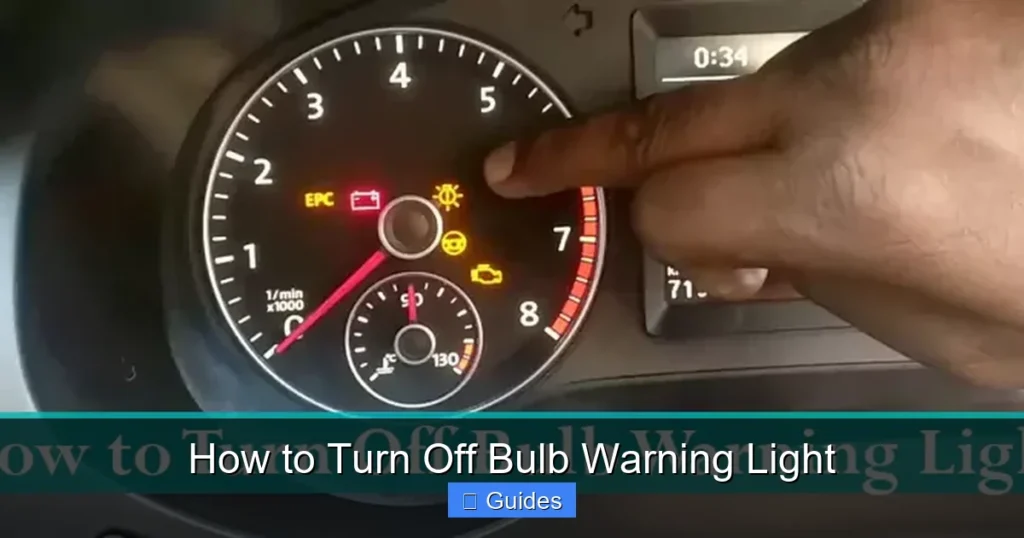
Visual guide about How to Turn Off Bulb Warning Light
Image source: lastinglights.com
Burnt-Out Filament: The Most Common Reason
This is by far the most frequent culprit. Light bulbs have filaments that eventually burn out, just like household bulbs. When a filament breaks, it creates an open circuit, and the electrical resistance drops to zero (or becomes infinite, depending on how you look at it), triggering the warning light. This could be any exterior light: a headlight, a tail light, a brake light, a turn signal, a reverse light, or even a license plate light.
Incorrect Bulb Type or Wattage
When replacing a bulb, it’s essential to use the correct type and wattage specified by your car’s manufacturer. Using a bulb with a different wattage or an incompatible type can alter the electrical resistance in the circuit. Even if the bulb lights up, the car’s monitoring system might detect this discrepancy and interpret it as a fault, leading to the bulb warning light appearing.
Aftermarket LEDs or HID Conversions: The CAN-bus Conundrum
Many drivers upgrade their incandescent bulbs to more efficient and brighter LED (Light Emitting Diode) or HID (High-Intensity Discharge) lights. While these offer benefits, they often draw significantly less power and have a different electrical resistance profile than traditional bulbs. Your car’s CAN-bus system, designed to monitor the resistance of incandescent bulbs, will detect this lower draw as a “fault” or a “burnt-out bulb,” illuminating the warning light. This is a very common reason for drivers to search for how to turn off bulb warning light after an upgrade.
Corroded or Loose Connections
Over time, moisture, dirt, and road salt can cause corrosion on bulb contacts and sockets. This corrosion creates resistance in the circuit, interfering with the proper flow of electricity and causing intermittent or complete failure. Similarly, a bulb that isn’t seated properly in its socket can create a loose connection, leading to the same warning. Vibrations from driving can also loosen connections over time.
Faulty Wiring
Less common but more serious, a damaged wire leading to a bulb can also trigger the warning. Wires can be frayed, pinched, or chewed by rodents. A break in the wire will cause an open circuit, just like a burnt-out bulb, and the car’s system will register a fault.
Blown Fuse
While usually affecting an entire circuit rather than a single bulb, a blown fuse can definitely cause a lighting system error. If multiple lights on one side or a specific function (like all brake lights) stop working, a blown fuse is a strong possibility.
Faulty Light Control Module (LCM) or Sensor
In rarer cases, the problem might not be with a bulb or wiring, but with the car’s internal control module responsible for monitoring the lights. If the Light Control Module (LCM) or a related sensor itself is faulty, it can send incorrect signals to the dashboard, causing the bulb warning light to illuminate even if all bulbs are functioning perfectly.
Your First Steps: Basic Troubleshooting at Home
When that bulb warning light first appears, don’t rush to the mechanic. Many issues can be diagnosed and fixed right in your driveway. Here’s how to begin your investigation into how to turn off bulb warning light.
Comprehensive Visual Inspection
This is your absolute first step. Park your car in a safe place, ideally in front of a wall or garage door at night, or have a friend help you. Systematically check every single exterior light:
- Headlights: Low beams and high beams.
- Tail Lights: Running lights (when headlights are on).
- Brake Lights: Have someone press the brake pedal while you check both sides and the center high-mount stop lamp (CHMSL).
- Turn Signals: Front and rear, left and right.
- Reverse Lights: Shift into reverse (with the parking brake on and engine off, or with a helper).
- License Plate Lights: These are often overlooked but can trigger the warning.
- Fog Lights: If your car has them.
- Side Marker Lights: Small lights on the sides of your car.
Look for any bulb that isn’t illuminating or appears dim. Sometimes, a bulb might look fine but its filament is broken inside. A quick tap can sometimes reveal a loose filament.
Check Interior Lights (Less Common)
While the bulb warning light primarily refers to exterior lights, it’s worth a quick check of interior lights like dome lights, glove box lights, or trunk lights if you’ve recently worked on them, though these are less likely to be the cause.
Confirm Bulb Wattage and Type
If you’ve recently replaced a bulb, double-check that you used the exact manufacturer-recommended specifications. Incorrect wattage or even a slightly different bulb type can trigger the warning. Consult your car’s owner’s manual for bulb specifications.
Inspect Fuses
Your car has one or more fuse boxes (usually under the hood and/or under the dashboard). Your owner’s manual will have a diagram showing which fuse protects which circuit. Locate the fuses related to your lighting system. A blown fuse will have a broken filament inside. You can use a fuse puller (often found in the fuse box lid) to remove and inspect them. If you find a blown fuse, replace it with one of the exact same amperage. A continually blowing fuse indicates a deeper electrical short that needs professional attention.
DIY Fixes for Common Bulb Warning Light Issues
Once you’ve identified the potential problem, many solutions are well within the grasp of a home mechanic. Here’s how to turn off bulb warning light with some common DIY fixes.
Replacing a Burnt-Out Bulb
This is the most straightforward fix. Bulb replacement procedures vary significantly between vehicles and even for different lights on the same car. Your owner’s manual is your best friend here. Generally:
- Purchase the Correct Bulb: Match the type and wattage exactly.
- Access the Bulb: This might involve opening the hood, removing a panel in the trunk, or reaching through a wheel well. Some headlights require removing the entire assembly.
- Disconnect the Electrical Connector: Usually a clip or twist-lock mechanism.
- Remove the Old Bulb: Twist or pull to remove it from its housing.
- Install the New Bulb: Handle new bulbs, especially halogen headlights, by their base only. Fingerprints can leave oil that causes hot spots and premature failure.
- Reconnect and Test: Reassemble everything and test the light before fully closing up the area.
Replacing a burnt-out bulb is often all it takes to turn off bulb warning light.
Cleaning Corroded Contacts
If a bulb is functional but the connection is poor, corrosion might be the issue. Carefully remove the bulb and inspect the metal contacts on both the bulb and inside the socket. If you see green, white, or powdery residue:
- Disconnect the Battery: As a safety precaution when working with electrical components.
- Clean with a Wire Brush or Emory Board: Gently scrape away the corrosion.
- Apply Dielectric Grease: This non-conductive grease helps prevent future corrosion and improves the seal.
- Reinsert the Bulb: Ensure a firm, secure connection.
Addressing Aftermarket LED/HID Issues
If you recently installed aftermarket LEDs or HIDs and the bulb warning light came on, you’re likely dealing with a CAN-bus incompatibility. The solution is usually to install load resistors or CAN-bus decoders. These devices are wired in parallel with your LED bulbs. They mimic the electrical resistance of traditional incandescent bulbs, tricking your car’s monitoring system into thinking a standard bulb is present, thus preventing the warning light. Ensure you purchase resistors or decoders specifically designed for your vehicle’s make/model and the type of LED/HID you installed. Proper installation, often involving splicing into wires, is crucial for these devices to successfully turn off bulb warning light.
What About a Loose Connection?
Sometimes, a bulb isn’t burnt out, but simply loose. Remove the bulb, inspect the socket for any bent pins that might prevent good contact, gently adjust if needed (with battery disconnected), and then firmly reinsert the bulb, ensuring it’s fully seated and twisted or clipped into place.
When It’s More Than Just a Bulb: Deeper Diagnostics
If you’ve replaced bulbs, checked fuses, cleaned contacts, and addressed LED issues, but the bulb warning light persists, it’s time for more advanced diagnostics. This is where things can get a bit more complex, and you might need specialized tools or professional help.
Inspecting Wiring for Damage
Carefully trace the wiring leading to the problematic light. Look for:
- Frayed or Exposed Wires: Where insulation is worn away.
- Pinched Wires: Where a wire might be trapped under a panel or bracket.
- Rodent Damage: Small chew marks on wiring harnesses.
- Corroded Connectors: Beyond the bulb socket, check the main harness connectors.
Any damage can interrupt the circuit. Minor damage might be repaired with electrical tape, but extensive damage or breaks may require professional wire splicing or replacement.
The Role of the Light Control Module (LCM) or Body Control Module (BCM)
As mentioned, some cars have dedicated modules (like an LCM or BCM) that control and monitor the lighting system. If this module malfunctions, it can trigger false warnings or genuinely fail to operate lights. Symptoms of a faulty module can include:
- The bulb warning light staying on despite all bulbs being good.
- Intermittent light operation or lights flickering.
- Specific lights failing even after bulb replacement and fuse checks.
Diagnosing a faulty LCM/BCM usually requires specialized diagnostic equipment that can communicate with your car’s computer system. This is typically a job for a qualified mechanic.
Using an OBD-II Scanner
If your car is from 1996 or newer, it has an OBD-II port. A basic OBD-II scanner (which you can buy or borrow from an auto parts store) can read diagnostic trouble codes (DTCs) stored in your car’s computer. While not all bulb warning light issues generate a specific code, some electrical faults or module errors might. Look for codes related to lighting circuits, body electrical, or communication errors. The scanner can provide valuable clues, helping you narrow down how to turn off bulb warning light.
Resetting Your Car’s System (Use with Caution!)
After you’ve fixed the underlying issue, the bulb warning light might not disappear immediately. Sometimes, the car’s computer needs a reset to clear the fault. However, proceed with caution, especially with modern vehicles.
Battery Disconnect Method
One common method is to disconnect your car’s battery for about 15-30 minutes. This essentially “resets” the car’s computer, clearing stored error codes and volatile memory. Here’s how:
- Locate your car battery (usually under the hood or in the trunk).
- Using a wrench, loosen the nut on the negative (-) battery terminal and carefully remove the cable.
- Wait 15-30 minutes.
- Reconnect the negative terminal tightly.
Important Warnings:
- Disconnecting the battery can reset your radio presets, clock, and potentially trigger anti-theft systems requiring a radio code.
- Modern cars rely heavily on their computers. Disconnecting the battery can sometimes cause other minor issues or require drive cycles for the computer to re-learn settings. Consult your owner’s manual before attempting this.
- If you’re not comfortable working with your battery, seek professional help.
Clearing Codes with an OBD-II Scanner
If you used an OBD-II scanner to read codes, many scanners also have a “clear codes” function. Once you’re confident the underlying issue is resolved, use this feature. This is a safer and less disruptive way to try and turn off bulb warning light compared to disconnecting the battery.
Preventive Measures to Keep the Light Off
The best way to avoid the headache of a bulb warning light is through proactive maintenance. A little prevention goes a long way in keeping your lighting system in top shape.
Regular Light Checks
Make it a habit to check all your exterior lights regularly, perhaps once a month or during your car wash routine. Walk around your car, switch on all lights (headlights, high beams, fog lights), then engage the turn signals, press the brake pedal, and shift into reverse. This simple check can catch a dying bulb before it triggers the dashboard warning.
Use Quality, Correct Bulbs
Always replace bulbs with the exact type and wattage specified by your car manufacturer. Opt for reputable brands, as cheap, generic bulbs can have inconsistent quality and a shorter lifespan. If you’re upgrading to LEDs, ensure they are “CAN-bus compatible” or that you install the necessary load resistors/decoders at the time of installation to proactively prevent the bulb warning light from appearing.
Proper Installation
When replacing bulbs, ensure they are securely seated in their sockets. Avoid touching halogen bulbs directly with your bare hands, as oils can cause premature failure. A firm, clean connection is vital for proper function and to prevent false warnings.
Keep Connections Clean
Occasionally, you might want to remove bulbs and inspect their contacts for any signs of corrosion. A quick clean with a contact cleaner or a small brush and a dab of dielectric grease can extend the life of your connections and prevent future issues.
Routine Vehicle Maintenance
During your regular service appointments, ask your mechanic to perform a thorough check of your vehicle’s lighting system. Professionals can spot early signs of wear on wiring, sockets, or potential issues with control modules before they escalate.
Conclusion
The bulb warning light on your dashboard is your car’s way of telling you something needs attention in its lighting system. While it can be a minor annoyance, it’s a critical safety feature that ensures you can see and be seen on the road. By understanding its common causes, performing basic troubleshooting, and knowing when to seek professional help, you can effectively diagnose and address the issue, learning how to turn off bulb warning light and restoring your car to optimal condition.
Most issues are simple DIY fixes, like replacing a burnt-out bulb or adding a resistor for LED upgrades. For more complex electrical problems, don’t hesitate to consult a qualified mechanic. Ultimately, addressing this warning light promptly not only ensures your vehicle’s safety and legality but also gives you back that peace of mind on every journey.
Frequently Asked Questions
What is the most common reason for the bulb warning light to appear?
The most common reason for the bulb warning light to appear is a burnt-out exterior light bulb. This could be a headlight, tail light, brake light, turn signal, or even a license plate light, as the car’s system detects the loss of electrical resistance from the broken filament.
How do I know which bulb is causing the warning?
To identify the faulty bulb, you need to perform a visual inspection of all your car’s exterior lights. Turn on your headlights, activate turn signals, press the brake pedal, and shift into reverse (safely), checking each light for illumination. The one that’s out or flickering is usually the culprit.
Can aftermarket LED bulbs cause the bulb warning light?
Yes, aftermarket LED bulbs are a very common cause for the bulb warning light. LEDs draw less power and have different electrical resistance than incandescent bulbs, which can trick your car’s monitoring system into thinking a bulb is burnt out. This usually requires installing CAN-bus compatible LEDs or external load resistors.
Is it expensive to fix a bulb warning light issue?
The cost to fix a bulb warning light varies widely. Replacing a burnt-out bulb yourself is very inexpensive (cost of the bulb, often $5-$30). If it requires a mechanic for more complex wiring or a control module issue, costs can range from $100 to several hundred dollars.
Should I disconnect the battery to reset the warning light?
Disconnecting the battery can sometimes reset the car’s computer and clear the warning light, but it’s not always recommended for modern vehicles as it can reset other settings or trigger anti-theft systems. It’s generally safer to use an OBD-II scanner’s clear codes function after fixing the underlying problem.
What if all my bulbs are working, but the warning light is still on?
If all your bulbs are confirmed working, the persistent warning light suggests a deeper issue. This could be due to incorrect bulb wattage, corrosion in the socket or wiring, a faulty fuse, or a malfunctioning light control module. In such cases, professional diagnosis with specialized equipment is often necessary.