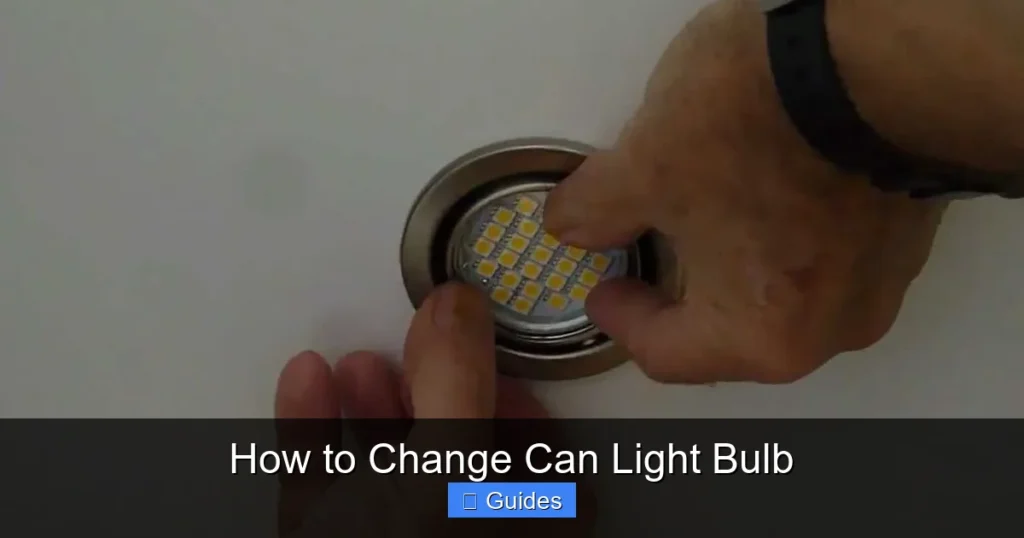
Changing a can light bulb is a straightforward home maintenance task anyone can master, provided you prioritize safety and choose the correct replacement. This guide walks you through every step, from identifying your current bulb and ensuring power is off, to safely removing the old bulb, installing the new one, and even troubleshooting common issues. You’ll gain the confidence to brighten your space without calling an electrician!
Welcome to the world of home maintenance, where a simple task like changing a light bulb can sometimes feel like a puzzle, especially when dealing with those sleek, integrated can lights in your ceiling. Don’t worry, you’re not alone! Many homeowners find themselves staring up at a dim or dead recessed light, wondering not just “how to change can light bulb,” but also “what kind of bulb do I even need?” or “how do I get that thing out without breaking my ceiling?”
Recessed lighting, often called can lights or pot lights, offers a clean, modern aesthetic that blends seamlessly into your ceiling. While they look great, their design can sometimes make bulb replacement seem more complicated than your average table lamp. But here’s the good news: with a little guidance, the right tools, and a focus on safety, learning how to change can light bulb is a surprisingly simple DIY project. You’ll save money on electrician calls and gain a valuable skill that keeps your home brightly lit and inviting.
This comprehensive guide will walk you through every step of the process, from understanding the different types of can lights and bulbs, to ensuring your safety, gathering your tools, and providing clear, detailed instructions for removal and installation. We’ll also cover common troubleshooting tips and even discuss options for upgrading your recessed lighting for better efficiency and functionality. By the end, you’ll feel confident tackling any can light bulb replacement in your home.
Key Takeaways
- Safety First: Always turn off power to the light fixture at the circuit breaker before beginning any work to prevent electrical shock.
- Identify Your Bulb Type: Before purchasing a replacement, determine if your can light uses an incandescent, halogen, CFL, or LED bulb, and note its base type (e.g., E26, GU10, MR16) and wattage/lumens.
- Gather the Right Tools: Essential tools include a stable ladder, work gloves, a clean cloth, and potentially a bulb removal tool or a flathead screwdriver for trim.
- Different Removal Methods: Can light bulbs and trims are held in place by various mechanisms (screw-in, twist-lock, bi-pin, torsion springs, tension clips), so understand how yours works before forcing anything.
- Upgrade for Efficiency: Consider replacing older bulb types with energy-efficient LED retrofit kits for long-term savings and improved lighting quality.
- Troubleshoot Common Issues: If your new bulb doesn’t work, recheck connections, ensure the bulb is fully seated, and confirm power is restored to the circuit.
Quick Answers to Common Questions
Can I put any LED bulb in my can light fixture?
No, not just any LED bulb will work. You need to ensure the LED replacement has the correct base type (e.g., E26, GU10, MR16) and that its physical size fits within the can housing and trim. Also, if your fixture is on a dimmer, the LED bulb must be specifically labeled as “dimmable.”
How do I know if my can light housing is IC rated?
IC-rated (Insulation Contact) housings are designed to be safely covered with insulation. You can often find a label inside the can housing itself, visible once the bulb and possibly the trim are removed. If it’s not labeled, assume it’s non-IC, meaning insulation should be kept at least 3 inches away from the housing.
What does “PAR” or “BR” mean on a can light bulb?
“PAR” stands for Parabolic Aluminized Reflector, and “BR” stands for Bulged Reflector. These terms describe the bulb’s shape and how it directs light. The number following (e.g., PAR30, BR40) indicates the bulb’s diameter in eighths of an inch.
Do I need a special tool to remove a recessed light bulb?
For standard screw-in bulbs, often no special tool is needed if you can comfortably grip the bulb. However, for smooth, floodlight-style bulbs (like PAR or BR) that are recessed deeply or hard to grasp, a suction cup bulb removal tool is highly recommended and makes the job much easier and safer.
My can light keeps flickering with the new LED bulb. What’s wrong?
Flickering with a new LED bulb is often due to an incompatibility with your existing dimmer switch. Most traditional dimmer switches are designed for incandescent bulbs and may not work well with LEDs. You likely need to replace your dimmer switch with one specifically rated for LED lighting to resolve the flickering issue.
📑 Table of Contents
Understanding Your Can Light and Bulb Types
Before you even think about climbing a ladder, it’s crucial to understand what you’re working with. Can lights aren’t all the same, and neither are their bulbs. A little knowledge here goes a long way in making the process smooth and successful.
Types of Can Lights
When people say “can light,” they’re usually referring to recessed lighting – fixtures installed directly into the ceiling, with only the trim visible. There are also surface-mount can lights, but our focus here will be on the more common recessed variety. Recessed lights consist of a housing (the “can” part hidden in the ceiling), a trim (the visible ring or baffle), and the bulb itself. The specific design of your housing and trim will dictate how you access and replace the bulb.
Bulb Types for Can Lights
Over the years, various bulb technologies have been used in can lights. Knowing what you have will help you choose the right replacement.
- Incandescent Bulbs: These are the traditional, energy-hungry bulbs that produce a warm, yellowish light. They get very hot and have a short lifespan. You’ll often find R30, R40, or BR (bulged reflector) shapes.
- Halogen Bulbs: A more efficient form of incandescent, halogen bulbs produce a brighter, whiter light and last a bit longer. They also run very hot. Common types include PAR (parabolic aluminized reflector) bulbs like PAR20, PAR30, PAR38, and smaller MR16 or GU10 bulbs.
- Compact Fluorescent Lamps (CFLs): These are energy-efficient twists or spirals that screw into standard sockets. They offer good lifespan but often have a slow warm-up time and can produce a cooler, sometimes greenish light.
- LED Bulbs: Light Emitting Diodes are the modern standard. They are incredibly energy-efficient, have exceptionally long lifespans, run cool, and offer a wide range of color temperatures and dimming options. Many LED bulbs are designed as direct replacements for older types (e.g., LED PAR30, LED BR40), and there are also full LED retrofit kits that replace the entire trim and bulb assembly.
Identifying Your Current Bulb Type and Base
This is perhaps the most critical step before you learn how to change can light bulb. You need to know what you’re replacing.
1. Look at the bulb itself: Once you safely remove the old bulb (we’ll get to that!), look for markings on the base or glass. These often indicate wattage, voltage, manufacturer, and sometimes the bulb type (e.g., “PAR30,” “BR40,” “MR16”).
2. Examine the base:
- Edison Screw-in (E26 or E27): The most common, where the bulb screws into a standard socket.
- GU10 Twist-Lock: Found on many halogen and some LED bulbs, these have two thick pins at the base that twist and lock into place.
- Bi-Pin (MR16, G4, GU5.3): These have two thinner pins that push directly into the socket. Often found in smaller, low-voltage fixtures.
3. Note the “PAR” or “BR” numbers: These numbers (e.g., PAR30, BR40) indicate the bulb’s diameter in eighths of an inch. A PAR30 is 30/8ths of an inch (3.75 inches) in diameter.
4. Consider color temperature and lumens: If you liked the light produced by the old bulb, note its color temperature (measured in Kelvin, K) and brightness (lumens, lm). Common color temperatures range from warm white (2700K-3000K) to cool white (4000K) to daylight (5000K-6500K). Lumens are more important than wattage for LED replacements.
Safety First: Essential Precautions
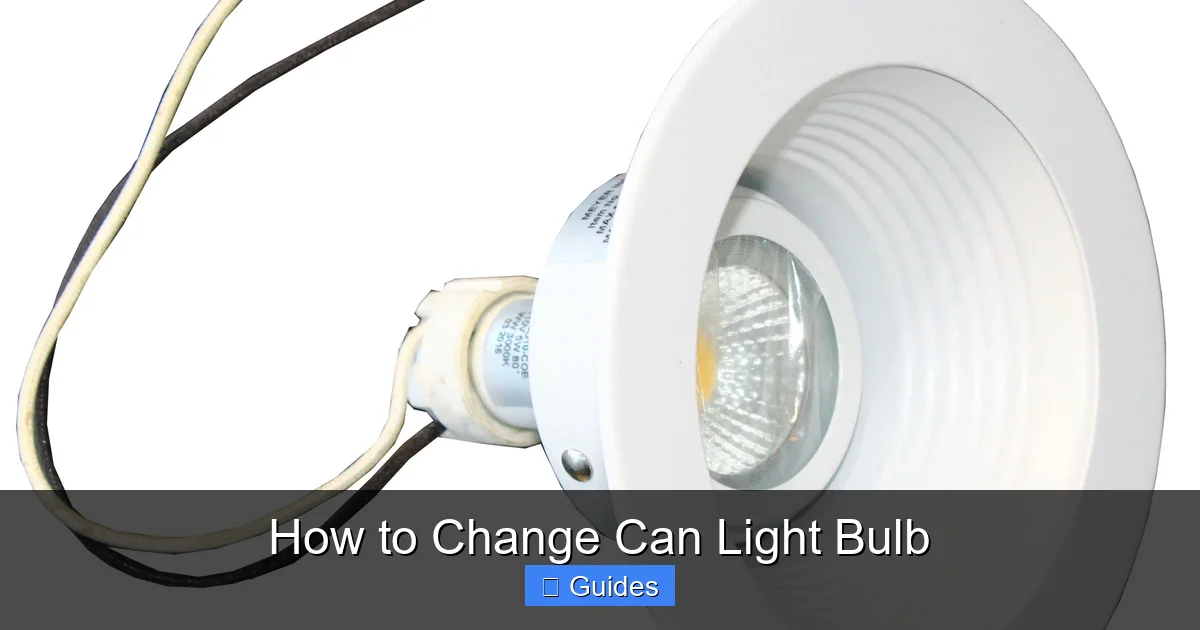
Visual guide about How to Change Can Light Bulb
Image source: storables.com
Electricity and heights are involved, so safety is paramount when you learn how to change can light bulb. Never skip these steps.
Power Down
This is non-negotiable.
- Identify the switch: First, turn off the wall switch controlling the can light.
- Locate the circuit breaker: Go to your home’s main electrical panel. Look for the circuit breaker that controls the room or specific light fixture you’re working on. It’s often labeled, but if not, you might need to flip breakers one by one until the light (if you temporarily turned it back on) goes out.
- Flip the breaker to “OFF”: This completely cuts power to the circuit, making it safe to handle the fixture. It’s a good idea to put a piece of tape or a “do not touch” sign over the breaker to prevent someone from accidentally turning it back on.
Ladder Safety
If your can light is out of arm’s reach, a stable ladder is essential.
- Use a sturdy ladder: Ensure it’s rated for your weight plus any tools.
- Proper placement: Position the ladder on a flat, stable surface. Avoid placing it on rugs or uneven flooring.
- Maintain three points of contact: When climbing, always have two hands and one foot, or two feet and one hand, on the ladder.
- Don’t overreach: Move the ladder as needed rather than stretching too far to reach the fixture.
Cooling Down
Old incandescent and halogen bulbs get incredibly hot. Give them at least 15-20 minutes to cool down after turning off the power. Handling a hot bulb can cause severe burns.
Personal Protective Equipment (PPE)
- Work gloves: Protect your hands from sharp glass (if a bulb breaks), heat, and oils.
- Safety glasses: Especially if you’re dealing with older, brittle bulbs or if there’s a risk of dust or debris falling from the ceiling.
Gathering Your Tools and Replacement Bulb
Having everything ready before you start saves time and prevents unnecessary trips up and down the ladder.
Necessary Tools
- Stable ladder: As discussed, for reaching ceiling fixtures.
- Work gloves: For safety and a better grip.
- Clean cloth or paper towel: For handling new bulbs (especially halogen, as oils from your skin can reduce their lifespan) and wiping down dusty trims.
- Flathead screwdriver or putty knife: Potentially needed to gently pry down a friction-fit trim.
- Bulb removal tool (optional but recommended for smooth bulbs): These are suction cups on a pole or handle, designed to grip smooth, floodlight-style bulbs (like PAR or BR types) that are hard to grasp by hand.
- Small trash can: For safely discarding the old bulb.
Choosing the Right Replacement Bulb
Based on your earlier identification step, here’s what to look for:
- Matching Base: Ensure the new bulb has the identical base type (e.g., E26, GU10, MR16) as your old one.
- Wattage/Lumens: If replacing an incandescent/halogen, choose an LED with equivalent lumens. Don’t worry about matching wattage; LEDs use far less energy for the same brightness. For example, a 60W incandescent might be replaced by an 8-10W LED with 800 lumens.
- Color Temperature (K): Choose a Kelvin (K) rating that matches your desired ambiance. 2700K-3000K for warm white, 4000K for cool white, 5000K+ for daylight.
- Dimmability: If your fixture is on a dimmer switch, ensure your new LED bulb is explicitly labeled “dimmable.” Using a non-dimmable LED with a dimmer can cause flickering or damage the bulb.
- Beam Angle: This determines how wide or narrow the light spread is. A narrower beam (e.g., 25-40 degrees) is good for accent lighting, while a wider beam (e.g., 90-120 degrees) is better for general room illumination.
- ENERGY STAR Certification: Look for this label for guaranteed energy efficiency and quality.
Step-by-Step Guide: How to Change Can Light Bulb
Now that you’re prepared, let’s get down to the actual process of how to change can light bulb.
1. Preparing the Area
- Ensure power is OFF at the breaker.
- Position your ladder securely beneath the can light.
- Gather all your tools within easy reach.
- Put on your work gloves and safety glasses.
2. Removing the Trim/Housing (if necessary)
Some can lights require removing the decorative trim to access the bulb, while others allow direct bulb removal.
- Friction-Fit Trim: Many trims are held in by simple friction. Gently pull down on the visible ring. It should slide out, revealing metal tension clips or springs. Once you see them, squeeze the clips or springs together and carefully pull the entire trim assembly down and out.
- Torsion Spring Trim: These trims have two strong wire springs on opposite sides that slot into receiving brackets inside the can housing. To remove, gently pull down on the trim. As it lowers, you’ll see the springs. Squeeze the loops of the torsion springs together to release them from their slots, then carefully lower the trim.
- Screw-In Trim: Less common, but some older trims might have small screws holding them in place. Unscrew these to remove the trim.
Once the trim is removed, carefully unclip any wiring connectors if the trim has integrated wiring (e.g., for some low-voltage or retrofit kits). Place the trim safely aside.
3. Removing the Old Bulb
This step varies significantly by bulb type:
- Standard Screw-in (E26): If the bulb has a traditional screw-in base, grasp it firmly (with gloves) and twist counter-clockwise until it unscrews. If it’s a smooth floodlight-style bulb (like a PAR or BR), a bulb removal suction cup tool can make this much easier.
- GU10 Twist-Lock: Push the bulb upwards slightly, then twist it counter-clockwise about a quarter turn until it releases from its socket.
- Bi-Pin (MR16, G4, GU5.3): Gently pull the bulb straight down to remove the two pins from their holes. Avoid wiggling excessively, as this can damage the socket.
Carefully place the old bulb in your trash can.
4. Inspecting the Socket
Before installing the new bulb, quickly inspect the socket.
- Look for any signs of scorching, corrosion, or damage.
- Ensure no broken pieces of the old bulb remain.
- If you see any damage, it might be best to consult an electrician.
- You can also use a dry, clean cloth to gently wipe away any dust or debris from inside the can or around the socket.
5. Installing the New Bulb
Handle new bulbs carefully, especially halogen bulbs. Avoid touching the glass part of halogen bulbs with bare hands, as oils can create hot spots and shorten their lifespan. Use a clean cloth or your gloves.
- Standard Screw-in (E26): Line up the new bulb with the socket and gently twist clockwise until it’s snug. Do not overtighten.
- GU10 Twist-Lock: Align the two pins with the corresponding slots in the socket, push upwards, and twist clockwise until it locks into place.
- Bi-Pin (MR16, G4, GU5.3): Carefully align the two pins with the holes in the socket and push straight up until they are fully seated.
6. Reattaching the Trim/Housing
Reverse the removal process:
- Friction-Fit Trim: Simply push the trim back up into the can opening until it’s flush with the ceiling.
- Torsion Spring Trim: Reconnect any wiring if you disconnected it. Hook the loops of the torsion springs back into their receiving brackets inside the can housing. Gently push the trim up until it’s flush with the ceiling.
- Screw-In Trim: Line up the trim and reinsert/tighten the screws.
7. Testing the Light
Once everything is back in place:
- Return to your electrical panel and flip the circuit breaker back to the “ON” position.
- Go back to the room and turn on the wall switch. Your new can light bulb should illuminate!
Troubleshooting Common Issues
Sometimes, even after carefully learning how to change can light bulb, things don’t go perfectly. Here are some common problems and their solutions.
Light Still Won’t Turn On
- Check the circuit breaker: Did you remember to turn it back on?
- Check the wall switch: Is it in the “ON” position?
- Re-seat the bulb: Turn off the power at the breaker again, climb back up, and gently try to twist or push the bulb more firmly into its socket. Sometimes it just needs a better connection.
- Try a different bulb: It’s rare, but new bulbs can occasionally be faulty. Try another new bulb or test the new bulb in a known working fixture if possible.
- Inspect the socket: With the power off, check for any bent tabs in a screw-in socket (gently pry them out slightly with a non-conductive tool if they’re too flat) or damaged pins in a bi-pin socket. If you see signs of charring or severe damage, you may need an electrician to replace the fixture or socket.
Bulb Too Difficult to Remove
- Cool down: If the bulb is hot, wait longer.
- Use a removal tool: A suction cup bulb removal tool is a lifesaver for smooth, tight-fitting floodlight bulbs.
- Wear gloves: For better grip.
- Gentle but firm pressure: For screw-in bulbs, apply firm, even counter-clockwise pressure. For twist-locks, push up slightly before twisting. Never force it, as glass can break. If a bulb breaks and leaves the base in the socket, *do not touch it with your bare hands*. Turn off the power, use needle-nose pliers to carefully unscrew the remaining base, and wear thick gloves and safety glasses.
Trim Won’t Stay Up
- Torsion springs: Ensure the springs are fully engaged in their slots inside the can housing. They should snap firmly into place. If they seem weak, they might be bent or worn, and you might need a new trim kit or to carefully bend them back into shape.
- Tension clips/friction: If the trim relies on tension clips or friction, make sure they are properly positioned and not bent out of shape. Sometimes older trims simply lose their “grip” over time.
Upgrading Your Can Lights (Beyond Just Changing a Bulb)
Changing a bulb is a great first step, but what if you want to improve your can lights even further?
Converting to LED Retrofit Kits
If you have older incandescent or halogen can lights, consider an LED retrofit kit. These kits replace the entire trim and bulb with a self-contained LED unit.
- Energy Efficiency: Dramatically reduces energy consumption.
- Improved Aesthetics: Often provides a cleaner, more modern look.
- Easy Installation: Many simply screw into the existing E26 socket and use torsion springs or friction clips to hold the trim in place.
- Dimmability and Color Tuning: Many offer advanced features not found in basic bulbs.
Smart Lighting Options
Many LED retrofit kits and smart bulbs are compatible with can lights, allowing you to control them via smartphone apps, voice assistants (like Alexa or Google Assistant), or smart home hubs. This opens up possibilities for scheduling, remote control, and even changing light color for ambiance.
Air Sealing for Efficiency
Older can light housings are often “non-IC” rated, meaning they require a gap between the housing and insulation, leading to air leaks into your attic. Even IC-rated (Insulation Contact) housings can leak. If you have access above the ceiling, sealing around the can light housing with caulk or spray foam can significantly improve your home’s energy efficiency and prevent drafts. There are also specific “airtight” rated retrofit kits.
Conclusion
Learning how to change can light bulb might have seemed daunting at first, but as you can see, it’s a perfectly manageable task for any homeowner. By following these steps – prioritizing safety, identifying the correct bulb, using the right tools, and carefully executing the replacement – you can quickly and confidently restore light to your home.
Don’t let a burnt-out bulb dim your day or your living space. Embrace the DIY spirit, and with this guide in hand, you’ll be a can light bulb changing pro in no time. Plus, by considering LED upgrades, you’re not just replacing a bulb; you’re investing in a brighter, more energy-efficient, and potentially smarter home for years to come. So, go ahead, grab that ladder, and illuminate your world!
Frequently Asked Questions
What is the most common type of can light bulb?
Historically, incandescent R30 or R40 bulbs were very common. However, today, the most common type of bulb or fixture for can lights is the LED, often in the form of a screw-in replacement (like an LED PAR30 or BR40) or a full LED retrofit kit that replaces the entire trim and bulb assembly.
How long do can light bulbs typically last?
The lifespan varies greatly by bulb type. Traditional incandescent bulbs might last around 750-1,000 hours, while halogen bulbs could reach 1,500-2,000 hours. CFLs typically last 8,000-10,000 hours, but modern LED bulbs are by far the longest-lasting, often rated for 25,000 to 50,000 hours or more, translating to many years of use.
Can I replace a halogen can light bulb with an LED?
Yes, in most cases, you can replace a halogen can light bulb with an equivalent LED. Ensure the LED has the same base type (e.g., GU10, MR16, E26) and that its lumens match your desired brightness. If the fixture is on a dimmer, confirm the LED replacement is dimmable.
Why do my can lights burn out so frequently?
Frequent burnout can be caused by several factors: using bulbs with incorrect wattage (too high), poor ventilation in the can housing causing overheating, loose wiring connections, excessive vibration, or cheap, low-quality bulbs. Upgrading to high-quality LED bulbs, which generate less heat and are more durable, often resolves this issue.
Are all can light trims removable?
Most can light trims are designed to be removable for bulb replacement or cleaning. They are typically held in place by friction clips, tension springs, or torsion springs. However, some newer integrated LED fixtures might have the “trim” as part of a sealed unit, where only the light source (not the whole trim) might be individually replaceable if at all.
What is the difference between lumens and watts for can light bulbs?
Watts measure the amount of energy a bulb consumes, while lumens measure the brightness of the light it produces. For older incandescent and halogen bulbs, higher wattage usually meant higher brightness. For LEDs, lumens are the more important measure of brightness, as LEDs produce significantly more light per watt, meaning a much lower wattage LED can be just as bright as a high-wattage incandescent.