Changing a fluorescent light bulb is a straightforward task that most homeowners can handle with confidence. The key is always to prioritize safety by turning off the power supply before you begin. Understanding the different types of fluorescent bulbs and having the right tools on hand will make the process smooth and efficient, ensuring your space is illuminated once more.
Welcome to the world of fluorescent lighting! While often seen in offices, kitchens, and garages, these energy-efficient workhorses eventually dim, flicker, or simply burn out. When that happens, many people might feel a bit daunted by the prospect of changing them. But here’s the good news: learning how to change fluorescent light bulb is a common household task that’s surprisingly simple once you know the right steps and safety precautions. You don’t need to be an electrician or a DIY guru to tackle this; with a little guidance, you’ll have your space brightly lit again in no time.
This comprehensive guide will walk you through everything you need to know about changing fluorescent light bulbs, from identifying the correct replacement to safely disposing of the old ones. We’ll cover different types of bulbs, the essential tools you’ll need, and a clear, step-by-step process to ensure a smooth and safe replacement. Think of this as your friendly handbook to conquering those flickering tubes and bringing consistent light back into your life. So, let’s roll up our sleeves and get ready to illuminate your world!
Key Takeaways
- Safety First: Always turn off the power at the circuit breaker before attempting to change a fluorescent light bulb to prevent electrical shock.
- Identify Bulb Type: Fluorescent bulbs come in various shapes (linear, circular, U-bend) and sizes (T8, T12, T5), each with specific pin configurations. Knowing your bulb type is crucial for a proper replacement.
- Gather the Right Tools: You’ll typically need a sturdy ladder, work gloves, safety glasses, the correct replacement bulb, and sometimes a clean cloth or screwdriver.
- Proper Removal Technique: For most linear bulbs, a gentle twist (about a quarter turn) and then pulling straight down will release the old bulb. Avoid excessive force.
- Careful Installation: Align the new bulb’s pins with the fixture’s sockets, push gently upwards, and then twist to secure it. Do not force it.
- Environmental Disposal: Fluorescent bulbs contain mercury, so they require special disposal. Never throw them in regular household trash; look for local recycling centers or hazardous waste facilities.
- Troubleshooting Tips: If a new bulb doesn’t work, recheck connections, ensure the power is on, or consider if the ballast might be the issue.
Quick Answers to Common Questions
Can I replace a T12 fluorescent bulb with a T8 or T5?
Generally, no, you cannot directly replace a T12 with a T8 or T5 bulb without also changing the fixture’s ballast. T12, T8, and T5 bulbs require different ballasts designed for their specific electrical characteristics. There are some “hybrid” LED tubes that can work with existing T12 ballasts, but always check compatibility carefully.
What is the white powder inside a broken fluorescent bulb?
The white powder inside a fluorescent bulb is phosphor, which coats the inside of the glass tube. This phosphor converts the ultraviolet (UV) light generated by the mercury vapor into visible light, making the bulb glow. While not highly toxic, it’s best not to inhale it, and it should be cleaned up carefully along with any broken glass.
How often should I change fluorescent light bulb?
The lifespan of a fluorescent light bulb varies greatly depending on its type, quality, and usage. Most modern fluorescent bulbs are rated for 10,000 to 20,000 hours of use, or even more. However, factors like frequent switching on/off, extreme temperatures, or a failing ballast can shorten their lifespan, necessitating a change sooner.
Can a fluorescent light bulb explode?
While extremely rare, a fluorescent light bulb can “pop” or “implode” under certain circumstances, such as being cracked, improperly installed, or if the ballast fails catastrophically. It’s more common for them to flicker, dim, or simply stop working. Always wear safety glasses and gloves when handling them as a precaution.
Is it okay to touch the new fluorescent bulb with bare hands?
It’s generally recommended to avoid touching the glass of a new fluorescent bulb with bare hands. The natural oils and dirt from your skin can create hot spots on the bulb’s surface when it heats up, potentially leading to premature failure or reduced lifespan. If you do touch it, gently wipe it clean with a soft, lint-free cloth before installation.
📑 Table of Contents
1. Safety First: Your Absolute Priority
Before you even think about touching that light fixture, understand that electricity is involved, and safety must be your top concern. Ignoring proper safety steps can lead to electrical shock, falls, or other injuries. Never rush this part of the process.
Turn Off the Power at the Source
This is the most critical step. Do NOT rely solely on a wall switch, as some fluorescent fixtures might still have residual power or be wired in a way that the switch doesn’t fully cut off power to the entire unit.
- Locate Your Breaker Box: Find your home’s main electrical panel or circuit breaker box. It’s usually in a utility closet, basement, garage, or laundry room.
- Identify the Correct Breaker: Look for a breaker that controls the room or specific fixture you’re working on. If labels aren’t clear, you might need to flip breakers one by one until the light goes out. It’s a good idea to label them for future reference once you’ve identified them.
- Flip the Breaker to “OFF”: Once identified, firmly flip the breaker to the “OFF” position.
- Verify No Power: Before touching the fixture, try flipping the light switch a few times to confirm the power is indeed off. If you have a non-contact voltage tester, this is an excellent time to use it on the fixture to double-check.
Personal Protective Equipment (PPE)
Even with the power off, a few simple items can protect you during the physical removal and installation process.
- Work Gloves: Fluorescent bulbs can sometimes shatter unexpectedly, and gloves protect your hands from sharp glass and potentially mercury. They also improve your grip.
- Safety Glasses: Essential for protecting your eyes from any potential shattering glass or dust.
- Sturdy Ladder: If the fixture is out of arm’s reach, use a stable, appropriate-height ladder. Ensure it’s placed on a level surface and is secure before climbing. Never stand on wobbly chairs or makeshift platforms.
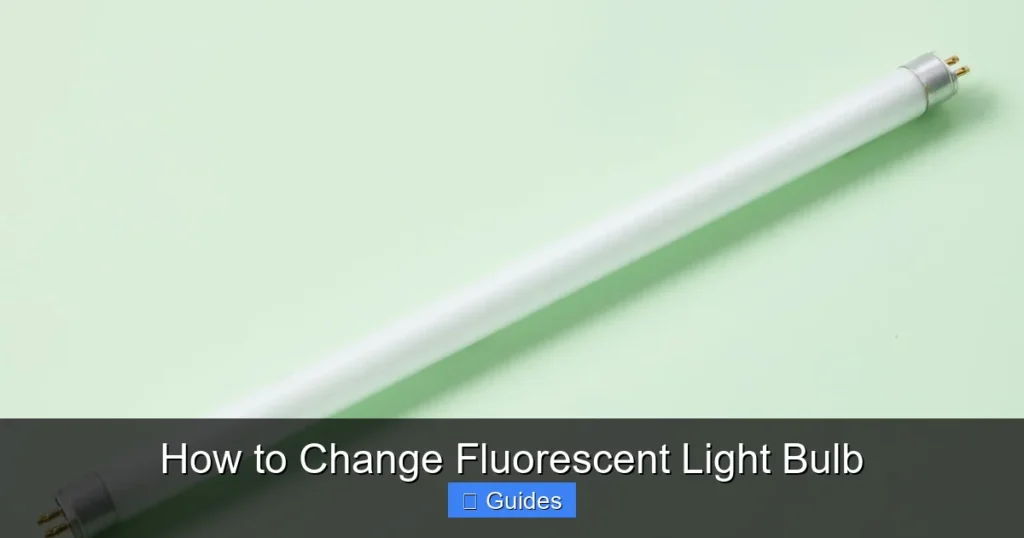
2. Identifying Your Fluorescent Bulb Type
Visual guide about How to Change Fluorescent Light Bulb
Image source: i.ytimg.com
Fluorescent bulbs aren’t one-size-fits-all. Knowing the specific type of bulb you need to replace is crucial for a successful swap. Take a moment to examine your existing bulb.
Shapes and Sizes
Fluorescent bulbs come in a variety of forms:
- Linear Tubes: These are the most common, straight tubes found in kitchens, garages, and workshops. They vary in length (e.g., 2-foot, 4-foot, 8-foot) and diameter.
- Circular (Circline) Bulbs: These are round or donut-shaped and often used in ceiling fixtures.
- U-Bend Bulbs: Essentially a linear tube bent into a “U” shape, designed for compact fixtures that need a lot of light in a smaller area.
Diameter Designations (T-sizes)
Linear bulbs are categorized by their diameter, indicated by a “T” followed by a number. The number represents eighths of an inch.
- T12: These are 1.5 inches in diameter (12/8 = 1.5 inches). Older, less energy-efficient, and contain more mercury. Many fixtures still use them.
- T8: These are 1 inch in diameter (8/8 = 1 inch). More energy-efficient than T12s and the most common replacement type today.
- T5: These are 5/8 inch in diameter. Very slim and highly efficient, often found in more modern or specialized fixtures.
Important Note: You generally cannot interchange T12, T8, or T5 bulbs directly unless your fixture specifically states it’s compatible with multiple types (often requiring a ballast swap). Always check the existing bulb or the fixture’s specifications.
Pin Configurations
Look at the ends of your bulb where it connects to the fixture.
- Bi-Pin: Most linear fluorescent bulbs have two pins at each end. These are the most common.
- Single Pin: Some older or specialized linear bulbs have a single pin at each end.
- 4-Pin or Quad-Pin: Commonly found on circular (circline) and U-bend bulbs, where all four pins are grouped at one end.
Once you’ve identified the type, size, and pin configuration, purchase an exact match. It’s a good idea to take the old bulb with you to the store if you’re unsure.
3. Gathering Your Tools and Materials
Having everything ready before you start will make the process much smoother and safer.
Essential Items:
- Replacement Fluorescent Bulb(s): Make sure it’s the correct type, size, and wattage (or equivalent LED replacement) for your fixture. Consider buying a spare.
- Sturdy Ladder: As mentioned, absolutely critical if the fixture is out of reach.
- Work Gloves: Protect your hands.
- Safety Glasses: Protect your eyes.
- Clean Cloth or Paper Towels: Useful for cleaning the fixture or wiping down the new bulb.
- Non-Contact Voltage Tester (Optional but Recommended): For verifying power is off.
- Plastic Trash Bag or Old Blanket/Sheet: For safely containing the old bulb once removed, especially important if it breaks.
- Screwdriver (Phillips or Flathead, as needed): Sometimes fixtures have covers secured by screws.
Consider LED Retrofits
While you’re changing a fluorescent bulb, you might consider upgrading to an LED tube. LED replacements for fluorescent bulbs offer several advantages:
- Energy Efficiency: Consume less power than fluorescent bulbs.
- Longer Lifespan: Last significantly longer.
- No Mercury: Safer for disposal.
- Instant On: No flickering or warm-up time.
However, not all LED tubes are direct replacements. Some are “plug-and-play” (ballast compatible), others require “ballast bypass” (rewiring the fixture to remove the ballast), and some are “hybrid.” Always check the LED bulb’s specifications and your fixture’s requirements. If you’re uncomfortable with electrical wiring, consult an electrician for ballast bypass installations. For the purpose of this guide, we’ll focus on direct fluorescent bulb replacement.
4. Step-by-Step Guide: How to Change Fluorescent Light Bulb
Now that you’re prepared and safe, let’s get into the actual process of changing that fluorescent light bulb.
H3.1. Pre-Steps: Final Checks
- Confirm Power Off: Double-check that the power to the fixture is definitely off at the circuit breaker. Try the wall switch again.
- Set Up Ladder: Place your ladder securely beneath the fixture. Ensure it’s stable and you can comfortably reach the entire fixture.
- Put on PPE: Don your work gloves and safety glasses.
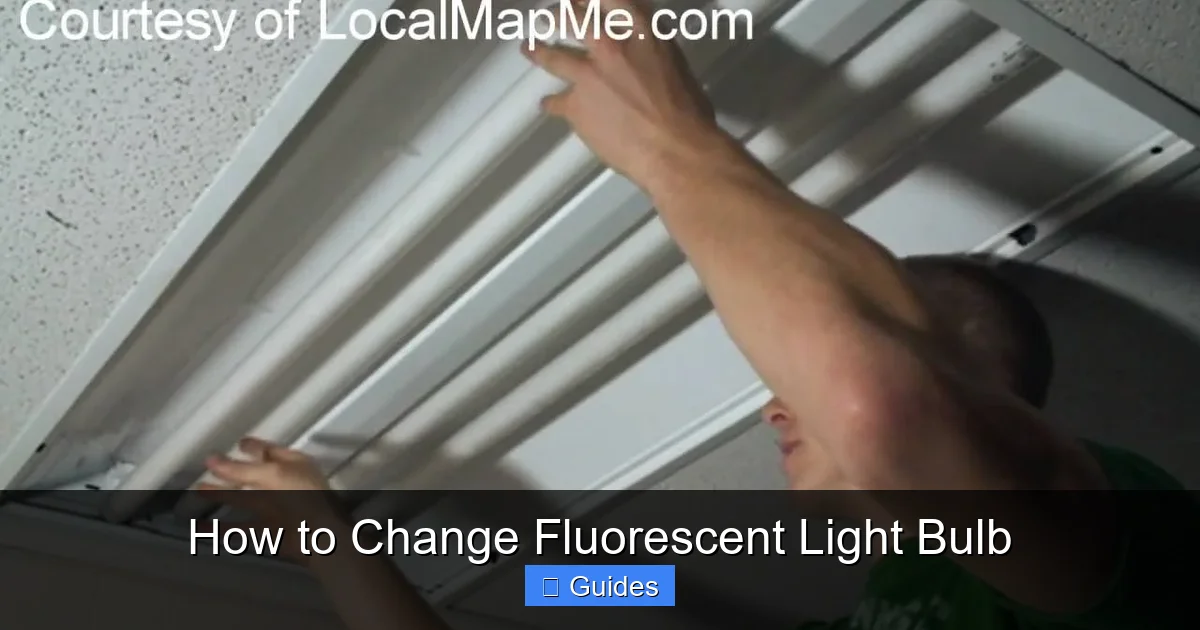
H3.2. Removing the Old Bulb (Linear Tubes)
This is the most common scenario.
- Remove Diffuser/Cover (if present): Many fluorescent fixtures have a plastic or glass cover (diffuser) that needs to be removed first.
- Look for latches, clips, or screws. Gently unclip or unscrew them.
- Carefully lower the cover and set it aside in a safe place where it won’t break.
- Grip the Bulb: With gloved hands, firmly but gently grasp the fluorescent tube near one end.
- Rotate the Bulb: Twist the tube about a quarter turn (90 degrees) in either direction. You should feel the pins disengage from the sockets.
- Tip: If it’s stiff, try twisting from both ends simultaneously.
- Lower the Bulb: Once the pins are disengaged, gently pull the tube straight down and out of the fixture. Be careful not to bend the pins or bump the tube against the fixture.
- Immediate Containment: Immediately place the old bulb into your plastic trash bag or wrap it in an old blanket/sheet to contain any potential shattering and for easier, safer transport for disposal.
H3.3. Removing Other Bulb Types
- Circular (Circline) Bulbs: These usually have a central 4-pin connector.
- Remove any retaining clips or screws that hold the bulb in place.
- Carefully pull the 4-pin connector straight out of its socket. It may be stiff.
- Remove the circular bulb from its mounting clips.
- U-Bend Bulbs: Similar to linear tubes but shorter and bent.
- Grasp the bulb firmly in the middle.
- Rotate it about a quarter turn until the pins disengage.
- Gently pull it straight down and out.
H3.4. Installing the New Bulb (Linear Tubes)
- Unwrap New Bulb: Carefully remove the new fluorescent bulb from its packaging. Avoid touching the glass directly with bare hands, as oils can create hot spots and shorten the bulb’s life. If you do touch it, wipe it clean with a soft, lint-free cloth.
- Align Pins: Look at the pins on both ends of the new bulb. They need to align with the slots in the fixture’s sockets.
- Insert Pins: Gently push the pins into the socket slots.
- Rotate and Secure: Once the pins are fully inserted into the slots, twist the bulb a quarter turn (90 degrees) until it locks securely into place. You should feel it “click” or firmly settle.
- Important: Do not force the bulb. If it doesn’t fit, double-check that you have the correct bulb type and that the pins are aligned.
- Replace Diffuser/Cover: Carefully reattach any plastic or glass diffuser or cover you removed earlier. Ensure it’s securely fastened.
H3.5. Installing Other Bulb Types
- Circular (Circline) Bulbs:
- Align the new circular bulb with its mounting clips and gently push it into place.
- Carefully push the 4-pin connector of the new bulb straight into its socket until it’s firmly seated.
- Reattach any retaining clips or screws.
- U-Bend Bulbs:
- Align the pins of the new U-bend bulb with the slots in the sockets.
- Push the pins into the slots.
- Twist the bulb a quarter turn to secure it.
H3.6. Testing the New Bulb
- Clear Area: Ensure all tools, the ladder, and any old bulbs are safely out of the way.
- Restore Power: Go back to your circuit breaker box and flip the breaker for the fixture back to the “ON” position.
- Test the Light: Return to the room and flip the light switch. Your new fluorescent light bulb should now illuminate the space!
If it doesn’t work, don’t panic. Check the troubleshooting section below.
5. Disposal and Environmental Considerations
Fluorescent bulbs contain a small amount of mercury, which is a hazardous substance. For this reason, you cannot simply throw them in your regular household trash in most areas. Proper disposal is crucial for environmental protection.
Recycling is Key
- Local Recycling Centers: Many municipalities and counties have hazardous waste disposal sites or specific recycling programs for fluorescent bulbs. Check your local waste management website or call their offices for information.
- Retailer Take-Back Programs: Some large hardware stores (like Home Depot, Lowe’s) or specialized lighting stores offer free recycling programs for fluorescent bulbs. Call ahead to confirm.
- Mail-Back Programs: For businesses or if local options are scarce, there are commercial mail-back programs where you can ship bulbs to recycling facilities (often for a fee).
Always transport old bulbs carefully to prevent breakage. If a bulb does break, open windows, leave the room for 15 minutes, and then carefully clean up the broken glass and mercury powder with disposable materials (not a vacuum cleaner, as it can spread mercury vapor). Seal everything in a plastic bag and dispose of it as hazardous waste.
6. Troubleshooting Common Issues
Sometimes, even after carefully following all the steps, your new fluorescent light bulb might not work perfectly. Here are some common problems and their solutions:
New Bulb Not Working
- Power Check: Is the circuit breaker firmly “ON”? Is the wall switch “ON”?
- Bulb Seating: Is the bulb properly seated in the sockets? Gently twist it a bit more to ensure the pins are making good contact.
- Wrong Bulb Type: Did you use the correct type of bulb (T8, T12, T5) and wattage for your fixture? Mixing types can prevent it from lighting or damage the ballast.
- Dead Bulb: Although rare for new bulbs, sometimes you get a dud. Try another new bulb if you have one.
- Ballast Failure: If the bulb is correctly installed, and definitely the right type, the problem might be the ballast. The ballast is the device in the fixture that regulates the current to the fluorescent bulb. When it fails, bulbs won’t light up or will flicker excessively. Replacing a ballast is a more complex electrical task and often requires professional help or a deeper DIY comfort level.
Flickering or Buzzing Bulb
- Cold Temperatures: Fluorescent bulbs can flicker or hum more in cold environments, especially when first turned on. They operate best within a certain temperature range.
- Aging Ballast: A flickering bulb that eventually dies, or a buzzing noise, often points to a failing ballast.
- Loose Connections: Ensure the bulb is fully seated and making good contact in the sockets.
- Dimmer Switch Incompatibility: Most fluorescent fixtures are not designed for use with standard dimmer switches unless explicitly stated. Using the wrong dimmer can cause flickering and damage the ballast.
Conclusion
Congratulations! You’ve successfully learned how to change fluorescent light bulb, tackled electrical safety, identified different bulb types, and perhaps even considered an energy-efficient upgrade. This guide empowers you to handle a common household task with confidence and expertise. Remember, safety is paramount, and proper disposal protects our environment. So, the next time a fluorescent bulb goes dark, you’ll be well-equipped to bring the light back! Keep these tips in mind, and you’ll maintain bright and functional lighting in your home or workspace for years to come.
Frequently Asked Questions
How do I know if my fluorescent bulb is burnt out or if it’s the ballast?
A completely burnt-out fluorescent bulb often shows blackened ends, while a failing ballast might cause consistent flickering, buzzing, slow starting, or simply no light even with a new bulb installed. If a new bulb doesn’t light up, the ballast is a strong suspect.
What are the benefits of switching to LED replacements for fluorescent bulbs?
LED replacements offer significant benefits, including greater energy efficiency, a much longer lifespan, instant-on illumination without flickering, and they do not contain mercury, making them safer for disposal. They can lead to substantial long-term savings on electricity and replacement costs.
Do I need an electrician to change a fluorescent light bulb?
No, you typically do not need an electrician to change a standard fluorescent light bulb. It’s a relatively simple DIY task, provided you follow all safety precautions, especially turning off the power at the circuit breaker. However, if you’re replacing a ballast or rewiring the fixture for LED, an electrician might be recommended.
Can I just unscrew a fluorescent light bulb like an incandescent one?
No, most fluorescent light bulbs (especially linear tubes) do not unscrew like incandescent bulbs. Instead, they typically require a gentle twist (usually a quarter turn) to disengage the pins from the fixture’s sockets, and then they can be pulled straight out. Forcing them to unscrew can damage the bulb or the fixture.
What should I do if a fluorescent bulb breaks during removal or installation?
If a fluorescent bulb breaks, immediately clear the area, open windows, and leave the room for 15 minutes to ventilate mercury vapor. Do not use a vacuum cleaner. Carefully scoop up all glass fragments and powder using stiff paper or cardboard, then use sticky tape to pick up smaller pieces. Place all materials in a sealed plastic bag and dispose of it as hazardous waste according to local regulations.
Are there different types of fluorescent ballasts, and do they matter?
Yes, there are different types of fluorescent ballasts (e.g., magnetic, electronic, rapid start, instant start), and they absolutely matter. The ballast must be compatible with the specific fluorescent bulb type (T12, T8, T5) and its wattage. Using an incompatible ballast can cause poor performance, flickering, reduced bulb life, or prevent the bulb from lighting entirely.