Changing a light bulb in your ceiling fan is a straightforward task, but it requires careful preparation and adherence to safety guidelines. Always start by turning off the power at the breaker to prevent electrical hazards. Then, identify your fan’s light cover and bulb type, carefully remove the old bulb, and install the new one while respecting wattage limits. Finally, reassemble the fan, restore power, and enjoy your illuminated space once more.
How to Change Light Bulb in Ceiling Fan
There’s nothing quite like the convenience of a ceiling fan that offers both a refreshing breeze and ambient lighting. But then, it happens. You flick the switch, the fan hums to life, but the light? Nothing. Just darkness. A dead light bulb in your ceiling fan can be a real nuisance, especially if it’s in a central room like your living room or bedroom. The good news is that changing a light bulb in your ceiling fan isn’t a mysterious or difficult task. It’s a common maintenance chore that just about anyone can tackle with a little guidance and the right approach.
Many people hesitate when it comes to ceiling fan repairs because they’re high up, seem complicated, or involve electricity. But don’t worry! This comprehensive guide will walk you through every step of how to change light bulb in ceiling fan, ensuring you do it safely and effectively. We’ll cover everything from crucial safety precautions to identifying different bulb types and putting everything back together. By the time you’re done, you’ll not only have a working light again but also the confidence to handle similar household tasks in the future.
So, if you’re ready to bring light back to your room and conquer that burnt-out bulb, grab a cup of coffee and let’s get started. We’ll break down each part of the process into simple, easy-to-follow steps. Soon, your ceiling fan will be shining bright once more, proving that a little DIY can go a long way!
Key Takeaways
- Prioritize Safety: Always turn off the power to the ceiling fan at your home’s circuit breaker before beginning any work to prevent electrical shock.
- Use a Stable Ladder: Ensure you have a sturdy, appropriately sized ladder or step stool that allows you to comfortably and safely reach the fan without overstretching.
- Identify Light Cover Type: Ceiling fans have various light cover styles (threaded, clip-on, screw-on); understanding how yours opens is key to accessing the bulb.
- Match Bulb Specifications: Always replace the old bulb with a new one of the correct base type, size, and wattage. Check the fan’s fixture for maximum wattage limits.
- Consider LED Upgrades: Opting for LED bulbs can save energy, last longer, and produce less heat, often improving the fan’s overall efficiency and lifespan.
- Handle with Care: When installing new bulbs, especially halogens, avoid touching the glass with bare hands as oils can create hot spots and shorten bulb life.
- Test Thoroughly: After installing the new bulb and reassembling the fan, restore power and test the light immediately to confirm it’s working correctly.
Quick Answers to Common Questions
How do I turn off the power to my ceiling fan safely?
Always go to your home’s main electrical panel (breaker box) and flip the circuit breaker labeled for the room or fan to the “OFF” position. Don’t just rely on the wall switch.
What tools do I need to change a ceiling fan light bulb?
You’ll typically need a new light bulb, a screwdriver (Phillips or flathead), a stable ladder or step stool, and optionally gloves, safety glasses, and a small container for screws.
How do I know what type of light bulb to buy for my ceiling fan?
First, check the old bulb’s base type (e.g., standard E26, candelabra E12). Then, look inside the fan’s light fixture for a sticker indicating the maximum wattage allowed and adhere to that limit.
What if the light bulb is stuck or breaks in the socket?
If stuck, wear gloves for better grip and try to turn gently. If it breaks, first ensure the power is OFF, then carefully use needle-nose pliers or a specialized broken bulb remover to twist out the metal base. Use extreme caution.
Can I replace incandescent bulbs with LED bulbs in my ceiling fan?
Yes, in most cases, you can replace incandescents with LED bulbs of the correct base type and wattage equivalent. LEDs are more energy-efficient and produce less heat, which is beneficial for enclosed fixtures like ceiling fan lights.
📑 Table of Contents
1. Safety First: Essential Preparations Before You Begin
Before you even think about touching your ceiling fan, the absolute most important thing to remember is safety. Working with electricity, even for something as simple as changing a light bulb, always carries a risk. Taking a few moments to prepare properly can prevent accidents and ensure a smooth process.
Turning Off the Power Safely
This is non-negotiable. Do NOT just rely on flipping the wall switch. While a wall switch controls the power, it might not completely de-energize the entire fixture, or it could be wired in a way that still leaves some wires “hot.” The safest method is to turn off the power at your home’s main electrical panel, also known as the breaker box.
Here’s how to do it:
- Locate Your Breaker Box: This is usually in your garage, basement, utility closet, or sometimes even an outside wall.
- Identify the Correct Breaker: Look for a label that indicates the room or area where your ceiling fan is located (e.g., “Living Room Fan,” “Master Bedroom Lights”). If the breakers aren’t labeled, you might need to flip breakers one by one until the fan loses power. It’s a good idea to have someone else standing in the room to confirm when the fan and its light turn off.
- Flip the Breaker: Once you’ve identified the correct breaker, flip it firmly to the “OFF” position.
- Test the Power: Go back to the ceiling fan and try turning the light switch on and off. Also, try operating the fan. If there’s absolutely no power to either, you’ve successfully cut the electricity. For an extra layer of safety, you can use a non-contact voltage tester to confirm no current is present near the light fixture.
Leave the breaker off until you’ve completely finished installing the new bulb and reassembling the fan.
Choosing the Right Ladder or Step Stool
Reaching your ceiling fan safely is paramount. Do not stand on a shaky chair, a stack of books, or any unstable surface. Invest in or borrow a sturdy step stool or a ladder that is tall enough for you to work comfortably without having to stretch precariously.
Here are some tips:
- Stability is Key: Make sure the ladder is placed on a flat, even surface. Avoid rugs or uneven flooring.
- Comfortable Reach: You should be able to reach the fan’s light kit with your hands, ideally without fully extending your arms. This gives you better control and prevents fatigue.
- Assistance (Optional): If you’re not comfortable working on a ladder alone, ask a friend or family member to hold the ladder steady for you.
Gathering Your Tools
Having all your tools ready before you start will save you trips up and down the ladder. Here’s what you’ll likely need:
- New Light Bulb(s): Make sure you have the correct type and wattage (more on this later).
- Screwdriver: Most light covers are held in place with Phillips-head or flathead screws.
- Small Container: A small bowl or magnetic dish is great for holding screws so they don’t roll away and get lost.
- Gloves: Latex or work gloves can provide a better grip, especially if the old bulb is stuck or if you’re handling a halogen bulb.
- Safety Glasses: If a bulb is stuck or breaks, safety glasses will protect your eyes.
- Non-Contact Voltage Tester (Optional but Recommended): For an extra safety check to confirm power is off.
- Cleaning Cloth: This is a great time to wipe down the light cover!
2. Identifying Your Ceiling Fan’s Light Kit Type
Ceiling fans come in a dazzling array of styles, and their light kits are no exception. Before you can replace the light bulb, you need to understand how to access it. This usually means figuring out how to remove the light cover or globe.
Common Light Cover Styles
Most ceiling fan light covers fall into a few general categories:
- Threaded Glass Bowl/Dome: This is a very common type. The glass globe or bowl simply screws directly into a threaded ring on the fan’s light housing. To remove it, grasp the glass firmly with both hands and turn it counter-clockwise. It might feel a bit stiff at first. Once it loosens, carefully unscrew it and lower it.
- Screw-On Glass Shades: Many fans have individual glass shades for each bulb. These are typically held in place by small decorative screws (usually two or three) around the rim of the shade. You’ll need a screwdriver to loosen these screws. Be careful not to loosen them too much, as they might fall out. Just enough to release the glass shade. Once loosened, the shade should drop down or pull away.
- Clip-On or Tension-Held Shades: Some shades are held in place by metal clips or tension springs. You might see small metal tabs that you need to push inwards or outwards to release the glass. Gently push or pull the clips to see if they give way, allowing the glass to be removed.
- Set Screw Holders: Similar to screw-on shades, but the glass might be held by larger set screws that directly press against the glass. Loosen these screws carefully.
- Quick-Release Tabs: A modern design, some covers have small, often barely visible tabs that you press or squeeze to release the cover. These are less common on older fans.
Tip: If you’re unsure, gently feel around the edges of the glass cover for screws or clips. Sometimes, a quick glance at the fan’s manual (if you still have it) can be very helpful!
Bulb Socket Types and Wattage Limits
Once the cover is off, you’ll see the light bulb(s). But not all light bulbs are created equal! There are several common types of sockets you might encounter in a ceiling fan:
- Medium Base (E26/E27 or A19): This is the standard screw-in base, like typical household bulbs. It’s the most common type.
- Candelabra Base (E12): A smaller screw-in base, often found on decorative fixtures or fans with multiple small lights. These bulbs resemble miniature versions of standard bulbs.
- GU10 or G9 Bi-Pin Base: These are “push-in” style bulbs with two pins that fit into specific holes. GU10s have a twist-and-lock mechanism, while G9s usually just push straight in.
- Mini Spiral/Pin Base: Less common, but some compact fluorescent (CFL) or specialty LED bulbs might use unique pin configurations.
More importantly, look inside the light fixture for a sticker or label that specifies the maximum wattage allowed for each bulb. This is CRUCIAL. Exceeding the maximum wattage can lead to overheating, damage the fixture, or even pose a fire hazard. Even if you’re using energy-efficient LEDs, always respect the wattage *equivalent* if the fixture specifies incandescent limits (e.g., if it says “MAX 60W Incandescent,” you can use a 9W LED that produces light equivalent to a 60W incandescent).
3. Step-by-Step Guide: Removing the Old Bulb
With the power off and the light cover removed, you’re ready to tackle the main event: getting that old, burnt-out bulb out of its socket. This is usually the easiest part, but sometimes there are a few snags.
Accessing the Light Bulb
Depending on your fan’s design, accessing the bulb might mean simply reaching in, or it might require a bit more maneuvering. If your fan has multiple individual shades, you’ll remove one shade per bulb. For a single bowl or dome, all bulbs will be accessible once the cover is off.
Make sure you have a clear line of sight and comfortable reach. Take a moment to assess the situation. Are there any other components in the way? Is the bulb base visible and easy to grip?
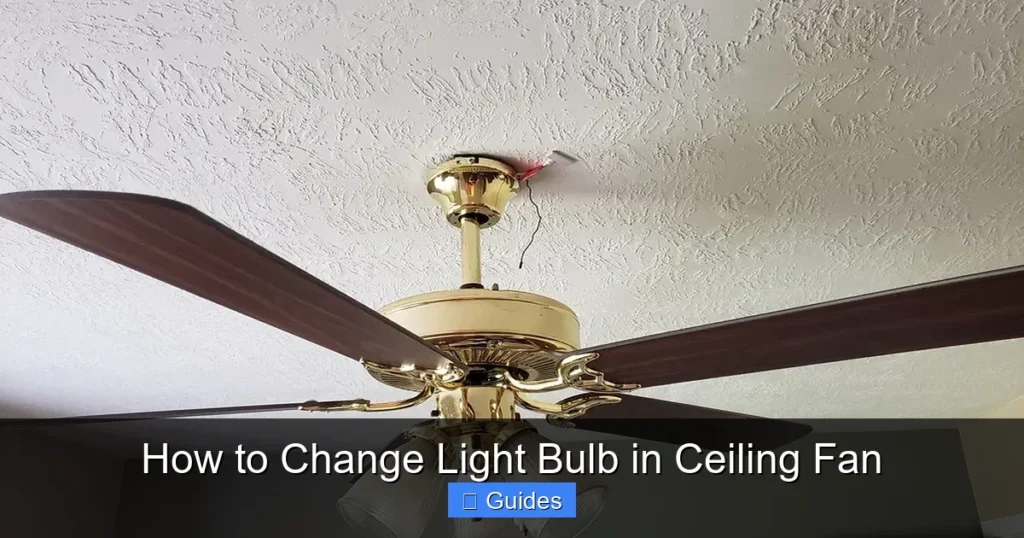
Visual guide about How to Change Light Bulb in Ceiling Fan
Image source: powertechelectricalnc.com
Unscrewing the Old Bulb
Most bulbs screw into their sockets. To remove an old bulb, grasp it firmly (gloves can help with grip, especially if the bulb is smooth or dusty) and turn it counter-clockwise.
- Gentle Pressure: Apply gentle, consistent pressure. You don’t want to squeeze too hard and risk breaking the bulb, especially if it’s glass.
- Listen for Resistance: If it’s turning freely, great! If it feels stuck, don’t force it immediately.
- If it’s a Pin-Type Bulb: For GU10 bulbs, you might need to push up slightly and twist counter-clockwise. For G9s, simply pull straight out.
Once the bulb is loose, continue to unscrew it carefully until it’s completely out of the socket. Place the old bulb somewhere safe where it won’t roll off your ladder or break.
Dealing with Stuck or Broken Bulbs
Occasionally, a bulb might be stuck due to heat, corrosion, or overtightening. Or worse, it might break, leaving the metal base in the socket. Don’t panic, but proceed with extreme caution.
For a Stuck Bulb:
- Gloves: Wear work gloves to get a better grip and protect your hands.
- Penetrating Oil (Last Resort): A tiny spray of electrical contact cleaner or penetrating oil around the base (NOT directly into the socket) might help loosen it, but this should be used very sparingly and only if the power is absolutely, unequivocally off.
- Rubber Grip Pad: A rubber jar opener or a piece of rubber glove can provide extra traction.
- Pliers (Very Gentle): If you can grip the metal base of the bulb without touching the glass, very gently try to twist it with pliers. Be extremely careful not to shatter the glass.
For a Broken Bulb (Base Stuck in Socket):
This is where safety glasses and gloves are absolutely essential.
- Confirm Power Off (Again!): Double-check with your voltage tester.
- Use Pliers: With pliers (preferably needle-nose or insulated ones), carefully grip the very edge of the metal base that’s still in the socket. Twist it counter-clockwise. Try to avoid pushing it deeper into the socket.
- Potato Trick: For a clean break where the base is exposed, you can sometimes push half of a raw potato firmly onto the exposed glass remnants and twist it. The potato provides grip.
- Screwdriver and Hammer (Extreme Caution): As a last resort, very carefully tap a flathead screwdriver into the side of the metal base at an angle, then use it to leverage and twist the base out. This carries a high risk of damaging the socket, so be extremely gentle.
If you’re uncomfortable dealing with a broken bulb base, it’s always best to call a qualified electrician. It’s not worth the risk of injury or damaging your fan’s electrical components.
4. Choosing and Installing the New Light Bulb
Now that the old bulb is out, it’s time to bring on the new! Selecting the right replacement and installing it correctly is key to a long-lasting and efficient light.
Selecting the Correct Bulb Type and Wattage
When choosing your new bulb, keep these factors in mind:
- Socket Type: This is non-negotiable. If your old bulb had a medium (E26) base, the new one must too. If it was candelabra (E12), get an E12.
- Wattage Limit: Refer back to that maximum wattage sticker on your fan’s fixture. Never install a bulb that exceeds this limit. If it says “MAX 60W,” you can use a 60-watt incandescent, or more commonly now, an LED bulb that *produces* light equivalent to a 60-watt incandescent, which will only *consume* around 8-12 watts.
- Physical Size: Make sure the new bulb will fit inside the light cover or shade. Some larger LED bulbs, while efficient, might be too big for compact fan fixtures.
Energy-Efficient Options (LEDs)
This is where you have an opportunity for an upgrade! While you could just replace the bulb with the exact same type as the old one (e.g., an incandescent with another incandescent), switching to LED (Light Emitting Diode) bulbs offers significant advantages:
- Energy Savings: LEDs consume up to 80-90% less energy than incandescent bulbs for the same light output. This translates to lower electricity bills.
- Longer Lifespan: LEDs typically last 15,000 to 50,000 hours or more, compared to 1,000-2,000 hours for incandescents. You’ll change the light bulb in ceiling fan far less often!
- Less Heat: LEDs produce very little heat, which is a big plus for enclosed fixtures like ceiling fan lights. Less heat means less stress on the fan’s components and less added heat to your room.
- Dimmable Options: If your ceiling fan light is on a dimmer switch, make sure to purchase “dimmable” LED bulbs. Not all LEDs are dimmable.
- Color Temperature: LEDs come in various “color temperatures,” measured in Kelvin (K). Lower K values (2700K-3000K) produce a warm, yellowish light (like traditional incandescents), while higher K values (4000K-5000K) produce a cooler, whiter, or bluer light. Choose what suits your preference and room.
Unless your fan specifically prohibits LED use (which is rare for light-only applications, but always good to check the manual), upgrading to LEDs is highly recommended.
Installing the New Bulb
Once you have the correct new bulb, installation is usually the reverse of removal.
- Handle with Care: For halogen bulbs, avoid touching the glass part with your bare hands. The oils from your skin can create hot spots that shorten the bulb’s life. If you accidentally touch it, wipe it clean with rubbing alcohol and a lint-free cloth. This isn’t as critical for incandescent or LED bulbs, but it’s still good practice to handle bulbs by their base.
- Screw In Clockwise: Gently screw the new bulb into the socket by turning it clockwise.
- Don’t Overtighten: Tighten it just enough so it’s snug. Overtightening can make it difficult to remove next time or even damage the socket. For pin-type bulbs, push or push and twist until it’s secure.
If your fan uses multiple bulbs, repeat the process for each one. Now is also a great time to give the interior of the light kit a quick dust or wipe-down before replacing the cover.
5. Reassembling the Fan and Testing
You’re almost there! With the new bulb(s) in place, the final steps involve putting the fan back together and confirming everything works as it should.
Replacing the Light Cover
This step is simply the reverse of how you removed the cover earlier.
- Clean the Cover: Before putting it back, take a moment to wipe down the inside and outside of the glass cover with a damp cloth or glass cleaner. This is a perfect opportunity to get rid of dust and grime that’s accumulated over time.
- Careful Alignment: If it’s a threaded glass bowl, carefully lift it and align the threads. Turn clockwise gently until it starts to catch, then continue screwing it on until it’s snug, but not overly tight.
- Re-secure Screws/Clips: If your cover uses screws or clips, carefully position the cover and re-insert/tighten the screws or re-engage the clips. Make sure all screws are tightened evenly to prevent the glass from vibrating or falling.
Ensure the cover is securely attached. A loose light cover can vibrate when the fan is on or, worse, fall and shatter.
Restoring Power and Testing
The moment of truth!
- Return to Breaker Box: Go back to your home’s electrical panel.
- Flip the Breaker: Firmly flip the circuit breaker you turned off earlier back to the “ON” position.
- Test the Light: Return to the room and flip the wall switch for the fan light. It should now illuminate! Also, test the fan’s operation to make sure you didn’t accidentally loosen any wiring while working.
If the light doesn’t come on, don’t panic. First, ensure the wall switch is on. Then, check the pull chain on the fan (if it has one) to ensure the light function is activated. If it still doesn’t work, you might need to go back and double-check the bulb’s tightness and the breaker.
Final Adjustments and Tips
- Check for Flickering: If your new LED bulb flickers, especially on a dimmer circuit, it might not be compatible with your dimmer switch. Consider replacing the dimmer with an LED-compatible one or trying a different brand of dimmable LED.
- Keep Spare Bulbs: Once you know the exact type and wattage of bulb your fan uses, it’s a good idea to keep a spare or two on hand. This makes the next replacement even quicker.
- Regular Cleaning: While you’re up there, consider giving the fan blades a quick wipe down. Dust on fan blades can be spread around your room.
Congratulations! You’ve successfully managed how to change light bulb in ceiling fan. This seemingly small task not only brings light back into your life but also builds your confidence in tackling household projects. It’s a satisfying feeling to complete a DIY task and see the immediate results. Remember these steps for the next time a bulb goes out, and you’ll be able to handle it like a pro. Enjoy your newly illuminated space!
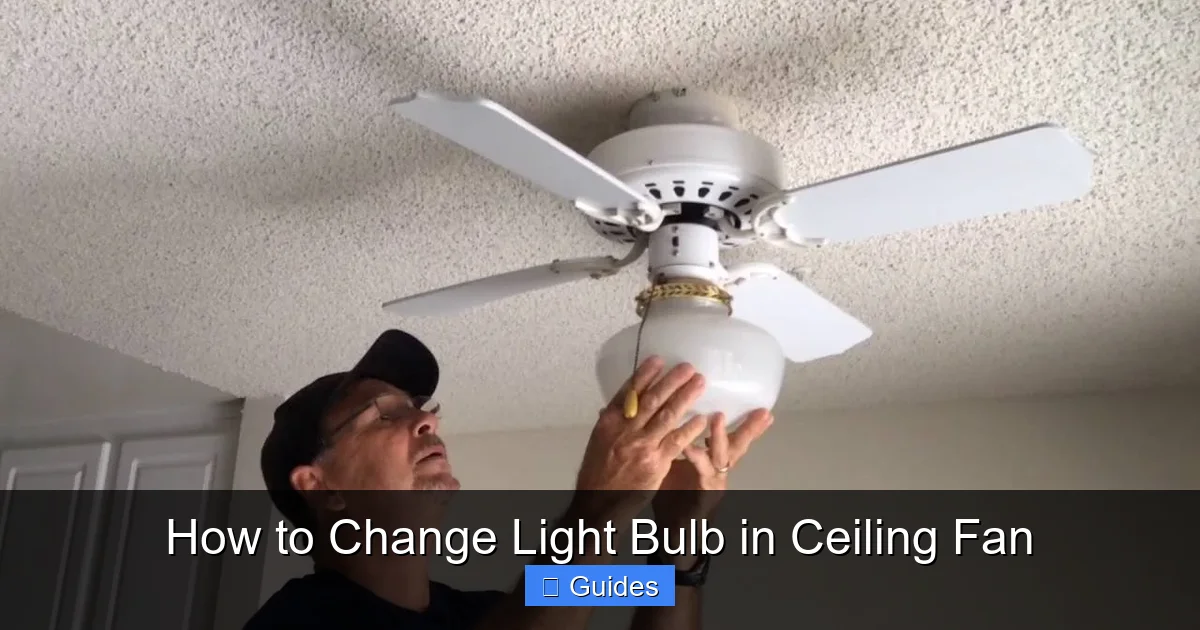
🎥 Related Video: Ceiling Fan Dome Removal
📺 How2ToGo
shorts How to replace dead bulbs in a dome ceiling fan. The quick and easy way to remove the dome and replace it.
Frequently Asked Questions
How often should I change the light bulb in my ceiling fan?
The frequency depends entirely on the type of bulb you’re using. Traditional incandescent bulbs might last 750-2,000 hours, while modern LED bulbs can last 15,000-50,000 hours or more, meaning you might only change them every few years, or even decades!
My ceiling fan has a pull chain for the light, do I need to worry about that?
Yes, if your fan has a pull chain specifically for the light, make sure it’s in the “on” position (usually after one pull) after you’ve restored power at the breaker and before testing the wall switch. Sometimes the pull chain can be accidentally toggled off.
The new LED bulb is flickering, what could be wrong?
Flickering with LED bulbs, especially in a ceiling fan, often indicates an incompatibility with your dimmer switch (if you have one). Not all LED bulbs are dimmable, and not all dimmers work well with LEDs. Try a “dimmable” LED bulb or consider upgrading to an LED-compatible dimmer switch.
Can I use a higher wattage bulb than recommended by the fan?
Absolutely NOT. Exceeding the maximum wattage listed on the fan’s fixture can cause the fixture to overheat, damage the wiring, shorten the lifespan of the fan, and create a significant fire hazard. Always stick to the recommended wattage or lower.
What’s the best way to clean the glass light cover while it’s off?
When the glass cover is removed, it’s the perfect time for a thorough cleaning. Use a mild soap and water solution, or a glass cleaner, and a soft cloth to wipe away dust and grime. Ensure it’s completely dry before reattaching it to the fan.
Should I wear gloves when changing a light bulb in a ceiling fan?
Wearing gloves is a good idea for several reasons. They can provide a better grip, especially if the bulb is smooth or dusty. For halogen bulbs, gloves prevent skin oils from touching the glass, which can create hot spots and shorten the bulb’s life. They also offer a layer of protection in case a bulb breaks.