Changing your porch light bulb is a simple task that enhances safety and curb appeal, but it requires careful attention to detail and, most importantly, electrical safety. Always turn off the power at the breaker first, gather the right tools, and follow the steps for your specific fixture type to ensure a smooth, safe replacement. This guide will walk you through everything you need to know to successfully install a new bulb and enjoy a brighter entryway.
There’s nothing quite like a welcoming glow from your porch light to greet you home or guide guests to your door. A functional porch light isn’t just about aesthetics; it’s a crucial element for safety, security, and visibility around your home. But what happens when that welcoming beacon flickers, dims, or goes out altogether? Don’t let a burnt-out bulb leave your entryway in the dark! Changing a porch light bulb might seem like a small task, but it’s one that many homeowners put off, often due to a lack of confidence or uncertainty about the process.
You’re in luck! Learning how to change porch light bulb is a straightforward DIY project that almost anyone can tackle with a little guidance. This comprehensive guide will walk you through every step, from the essential safety precautions to troubleshooting tricky fixtures, ensuring you can bring light back to your porch quickly and safely. We’ll demystify the process, providing you with all the knowledge and tips you need to illuminate your home’s entrance once again.
Key Takeaways
- Prioritize Safety Above All: Always turn off the power to your porch light at the circuit breaker before beginning any work to prevent electrical shock.
- Gather the Right Tools: Ensure you have a stable ladder, the correct replacement bulb, screwdrivers, gloves, and a voltage tester on hand before you start.
- Understand Your Fixture Type: Porch light fixtures vary; know how to safely open or disassemble yours, whether it’s an enclosed globe, an open design, or has a decorative cage.
- Handle Bulbs Carefully: When removing or installing, handle bulbs by their base or use a clean cloth to avoid transferring oils from your skin, which can shorten bulb life.
- Match Bulb Specifications: Always replace a bulb with one of the correct base type, wattage, and voltage as specified by the fixture to prevent damage or fire hazards.
- Clean as You Go: Take the opportunity to clean the fixture’s globe or diffuser while it’s open, improving light output and appearance.
Quick Answers to Common Questions
Question 1?
My porch light still isn’t working after I changed the bulb. What should I check next?
Answer 1?
First, double-check that the circuit breaker is fully engaged and the wall switch is on. Then, turn off the power again and ensure the new bulb is screwed in snugly. If it still doesn’t work, there might be a loose wire connection within the fixture, a faulty light switch, or a problem with the fixture itself, which might require an electrician.
Question 2?
What type of bulb should I use for my porch light, and can I switch to LED?
Answer 2?
You should use a bulb with the correct base type (e.g., E26 standard) and a wattage equal to or less than the fixture’s maximum rating. Yes, you can almost always switch to an LED bulb, which offers energy efficiency and a longer lifespan. Just ensure the LED bulb is rated for outdoor or damp locations if required by your fixture.
Question 3?
Can I use a higher wattage bulb than what’s recommended on my porch light fixture?
Answer 3?
No, you should never use a bulb with a higher wattage than the maximum recommended on your fixture. Exceeding the wattage limit can cause the fixture to overheat, melt wiring, damage the socket, and create a serious fire hazard.
Question 4?
My porch light fixture is full of dead bugs and dirt. How do I clean it safely?
Answer 4?
Always turn off the power at the circuit breaker first. Carefully remove the globe or cover as you would to change the bulb. Use a soft brush, a damp cloth, or a handheld vacuum to remove bugs and debris. You can wash glass globes with mild soapy water, ensuring they are completely dry before reassembling the fixture.
Question 5?
How often should I expect to change my porch light bulb?
Answer 5?
The lifespan of a porch light bulb varies greatly by type. Incandescent bulbs might last 750-2,000 hours, CFLs 8,000-10,000 hours, and LED bulbs can last 25,000-50,000+ hours. You’ll typically change it when it burns out, or you might choose to replace it preemptively if you’re upgrading to a more energy-efficient LED.
📑 Table of Contents
Safety First: Your Number One Priority When Changing a Porch Light Bulb
Before you even think about touching your porch light fixture, remember this golden rule: safety always comes first. Working with electricity, even in a seemingly simple task like changing a light bulb, carries inherent risks. A momentary lapse in caution can lead to electric shock or falls. By following these crucial safety steps, you’ll protect yourself and ensure a smooth, worry-free bulb replacement.
Always Kill the Power at the Breaker
This is arguably the most critical step when you want to change porch light bulb. You must turn off the power to the fixture before you do anything else. Simply flipping the light switch off isn’t enough; residual power can still be present in the fixture. Here’s how to do it:
- Locate Your Electrical Panel: This is usually a metal box in your basement, garage, utility closet, or outside.
- Identify the Correct Breaker: Look for a breaker labeled “Exterior Lights,” “Porch Light,” or “Outdoor Outlets.” If it’s not clearly marked, you might have to do some trial and error. Turn off a main lighting breaker and see if the porch light goes out. If not, turn it back on and try another.
- Test for Power: After flipping the breaker, go back to your porch and flip the light switch to the “on” position. The light should not come on. For an extra layer of safety, use a non-contact voltage tester (often called a “tick tester”). Touch the tester to the wiring inside the light fixture (once you’ve opened it, which we’ll cover soon). If it lights up or beeps, there’s still power, and you need to find the correct breaker.
- Label the Breaker: Once you’ve identified the right breaker, consider labeling it clearly for future reference.
Choose the Right Ladder for the Job
Unless your porch light is within easy arm’s reach while standing on the ground, you’ll need a ladder. Using a wobbly chair or a stack of boxes is extremely dangerous and should never be considered. Here’s how to ensure ladder safety:
- Stable Surface: Place your ladder on a firm, level surface. Uneven ground is a recipe for disaster.
- Proper Height: Select a ladder that allows you to comfortably reach the light fixture without overextending. You should ideally be able to work with both hands without feeling off-balance.
- Have a Spotter: If possible, ask a friend or family member to hold the base of the ladder for added stability, especially if you’re working at a significant height.
- Maintain Three Points of Contact: Always have two hands and one foot, or two feet and one hand, on the ladder at all times. Avoid leaning too far to one side.
Personal Protective Equipment (PPE)
Even for a simple task, a little PPE goes a long way:
- Work Gloves: Protect your hands from sharp edges on the fixture, broken glass from an old bulb, or corrosive elements. Cotton gloves can also prevent you from leaving oily fingerprints on a new halogen or incandescent bulb, which can shorten its lifespan.
- Safety Glasses: Always wear safety glasses or goggles. Small pieces of glass from a broken bulb or dust/debris from the fixture can cause eye injuries.
Gathering Your Essential Tools and Supplies
Before you climb that ladder or even turn off the power, take a moment to gather everything you’ll need. A quick trip back and forth to the garage or shed for a forgotten tool can be frustrating and increase the risk of a fall. Being prepared makes the job quicker and safer.
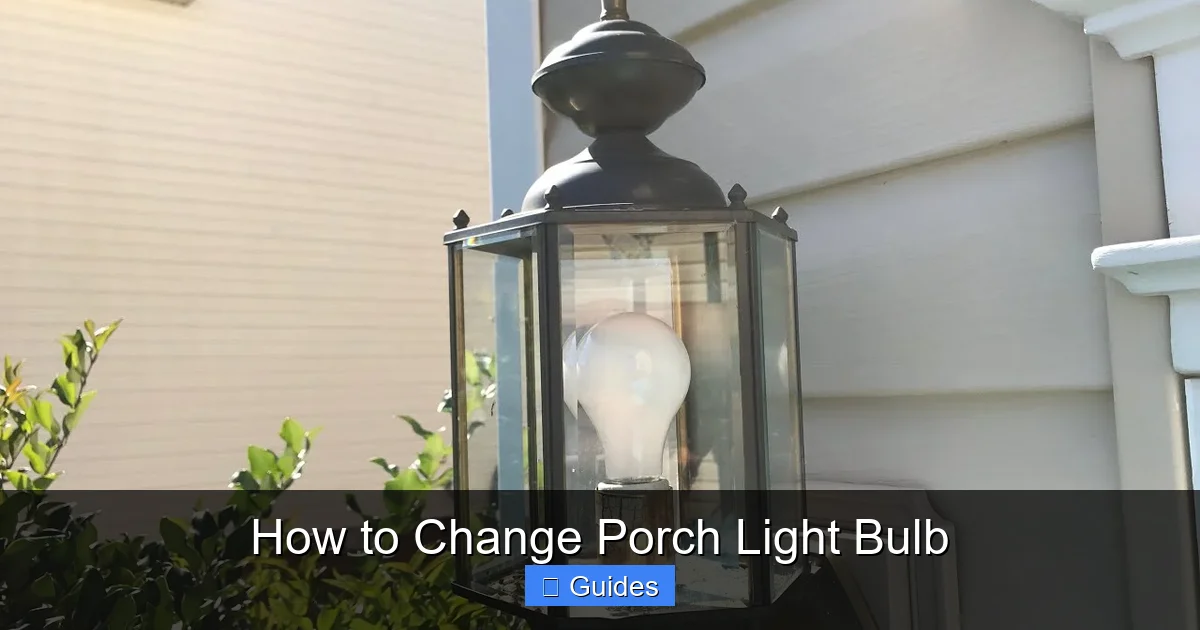
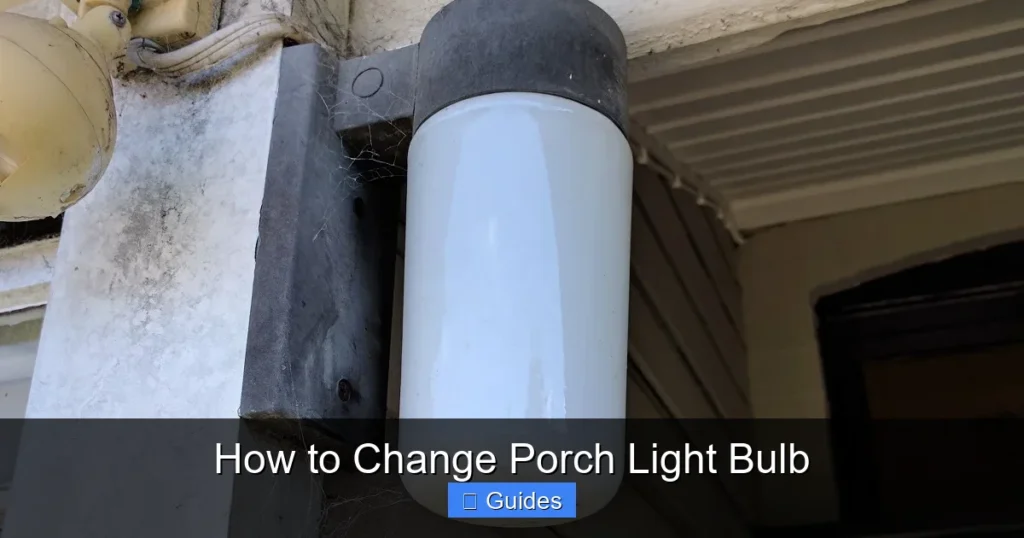
Visual guide about How to Change Porch Light Bulb
Image source: i.ytimg.com
The New Light Bulb: Getting it Right
This might seem obvious, but many people grab “any” bulb. Here’s how to choose the right replacement when you want to change porch light bulb:
- Type: Is it an incandescent, CFL, LED, or halogen? While you can often switch between types (e.g., incandescent to LED), ensure the new bulb is suitable for outdoor, enclosed, or damp locations if your fixture requires it. LED bulbs are a popular choice for outdoor lights due to their energy efficiency and long lifespan.
- Base: Most porch lights use a standard E26 (medium screw-in) base, but always double-check. Some smaller or specialty fixtures might use candelabra (E12) or other bases.
- Wattage: Crucially, never exceed the maximum wattage listed on your fixture. Using a bulb with too high a wattage can cause overheating, damage the fixture, melt wiring, and create a fire hazard. If you’re switching to an LED, remember that an LED’s “equivalent wattage” (e.g., 60W equivalent) refers to its light output, not its power consumption. The actual wattage of an LED is much lower, so it will almost certainly be below your fixture’s limit.
- Color Temperature (Optional): For outdoor lighting, you might prefer a “warm white” (2700K-3000K) for a cozy feel or “cool white” (4000K-5000K) for brighter, more task-oriented lighting.
Basic Hand Tools
- Screwdriver Set: You’ll likely need a Phillips head or flathead screwdriver to remove any screws holding a globe, cage, or cover in place.
- Pliers: Needle-nose or regular pliers can be helpful for gripping a stubborn bulb base or manipulating small parts.
- Non-Contact Voltage Tester: As mentioned, this is a vital safety tool to confirm power is off.
- Bulb Gripper (Optional): If your porch light bulb is large, smooth, or difficult to reach, a bulb gripper tool (a suction cup on a pole) can make removal and installation much easier and safer.
Safety Gear
- Work Gloves: Essential for protection.
- Safety Glasses: Protect your eyes from debris.
Cleaning Supplies
- Clean Cloths or Paper Towels: For wiping down the fixture and handling the new bulb.
- Glass Cleaner or Mild Soapy Water: If you plan to clean the glass globe or diffuser while it’s removed.
Accessing the Old Bulb: Decoding Your Fixture Type
Porch light fixtures come in a myriad of designs, and how you access the old bulb will depend on the specific type you have. Take a moment to examine your fixture before you start prying things open. Patience and a gentle approach are key here.
Open Fixtures: The Easiest Approach
Some porch lights are completely open at the bottom, or have only a small decorative cage that doesn’t obstruct bulb access. If this is your setup:
- Simply Unscrew: Once power is off and you’re safely on your ladder, you can often just reach in and unscrew the bulb.
- Check for Dust/Debris: Even in open fixtures, dust, cobwebs, or insects can accumulate. This is a good time to wipe the interior clean.
Enclosed Fixtures with a Globe or Diffuser
These are very common. The bulb is protected by a glass globe, plastic diffuser, or metal casing. You’ll need to open or remove part of the fixture:
- Screws: Many fixtures have small thumbscrews or regular screws (often 2-4) around the rim or base of the globe. Carefully loosen or remove these to detach the globe. Hold onto the globe securely as you remove the last screw.
- Clips or Latches: Some globes are held in place by spring clips or latches. Gently push, pull, or unhook these to release the globe.
- Twist-Off: Less common, but some globes might twist counter-clockwise a quarter turn or so to unlock and drop down.
- Hinged Covers: Some fixtures have a hinged top or front panel that swings open after releasing a latch or screw.
- Handling Glass: Always use gloves when handling glass globes. They can be surprisingly heavy, especially if wet from cleaning. Set it aside carefully where it won’t roll or break.
Decorative Cages and Covers
Many attractive porch lights feature decorative metal cages or covers over the globe or bulb. These usually need to be detached first:
- Screws: Look for screws on the sides, top, or bottom of the cage that secure it to the main fixture body.
- Clips: Some cages are held by small clips that need to be gently pried open.
- Hinges: Similar to globes, some cages might be hinged and swing open after releasing a latch.
Sensor or Smart Light Fixtures
If your porch light has a motion sensor, dusk-to-dawn sensor, or is a smart light fixture, the access method for the bulb itself is usually the same as described above. The sensor components are typically separate from the bulb housing. Just be mindful of delicate wiring related to the sensor when you’re working inside the fixture.
Once you’ve successfully accessed the old porch light bulb, you’re ready for the next step: removal!
Gently Removing the Stubborn Old Bulb
With the power off and the fixture open, you can now focus on taking out the old, defunct bulb. This part is usually straightforward, but sometimes bulbs can be a bit stubborn. Take your time and be gentle.
Standard Twist-Out Bulbs
Most bulbs are screw-in type (Edison screw base). To remove it:
- Grip the Bulb: Using your gloved hand, grasp the bulb firmly but gently.
- Twist Counter-Clockwise: Turn the bulb counter-clockwise until it loosens and unscrews completely from the socket.
- Avoid Overtightening: If the bulb feels stuck, avoid forcing it with excessive strength, as this can break the glass or damage the socket.
- Inspect the Socket: Once the bulb is out, quickly inspect the socket for any corrosion, debris, or obvious damage. Clean away any dust or insect nests.
Dealing with Stuck or Over-Tightened Bulbs
Sometimes, moisture, rust, or simply being overtightened can make a bulb incredibly difficult to remove. Here are some strategies:
- Rubber Gloves or Cloth: If your work gloves don’t provide enough grip, a pair of rubber dishwashing gloves or even a thick rubber band wrapped around the bulb can offer extra traction.
- Bulb Gripper: For extremely stubborn or large bulbs, a specialty bulb gripper (a suction cup tool) can provide leverage.
- Penetrating Oil (Use Extreme Caution): In rare cases, if the base is metal and completely seized, a tiny amount of penetrating oil like WD-40 applied ONLY to the very edge of the screw base (NOT the glass) might help. Apply with a cotton swab, wait a few minutes, then try again. Wipe up any excess immediately. Ensure power is OFF and the area is dry if you use this method.
- Don’t Force It: If the bulb simply won’t budge with reasonable force, forcing it risks breaking the bulb in the socket, which creates a more challenging and potentially dangerous situation.
What If the Bulb Breaks?
This is where safety glasses and gloves become absolutely essential. A broken bulb in the socket is a nuisance, but manageable:
- Keep Power OFF: Double-check that the power is definitely off at the breaker.
- Clear Glass Shards: Carefully remove any large pieces of broken glass from the fixture and surrounding area. Use pliers or a sturdy cloth.
- Remove the Base: The most common scenario is that the glass bulb breaks, leaving the metal screw base stuck in the socket.
- Needle-Nose Pliers: With your gloves and safety glasses on, use needle-nose pliers to grasp the metal rim of the bulb base. Gently twist counter-clockwise.
- Potato Method (Last Resort): If the pliers don’t work, some people recommend pressing a raw potato half onto the jagged base and twisting. The potato provides a grip. Be very careful with this method, ensuring it’s dry and provides a good seal. Again, power must be OFF.
- Vacuum: Use a handheld vacuum cleaner to pick up any tiny glass shards.
- Inspect Socket: After removing the base, inspect the socket carefully for any damage or remaining glass.
Installing Your Bright New Bulb with Confidence
With the old bulb safely removed and any cleaning completed, it’s time for the gratifying part: installing the new porch light bulb. This is where your careful selection of the replacement bulb pays off.
Match the Bulb Type and Wattage
Before you screw it in, do one last check:
- Is it the correct base type? (e.g., E26 standard)
- Is the wattage equal to or less than the fixture’s maximum rating?
- Is it rated for outdoor/damp locations if necessary?
If you’re upgrading to an LED, this is an excellent choice for longevity and energy savings. Just ensure it’s compatible with any dimmers or sensors if your fixture has them.
The Proper Way to Screw in a Bulb
This might seem basic, but proper installation can prevent issues down the line:
- Handle by the Base: If you’re using an incandescent or halogen bulb, avoid touching the glass directly with your bare hands. Oils from your skin can create hot spots, leading to premature bulb failure. Handle it by the metal screw base or use a clean cloth or your gloves. This isn’t as critical for LEDs but is still good practice.
- Align and Twist Clockwise: Carefully align the new bulb’s base with the socket. Gently screw it in clockwise until it feels snug.
- Hand-Tighten Only: Do NOT overtighten the bulb. It only needs to be hand-tight. Overtightening can strip the socket threads, make future removal difficult, or even break the bulb.
Cleaning and Reassembling Your Fixture
While the fixture is open and accessible, take a few extra minutes to clean it:
- Wipe Down the Globe/Diffuser: Use glass cleaner or mild soapy water to clean any glass globes or plastic diffusers. Dust, dirt, and insect accumulation can significantly reduce light output. Ensure it’s completely dry before reattaching.
- Clean the Interior: Use a damp cloth to wipe down the inside of the fixture, removing cobwebs, dust, and dead insects.
- Reassemble Carefully: Put the globe, diffuser, or cage back onto the fixture in the reverse order of how you removed it. Be gentle with screws; hand-tighten them to avoid cracking glass or stripping threads. Ensure all components are securely fastened to prevent them from falling off in windy conditions.
Final Checks and Enjoying Your New Porch Light
You’re almost done! The hard work is behind you. Now it’s time for the satisfying moment of seeing your porch light glow once again.
Restoring Power and Testing
- Clear the Area: Make sure all tools are put away and no one is standing directly under the fixture.
- Flip the Breaker: Go back to your electrical panel and flip the breaker you turned off earlier back to the “on” position.
- Test the Light: Head back to your porch and flip the light switch. Your new porch light should now illuminate! If it doesn’t, don’t panic.
Troubleshooting (If the Light Doesn’t Come On)
- Check the Bulb: Is it screwed in all the way? Sometimes a slightly loose connection is the culprit.
- Check the Switch: Is the wall switch definitely on?
- Re-Check the Breaker: Did you flip the correct breaker, and is it fully in the “on” position?
- Inspect for Damage: Turn off the power again and carefully re-inspect the socket for any signs of damage or corrosion that might prevent a good connection.
- Try Another Bulb: Although rare, a new bulb can occasionally be faulty. Try a different new bulb if you have one.
- Professional Help: If none of these steps work, there might be a wiring issue in the fixture or switch, and it’s best to call a qualified electrician.
Proper Disposal of Old Bulbs
Once your new light is shining, remember to dispose of the old bulb properly:
- Incandescent and Halogen: These can typically be disposed of with regular household trash.
- CFLs (Compact Fluorescent Lamps): CFLs contain a small amount of mercury and should NOT be thrown in regular trash. Many hardware stores, recycling centers, or local waste management facilities offer special recycling programs for CFLs.
- LEDs: While not containing mercury, many components of LEDs are recyclable. Check with your local recycling facility for guidance.
And there you have it! You’ve successfully learned how to change porch light bulb. Take a moment to appreciate the renewed brightness and enhanced security your freshly lit porch provides.
Changing a porch light bulb is more than just a quick fix; it’s a small act of home maintenance that contributes to your home’s overall appeal and safety. By following these simple, step-by-step instructions, you’ve not only replaced a bulb but also gained valuable DIY experience and confidence. Keep your porch light shining brightly, making your home a beacon of warmth and welcome for years to come!
🎥 Related Video: How to change an Outdoor Porch Lantern Sconce Light Bulb–Simple DIY do it yourself procedure HQ
📺 jakeguitar01
This video shows how to replace a light bulb in an outdoor lighting sconce fixture. This video was created because sometimes the …
Frequently Asked Questions
Is it safe to change a porch light bulb in the rain?
No, it is generally not safe to change a porch light bulb in the rain or any wet conditions. Water and electricity are a dangerous combination, increasing the risk of electrical shock. Always wait for dry weather and ensure the fixture and surrounding area are completely dry before attempting to change the bulb.
How do I remove a stuck light bulb that won’t twist out?
If a bulb is stuck, first ensure the power is off. Try using rubber gloves or a bulb gripper tool for extra grip. For a metal base that seems seized, a tiny amount of penetrating oil applied very carefully to the threads (avoiding the glass) with a cotton swab might help, but ensure the area is dry and power is off.
What if my porch light is on a motion sensor or dusk-to-dawn sensor?
If your porch light has a sensor, the process for changing the bulb remains the same: kill the power, replace the bulb, and then restore power. After installing the new bulb, you might need to test the sensor’s functionality or adjust its settings, especially if the new bulb’s type (e.g., LED) affects its sensitivity.
Are all outdoor light bulbs the same, or do I need a specific type?
No, not all outdoor light bulbs are the same. While many use standard screw-in bases, you must match the base type, wattage, and voltage to your fixture. Additionally, some outdoor fixtures require bulbs specifically rated for outdoor or damp locations to withstand weather elements, so always check the packaging.
Can I use an indoor light bulb in my outdoor porch light fixture?
It is generally not recommended to use an indoor bulb in an outdoor porch light fixture unless the fixture itself is fully enclosed and sealed, or the bulb is specifically rated for outdoor use. Indoor bulbs are not designed to withstand moisture, temperature fluctuations, or direct exposure to the elements, which can lead to premature failure or safety hazards.
My new LED porch light flickers, what could be wrong?
If your new LED porch light flickers, there could be a few reasons. Common culprits include incompatibility with an existing dimmer switch (LEDs require specific “dimmable” LEDs and LED-compatible dimmers), a loose connection in the socket, or a faulty LED bulb. Ensure the bulb is fully screwed in and consider trying a different LED bulb or checking dimmer compatibility.