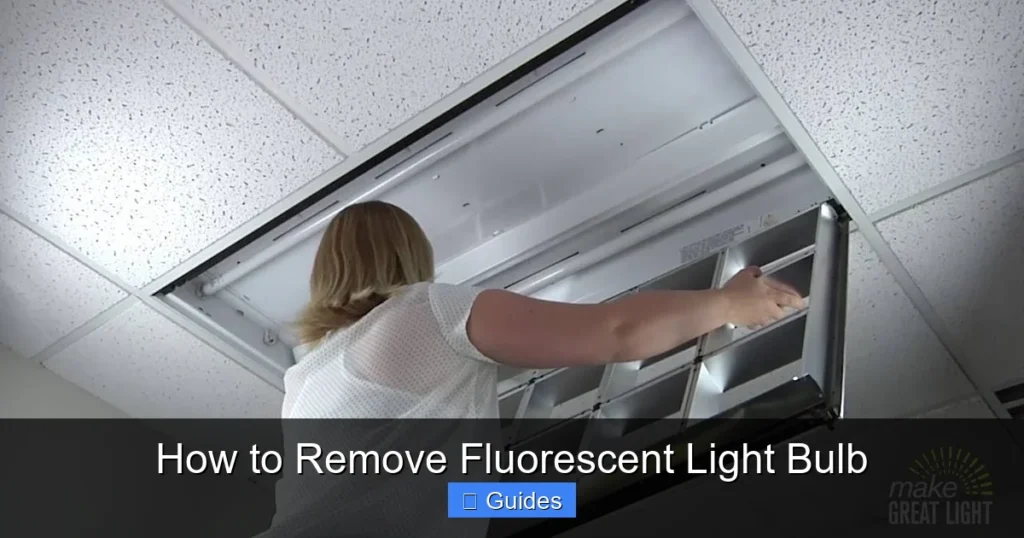
Safely removing a fluorescent light bulb is a straightforward task if you follow the right steps. Always prioritize safety by turning off power, wearing protective gear, and using a stable ladder. This guide will walk you through how to remove fluorescent light bulbs, covering various types and ensuring proper handling and disposal for a safe and easy bulb replacement experience.
There comes a time in every home or office when a trusty fluorescent light bulb flickers, dims, or simply gives up the ghost. When that moment arrives, you might find yourself staring up at the fixture, wondering, “How exactly do I remove this fluorescent light bulb?” It might seem like a simple task, but unlike traditional incandescent bulbs that you just unscrew, fluorescent lights often require a slightly different approach. And because they contain a tiny amount of mercury, handling them correctly isn’t just about convenience; it’s about safety and environmental responsibility too.
Don’t worry, you’ve come to the right place! This comprehensive guide will walk you through every step of how to remove fluorescent light bulbs, ensuring you do it safely, efficiently, and without any unexpected shocks or shattered glass. We’ll cover different types of fluorescent bulbs, the tools you’ll need, and what to do with the old bulb once it’s out. By the end of this article, you’ll be a fluorescent bulb removal pro, ready to tackle any flickering light that comes your way!
Key Takeaways
- Always Cut the Power: Before attempting any bulb removal, ensure the light fixture’s power is completely off at the circuit breaker to prevent electric shock.
- Wear Protective Gear: Safety glasses and work gloves are essential to protect your eyes from falling debris and your hands from cuts, especially if a bulb breaks.
- Use a Stable Ladder: Ensure your ladder is secure and on a level surface, and have someone spot you if working at height, to prevent falls.
- Identify Bulb Type: Different fluorescent bulbs (linear, U-bend, circline, compact) have distinct removal methods. Knowing your bulb type is crucial for correct removal.
- Twist and Pull Gently: For linear fluorescent bulbs, a gentle twist (usually 90 degrees) followed by a careful pull is the standard removal technique. Avoid excessive force.
- Handle with Care: Fluorescent bulbs contain a small amount of mercury. Always handle them gently to prevent breakage and dispose of them properly at designated recycling centers.
- Plan for Disposal: Never throw fluorescent bulbs in regular household trash. Research local hazardous waste or recycling facilities for safe and environmentally responsible disposal.
Quick Answers to Common Questions
How do you unlock a fluorescent tube?
To unlock a linear fluorescent tube, grasp it firmly near one end and gently twist it a quarter turn (90 degrees). You should feel the pins at the ends release from the sockets.
Can you just pull out a fluorescent light bulb?
No, you generally cannot just pull out a fluorescent light bulb. Linear fluorescent bulbs are held in place by pins that lock into sockets. You must twist them first to unlock the pins before pulling them out.
What do you do if a fluorescent bulb breaks?
If a fluorescent bulb breaks, immediately clear the area, open windows to ventilate for 15-20 minutes, and put on heavy-duty gloves and safety glasses. Use stiff paper or cardboard and sticky tape to collect all fragments and powder, placing them in a sealed plastic bag for hazardous waste disposal. Do not use a vacuum cleaner.
Can I throw fluorescent bulbs in the regular trash?
No, you should not throw fluorescent bulbs in regular household trash. They contain a small amount of mercury, which is a hazardous material, and must be recycled at designated facilities or household hazardous waste collection sites.
Do I need to turn off the power at the circuit breaker to remove a fluorescent bulb?
Yes, absolutely. It is crucial to turn off the power to the light fixture at the circuit breaker before attempting to remove any fluorescent bulb to prevent the risk of electric shock.
📑 Table of Contents
- Safety First: The Golden Rule of Bulb Removal
- Identifying Your Fluorescent Bulb Type
- Gathering Your Tools and Supplies
- Step-by-Step Guide: How to Remove Linear Fluorescent Light Bulbs (T8, T12, T5)
- Step-by-Step Guide: How to Remove Other Fluorescent Bulb Types
- Disposing of Fluorescent Light Bulbs Safely
- Troubleshooting Common Issues During Removal
- Conclusion: Light Up Your Life Safely!
Safety First: The Golden Rule of Bulb Removal
Before you even think about touching that old fluorescent light bulb, safety must be your absolute top priority. Skipping these initial steps isn’t just risky; it could lead to electric shock, falls, or cuts. Remember, a few moments of preparation can save you a lot of trouble.
Turn Off the Power – Absolutely Crucial!
This is the most critical step. Never, ever attempt to remove a fluorescent light bulb with the power still on. You risk a serious electric shock. Here’s how to do it right:
- Locate Your Circuit Breaker Box: This is usually in a utility closet, basement, garage, or sometimes an outdoor panel.
- Identify the Correct Breaker: Look for labels that indicate “Lights,” “Living Room,” “Kitchen,” or the specific area where the light fixture is located. If unsure, you can turn off the main breaker, but this will cut power to your entire home.
- Flip the Switch: Firmly switch the breaker to the “OFF” position.
- Test the Light: Go back to the light fixture and try to turn the light on using its wall switch. If it doesn’t come on, you’ve successfully cut the power. If it does, you’ve flipped the wrong breaker – go back and try another until the light stays off.
- Inform Others: If other people are in the house, let them know you’ve turned off the power to a specific area and why. This prevents someone from accidentally flipping the breaker back on while you’re working.
Gather Your Essential Safety Gear
Once the power is off, it’s time to gear up. These items will protect you from potential hazards:
- Safety Glasses or Goggles: Essential for protecting your eyes from dust, debris, or shattered glass if the bulb breaks.
- Work Gloves: Protect your hands from sharp edges if the bulb breaks, and provide a better grip on a potentially slippery or dusty bulb.
- Sturdy Ladder or Step Stool: Do not stand on chairs, wobbly boxes, or anything unstable. Use a proper ladder that can safely support your weight and reach the fixture comfortably without overextending. Ensure it’s on a level, stable surface.
- Optional: Drop Cloth or Old Newspaper: If you’re concerned about dust or small fragments, lay one down beneath your workspace.
Identifying Your Fluorescent Bulb Type
Not all fluorescent light bulbs are created equal when it comes to removal. Knowing which type you’re dealing with will help you apply the correct technique. Most common are linear tubes, but there are others.
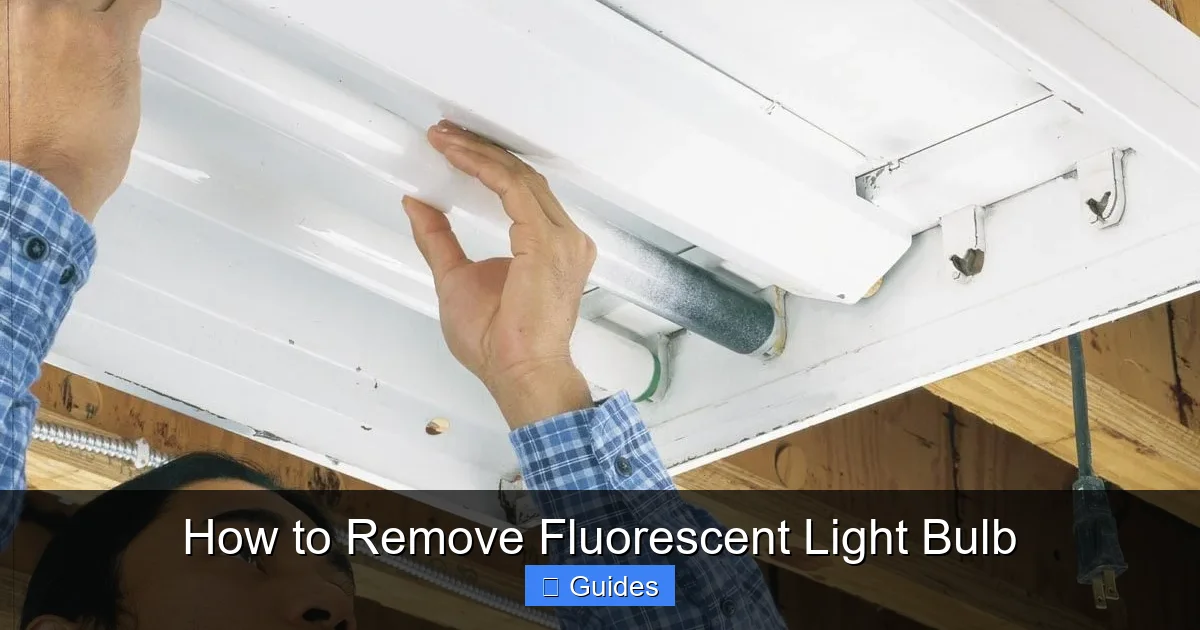
Visual guide about How to Remove Fluorescent Light Bulb
Image source: familyhandyman.com
Linear Fluorescent Tubes (T8, T12, T5)
These are the most common type, long and straight, found in many garages, kitchens, and offices. The ‘T’ stands for tubular, and the number (e.g., T8, T12, T5) refers to the diameter in eighths of an inch (T8 is 1 inch, T12 is 1.5 inches, T5 is 5/8 inch). Their removal method is generally the same.
U-Bend Fluorescent Tubes
These are essentially linear tubes that have been bent into a U shape. They often fit into square or rectangular fixtures where a straight tube wouldn’t. They have two pins at each end, similar to linear tubes, and are removed similarly but with extra care due to their shape.
Circline Fluorescent Tubes
As the name suggests, these are circular bulbs. They are common in older kitchen fixtures or ceiling lights. They usually have a single connector point with four pins in the center or on the side. They often have a twist-lock or snap-in mechanism.
Compact Fluorescent Lamps (CFLs)
These are the spiral or curled bulbs that often replace incandescent bulbs in standard screw-in sockets. If you have one of these, removing it is as simple as unscrewing it counter-clockwise, just like an old incandescent bulb. However, they still contain mercury and require special disposal.
Note: This guide primarily focuses on the larger, more traditional fluorescent tubes found in fixtures, as CFLs are generally straightforward to unscrew.
Gathering Your Tools and Supplies
Beyond the safety gear, you’ll need a few other items to ensure a smooth removal process. Most of these are common household items.
Must-Have Items:
- Stable Ladder or Step Stool: (Already covered in safety, but worth reiterating as a tool).
- New Replacement Bulb (Optional but Recommended): If you plan to install a new bulb immediately, have it ready. Make sure it’s the correct type and size for your fixture.
- Trash Bag or Old Blanket: For safely containing a broken bulb or for careful transport of an intact old bulb to a recycling center.
Helpful Extras:
- Damp Cloth or Paper Towels: For wiping away dust or cleaning the fixture if needed.
- Masking Tape or Duct Tape: In case a bulb breaks and you need to safely contain glass fragments.
- Empty Cardboard Tube or Box: For transporting the old bulb to a recycling facility.
Step-by-Step Guide: How to Remove Linear Fluorescent Light Bulbs (T8, T12, T5)
This is the most common removal scenario. Follow these steps carefully, always keeping safety in mind.
1. Confirm Power is Off and Position Your Ladder
Double-check that the power to the fixture is off at the circuit breaker. Put on your safety glasses and gloves. Position your stable ladder directly beneath the fixture, ensuring you can comfortably reach both ends of the bulb without straining or overextending. If there’s a diffuser or cover, you’ll need to remove that first. These usually unlatch, slide, or unclip.
2. Grasp the Bulb Firmly but Gently
With both hands, reach up and grasp the fluorescent light bulb near one end. Your grip should be firm enough to control the bulb, but gentle enough not to crush it. Avoid grabbing it in the very middle where it might flex too much.
3. Twist the Bulb 90 Degrees
This is the key step for linear fluorescent bulbs. Gently rotate the bulb a quarter turn (90 degrees). You should feel it “unlock” or loosen from the pins in the socket. The pins at each end of the bulb are designed to slide into slots in the fixture’s tombstone (socket) and then lock into place when twisted.
- Tip: If the bulb feels stuck, try wiggling it gently while twisting. Sometimes dust or corrosion can make it a bit stiff. Don’t force it excessively.
4. Lower One End of the Bulb
Once you’ve twisted it 90 degrees, one end of the bulb should now be free to drop slightly. Carefully lower that end of the bulb away from the fixture’s socket.
5. Slide the Bulb Out of the Other Socket
With one end free, carefully slide the entire bulb out of the remaining socket. The pins on the other end will simply slide out of their slot. You now have the old fluorescent light bulb fully removed.
6. Handle and Prepare for Disposal
Keep a firm, two-handed grip on the bulb. Gently bring it down from the ladder. Place it carefully in a safe spot where it won’t roll or be stepped on. If you’re installing a new bulb, proceed to the next section. If not, immediately prepare it for safe disposal.
What if the bulb breaks during removal?
If the bulb shatters (it happens!), stay calm. Do not touch broken glass with bare hands. Descend the ladder. Use heavy-duty gloves and a broom and dustpan to sweep up all glass fragments. Use masking tape to pick up smaller shards. Place all broken pieces and dust into a sturdy plastic bag, seal it, and label it as “Broken Glass – Mercury Containing.” Ventilate the area for 15-20 minutes, as broken fluorescent bulbs can release a small amount of mercury vapor.
Step-by-Step Guide: How to Remove Other Fluorescent Bulb Types
While linear tubes are common, you might encounter other types that require slightly different handling.
How to Remove U-Bend Fluorescent Bulbs
U-bend bulbs are essentially linear bulbs bent into a ‘U’ shape, and their removal is very similar:
- Safety First: Turn off the power at the breaker, don your safety glasses and gloves, and position your stable ladder. Remove any diffuser.
- Grasp Both Ends: With both hands, gently grasp the curved bulb near its pin connections at both ends.
- Twist and Release: Simultaneously, gently twist both ends of the bulb a quarter turn (90 degrees). You should feel the pins unlock from the sockets.
- Carefully Lower: Once unlocked, carefully lower the entire U-bend bulb out of the fixture. Its curved shape means you’ll need to angle it slightly to clear the fixture housing.
- Prepare for Disposal: Handle the bulb gently and prepare it for safe recycling.
How to Remove Circline Fluorescent Bulbs
Circline bulbs often have a different mounting mechanism, usually a central connector or a series of clips.
- Safety First: Turn off power, wear safety gear, and set up your ladder. Remove any cover or diffuser.
- Locate the Connector/Clips: Look for a central plug-in connector (often 4 pins) or small spring clips holding the bulb in place.
- Disconnect/Release:
- For a central connector: Gently pull the plug straight out of the socket. It might be stiff.
- For clips: Carefully depress or unlatch the clips holding the bulb. There might be 2-4 clips around the circumference.
- Lower the Bulb: Once disconnected or unclipped, gently lower the circular bulb from the fixture.
- Prepare for Disposal: Carefully secure the bulb for recycling.
How to Remove Compact Fluorescent Lamps (CFLs)
If you’re dealing with a spiral or curled CFL in a standard screw-in socket:
- Safety First: Turn off power, wear safety glasses and gloves, and ensure you have a stable base if working at height.
- Allow to Cool: If the bulb has been on, allow it a few minutes to cool down, as they can get hot.
- Grasp the Base (Not the Glass!): This is crucial. Grip the CFL firmly by its plastic or metal base, *not* by the glass spirals. The glass is fragile and can easily break.
- Unscrew Counter-Clockwise: Twist the bulb counter-clockwise until it detaches from the socket.
- Prepare for Disposal: Carefully transport the bulb for recycling.
Disposing of Fluorescent Light Bulbs Safely
This section is incredibly important. Fluorescent light bulbs contain a small amount of mercury, a hazardous material. They should *never* be thrown into regular household trash. Proper disposal is essential for environmental protection and public health.
Why Proper Disposal Matters
- Mercury Content: While the amount of mercury in a single bulb is small (typically 1-5 milligrams), if millions of bulbs end up in landfills, that mercury can accumulate and contaminate soil and water.
- Recycling Benefits: Recycling allows the glass, metal, and phosphor powder to be recovered and reused, reducing the need for new raw materials and preventing pollution.
- Legal Requirements: In many areas, it’s illegal to dispose of fluorescent bulbs in regular trash.
How to Prepare Bulbs for Recycling
- Keep Intact: The best scenario is to keep the bulb intact.
- Use Original Packaging or Cardboard: If you have the new bulb’s packaging, use it to safely transport the old one. Otherwise, a cardboard tube or box is ideal to prevent breakage during transport.
- Label Clearly: If possible, label the package “Fluorescent Bulbs for Recycling.”
Where to Recycle Fluorescent Bulbs
Finding a recycling point might require a little research, but it’s usually quite easy:
- Local Household Hazardous Waste (HHW) Facilities: Many cities and counties operate HHW collection sites or events where you can drop off fluorescent bulbs and other hazardous materials.
- Retailers: Large hardware stores (like Home Depot, Lowe’s) and some other retail chains often have free recycling programs for fluorescent bulbs (especially CFLs). Check with your local store.
- Utility Companies: Some electric utility companies offer recycling programs or provide information on local options.
- Recycling Websites: Websites like Earth911.com or EPA.gov can help you find local recycling centers by entering your zip code.
Troubleshooting Common Issues During Removal
Sometimes, things don’t go exactly as planned. Here are a few common hiccups and how to deal with them.
The Bulb is Stuck or Won’t Twist
This can happen if the fixture is old, dusty, or has some corrosion.
- Gentle Wiggling: While twisting, try gently wiggling the bulb back and forth a tiny bit. This can help dislodge it.
- Lubricant (Carefully!): If it’s extremely stuck, a very tiny spray of silicone lubricant on the ends of the tombstone (where the pins go) might help. Be extremely careful not to get lubricant on the bulb itself, as it could make it slippery. And ensure the power is definitely OFF.
- Patience: Don’t force it with excessive strength, as this can break the bulb. Take a break and try again.
The Bulb Breaks During Removal
We’ve already touched on this, but it’s worth reiterating the key steps:
- Don’t Panic: Accidents happen.
- Evacuate and Ventilate: Have people leave the area, and open windows for 15-20 minutes to ventilate any mercury vapor.
- Don Protective Gear: Put on heavy-duty gloves, safety glasses, and sturdy shoes if you weren’t already wearing them.
- Clean Up Thoroughly: Use stiff paper or cardboard to scoop up large pieces. Use sticky tape (like duct tape) to pick up small fragments and powder. Do NOT use a vacuum cleaner, as it can spread mercury vapor.
- Dispose Safely: Place all debris in a sealed plastic bag and take it to a hazardous waste facility.
The Diffuser or Cover is Difficult to Remove
Light diffusers come in many styles.
- Look for Latches/Clips: Most have small metal or plastic latches along the sides or ends that you push, pull, or squeeze to release.
- Sliding Panels: Some simply slide out from one end.
- Screws: Occasionally, a cover might be held in place by small screws.
- Consult Manual: If you still have the fixture’s manual (unlikely for older ones), it will show how to remove the cover. Otherwise, carefully examine the fixture for any obvious release mechanisms.
Conclusion: Light Up Your Life Safely!
Learning how to remove fluorescent light bulbs might seem like a small DIY task, but doing it correctly is a big win for your safety and the environment. By following these steps – from the all-important power shut-off to carefully twisting and responsibly recycling – you can confidently tackle any flickering fluorescent light in your home or workplace.
Remember, patience and a methodical approach are your best friends when dealing with electrical fixtures and fragile bulbs. Always prioritize your safety gear and never rush the process. With this guide, you’re now equipped with the knowledge and confidence to handle fluorescent bulb replacement like a pro, ensuring your spaces remain brightly lit and your planet a little cleaner. Happy bulb changing!
🎥 Related Video: How to Remove Fluorescent Light Bulbs
📺 Daddicated
How to remove fluorescent light bulbs. Learn the easy and safe way to remove fluorescent light bulbs with our step-by-step guide.
Frequently Asked Questions
What tools do I need to remove a fluorescent light bulb?
To safely remove a fluorescent light bulb, you’ll need essential safety gear like safety glasses, work gloves, and a sturdy ladder or step stool. While not strictly a tool, having a reliable means of climbing to reach the fixture is paramount for your safety.
How do I know what type of fluorescent bulb I have?
The most common types are long, straight “linear” tubes (T8, T12, T5), U-shaped tubes, or circular “circline” bulbs. Compact fluorescent lamps (CFLs) are spiral-shaped and screw into standard sockets. Look at the shape and how it’s connected to the fixture.
Is it safe to touch a fluorescent light bulb with bare hands?
It’s generally recommended to wear work gloves when handling fluorescent bulbs, especially during removal. This protects your hands from potential cuts if the bulb breaks and helps you maintain a better grip, reducing the chance of accidental breakage.
What if the pins on my fluorescent bulb are stuck or bent?
If the pins are stuck, try gently wiggling the bulb while twisting. If they appear bent, you might have to apply a very slight, careful additional twist to free them, but avoid excessive force. Bent pins on an old bulb usually mean it’s time for disposal, regardless of whether it’s working.
How do I dispose of a broken fluorescent light bulb?
If a fluorescent bulb breaks, do not use a vacuum cleaner. Instead, carefully sweep up larger pieces with a stiff paper or cardboard, then use sticky tape to pick up smaller fragments and powder. Place all debris into a sealed plastic bag and take it to a hazardous waste collection center for proper disposal.
Can I replace a fluorescent bulb with an LED bulb?
Yes, in many cases, you can replace fluorescent bulbs with LED equivalents. However, it often requires either specific “plug-and-play” LED tubes designed for existing ballasts or a simple rewiring of the fixture to bypass the ballast (ballast bypass LEDs). Always check compatibility and consult an electrician if unsure.