
Removing recessed light bulbs can seem tricky, but with the right approach, it’s a straightforward task. Always prioritize safety by turning off the power before you start. Identifying your bulb type – whether it’s a screw-in, twist-and-lock, or pin-type – is crucial for choosing the correct removal method and tools, ensuring a smooth replacement process.
Hey there, DIY enthusiast! Have you ever looked up at your recessed lights, seen a bulb go out, and felt a tiny pang of dread? You’re not alone. Recessed lighting is fantastic for creating sleek, modern aesthetics, but when it comes to changing a bulb, it can feel like you’re solving a puzzle designed by an electrician. The good news? It’s usually much simpler than it looks, and with a little guidance, you’ll be a pro at how to remove a recessed light bulb in no time.
Whether you’re dealing with a dimly lit room, a flickering light, or just upgrading to more energy-efficient LEDs, knowing how to remove a recessed light bulb safely and effectively is a handy skill. There are a few different types of recessed bulbs, and each has its own little secret for removal. Don’t worry, we’re going to walk through each scenario together, ensuring you feel confident and capable.
Before we dive into the nitty-gritty of various bulb types and tools, remember that safety is our top priority. Electricity and human hands don’t mix well without proper precautions. So, let’s start there, and then we’ll break down everything you need to know to get that old bulb out and a new one shining bright!
Key Takeaways
- Safety First: Always turn off the power to the light fixture at the circuit breaker before attempting any bulb removal or replacement to prevent electrical shock.
- Identify Your Bulb Type: Recessed fixtures use various bulbs like screw-in (PAR, BR, R), twist-and-lock (GU10), or pin-type (MR16, JC). Each requires a specific removal technique.
- Gather the Right Tools: Depending on the bulb, you might need a step ladder, gloves, safety glasses, a suction cup tool, a bulb gripper, or even needle-nose pliers for broken bases.
- Know the Removal Method: Screw-in bulbs twist out, GU10 bulbs push up and twist, while pin-type bulbs pull straight out. Smooth-faced bulbs often benefit from a suction cup.
- Handle with Care: Old bulbs can be hot or brittle. Allow them to cool, and use gloves to protect your hands and prevent transferring oils to new halogen bulbs.
- Troubleshoot Common Issues: For stuck bulbs, gently wiggle or try a penetrating lubricant (when power is off). For broken bulbs, use pliers to carefully remove the base.
- Integrated LEDs: Be aware that some recessed fixtures have integrated LED components that are not designed for bulb replacement and may require professional attention for fixture replacement.
Quick Answers to Common Questions
Can I remove a recessed light bulb without turning off the power?
No, you should never attempt to remove any light bulb, especially a recessed one, without first turning off the power at the circuit breaker. This is a critical safety step to prevent electrical shock.
What if my recessed light bulb is stuck?
If a screw-in bulb is stuck, try using a rubber glove, a piece of rubber, or a bulb gripper for extra traction. For GU10 bulbs, ensure you’re applying enough upward pressure while twisting counter-clockwise. Always ensure power is off before trying to free a stuck bulb.
How do I remove a recessed bulb that has broken and left the base in the socket?
First, turn off the power at the circuit breaker immediately. Wear thick gloves and safety glasses. Use needle-nose pliers to grip the edge of the metal base and carefully twist it counter-clockwise until it comes out. You can also try the potato method for screw-in bases.
Do I need special tools for removing recessed light bulbs?
Not always, but specialized tools like a suction cup bulb remover or a bulb gripper can make the process much easier, especially for smooth-faced bulbs or those recessed deep within the fixture. For basic screw-in bulbs, gloves often suffice.
How do I know what type of replacement bulb to buy?
Always check the specifications of the bulb you removed (wattage, voltage, base type like E26, GU10, MR16, and color temperature) or consult your fixture’s manual. If replacing with LED, ensure it’s “dimmable” if your fixture uses a dimmer switch.
📑 Table of Contents
Safety First: Your Non-Negotiable Step
Before you even think about touching that light fixture, we need to talk about safety. This isn’t just a suggestion; it’s a critical step that protects you from electrical shock, burns, and potential damage to your home’s electrical system. Seriously, don’t skip this part!
Power Down, Always!
This is the golden rule for any electrical work. You absolutely must turn off the power to the light fixture before attempting to remove any recessed light bulb. Here’s how to do it safely:
- Identify the Breaker: Go to your home’s main electrical panel (usually in a basement, garage, or utility closet).
- Flip the Switch: Find the circuit breaker that controls the room or specific light fixture you’re working on. If your panel isn’t labeled, you might need to flip switches until the light goes out. It’s often helpful to have someone observe the light while you flip breakers.
- Test It: Once you think you’ve found the right breaker, flip the light switch for that fixture to the “on” position. If the light doesn’t come on, you’ve successfully cut the power. If it does, go back to the panel and try another breaker.
- Consider a Lockout Tagout Device: For extra safety, especially if others might be in the house, you can use a lockout tagout device on the breaker switch. This physically prevents anyone from accidentally turning the power back on while you’re working.
It’s always better to be overly cautious than to risk an electrical accident. A little extra time spent at the breaker box can save you a lot of trouble.
Essential Safety Gear
Beyond cutting the power, a few simple items can make the job safer and more comfortable:
- Gloves: Work gloves protect your hands from sharp edges (if a bulb breaks), dirt, and oils. They also provide a better grip, especially if you’re dealing with a slippery bulb.
- Safety Glasses: Always a good idea when working overhead, especially if there’s a risk of a bulb breaking or debris falling.
- Sturdy Step Ladder: Never stand on a wobbly chair or stack of books. Use a stable step ladder that allows you to reach the fixture comfortably without overextending.
- Let it Cool: Halogen and incandescent bulbs get extremely hot. If the light has been on recently, give it plenty of time (at least 15-30 minutes) to cool down before touching it.
Identify Your Recessed Light Bulb Type
Before you can figure out how to remove a recessed light bulb, you need to know what kind of bulb you’re dealing with. Recessed fixtures are versatile and can house several different types of bulbs. Each type has a unique base and removal method. Don’t worry if you don’t know the jargon; we’ll explain it simply.
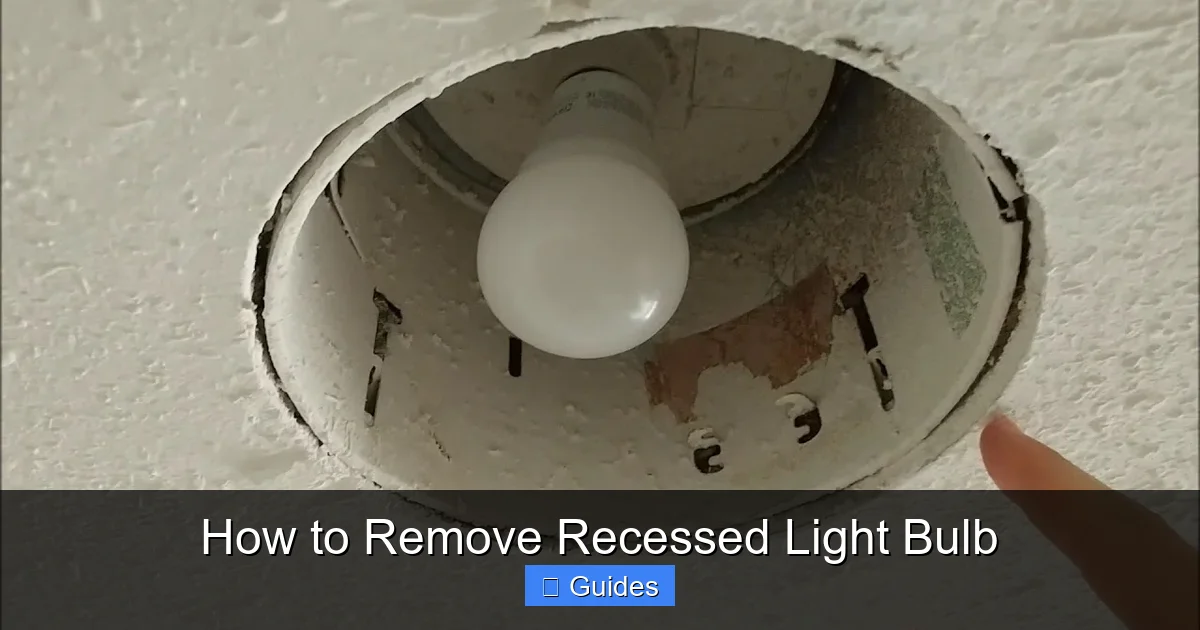
Visual guide about How to Remove Recessed Light Bulb
Image source: i.ytimg.com
The Classic Screw-In (PAR, BR, R Types)
These are perhaps the most common and easiest to identify. They look like traditional light bulbs, just bigger and often with a reflector shape. They have a standard Edison screw base (E26 or E27 in North America). Common examples include PAR, BR, and R bulbs, which are designed to direct light in a specific beam.
- Appearance: Generally larger, often with a wide, reflective face. They screw directly into a socket.
- Removal Method: Twist counter-clockwise.
Twist-and-Lock (GU10)
GU10 bulbs are popular in modern recessed lighting, especially for spotlights or track lighting. They have two short, blunt pins at the base that push into the socket and then twist to lock into place.
- Appearance: Smaller, often with a flat or slightly domed glass face. Two blunt pins protrude from the base.
- Removal Method: Push up slightly, then twist counter-clockwise.
Pin-Type (MR16, JC with Bi-Pin/G4)
These bulbs are also smaller and often used for accent lighting. They have two slender, sharp pins that simply plug straight into the socket. MR16s are common, often appearing similar to GU10s but with pin bases.
- Appearance: Small, often with a multifaceted reflector. Two slender, sharp pins protrude from the base.
- Removal Method: Pull straight out.
Integrated LEDs (Sometimes Not Removable)
With the rise of LED technology, many newer recessed fixtures now come with “integrated” LED modules. This means the LED light source is built directly into the fixture and is not designed to be replaced like a traditional bulb. If your fixture is an integrated LED, you won’t be able to remove a “bulb.” You might need to replace the entire trim or fixture if the LED fails.
- Appearance: Often a flat, smooth panel or lens that’s flush with the trim, with no visible bulb or socket.
- Removal Method: Generally not removable by the homeowner. Consult the fixture’s manual or an electrician.
A quick look at the base of the bulb (if you can see it) or even a visual comparison to these descriptions will usually tell you which type you’re dealing with. If in doubt, gently try the different methods, starting with the least forceful, after ensuring the power is off!
Gathering Your Tools for the Task
Having the right tools can make the difference between a quick, easy bulb change and a frustrating struggle. While some bulbs just require your bare (gloved) hands, others benefit greatly from specialized gadgets. Let’s look at what you might need.
Basic Hand Tools
- Sturdy Step Ladder: As mentioned, absolutely essential for safety and comfortable reach.
- Work Gloves: For grip, protection, and to avoid leaving fingerprints on new halogen bulbs.
- Safety Glasses: For eye protection from debris or broken glass.
- Flashlight or Headlamp: To help you see clearly in the fixture, especially after the power is off.
Specialty Tools for Recessed Bulbs
These are the MVPs for tricky or smooth-faced bulbs:
- Suction Cup Bulb Remover: This is a lifesaver for smooth-faced bulbs (like some PAR, R, or GU10 bulbs) that don’t offer much to grip. It typically comes with a pole or handle, but smaller handheld versions are also available. You press the suction cup firmly onto the bulb’s face, ensuring a good seal, then twist or pull.
- Bulb Gripper/Changer: Similar to a suction cup, but these often use rubber or spring-loaded “fingers” to grip the bulb. They are particularly useful for larger screw-in bulbs (PAR, BR) that are recessed deep within the can, making them hard to reach with just your hand. These usually attach to an extension pole.
- Needle-Nose Pliers or Lineman’s Pliers: Indispensable if a bulb breaks, leaving the metal base stuck in the socket. These allow you to carefully grip and twist out the remaining base without touching the electrical contacts.
- Electrical Tape: Useful for wrapping the base of a broken bulb before using pliers, adding an extra layer of insulation and preventing shattered glass.
The DIY Alternatives
No specialty tools? No problem, for some bulb types!
- Duct Tape or Packing Tape (for smooth bulbs): For smooth-faced bulbs without much grip, you can try firmly pressing a strong piece of duct tape or packing tape onto the face of the bulb. Create a handle with the tape, and then use it to twist or pull the bulb. This can work in a pinch for lighter bulbs.
- Rubber Kitchen Gloves or a Rubber Band: For screw-in bulbs that are just a bit too slippery, wearing a pair of rubber kitchen gloves or even wrapping a thick rubber band around the bulb can give you the extra grip you need to twist it out.
Remember, always choose the right tool for the job to make it easier and safer. A small investment in a suction cup remover can save you a lot of headaches down the line, especially if you have many recessed lights.
Step-by-Step Guide: How to Remove Each Recessed Light Bulb Type
Alright, you’ve turned off the power, you’ve got your safety gear, and you know your bulb type. Now, let’s get that old bulb out!
Removing Screw-In Bulbs (PAR, BR, R)
These are usually the most straightforward, but their size can sometimes make them tricky.
- Position Your Ladder: Place your sturdy step ladder directly under the light fixture.
- Gain Access: Some recessed trims have a decorative ring or baffle. You might need to gently pull down on this trim to get better access to the bulb. Often, these trims are held in by tension clips and will spring back into place.
- Grip the Bulb: If the bulb has a rough texture or enough surface area, you might be able to grip it directly with your gloved hand. If it’s smooth, or too deep to reach, this is where your suction cup bulb remover or bulb gripper comes in handy. Press the suction cup firmly onto the center of the bulb until it seals.
- Twist Counter-Clockwise: With a firm grip (either by hand or with your tool), twist the bulb counter-clockwise. It should loosen fairly easily. Continue twisting until the bulb is completely unscrewed from the socket.
- Carefully Remove: Once unscrewed, gently pull the bulb straight down and out of the fixture.
- Inspect and Replace: Check the socket for any debris. Insert your new screw-in bulb by turning it clockwise until it’s finger-tight. Don’t overtighten!
Removing Twist-and-Lock Bulbs (GU10)
These bulbs require a specific maneuver.
- Position Your Ladder: Get stable under the fixture.
- Access the Bulb: GU10 bulbs often sit flush within the trim.
- Push Up and Twist: Place your fingers (wearing gloves!) on either side of the bulb, or use a suction cup tool. Gently but firmly push the bulb up into the fixture a millimeter or two. While maintaining this slight upward pressure, twist the bulb approximately a quarter turn counter-clockwise. You should feel it unlock from its position.
- Pull Down: Once unlocked, the bulb will drop slightly. Gently pull it straight down and out.
- Replace: To insert a new GU10 bulb, align its pins with the slots in the socket, push it up, and twist clockwise until it locks firmly into place. Give it a gentle tug to ensure it’s secure.
Removing Pin-Type Bulbs (MR16, G4)
These are typically the easiest to remove once you know the trick.
- Position Your Ladder: Get stable under the fixture.
- Access the Bulb: Many MR16s are held in by a retaining wire or spring clip within the recessed trim. You may need to gently pry this wire aside or carefully remove the clip to free the bulb. Some recessed fixtures have a whole inner housing that pulls down to reveal the bulb; consult your fixture’s manual if unsure.
- Grip and Pull: With your gloved fingers, grip the bulb itself (avoid pulling on the pins) and pull it straight down and out of the socket. There’s no twisting involved with these.
- Replace: Carefully align the new bulb’s pins with the holes in the socket. Gently push the pins straight in until they are fully seated. If there was a retaining wire or clip, reposition it to secure the new bulb.
What About Integrated LED Fixtures?
If you have an integrated LED fixture, you won’t find a bulb to remove. The LEDs are built into the fixture. If it fails, the entire fixture (or at least the LED module within the fixture) usually needs to be replaced. Consult the manufacturer’s instructions or consider calling an electrician if you believe your integrated LED fixture is faulty.
Troubleshooting Common Recessed Light Bulb Removal Issues
Sometimes, removing a recessed light bulb isn’t as straightforward as it should be. Here are some common problems you might encounter and how to tackle them.
Stuck or Stripped Bulbs
Older bulbs, especially those in damp environments or exposed to heat cycles, can become stuck in the socket or have their screw threads corrode.
- For Stuck Screw-Ins:
- Gentle Wiggle: If it won’t twist, try gently wiggling the bulb while applying counter-clockwise pressure.
- Penetrating Lubricant (CAUTION!): With the power COMPLETELY off and verified, you can try a very small amount of WD-40 or a similar penetrating oil around the base of the bulb, letting it sit for a few minutes. Wipe away any excess carefully before attempting to twist again. NEVER use this if the power is on or if you’re not confident in your electrical safety.
- More Grip: Use a rubber glove, a piece of rubber, or a bulb gripper for extra traction.
- For Stuck Twist-and-Lock (GU10): Ensure you’re applying enough upward pressure while twisting. Sometimes the spring mechanism can be a bit stiff. Don’t force it excessively.
Broken Bulbs
This is arguably the most intimidating scenario, but it’s manageable with the right approach and strict adherence to safety.
- ENSURE POWER IS OFF: Double-check the breaker. This is non-negotiable.
- Protect Yourself: Put on thick work gloves and safety glasses.
- Clear Loose Glass: Carefully use needle-nose pliers or a cloth to pick out any larger shards of glass from the socket area. Be gentle.
- Remove the Base: The goal is to remove the metal screw-in base that’s left in the socket.
- Pliers Method: Use needle-nose pliers. Gently grip the very edge of the metal base that’s still in the socket. Try to turn it counter-clockwise. If it’s too sharp, you can wrap a piece of electrical tape around the base first to provide some insulation and a better grip.
- Potato Method (for screw-in only): If the pliers aren’t working, and there are no sharp glass edges protruding, you can try pressing a raw potato (cut in half) firmly into the broken bulb base. The potato’s flesh should grip the metal, allowing you to twist it out counter-clockwise. This method is surprisingly effective but requires caution.
- Inspect the Socket: Once the base is out, inspect the socket for any damage or remaining glass. If the socket is damaged, it’s best to call a qualified electrician.
When the Trim is the Problem
Sometimes, the entire recessed trim assembly is stuck, making it hard to access the bulb. The trim is the visible ring or cover around the bulb.
- Tension Clips: Most trims are held in by tension springs or clips. Gently pull down on the trim. If it’s resistant, look for small clips inside the can that you might need to squeeze or release.
- Paint Seal: Sometimes, paint can seal the trim to the ceiling. Use a utility knife to carefully score along the edge where the trim meets the ceiling to break the paint seal before gently pulling down.
Handling Hot Bulbs
As mentioned, traditional bulbs get very hot. If you forgot to let it cool down and the bulb is hot, use a thick rag or oven mitt to protect your hand while removing it. Better yet, wait until it’s completely cool!
Patience and a methodical approach are your best friends when troubleshooting. Don’t force anything, and if you’re ever unsure or uncomfortable, it’s always wise to consult a professional electrician.
Conclusion: Light Up Your Life with Confidence
And there you have it! What once might have seemed like a daunting task – learning how to remove a recessed light bulb – is now within your grasp. We’ve covered everything from the absolute necessity of safety to identifying different bulb types, gathering the right tools, and tackling common troubleshooting scenarios. You’re now equipped with the knowledge to approach your recessed lighting with confidence.
Remember, every successful DIY project starts with preparation and ends with a sense of accomplishment. The next time a recessed light goes dark, you won’t just see a problem; you’ll see an opportunity to put your new skills to good use. Go ahead, swap out that old bulb, install that new energy-efficient LED, and enjoy your beautifully lit space!
Keep these tips handy, and don’t hesitate to refer back to this guide whenever you need a quick refresh. Happy lighting!
Frequently Asked Questions
How do I tell if my recessed light is an integrated LED or uses a replaceable bulb?
Integrated LED fixtures often have a flat, smooth lens with no visible bulb or socket, and the entire trim is usually one sealed unit. If you see a distinct bulb that can be gripped or has visible pins/screws, it’s likely a replaceable bulb. Check the product manual if you still can’t tell.
Can I use an LED bulb to replace an incandescent or halogen recessed bulb?
Yes, in most cases, you can replace incandescent or halogen bulbs with LED equivalents, as long as the LED bulb has the correct base (e.g., E26, GU10, MR16) and wattage equivalent. If your fixture is on a dimmer, ensure the new LED bulb is specifically labeled as “dimmable” and that your dimmer is LED-compatible.
Why is my recessed light flickering after I replaced the bulb?
Flickering can be caused by several factors: the new bulb might not be fully seated, the dimmer switch might not be compatible with LED bulbs (if you switched to LED), there could be a loose wire in the fixture, or the bulb itself might be faulty. Start by reseating the bulb and checking dimmer compatibility.
What if the light fixture’s trim is painted and stuck to the ceiling?
If the trim is stuck due to paint, use a utility knife to carefully score along the seam where the trim meets the ceiling. This will break the paint seal, allowing you to gently pull down or remove the trim without damaging the ceiling.
Is it safe to touch the metal parts inside the socket if the power is off?
While the power being off makes it safer, it’s still best practice to avoid touching the metal electrical contacts inside the socket directly, especially with bare hands. Use insulated tools like pliers for broken bulb bases, and always double-check the power is off with a non-contact voltage tester if you have one.
My new recessed bulb isn’t working after I installed it. What should I do?
First, ensure the bulb is properly screwed in or fully seated and locked. Next, check if the circuit breaker is on and the wall switch is in the “on” position. If it still doesn’t work, try testing the bulb in another working fixture to see if the bulb itself is faulty, or try a different bulb in the non-working fixture.