
Ever wondered how do you make a potato powered light bulb? It’s a fascinating science experiment! By using a potato as an electrolyte and inserting two different metals (like zinc and copper) as electrodes, you can create a simple battery (a voltaic cell). Connecting several of these “potato cells” in a series provides enough voltage to light a small LED bulb, demonstrating basic electrochemical principles in a fun, hands-on way.
Have you ever looked at a common potato and wondered if it could do more than just make delicious fries or mashed potatoes? What if we told you that this humble root vegetable holds a secret power, capable of generating electricity? It sounds like something out of a sci-fi movie, right? But it’s true! With a few simple materials and a bit of scientific curiosity, you can learn how do you make a potato powered light bulb.
This isn’t magic; it’s basic electrochemistry, an exciting field of science that explores the relationship between electricity and chemical reactions. Building a potato battery and lighting an LED is a fantastic, hands-on project for students, educators, or anyone with a knack for DIY science. It’s a safe, inexpensive, and incredibly engaging way to understand fundamental principles of circuits and power generation. Get ready to embark on a scientific adventure that might just change the way you look at your pantry staples forever!
So, are you ready to transform a spud into a power source? Let’s dive in and discover exactly how do you make a potato powered light bulb, from understanding the science to gathering your supplies and putting it all together. You’ll be amazed at what a little ingenuity and a few potatoes can accomplish!
Key Takeaways
- Basic Science: A potato battery is a type of voltaic cell that converts chemical energy into electrical energy using an acid (in the potato) and two dissimilar metals.
- Essential Components: You’ll need potatoes, zinc electrodes (galvanized nails/screws), copper electrodes (copper wire/pennies), connecting wires, and a low-voltage LED light.
- Electrolyte Role: The phosphoric acid within the potato acts as the electrolyte, facilitating the chemical reaction between the metals.
- Series Connection is Key: A single potato typically produces only about 0.5-0.9 volts, which isn’t enough for most LEDs. You’ll need to connect several potatoes in a series to achieve the necessary voltage (usually 2-3 volts).
- Preparation Matters: Boiling potatoes for about 8 minutes before use can significantly increase their power output and longevity by breaking down cell walls and improving ion flow.
- Educational Value: This project is a fantastic hands-on way to teach fundamental concepts of electricity, chemistry, and circuits to children and adults alike.
- Safety Considerations: Always handle sharp objects and small electrical components with care. Supervise children during the experiment.
Quick Answers to Common Questions
How many potatoes do I need to light an LED?
You will typically need at least 3-5 medium-sized potatoes connected in series to generate enough voltage (around 2-3 volts) to light a standard low-voltage LED bulb. The exact number can vary based on the potato type, preparation, and the LED’s voltage requirement.
Can I use any metal for the electrodes?
No, you need two different metals with a significant difference in their electrochemical reactivity. Zinc (like from galvanized nails) and copper (like from copper wire or pre-1982 pennies) are the most common and effective combination for a potato battery.
Why does boiling the potato help?
Boiling the potato for about 8-10 minutes breaks down its internal cell walls, making it easier for ions to move freely within the potato’s flesh. This reduces the potato’s internal resistance and allows it to produce more current and a slightly higher, more stable voltage.
How long will a potato battery last?
A potato battery can power a small LED for several days, and sometimes even over a week, depending on the potato’s freshness, preparation, and the load (the LED). Eventually, the chemical reactions will deplete, and the potato will start to decompose.
What kind of light bulb can I power with a potato?
You can only power very low-voltage, low-current devices like small Light Emitting Diodes (LEDs) or tiny LCD clocks with a potato battery. Standard incandescent light bulbs require much more power than potatoes can provide.
📑 Table of Contents
The Surprising Science Behind Potato Power
Before we start poking wires into vegetables, it’s helpful to understand the “why” behind this cool experiment. When you’re trying to figure out how do you make a potato powered light bulb, you’re essentially building a very simple battery, also known as a voltaic or galvanic cell.
What’s a Voltaic Cell?
A voltaic cell is a device that converts chemical energy into electrical energy through a spontaneous oxidation-reduction (redox) reaction. It typically consists of two different metals (electrodes) immersed in an electrolyte solution. In our case, the potato provides the electrolyte!
The Role of the Potato (Electrolyte)
The potato isn’t just a container; it’s an active participant! Its moist, acidic flesh contains phosphoric acid, which acts as the electrolyte. An electrolyte is a substance that contains free ions, allowing electricity to be conducted through it. These ions are crucial because they allow for the movement of charge between the two different metal electrodes you’ll be using. Without the potato’s electrolyte, the chemical reaction needed to produce electricity simply wouldn’t happen.
The Role of the Metals (Electrodes)
For your potato battery, you’ll need two different types of metal. The most common and effective combination is zinc and copper. Here’s why:
- Zinc (Negative Electrode/Anode): Zinc is more reactive than copper. When placed in the potato’s acidic environment, the zinc atoms readily give up electrons. This process is called oxidation, and it creates a negative charge on the zinc electrode.
- Copper (Positive Electrode/Cathode): Copper is less reactive than zinc. It acts as the site where the electrons, after traveling through an external circuit (your wires and LED), are received. In the potato battery, hydrogen ions from the acid gain these electrons and become hydrogen gas, completing the circuit. This process is called reduction.
The difference in reactivity between these two metals is what drives the electrons to flow from the zinc, through your external circuit (lighting your LED!), and to the copper.
How It Generates Electricity
So, how do you make a potato powered light bulb light up with this setup? Here’s the simplified breakdown:
- The zinc electrode, being more reactive, starts to corrode (oxidize) within the potato’s acid, releasing electrons.
- These released electrons build up on the zinc, creating a negative charge.
- When you connect an external circuit (wires to an LED) between the zinc and copper, these electrons are “pulled” towards the positively charged copper electrode.
- As electrons flow from the zinc through the external circuit to the copper, they generate an electric current – and this current is what will power your light bulb!
- Inside the potato, positive ions (like hydrogen ions from the phosphoric acid) migrate towards the copper electrode to balance the charge, completing the internal circuit.
This continuous flow of electrons is the electricity we harness. Each potato cell can typically generate about 0.5 to 0.9 volts, depending on the potato and metals used.
Gathering Your Materials: What You’ll Need
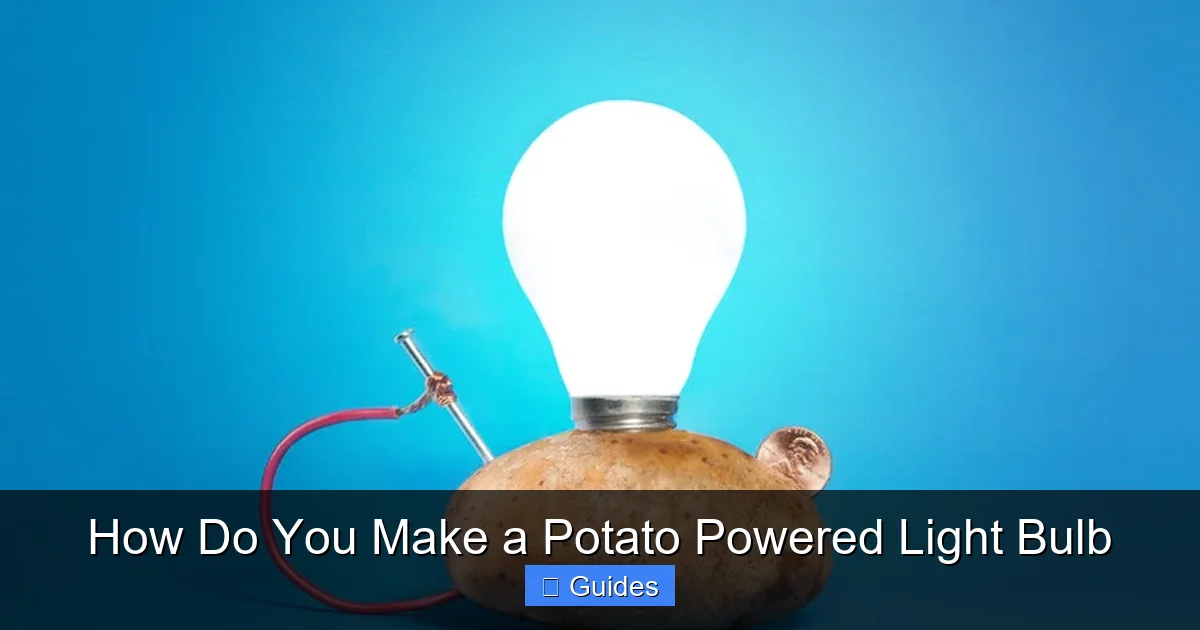
Visual guide about How Do You Make a Potato Powered Light Bulb
Image source: sciencing.com
Now that you understand the science, let’s get practical. To answer the question of how do you make a potato powered light bulb, you’ll need to gather a few readily available items.
The Star: Your Potato Choices
You don’t need any special kind of potato. Regular russet, Yukon Gold, or even red potatoes will work just fine.
- Quantity: Plan on using at least 3-5 potatoes to reliably light a standard low-voltage LED. More is always better for experimenting!
- Size: Larger potatoes tend to work better as they offer more surface area for the chemical reaction.
- Condition: Fresh, firm potatoes are ideal. Avoid potatoes that are soft, moldy, or sprouting excessively.
The Electrodes: Zinc and Copper Are Key
This is where the magic happens!
- Zinc Electrodes:
- Galvanized Nails or Screws: These are excellent because they are coated in zinc. Look for nails specifically labeled “galvanized.” Common steel nails will not work as well, if at all.
- Zinc Strips: If you can find actual zinc strips from a hardware or hobby store, even better!
- Copper Electrodes:
- Copper Pennies (Pre-1982): Pennies minted before 1982 are almost pure copper and work great. Newer pennies are zinc-core with a copper coating, which can cause issues.
- Copper Wire: Bare copper wire (like electrical grounding wire, or even stripped household wire) cut into strips or small coils is perfect.
- Copper Strips: Similar to zinc, dedicated copper strips are ideal if available.
Aim for electrodes that are long enough to be inserted well into the potato without touching each other.
The Light: Low-Voltage LED
You can’t light a standard incandescent bulb with a potato battery. They require too much voltage and current.
- LED (Light Emitting Diode): You’ll need a low-voltage LED, typically rated for 1.5 to 3 volts. Red, yellow, or green LEDs often have lower voltage requirements (around 1.5-2V) than blue or white LEDs (around 3V). Start with a red LED if you’re unsure.
- Important Note: LEDs are diodes, meaning current only flows in one direction. They have a positive lead (anode, usually longer) and a negative lead (cathode, usually shorter). Pay attention to this when connecting!
Connecting It All: Wires and Tools
- Alligator Clip Wires: These are incredibly helpful for quickly and securely connecting your potato cells and LED without soldering. Get a pack with different colors for easier circuit tracing.
- Small Knife or Slotted Screwdriver: For making small slits in the potato to insert the electrodes.
- Multimeter (Optional but Recommended): This tool allows you to measure the voltage and current produced by your battery, giving you valuable insight into its performance.
- Sandpaper or Steel Wool (Optional): To clean the electrodes if they are tarnished, ensuring good electrical contact.
Safety First!
While this is a relatively safe experiment, always exercise caution:
- Adult Supervision: Children should always be supervised by an adult when using sharp objects or handling small electrical components.
- Sharp Objects: Be careful when using knives or screwdrivers to prepare the potatoes.
- Choking Hazard: Small LED bulbs and wires can be choking hazards for young children.
Step-by-Step Guide: Building Your Potato Battery
Now for the exciting part! Let’s get down to the nitty-gritty of how do you make a potato powered light bulb.
Preparing Your Potato for Maximum Power
This step isn’t strictly necessary, but it can significantly boost your battery’s performance and longevity.
- Clean Your Potatoes: Wash off any dirt.
- The Boiling Trick (Highly Recommended):
- Place your potatoes in a pot of water.
- Bring the water to a boil and let the potatoes boil for about 8-10 minutes. Don’t cook them until they’re soft enough to eat; you want them still firm.
- Carefully remove the potatoes from the hot water and let them cool down completely.
- Why this helps: Boiling breaks down the potato’s cell walls, allowing the ions within the potato to move more freely, which in turn improves conductivity and increases the battery’s power output.
Inserting the Electrodes Correctly
This is crucial for establishing the voltaic cell.
- Clean Electrodes: If your galvanized nails or copper pieces are dirty or tarnished, give them a quick scrub with sandpaper or steel wool to ensure good electrical contact.
- Make Slits: Use your small knife or slotted screwdriver to make two small, parallel slits on one side of each potato. These slits should be about 1 to 2 inches apart. Ensure they are deep enough to insert the electrodes securely.
- Insert Electrodes:
- Gently push one galvanized nail (zinc electrode) into one slit of the potato.
- Then, push one copper piece (copper electrode) into the other slit of the same potato.
- Critical Point: Ensure the two electrodes do NOT touch inside the potato. If they touch, you’ll create a short circuit, and no electricity will flow through your external circuit.
- Leave enough of the electrodes exposed outside the potato so you can attach your alligator clips easily.
Congratulations! You’ve just created a single potato cell. If you have a multimeter, you can touch its probes to the copper (positive) and zinc (negative) electrodes of a single potato. You should read about 0.5 to 0.9 volts.
Wiring Your Potato Cell
Before attempting to light the bulb, let’s understand how to connect multiple cells. A single potato battery usually won’t be enough to light an LED. LEDs typically require 1.5 to 3 volts, and a single potato only provides less than 1 volt. This means you’ll need to connect several potatoes together.
Connecting Multiple Potatoes in Series
To increase the voltage, you need to connect your potato cells in a “series” arrangement. This is similar to how batteries are arranged in a flashlight.
- Identify Polarity: Remember, the copper electrode is your positive (+) terminal, and the zinc electrode is your negative (-) terminal for each potato cell.
- Series Connection Rule: To connect in series, you always connect the negative terminal of one cell to the positive terminal of the next cell.
- Step-by-Step Wiring:
- Take your first potato. Connect an alligator clip wire from its copper (+) electrode. Let this wire hang free for now – this will be your final positive output.
- Now, connect another alligator clip wire from the zinc (-) electrode of the first potato to the copper (+) electrode of the second potato.
- Continue this pattern: connect the zinc (-) electrode of the second potato to the copper (+) electrode of the third potato.
- Keep going until you’ve connected all your potatoes this way. The last potato in your chain will have a free zinc (-) electrode. This will be your final negative output.
- Visual Check: You should have a continuous chain, with the zinc of one potato always connected to the copper of the next. At the ends of your chain, you’ll have one free copper (positive) and one free zinc (negative) electrode.
If you have a multimeter, now is a great time to measure the total voltage across the free positive and negative ends of your potato battery chain. If you used 4 potatoes and each gives 0.7V, you should measure roughly 2.8V (4 x 0.7V). This is often enough to power a typical red or yellow LED.
Powering a Light Bulb: Series Connections for Success
Now for the moment of truth! Let’s answer the core question: how do you make a potato powered light bulb illuminate with your homemade battery.
Why One Potato Isn’t Enough for Most LEDs
As mentioned, a single potato provides less than 1 volt. Most common LEDs require at least 1.5 to 2 volts to light up, with some white or blue LEDs needing 3 volts or more. This is why connecting potatoes in series is absolutely essential. By adding the voltages of individual potato cells, you accumulate enough potential difference to overcome the LED’s forward voltage requirement.
Attaching Your LED Light
Remember the polarity of your LED!
- Identify LED Leads: The longer lead of an LED is typically the positive (anode), and the shorter lead is the negative (cathode).
- Connect to Your Battery:
- Connect the positive (longer) lead of your LED to the free copper (+) electrode (or the positive output wire) of your potato battery chain.
- Connect the negative (shorter) lead of your LED to the free zinc (-) electrode (or the negative output wire) of your potato battery chain.
- Observe! If you’ve made all the connections correctly and have enough voltage, your LED should light up! It might glow faintly at first, but it should be visible.
If it doesn’t light up immediately, don’t worry! This is part of the troubleshooting process.
Troubleshooting Common Issues
It’s common for things not to work perfectly on the first try. Here’s what to check if your LED isn’t lighting up:
- LED Polarity: Is the LED connected correctly? Try reversing the LED’s leads. LEDs only allow current in one direction.
- Loose Connections: Are all alligator clips firmly attached to the electrodes and LED leads? Wiggle them a bit to ensure good contact.
- Electrodes Touching: Are the zinc and copper electrodes touching inside any of the potatoes? If so, separate them to prevent a short circuit.
- Insufficient Voltage: Have you connected enough potatoes in series? Measure the total voltage of your battery chain with a multimeter. If it’s below the LED’s rated voltage, you’ll need more potatoes. For a typical red LED (around 1.7-2V), you might need 3-4 potatoes. For a white LED (around 3-3.2V), you might need 5-6 potatoes.
- Dirty Electrodes: Ensure your electrodes are clean and free of corrosion or tarnish.
- Dead LED: While rare, LEDs can be faulty. Try a different LED if you have one.
- Boiling Effect: If you didn’t boil your potatoes, try doing so. It really does make a difference in output.
Patience and methodical checking are key! Once it lights up, you’ve successfully learned how do you make a potato powered light bulb!
Boosting Your Potato Battery & Experimenting Further
You’ve lit an LED, but the fun doesn’t have to stop there! There are ways to improve your potato battery and explore other possibilities.
The Boiling Trick: More Power Per Potato
We mentioned it earlier, but it bears repeating: boiling your potatoes for 8-10 minutes (and letting them cool) significantly enhances their conductivity. The heat breaks down the internal cell walls, creating less internal resistance and allowing ions to move more freely, which means more current and slightly higher voltage per potato. This can make a noticeable difference in how brightly your LED glows or how many potatoes you need.
Other Food Batteries?
Potatoes aren’t the only produce that can act as an electrolyte! Many other fruits and vegetables can be used.
- Lemons and Limes: These are classic for battery experiments due to their high citric acid content.
- Apples: Similar to potatoes, apples contain malic acid.
- Oranges, Grapefruits: Any acidic fruit can potentially work.
- Tomatoes: Another viable option, though often messier.
The principle is the same: acidic fluid acts as the electrolyte, and two dissimilar metals (zinc and copper) facilitate the electron flow. Experiment to see which food provides the best output!
Measuring Voltage and Current
If you have a multimeter, you can take your experimentation further:
- Voltage (V): Measure the open-circuit voltage across your potato battery chain. This tells you the potential difference available.
- Current (A or mA): Measure the short-circuit current (briefly connect the probes directly to the output terminals) or the current flowing through your LED (by connecting the multimeter in series with the LED). This tells you how many electrons are actually flowing. A higher current means a brighter light.
Comparing voltage and current for boiled vs. unboiled potatoes, or different types of fruits, can provide fascinating insights into electrochemistry.
Practical Applications (Beyond Just a Light)
While a potato battery won’t power your TV, understanding how do you make a potato powered light bulb opens doors to appreciating power generation. Beyond just an LED, you could try to power:
- A Small LCD Clock: Many small digital clocks require very little power and can often run on a few potato cells for a surprisingly long time.
- A Tiny Buzzer: Low-power buzzers or speakers can also be driven by a potato battery, demonstrating sound generation from chemical energy.
This project highlights the fundamental concept of converting chemical energy into electrical energy, a process that is vital in countless technologies, from car batteries to pacemakers. It teaches about circuits, series connections, voltage, and current in a tangible, memorable way.
Conclusion
So there you have it! You’ve successfully embarked on a scientific journey, transforming a common potato into a source of electrical power. You’ve learned how do you make a potato powered light bulb by understanding the roles of the electrolyte and electrodes, mastering the art of series connections, and troubleshooting common hurdles. This project isn’t just about lighting an LED; it’s about igniting curiosity, fostering a love for science, and demonstrating that amazing scientific principles are at play all around us, even in our kitchen pantries.
The next time you see a potato, you might just remember its secret potential. Whether you’re a budding scientist, a curious parent, or an educator looking for an engaging lesson, the potato battery project is a brilliant way to explore the wonders of electrochemistry and basic circuits. So go ahead, grab some spuds, gather your materials, and light up your world – one potato at a time!
🎥 Related Video: Potato POWER: How to make a potato light bulb
📺 Cass County Electric Cooperative
The potato light bulb experiment is the perfect project to make at home! This simple and effective science experiment is a great …
Frequently Asked Questions
Is a potato battery dangerous?
No, a potato battery is very safe. The voltage and current produced are extremely low and pose no risk of electric shock. The main safety considerations are handling sharp objects (knives, nails) during assembly and ensuring adult supervision for children.
Can other fruits or vegetables be used instead of potatoes?
Yes, many other acidic fruits and vegetables can function as electrolytes in a battery. Lemons, limes, oranges, apples, and even tomatoes are popular alternatives, with lemons often yielding a good amount of power due to their high citric acid content.
Why do I need two different metals?
Two different metals are essential because their differing reactivity in the presence of the potato’s acid creates an electrochemical potential difference. One metal (e.g., zinc) readily loses electrons (oxidation), while the other (e.g., copper) accepts them (reduction), driving the flow of electricity through an external circuit.
What is the maximum voltage a potato battery can produce?
A single potato cell typically produces between 0.5 to 0.9 volts. To achieve higher voltages, you must connect multiple potato cells in series, where their individual voltages add up. For example, five potatoes might produce around 3-4.5 volts.
Will a larger potato make a stronger battery?
Generally, a larger potato can store more electrolyte and provide more surface area for the chemical reactions with the electrodes. This often results in a battery that can sustain current for a longer period and potentially slightly higher current output, though the voltage per potato remains roughly the same.
Why doesn’t the potato itself light up?
The potato itself doesn’t light up because it’s not designed to emit light; it acts as an electrolyte to facilitate the flow of electrons between the metals. The light is produced by the LED (Light Emitting Diode), which converts the electrical energy generated by the potato battery into light.