Replacing a fluorescent light bulb doesn’t have to be intimidating! This comprehensive guide walks you through the entire process, emphasizing safety first by always turning off the power. You’ll learn how to identify the correct replacement bulb, gather essential tools, and follow simple steps to remove the old bulb and install a new one, ensuring your space is brightly lit again in no time.
Do you have a flickering fluorescent light that’s driving you batty? Or perhaps one that’s just given up the ghost entirely, leaving a dark void in your kitchen, garage, or workshop? You’re not alone! Fluorescent lighting has been a staple in many homes and commercial spaces for decades, offering bright, efficient illumination. However, like all light sources, they eventually reach the end of their lifespan, and knowing how to replace a fluorescent light bulb is a valuable skill that can save you time and money.
Many people feel a little intimidated by fluorescent lights, perhaps due to their size, the hum they sometimes emit, or the slightly more involved replacement process compared to a traditional incandescent bulb. But here’s the good news: replacing a fluorescent light bulb is a straightforward task that most DIYers can tackle with a little preparation and the right instructions. We’re going to break down everything you need to know, from ensuring your safety to properly disposing of the old bulb, making the process as smooth and painless as possible.
In this friendly guide, we’ll walk you through each step, ensuring you understand the “why” behind each action, not just the “how.” By the end, you’ll feel confident in your ability to swap out those old, tired tubes and bring bright, reliable light back into your space. So, let’s roll up our sleeves and learn how to replace a fluorescent light bulb safely and effectively!
Key Takeaways
- Safety is Paramount: Always turn off the power to the fixture at the circuit breaker before you begin to prevent electrical shocks.
- Identify the Right Bulb: Know your bulb’s type (T8, T12, etc.), length, wattage, and pin configuration to ensure you buy the correct replacement.
- Gather Essential Tools: A sturdy stepladder, gloves, safety glasses, and potentially a non-contact voltage tester are crucial for a safe and efficient replacement.
- Gentle Removal and Installation: Fluorescent tubes are fragile. Handle them carefully, rotating to release and install, avoiding excessive force.
- Proper Disposal is Key: Fluorescent bulbs contain mercury, so never just throw them in regular trash. Look for local recycling programs or designated collection sites.
- Troubleshooting Tips: If the new bulb doesn’t work, check power, connections, and the ballast before assuming the bulb is faulty.
- Consider LED Upgrades: While replacing, consider upgrading to LED tubes for better energy efficiency, longer lifespan, and improved light quality.
Quick Answers to Common Questions
Can I touch a fluorescent bulb with bare hands?
While it’s generally safe to touch the glass with bare hands when installing, wearing gloves is recommended. Fingerprints can leave oils that might shorten the bulb’s life or create hot spots, and gloves also provide better grip and protection if the bulb breaks.
Do I need to replace the ballast when I replace a fluorescent light bulb?
Not always. You only need to replace the ballast if it’s faulty. If the new bulb doesn’t work or flickers persistently, even after proper installation, then a failing ballast is a likely culprit.
Can I replace a T12 bulb with a T8 bulb?
You generally cannot directly replace a T12 bulb with a T8 bulb without changing the ballast, as T8 bulbs require a more energy-efficient electronic ballast, while T12 fixtures typically have older magnetic ballasts. There are special “hybrid” LED tubes designed to work with either, or you can replace the ballast or the entire fixture.
How often should I replace a fluorescent light bulb?
Fluorescent bulbs typically last between 7,000 to 24,000 hours, depending on the type and usage. Signs that it’s time to replace include flickering, dimming, slow starting, or blackened ends.
What if I drop and break a fluorescent bulb?
If a fluorescent bulb breaks, there’s a small amount of mercury vapor released. Open windows to ventilate the area, and carefully scoop up all glass fragments and powder using stiff paper or cardboard. Do not use a vacuum cleaner, as it can spread mercury-containing powder. Place all materials in a sealed plastic bag and dispose of it at a hazardous waste facility.
📑 Table of Contents
- Safety First: Your Top Priority When Replacing a Fluorescent Light Bulb
- Identifying Your Fluorescent Light Bulb: What Kind Do You Need?
- Tools and Materials You’ll Need
- Step-by-Step Guide: How to Replace a Fluorescent Light Bulb
- Troubleshooting Common Fluorescent Bulb Issues
- Proper Disposal of Old Fluorescent Bulbs
- Conclusion: Light Up Your Space with Confidence
Safety First: Your Top Priority When Replacing a Fluorescent Light Bulb
Before you even think about touching that flickering tube, safety needs to be your number one concern. Working with electricity always carries risks, but by taking a few simple precautions, you can prevent accidents and ensure a smooth replacement process. Remember, knowing how to replace a fluorescent light bulb safely is just as important as knowing the steps themselves.
Always Kill the Power
This is the most critical step. Do not skip it!
- Locate Your Breaker Box: Find your home or office’s electrical service panel, usually a metal box in a garage, basement, utility closet, or outside.
- Identify the Right Breaker: Look for the breaker that controls the room or specific fixture where you’ll be working. Breakers are often labeled, but if yours aren’t, you might need to test them. Turn off the main breaker if you’re unsure, though this will cut power to your entire space.
- Flip the Breaker Off: Once you’ve identified the correct breaker, flip it to the “OFF” position.
- Verify No Power: Before touching anything on the fixture, use a non-contact voltage tester to confirm that the power is indeed off. Touch the tester to the wires leading into the fixture or the metal components of the fixture itself. If it doesn’t light up or beep, you’re good to go. If it does, recheck the breaker.
Protect Yourself
Once the power is off, it’s time to prepare your personal safety.
- Wear Safety Glasses: Fluorescent tubes are made of glass and can shatter if dropped or handled roughly. Eye protection is essential to guard against flying shards.
- Gloves are Recommended: While not strictly necessary for electrical safety once the power is off, gloves can protect your hands from sharp edges, dust, or even trace amounts of mercury if a bulb breaks. Plus, they improve grip.
- Use a Sturdy Ladder: If the fixture is overhead, use a stable stepladder or extension ladder. Never stand on chairs, tables, or anything wobbly. Have someone spot you if possible.
Identifying Your Fluorescent Light Bulb: What Kind Do You Need?
Before you can replace a fluorescent light bulb, you need to know what kind of bulb you’re replacing! Fluorescent lights come in several varieties, and choosing the wrong one means it won’t fit or work properly.
Linear Fluorescent Tubes (The Long Ones)
These are the most common type people think of when they hear “fluorescent light bulb.” They are long, cylindrical tubes.
- Diameter (T-Rating): This is crucial. Fluorescent tubes are classified by their diameter in eighths of an inch.
- T12: These older bulbs are 1.5 inches (12/8ths) in diameter.
- T8: These are 1 inch (8/8ths) in diameter and are more energy-efficient than T12s.
- T5: These are 5/8ths of an inch in diameter, even more energy-efficient, and often found in smaller or more modern fixtures.
How to check: Look for markings on the end of the existing bulb. It will usually say something like “F40T12” (meaning 40-watt, T12 tube) or “F32T8.” If not, you can measure the diameter.
- Length: Standard lengths include 2 feet, 4 feet, and 8 feet. Measure your existing bulb from end to end (including the pins) to ensure you get the correct length.
- Wattage: The wattage is usually indicated in the bulb’s model number (e.g., F40T12 is 40 watts). Match the wattage to your fixture’s requirements. Using a bulb with too high a wattage can damage the fixture’s ballast.
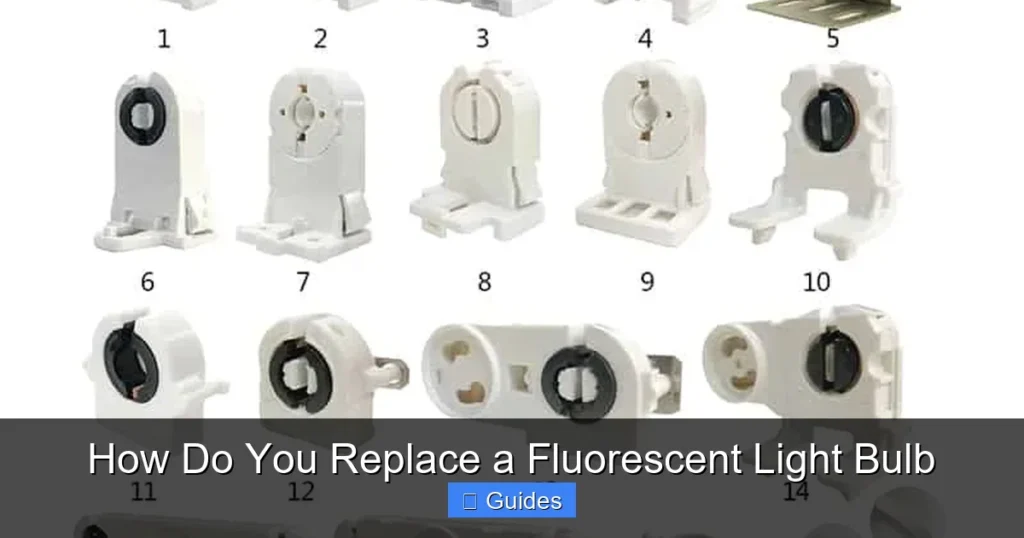
- Pin Configuration: Most linear fluorescents use a “bi-pin” base, meaning two pins on each end. Ensure the pins on your new bulb match the sockets of your fixture.
Compact Fluorescent Lamps (CFLs)
These are often spiral-shaped or U-shaped and screw into standard incandescent sockets, though some have pin bases for specific fixtures. If you’re replacing a screw-in CFL, the process is much like an incandescent bulb (unscrew, screw in). If it’s a pin-based CFL, note the number of pins and the base type.
Consider an LED Upgrade
While you’re at it, you might consider upgrading to LED tubes. These are more energy-efficient, last longer, and don’t contain mercury.
- Ballast Compatibility: Some LED tubes are “ballast-compatible” (plug-and-play), meaning they work with your existing fluorescent ballast. Others are “ballast-bypass” (direct wire), which requires minor rewiring to remove the ballast.
- “Hybrid” LEDs: These offer both options.
Always check the specifications of any LED replacement bulb carefully to ensure it’s compatible with your fixture. If you’re unsure about rewiring, consult an electrician.
Tools and Materials You’ll Need
Gathering your supplies beforehand will make the process much smoother. When you’re ready to replace a fluorescent light bulb, having everything at hand means fewer trips up and down the ladder.
- New Fluorescent Bulb(s): Ensure you have the correct type, length, wattage, and pin configuration, as discussed above.
- Sturdy Stepladder: For reaching overhead fixtures safely.
- Safety Glasses: To protect your eyes.
- Work Gloves: For better grip and hand protection.
- Non-Contact Voltage Tester: Essential for verifying the power is off.
- Soft Cloth or Paper Towels: For cleaning the fixture or bulb ends.
- Small Trash Can or Container: For safe disposal of the old bulb.
Step-by-Step Guide: How to Replace a Fluorescent Light Bulb
Now that safety is covered and you have your materials, it’s time for the actual replacement. Follow these steps carefully to replace a fluorescent light bulb.
Step 1: Turn Off the Power and Set Up
As emphasized, this is critical. Go to your circuit breaker panel and flip the switch for the fixture you’re working on to the “OFF” position. Use your non-contact voltage tester to double-check that no power is reaching the fixture. Place your sturdy ladder directly beneath the fixture, ensuring it’s stable. Put on your safety glasses and gloves.
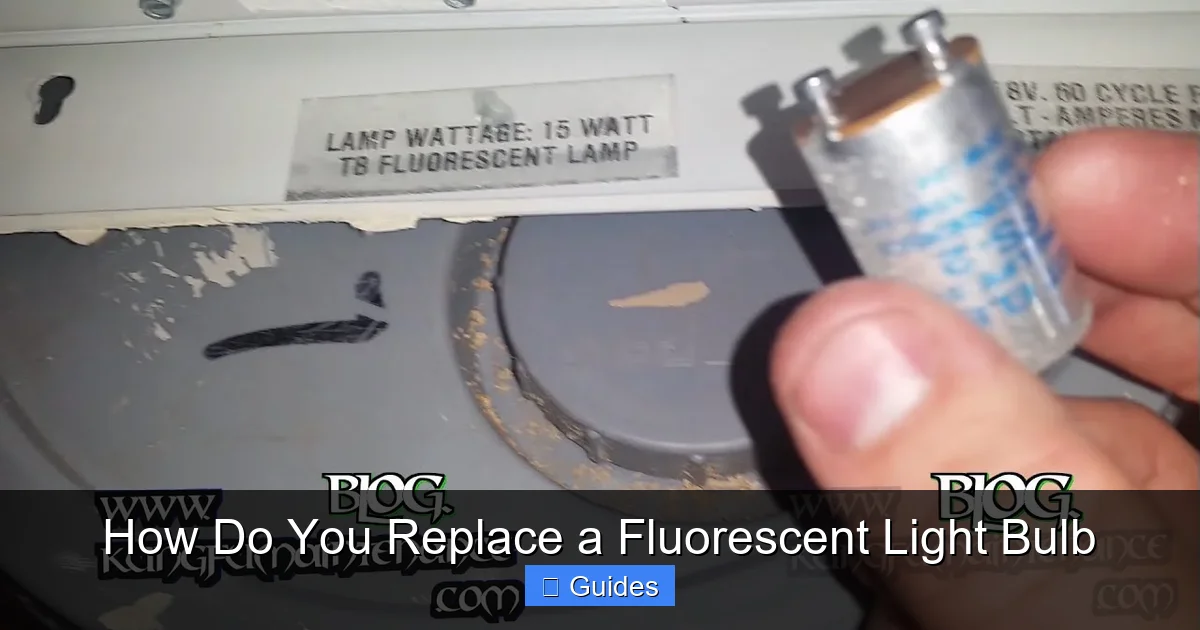
Visual guide about How Do You Replace a Fluorescent Light Bulb
Image source: i.ytimg.com
Step 2: Remove Any Diffuser or Cover
Many fluorescent fixtures have a plastic or glass diffuser (cover) that clips on, slides off, or is held in place by latches or screws. Carefully remove this cover and set it aside in a safe place where it won’t break. Be mindful if it’s glass; it can be heavy and fragile.
Step 3: Remove the Old Fluorescent Bulb
This step requires a gentle touch. Fluorescent tubes are fragile and can break if forced.
- Rotate the Bulb: Grasp the fluorescent tube near one end. Gently rotate the tube about a quarter turn (90 degrees) in either direction. You should feel the pins disengage from the sockets.
- Slide Out the Bulb: Once the pins are disengaged, carefully slide the bulb out of the sockets. Hold it firmly but gently with both hands, supporting its length, to avoid bending or snapping it.
- Lower Carefully: Bring the old bulb down from the ladder slowly and place it in your designated container for disposal.
Step 4: Clean the Fixture (Optional, but Recommended)
While the fixture is open, it’s a great time to give it a quick clean. Dust can accumulate inside the fixture and on the reflectors, reducing light output. Use a soft, dry cloth or a damp cloth (if you’re absolutely sure the power is off and you’ll let it dry completely) to wipe away any dust or grime. You can also wipe the socket ends to ensure good contact for the new bulb.
Step 5: Install the New Fluorescent Bulb
Installing the new bulb is essentially the reverse of removal.
- Position the New Bulb: Carefully take your new fluorescent bulb (still wearing gloves for a better grip and to keep it clean). Position the pins on each end of the bulb into the slots of the sockets.
- Engage the Pins: Once the pins are seated in the slots, gently rotate the bulb about a quarter turn (90 degrees) until you feel the pins lock into place. You should feel a slight click or resistance as they engage. Make sure it feels secure and doesn’t wobble.
Step 6: Replace the Diffuser and Restore Power
Once the new bulb is securely in place, carefully reattach the diffuser or cover you removed earlier. Make sure it’s properly seated and latched. Descend your ladder, put away your tools, and then return to your circuit breaker panel. Flip the breaker back to the “ON” position. Your new fluorescent light bulb should now illuminate!
Troubleshooting Common Fluorescent Bulb Issues
What if you replace a fluorescent light bulb, and it still doesn’t work? Don’t despair! Here are a few common issues and their solutions.
New Bulb Doesn’t Light Up at All
- Check Power: Double-check that the breaker is definitely on. Sometimes breakers can trip unexpectedly.
- Check Bulb Seating: Ensure the new bulb is fully seated and rotated correctly in the sockets. Remove and reinstall it, making sure the pins are firmly engaged.
- Test with Another Bulb: If you have another working fluorescent bulb of the same type, try it in the fixture. If that one works, your new bulb might be faulty (though rare).
- Consider the Ballast: The ballast is an electrical component inside the fixture that regulates current to the bulb. If the ballast is old or faulty, it won’t ignite the bulb. Replacing a ballast is a more involved task, often requiring an electrician. Signs of a failing ballast include humming, flickering, or slow starts before total failure.
New Bulb Flickers
- Loose Connection: Again, ensure the bulb is securely seated and the pins have good contact.
- Temperature: Fluorescent bulbs can flicker in very cold environments until they warm up.
- Failing Ballast: Persistent flickering is a strong indicator of a dying ballast.
- Wrong Bulb Type: Ensure the wattage and type (T8, T12, etc.) of your new bulb exactly match the fixture’s requirements.
End of Bulb is Dark or Blackened
This is a normal sign of an aging fluorescent bulb reaching the end of its life, even if the rest of the tube still lights up. It’s time to replace a fluorescent light bulb when you see this.
Proper Disposal of Old Fluorescent Bulbs
This is an important, often overlooked step when you replace a fluorescent light bulb. Fluorescent tubes contain small amounts of mercury, which is a hazardous substance. They should never be thrown into your regular household trash or recycling bin.
- Check Local Regulations: Look up hazardous waste disposal facilities or recycling programs in your municipality or county. Many hardware stores (like Home Depot or Lowe’s), municipal recycling centers, or household hazardous waste collection events will accept fluorescent bulbs for free.
- Safe Transport: When transporting old bulbs, try to keep them in their original packaging or wrap them carefully in newspaper to prevent breakage.
- Mercury-Free Alternatives: As mentioned, consider switching to LED tubes in the future to avoid mercury and gain energy efficiency benefits.
Conclusion: Light Up Your Space with Confidence
Congratulations! You’ve successfully learned how to replace a fluorescent light bulb, from ensuring your safety to properly disposing of the old tube and troubleshooting potential issues. It’s a skill that empowers you to keep your home or workspace brightly lit and running efficiently without always calling in a professional.
Remember, the key takeaways are always prioritizing safety by turning off the power, identifying the correct replacement bulb, handling tubes gently, and disposing of them responsibly. With these steps, replacing a fluorescent light bulb is a task you can tackle with confidence. Enjoy your newly illuminated space, and rest easy knowing you’ve done it yourself!
Frequently Asked Questions
What causes fluorescent lights to flicker?
Fluorescent lights can flicker for several reasons. Common causes include an aging or failing bulb, a faulty ballast (the component that regulates current), cold temperatures in the environment, or sometimes loose connections within the fixture. Ensuring the bulb is correctly seated can sometimes resolve minor flickering.
Are fluorescent light bulbs still available for purchase?
Yes, fluorescent light bulbs are still available, though their availability is becoming more limited due to bans and increased adoption of LED technology. Many regions have phased out certain types of fluorescent bulbs, especially less energy-efficient T12 models, but T8 and T5 bulbs can still be found at hardware stores and online retailers.
Is it safe to touch the pins of a fluorescent bulb?
Once the power to the fixture has been completely turned off at the circuit breaker, it is generally safe to touch the pins of a fluorescent bulb. However, always verify that the power is off using a non-contact voltage tester before touching any part of the fixture or bulb pins to ensure your safety.
How do I know if my fluorescent fixture has a bad ballast?
Signs of a bad ballast often include buzzing or humming sounds coming from the fixture, flickering bulbs even after replacement, or bulbs that don’t light up at all despite being new and correctly installed. A very old ballast might also emit a burning smell. Replacing a ballast usually requires electrical knowledge, so consider calling a professional.
Can I replace a fluorescent fixture with an LED fixture?
Yes, you can absolutely replace an entire fluorescent fixture with a new LED fixture. This is often an excellent upgrade for energy efficiency and lighting quality. Alternatively, you can use “ballast-bypass” LED tubes that require minor rewiring to remove the old ballast, or “plug-and-play” LED tubes that work with existing compatible ballasts.
What is the difference between a T8 and a T12 fluorescent bulb?
The main difference between T8 and T12 fluorescent bulbs lies in their diameter and energy efficiency. T12 bulbs are 1.5 inches in diameter and typically use older magnetic ballasts. T8 bulbs are 1 inch in diameter, more energy-efficient, and designed to work with electronic ballasts. T8s provide better light output per watt and have largely replaced T12s.