Don’t let a burnt-out tail light put you at risk or cost you a ticket! Learning how to change a tail light bulb yourself is a simple, cost-effective DIY project that anyone can tackle. This comprehensive guide walks you through every step, from identifying the correct bulb to safely replacing it and getting back on the road with confidence.
How to Change a Tail Light Bulb
Picture this: you’re driving along, enjoying your commute, when a friendly passerby or a vigilant police officer signals you that one of your tail lights is out. It’s a common occurrence, but one that shouldn’t be ignored. A non-functioning tail light isn’t just an inconvenience; it’s a significant safety hazard that drastically reduces your visibility to other drivers, especially at night or in bad weather. Plus, in many places, it’s illegal and can lead to an unexpected traffic ticket!
The good news? Learning how to change a tail light bulb yourself is one of the simplest and most rewarding car maintenance tasks you can undertake. You don’t need to be a seasoned mechanic, nor do you need a garage full of specialized tools. With a little guidance, some basic tools, and a few minutes of your time, you can tackle this project, save money on labor costs, and get back on the road safely and legally. This comprehensive guide will walk you through every step, ensuring you have the confidence to successfully change your tail light bulb.
Key Takeaways
- Safety First: Always turn off your vehicle and engage the parking brake before starting any work. Consider wearing gloves to protect your hands and avoid touching the new bulb directly.
- Identify the Correct Bulb: Before you begin, consult your car’s owner’s manual or use an online bulb finder tool to ensure you purchase the exact replacement tail light bulb. There are different types, and using the wrong one can cause electrical issues.
- Gather Your Tools: Most tail light bulb changes require only basic tools like screwdrivers (Phillips and flathead), a small socket wrench set, and potentially a trim removal tool. Have them ready to streamline the process.
- Accessing the Assembly: The most common method involves opening the trunk and looking for screws or clips that hold the tail light assembly in place. Some vehicles may require removing interior trim panels.
- Gentle Removal and Installation: When removing the old bulb, twist the socket counter-clockwise and then gently pull the bulb straight out. For installation, align the new bulb correctly, push it firmly into the socket, and twist the socket clockwise to secure.
- Test Before Reassembly: Crucially, test the new tail light bulb by turning on your vehicle’s lights before fully reassembling everything. This saves you from having to take it apart again if the bulb doesn’t work.
Quick Answers to Common Questions
Can I drive with a tail light out?
No, driving with a tail light out is generally illegal and unsafe. It significantly reduces your vehicle’s visibility to other drivers, especially at night, increasing the risk of an accident. You could also receive a traffic ticket.
How long does it take to change a tail light bulb?
For most vehicles, changing a tail light bulb is a quick job that takes anywhere from 10 to 30 minutes, depending on how easily you can access the bulb assembly.
Do I need special tools to change a tail light bulb?
Most tail light bulb changes only require basic tools like Phillips and flat-head screwdrivers, and sometimes a small socket wrench set. A plastic trim removal tool can be helpful for interior panels.
How often should I change my tail light bulbs?
Tail light bulbs typically last for several years, often 500 to 1000 hours of use. You only need to change them when they burn out, though it’s a good idea to check them periodically.
What if my new tail light bulb doesn’t work after installation?
If a new bulb doesn’t work, first check that it’s seated properly and is the correct type. Then, inspect the fuse for the tail lights and the bulb socket for any corrosion or damage. Try another new bulb if you suspect the first one was faulty.
📑 Table of Contents
- Step 1: Diagnosing the Problem and Finding the Right Replacement Bulb
- Step 2: Gathering Your Tools and Prioritizing Safety
- Step 3: Accessing the Tail Light Bulb Assembly
- Step 4: The Bulb Replacement Process
- Step 5: Reassembly and Final Checks
- Troubleshooting Common Issues and When to Call a Pro
- Conclusion: Drive Safely and Proudly
Step 1: Diagnosing the Problem and Finding the Right Replacement Bulb
Before you dive into the exciting world of automotive repairs, the first order of business is to confirm that the issue is indeed a burnt-out tail light bulb and to identify the correct replacement. Sometimes, what seems like a simple bulb issue can be something else entirely, like a blown fuse or a wiring problem. But more often than not, it’s just the bulb.
Is Your Tail Light Really Out? Checking the Basics
It sounds obvious, but let’s make sure. Have someone stand behind your car while you engage the brakes, turn on your headlights, and then your hazard lights. Your tail lights typically serve multiple functions: they glow dimly when your headlights are on (running lights), glow brighter when you press the brake pedal (brake lights), and flash with your turn signals and hazard lights. Check all of these functions. If only one function is out (e.g., only the brake light but not the running light), it might indicate a dual-filament bulb where one filament has failed, or a specific fuse. If all functions on one side are dead, it’s almost certainly the bulb or a fuse.
Don’t forget to check the other side too! Sometimes, people forget to check the working side to compare. Also, make sure your car’s light switch is actually on the “headlights” or “running lights” setting, not just “auto” or “off.”
Understanding Tail Light Bulb Types
Not all tail light bulbs are created equal. There are a few common types you might encounter:
- Incandescent Bulbs: These are the traditional glass bulbs with a visible filament, much like old household light bulbs. They come in various shapes and sizes (e.g., 1157, 3157, 7443) and can be single-filament (one brightness) or dual-filament (two brightnesses for running and brake lights).
- LED Bulbs: Many newer vehicles use LED (Light Emitting Diode) lights, which are more energy-efficient and last much longer. If your vehicle has an LED tail light assembly, replacing a single bulb might not be an option. Often, you’d need to replace the entire LED circuit board or even the whole tail light assembly. However, some vehicles use standard sockets but accept aftermarket LED replacement bulbs.
- Halogen Bulbs: Less common for tail lights, but some vehicles might use them. They are a type of incandescent bulb filled with halogen gas for brighter output and longer life.
Knowing which type of bulb your car uses is crucial for purchasing the correct replacement. You don’t want to get halfway through changing your tail light bulb only to find the new one doesn’t fit.
How to Find the Correct Replacement Bulb for Your Vehicle
This is arguably the most important step in the entire process of how to change a tail light bulb. Getting the right bulb ensures compatibility and proper function. Here’s how you can find it:
- Owner’s Manual: Your vehicle’s owner’s manual is your best friend. It typically has a section dedicated to bulb specifications, listing the exact bulb number for each exterior light, including your tail light bulb.
- Online Bulb Finder Tools: Many auto parts store websites (e.g., AutoZone, O’Reilly Auto Parts, Advance Auto Parts) have online tools where you input your car’s year, make, and model, and it will tell you the correct bulb numbers.
- The Old Bulb Itself: Once you remove the old tail light bulb (we’ll cover this soon!), the bulb number is usually printed on its base. This is a foolproof way, but it means you have to remove it before you can buy a replacement, which might mean a trip to the store with a missing tail light.
- Ask an Expert: When in doubt, head to your local auto parts store and ask a knowledgeable employee. They can look up the correct tail light bulb for you using your vehicle’s information.
Make sure to purchase a quality bulb. While a cheaper bulb might save you a few dollars upfront, higher quality bulbs from reputable brands tend to last longer and offer better performance. Always buy in pairs if your running lights use the same bulb type, as the other side is likely to go out soon too.
Step 2: Gathering Your Tools and Prioritizing Safety
With the correct tail light bulb in hand, it’s time to prepare for the actual replacement process. This involves gathering a few basic tools and, most importantly, ensuring your safety.
Visual guide about How to Change a Tail Light Bulb
Image source: i.ytimg.com
Essential Tools for the Job
Most tail light bulb changes are straightforward and don’t require an extensive toolkit. Here’s what you’ll likely need:
- Screwdrivers: You’ll probably need both Phillips-head and flat-head screwdrivers. Many tail light assemblies are held in place with Phillips screws. A flat-head might be useful for prying open stubborn clips or trim panels.
- Socket Wrench Set (Optional but Recommended): Some vehicles use bolts (often 10mm or 13mm) to secure the tail light housing. A small socket wrench set with extensions can be invaluable.
- Trim Removal Tool (Optional): If your vehicle requires removing interior trunk trim panels to access the tail light assembly, a plastic trim removal tool is fantastic. It helps you pry off panels without scratching or damaging the plastic. If you don’t have one, a flat-head screwdriver wrapped in a cloth can work in a pinch, but be very careful.
- Gloves: Latex, nitrile, or even clean work gloves are a good idea. They protect your hands from dirt and grime. More importantly, when handling new halogen or incandescent bulbs, touching the glass with bare fingers can leave oils that create hot spots, reducing the bulb’s lifespan.
- New Tail Light Bulb: Of course! Make sure it’s the right one.
- A Clean Rag or Paper Towel: Useful for cleaning any dirt or debris around the assembly or for handling the new bulb if you don’t have gloves.
Safety First: Important Precautions
Working on any part of your car, even something as simple as changing a tail light bulb, requires a few basic safety measures:
- Turn Off Your Vehicle: Always turn off the engine and remove the keys from the ignition. This prevents any accidental electrical shocks or the car starting unexpectedly.
- Engage the Parking Brake: Ensure your parking brake is firmly set to prevent the vehicle from rolling.
- Work in a Well-Lit Area: A well-lit environment (daylight or a good work light) will make it much easier to see what you’re doing, identify small screws or clips, and prevent strain.
- Wear Eye Protection: While not strictly necessary for this job, it’s a good habit to wear safety glasses whenever you’re working on a vehicle. You never know when a piece of plastic might snap or something might fly.
- Beware of Hot Bulbs: If your tail light bulb has just gone out, or if you’ve been driving recently, the old bulb can be very hot. Give it time to cool down before attempting to remove it.
By taking these simple precautions, you ensure a safe and successful tail light bulb replacement experience.
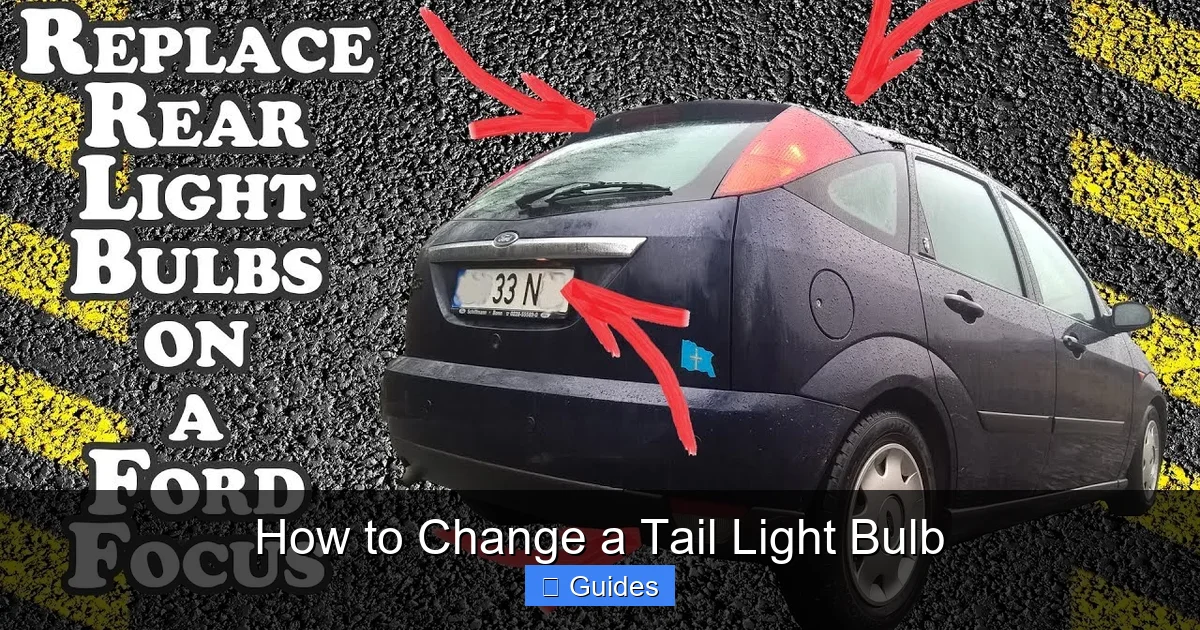
Step 3: Accessing the Tail Light Bulb Assembly
This is where the actual hands-on work begins! The process of accessing your tail light bulb will vary slightly depending on your vehicle’s make and model, but the general principles remain the same. Most tail lights are accessed from inside the trunk or cargo area.
Opening the Trunk and Locating the Assembly
Pop open your trunk or liftgate. Look at the inside wall of the trunk, directly behind where the tail light is located on the exterior of the car. You should see the back of the tail light assembly, usually a plastic housing with wires coming out of it.
Some vehicles make it incredibly easy, with the entire assembly exposed. Others hide it behind carpeted trim panels or plastic covers. Take a moment to observe how your particular vehicle is designed.
Removing Trim Panels (If Necessary)
If the tail light assembly is hidden, you’ll need to remove the obstructing trim. This is where your trim removal tool comes in handy.
- Identify Fasteners: Look for plastic clips, screws (often Phillips-head), or sometimes even small twist-tabs that hold the trim panel in place.
- Carefully Remove: Use your trim removal tool or a flat-head screwdriver (with care to avoid scratches) to gently pry out plastic clips. For screws, simply unscrew them. Store any removed fasteners in a safe place so they don’t get lost.
- Peel Back the Trim: Once the fasteners are removed, you should be able to carefully peel back or unclip the trim panel enough to gain access to the back of the tail light assembly. You may not need to remove the entire panel, just enough to work comfortably.
Be gentle! Plastic trim can be brittle, especially in older cars, and breaking clips or tabs can make reassembly difficult or lead to rattles later on.
Detaching the Tail Light Housing or Lens
Now that you’ve got access, you need to get to the individual bulb. In most cars, you won’t remove the entire exterior tail light housing, but rather a smaller part of it or access the bulb holders directly.
- External Screws: Many cars have two or three visible screws on the outside of the tail light lens itself, accessible from the exterior of the car (often inside the trunk opening, but still on the outside of the car’s body). These screws usually hold the whole light assembly in place. Remove these screws.
- Internal Bolts/Nuts: Less commonly, the entire tail light assembly might be secured by bolts or nuts accessible from inside the trunk. These often require a socket wrench.
- Twist-Lock Bulb Holders: Sometimes, you don’t remove any large housing. Instead, individual bulb holders (plastic connectors with wires) twist directly out of the back of the main tail light assembly. They usually require a quarter-turn counter-clockwise to unlock and remove.
Carefully note how the components are secured. If you remove screws or bolts holding the entire assembly, gently pull the assembly straight back, away from the car body. It might be snug, as there are usually alignment pins. Be careful not to pull too hard or fast, as the wiring harness will still be connected.
If the entire assembly comes loose, you’ll often find a main electrical connector that needs to be unclipped before you can fully remove the assembly for easier access to the bulbs. Press the tab on the connector and pull gently to separate it.
Step 4: The Bulb Replacement Process
You’re almost there! With the tail light assembly or individual bulb holders accessible, it’s time to actually change that pesky tail light bulb.
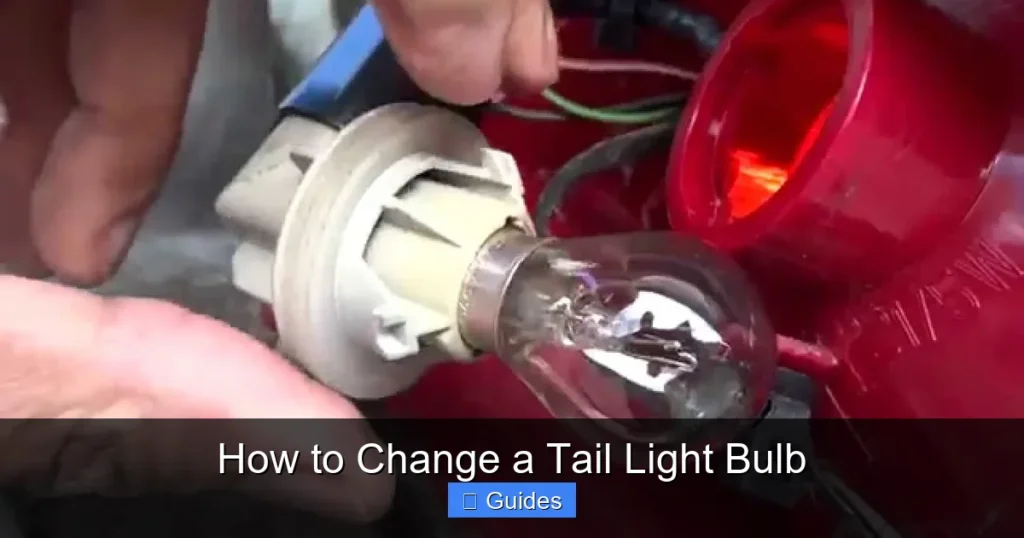
Carefully Removing the Old Bulb
Once you have access to the back of the tail light assembly, you’ll see one or more bulb sockets. The non-working tail light bulb will be in one of them. Different bulbs might be for your running lights, brake lights, turn signals, and reverse lights.
- Identify the Correct Socket: Look at the back of the assembly. The running/brake light bulb is typically the largest or centrally located. If you’re unsure, you can often visually trace the filament of the old bulb through the lens or simply remove the suspected bulb.
- Twist and Pull: Most bulb sockets twist counter-clockwise a quarter turn or so to unlock from the housing. Once unlocked, pull the socket straight out.
- Remove the Bulb from the Socket:
- Wedge-Type Bulbs (e.g., 921, 194, 7443): These bulbs simply pull straight out of the socket. They don’t twist. Gently but firmly pull the old bulb out.
- Bayonet-Type Bulbs (e.g., 1157, 1156): These bulbs have two small pins on their base. Push the bulb slightly into the socket, twist it counter-clockwise, and then pull it out.
Remember, if the bulb has been on recently, it might be hot. Use gloves or a rag to handle it. Inspect the old tail light bulb. If the filament is broken or the glass is blackened, you’ve confirmed the problem.
Inserting the New Tail Light Bulb
This is where your new bulb comes in! Be very careful not to touch the glass of the new bulb with your bare fingers, especially if it’s an incandescent or halogen bulb. The oils from your skin can create hot spots, causing the bulb to fail prematurely. Use gloves or a clean cloth to handle it.
- Align and Push:
- Wedge-Type: Simply align the metal contacts on the base of the new bulb with the slots in the socket and push it firmly straight in until it’s snug.
- Bayonet-Type: Align the pins on the bulb’s base with the slots in the socket, push the bulb in, and then twist it clockwise until it locks into place.
- Check for Firmness: Once inserted, give the bulb a gentle tug to ensure it’s securely seated in the socket. A loose connection can cause intermittent flickering or prevent the bulb from working at all.
Don’t force the bulb. If it’s not going in smoothly, double-check that you have the correct type of bulb and that you’re aligning it properly. For dual-filament bulbs (like an 1157 or 3157), it’s important to orient it correctly if it has offset pins.
Crucial Step: Testing the New Bulb Before Reassembly
Before you put everything back together, perform a quick test to make sure your hard work has paid off. This step is critical because there’s nothing more frustrating than reassembling everything only to find the bulb still doesn’t work.
- Reconnect Electrical Connector (if disconnected): If you unplugged the main electrical connector from the tail light assembly, plug it back in now.
- Turn on Vehicle Lights: Get into your car, turn the ignition to the “on” position (engine doesn’t necessarily need to be running, but it helps if your car requires it for full power), and turn on your headlights. Have someone observe the new tail light bulb. Does it light up?
- Test Brake Lights and Turn Signals: While someone watches, press the brake pedal. Does the tail light glow brighter? Activate the turn signal for that side. Does it flash? Activate your hazard lights. Does it flash along with the other lights?
If all functions work, fantastic! You’ve successfully installed your new tail light bulb. If not, don’t panic. Check the troubleshooting section later in this guide.
Step 5: Reassembly and Final Checks
You’ve successfully learned how to change a tail light bulb and confirmed it’s working. Now it’s time to put everything back in its place.
Putting Everything Back Together
Reassembly is essentially the reverse of the disassembly process. Be methodical and careful.
- Reinsert Bulb Socket: Twist the bulb socket (with the new bulb) clockwise back into the tail light housing until it locks securely.
- Reattach Tail Light Assembly: If you removed the entire tail light assembly, carefully guide it back into its opening in the car’s body. Make sure any alignment pins fit into their corresponding holes. Gently push it until it’s flush.
- Tighten Screws/Bolts: Reinstall any screws or bolts that held the tail light assembly in place. Don’t overtighten them, as this can strip threads or crack plastic. Just snug them up.
- Replace Trim Panels: If you removed any interior trim panels, reposition them and secure them with their original screws or clips. Make sure everything snaps or screws back into place properly, ensuring no gaps or loose pieces.
The All-Important Final Inspection
Before you consider the job done and hit the road, perform a final, comprehensive check of all your vehicle’s exterior lights.
- All Lights Check: Turn on your headlights, parking lights, brake lights, turn signals (left and right), and hazard lights. Have someone observe from outside the car, or use a reflection in a window or garage door.
- Running Lights: Are both tail lights glowing evenly when your headlights are on?
- Brake Lights: Do both brake lights illuminate brightly when the pedal is pressed?
- Turn Signals: Do both front and rear turn signals flash correctly on both sides? Is the new tail light bulb flashing at the correct speed (not hyper-flashing)?
- Reverse Lights: Shift into reverse (with the parking brake on!) and check your reverse lights.
This final check ensures that not only did you fix the original problem, but you also haven’t inadvertently caused any new ones. Plus, it’s a good habit to regularly check all your vehicle lights to ensure you’re always visible and safe on the road.
Troubleshooting Common Issues and When to Call a Pro
Most of the time, changing a tail light bulb is a simple and successful DIY project. However, sometimes things don’t go as planned. Here are some common troubleshooting tips and when it might be best to seek professional help.
What If the New Bulb Doesn’t Work?
If you’ve installed a new tail light bulb and it still doesn’t light up, here’s a checklist of things to investigate:
- Is the Bulb Correct? Double-check that you have the exact bulb number recommended for your vehicle. Even slight differences can prevent it from working.
- Is the Bulb Seated Properly? Remove the bulb and reinsert it. Sometimes it just needs to be pushed in more firmly or twisted to lock correctly. For wedge bulbs, try flipping it 180 degrees (some LED replacements are polarity sensitive).
- Is the Bulb Defective? New bulbs can occasionally be faulty. If you bought a multi-pack, try another bulb from the same pack. If you only bought one, you might need to test it (if possible) or exchange it.
- Check the Fuse: A blown fuse is a common culprit. Consult your owner’s manual for the location of your fuse box (usually under the hood or under the dash) and identify the fuse for your tail lights (or brake lights, running lights, etc., as specific fuses might be for specific functions). A blown fuse will have a broken wire inside it. Replace it with a fuse of the exact same amperage.
- Corroded Socket or Wiring: Inspect the bulb socket. Look for any signs of corrosion (greenish or white buildup) or melted plastic. Clean any corrosion with a small brush and electrical contact cleaner. Check the wires leading to the socket for any breaks or frayed insulation.
- Bad Ground: A poor ground connection can prevent a bulb from lighting. While harder to diagnose for a DIYer, sometimes simply wiggling the wires or the socket can temporarily reveal a ground issue.
When Your Tail Light Bulb Changes Are Beyond DIY
While learning how to change a tail light bulb is a fantastic skill, there are times when it’s best to call in a professional mechanic:
- Persistent Problems: If you’ve tried all the troubleshooting steps and your tail light still isn’t working, there might be a deeper electrical issue, such as a faulty wiring harness, a more complex short circuit, or a problem with the car’s computer system (body control module).
- Complex Assemblies: Some modern vehicles, especially luxury cars, have extremely complex tail light assemblies, often fully sealed LED units. Replacing individual bulbs might not be possible, and the entire unit can be expensive and require specialized tools or knowledge to remove and replace.
- Integrated LED Lights: If your vehicle uses integrated LED tail lights and a segment of the LED array is out, you generally cannot replace individual LEDs. The entire tail light assembly will need to be replaced, which is a more involved and costly repair best left to professionals.
- Difficulty Accessing: If you find that you simply cannot access the tail light assembly without removing half the car’s interior or specialized panels, it might be worth letting a professional handle it to avoid accidental damage.
Don’t hesitate to seek professional help if you’re unsure or uncomfortable at any point. Safety is paramount, and sometimes the peace of mind of a professional repair is well worth the cost.
Conclusion: Drive Safely and Proudly
Congratulations! You’ve successfully navigated the process of how to change a tail light bulb. This seemingly small repair is a significant step towards safer driving, not just for you but for everyone else on the road. By tackling this yourself, you’ve not only saved money but also gained valuable experience and confidence in performing basic car maintenance.
Regularly checking your vehicle’s lights should be part of your routine maintenance. A quick walk-around your car before driving, or a periodic check with a helper, can prevent the surprise of a burnt-out bulb. Now that you know how to change a tail light bulb, you’re better prepared for future automotive challenges and can drive away knowing you’ve kept your vehicle in top, safe working order. Keep shining bright on the road!
🎥 Related Video: Remove brake light/turn signal bulb. Replace with new bulb. Installation is reverse of removal
📺 Mr. Delray
Frequently Asked Questions
How do I know what type of tail light bulb my car needs?
The best way to determine the correct tail light bulb type is to consult your vehicle’s owner’s manual, which provides a detailed list of all bulb specifications. Alternatively, you can use online bulb finder tools offered by auto parts stores, or remove the old bulb to read its number printed on the base.
Is it okay to touch the new tail light bulb with my bare hands?
It is generally not recommended to touch new incandescent or halogen tail light bulbs with bare hands. The oils from your skin can create hot spots on the bulb’s glass, leading to premature failure and a shorter lifespan. Always use gloves or a clean cloth when handling new bulbs.
What if I have LED tail lights? Can I still change the bulb?
For vehicles with integrated LED tail lights, you typically cannot change individual bulbs. If a section of your LED tail light is out, it often means the entire LED circuit board or the whole tail light assembly needs to be replaced, which can be a more complex and costly repair.
Can a blown fuse cause my tail light to stop working?
Yes, a blown fuse is a common reason for a tail light or multiple lights to stop working. If replacing the bulb doesn’t fix the issue, you should check your vehicle’s fuse box (refer to your owner’s manual for its location and the specific fuse for your tail lights) and replace any blown fuses with one of the exact same amperage rating.
Should I change both tail light bulbs at the same time?
While not strictly necessary, it’s often a good idea to change both tail light bulbs (especially running lights or brake lights) at the same time if they are the same type and have been in use for a similar duration. Bulbs tend to have similar lifespans, so if one goes out, the other might not be far behind, saving you another repair trip soon.
What if the tail light bulb is stuck in the socket?
If a tail light bulb is stuck, especially a wedge-type, it might be due to corrosion or heat fusion. You can try gently wiggling it while pulling, or use needle-nose pliers with a protective cloth (to avoid crushing the bulb). For bayonet-type bulbs, ensure you’re pushing in and twisting firmly counter-clockwise before pulling. A small amount of electrical contact cleaner can sometimes help free up corrosion.