
Changing a light bulb in a high ceiling chandelier can seem daunting, but with the right preparation and safety measures, it’s a manageable task. This guide will walk you through everything from selecting the correct tools and ensuring a secure work environment to the step-by-step process of replacing the bulb itself. Prioritize safety by turning off power and using stable access equipment. Don’t let a burnt-out bulb dim your beautiful lighting; follow our advice for a bright, safe outcome.
How to Change Light Bulb in High Ceiling Chandelier
That beautiful, sparkling chandelier hanging majestically in your grand foyer or dining room is a true centerpiece, isn’t it? It adds elegance, light, and a touch of luxury to your home. But then, it happens – a bulb goes out. And then another. Suddenly, your stunning fixture looks less than perfect, and a shadow of dread might creep in as you look up, up, up, realizing just how high that “high ceiling” truly is.
Changing a light bulb might sound like a trivial task, something you do without a second thought in a desk lamp. However, when you’re dealing with a delicate, often heavy, and expensive fixture suspended many feet above the ground, it transforms into a significant project. It’s not just about swapping out a bulb; it’s about safety, precision, and having the right tools for the job. This comprehensive guide will walk you through every step of *how to change light bulb in high ceiling chandelier*, ensuring you can tackle this task confidently and safely.
Key Takeaways
- Safety First: Always turn off the power to the chandelier at the circuit breaker before beginning any work. This is the single most important step to prevent electrical shocks.
- Assess Your Chandelier and Ceiling Height: Before gathering tools, determine the exact height and the type of chandelier to choose the most appropriate and safest access method (ladder, scaffolding, or a pole bulb changer).
- Gather the Right Tools: You’ll need more than just a new bulb. Prepare extension ladders, scaffolding, a long-reach bulb changer, gloves, safety glasses, a small bucket for old bulbs, and possibly a helper.
- Choose the Best Access Method: For heights over 8-10 feet, consider scaffolding for stability. For lower high ceilings, a sturdy extension ladder or a specialized bulb changer may suffice. Never overreach or use unstable platforms.
- Handle Bulbs Carefully: Old bulbs can be hot or even shatter. Use gloves to protect your hands and to avoid leaving oils on new halogen or incandescent bulbs, which can shorten their lifespan.
- Consider Long-Term Solutions: When replacing, think about upgrading to LED bulbs. They last significantly longer, reducing the frequency of this challenging task and saving energy in the long run.
- Don’t Rush the Process: Take your time with each step, especially when setting up equipment and maneuvering around the chandelier. Rushing can lead to accidents or damage to the fixture.
Quick Answers to Common Questions
How often should I change chandelier bulbs?
The frequency depends on the bulb type. Incandescent bulbs might last 1,000-2,000 hours (about 1-2 years with typical use), while LED bulbs can last 15,000-50,000 hours (15-25 years or more), significantly reducing how often you need to change them.
Can I use any type of bulb in my chandelier?
No, you must match the bulb’s base type (e.g., E12 candelabra, E26 medium) and ensure the wattage (or LED equivalent) does not exceed the fixture’s maximum rating to prevent overheating.
Is it okay to mix different types of bulbs in a chandelier?
While technically possible if the bases match, it’s generally not recommended. Different bulb types can have varying light outputs, color temperatures, and dimming behaviors, leading to an inconsistent and aesthetically unpleasing look.
What if a bulb breaks in the socket?
First, ensure the power is definitely off at the circuit breaker. Then, use needle-nose pliers or a potato (pushed onto the broken glass for grip) to carefully twist the metal base counter-clockwise out of the socket. Wear thick gloves and safety glasses.
Should I clean the chandelier when changing bulbs?
Yes, it’s an excellent opportunity! Since you already have the access equipment set up, gently dusting or cleaning the chandelier with a soft cloth can restore its sparkle and enhance the new bulbs’ light output.
📑 Table of Contents
Assessing Your Chandelier and Gathering Supplies
Before you even think about climbing, you need to understand what you’re up against and what you’ll need. A little preparation goes a long way, especially when dealing with heights and electricity.
Identify the Chandelier Type and Height
Take a good look at your chandelier. Is it a simple, open design, or is it intricate with many delicate crystals and arms? Knowing this will help you choose your access method and how carefully you need to maneuver. Also, accurately estimate the height. Is it 10 feet? 15 feet? Or even higher? This dictates the type of ladder or scaffolding you’ll require. A tape measure can be your best friend here.
Determine the Bulb Type and Quantity
Before you get up there, know what kind of bulb you need. Most chandeliers use candelabra (E12) or medium (E26) base bulbs, often in decorative shapes like flame tips or torpedoes. Common types include:
- Incandescent: The traditional, warm glow bulb. They get hot and have a shorter lifespan.
- Halogen: Brighter, more efficient than incandescent, but still get very hot.
- CFL (Compact Fluorescent Lamp): Energy-efficient, but can be slow to reach full brightness and contain mercury.
- LED (Light Emitting Diode): The most energy-efficient and longest-lasting option. They are cooler to the touch and often dimmable. Highly recommended for high ceilings to minimize future changes.
It’s always a good idea to buy a few extra bulbs, especially if your chandelier uses a specific type that might be hard to find later. If you’re swapping one out, consider replacing all of them with new, matching bulbs for consistent brightness and to avoid another trip up soon.
Essential Tools and Equipment
This isn’t a job for just a stool and a step ladder. You’ll need specialized equipment to safely *how to change light bulb in high ceiling chandelier*.
- New Light Bulbs: Make sure they match the base, wattage (or LED equivalent), and color temperature of your existing bulbs, or replace them all for uniformity.
- Sturdy Extension Ladder: For heights up to about 12-15 feet, a good quality extension ladder might work. Ensure it’s rated for your weight plus the weight of any tools. An A-frame ladder might also be suitable if the ceiling isn’t excessively high and allows for stable placement.
- Scaffolding: For very high ceilings (15 feet and above) or unusually delicate chandeliers, scaffolding provides the most stable and safest platform. You can rent scaffolding from hardware stores.
- Long-Reach Bulb Changer Pole: These telescoping poles come with various attachments (suction cups, wire cages) designed to grip and twist different types of bulbs. They are fantastic for reaching bulbs without needing to get right up to the fixture, but they require a steady hand.
- Rubber Gloves: Protect your hands and prevent finger oils from getting on new halogen or incandescent bulbs, which can cause premature failure.
- Safety Glasses: Essential for protecting your eyes from dust, debris, or a potentially shattering old bulb.
- Small Bucket or Bag: To safely hold old, hot, or broken bulbs.
- Soft Cloth or Dusting Tool: Since you’re already up there, it’s a great time to give the chandelier a quick clean.
- Flashlight or Headlamp: To see clearly in dim areas.
- Helper (Recommended): An extra set of hands can stabilize a ladder, hand you tools, or offer moral support.
Safety First: Essential Precautions
Safety cannot be overstated when working at heights with electricity. Neglecting any of these steps could lead to serious injury or damage.
Turn Off the Power!
This is the absolute most critical step. Go to your home’s electrical panel (breaker box) and locate the breaker that controls the circuit for your chandelier. Flip it to the “OFF” position. It’s a good idea to put a piece of tape or a “DO NOT TOUCH” sign over the breaker so no one accidentally flips it back on while you’re working. Don’t rely solely on a wall switch; always cut power at the source.
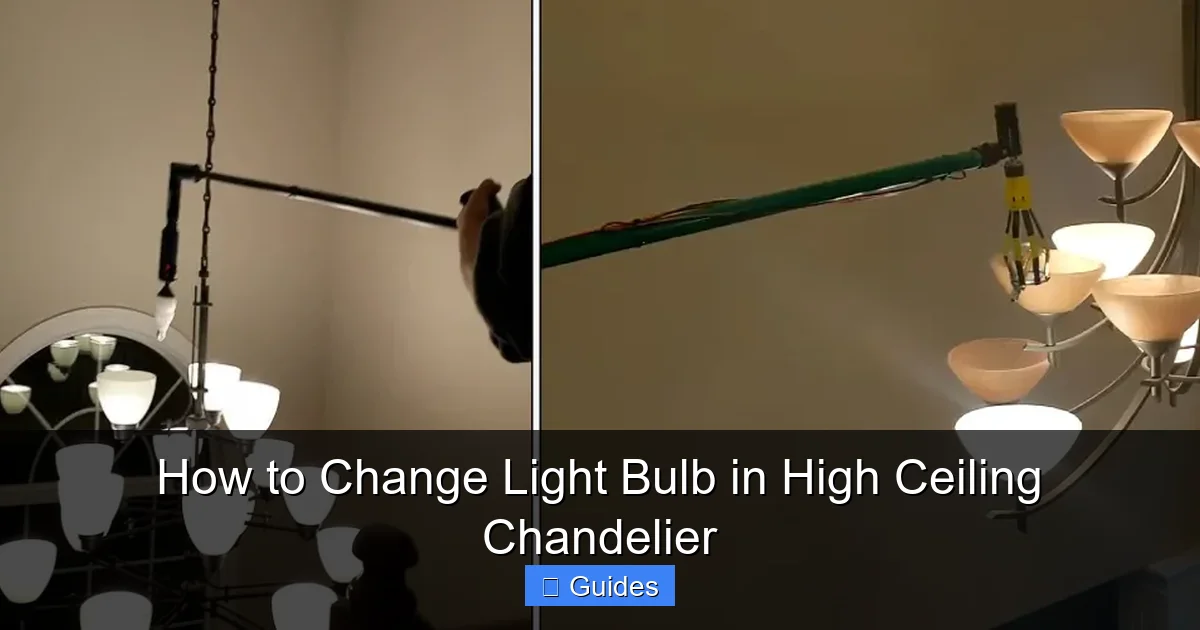
Visual guide about How to Change Light Bulb in High Ceiling Chandelier
Image source: i0.wp.com
Ensure a Stable Work Environment
Ladder Safety
- Placement: Position your ladder on a flat, solid, non-slip surface. If on carpet, use a plywood sheet underneath for stability.
- Angle: For extension ladders, the 4-to-1 rule is key: for every four feet of height, the base should be one foot away from the wall.
- Extension: The ladder should extend at least three feet above the point of support.
- Don’t Overreach: Never lean too far to one side. If you can’t comfortably reach the bulb, reposition the ladder or use a different access method.
- Secure the Base: Have your helper steady the base of the ladder, or use non-slip feet.
Scaffolding Safety
- Level Surface: Ensure the scaffolding is set up on a level, firm surface. Use leveling jacks if necessary.
- Lock Wheels: If your scaffolding has wheels, make sure they are locked before climbing.
- Guardrails: Always use guardrails on scaffolding, especially if working at significant heights.
- Follow Instructions: Adhere to the manufacturer’s assembly and usage instructions meticulously.
Wear Proper Protective Gear
Always wear safety glasses to protect your eyes from falling dust, debris, or glass from a broken bulb. Sturdy work gloves will protect your hands from hot bulbs, sharp edges, and provide a better grip. Closed-toe shoes are also recommended for stability.
Clear the Work Area
Remove any furniture, rugs, or decorative items from the area directly below and around the chandelier. This creates a clear space for your equipment and prevents damage in case something falls.
Choosing the Right Access Method
The method you choose for *how to change light bulb in high ceiling chandelier* is crucial for both safety and effectiveness.
Extension Ladders: For Moderate Heights
An extension ladder is a common choice for ceilings up to about 15 feet. They offer versatility in height and are relatively easy to set up. However, they can be wobbly, especially when extended, and require careful placement to avoid damaging floors or walls. It’s best used when you can place the ladder so that you are working directly in front of the bulb, not reaching sideways.
Scaffolding: For Maximum Stability and Very High Ceilings
For ceilings 15 feet or higher, or if your chandelier is particularly large and delicate, scaffolding is the safest and most stable option. It provides a wide, flat platform to stand on, allowing you to move freely around the fixture with both hands available. You can rent modular scaffolding units that are relatively easy to assemble. While more time-consuming to set up, the peace of mind and enhanced safety are well worth it.
Long-Reach Bulb Changer Poles: A Hands-Off Approach
These specialized poles are excellent for reaching bulbs without having to get your body right up to the fixture. They come with various attachments:
- Suction Cup Attachments: Best for smooth, non-textured bulbs (like floodlights or some recessed bulbs). You press the cup onto the bulb, twist, and then release.
- Cage or Claw Attachments: Designed to grip standard A-style or candelabra bulbs. You gently fit the cage around the bulb and twist.
While convenient, these require a very steady hand and can be challenging with delicate chandelier bulbs or tight spaces. Practice on an easily reachable bulb first to get the feel for it. They are ideal for *how to change light bulb in high ceiling chandelier* if the fixture is sturdy and the bulbs are easily accessible from a distance.
Chandelier Lift Systems: The Ultimate Solution (If You Have One)
Some luxury homes with very high ceilings and elaborate chandeliers are equipped with motorized lift systems. These allow the entire chandelier to be lowered to a manageable height with the push of a button. If your home has one, congratulations! This is by far the safest and easiest way to *how to change light bulb in high ceiling chandelier*. Consult your home’s manual for operating instructions.
The Step-by-Step Bulb Replacement Process
Now that your workspace is safe and your tools are ready, it’s time to replace those bulbs.
Step 1: Secure Your Access Method
Carefully set up your ladder or scaffolding according to the safety guidelines above. Double-check that it’s stable and secure before you ascend. If you have a helper, have them assist in stabilizing the ladder.
Step 2: Ascend and Assess the Chandelier
Slowly and carefully climb to your working height. Take a moment to get comfortable and stable. Observe the chandelier again. Identify the burnt-out bulbs and plan your approach. If the fixture is dusty, you might want to give it a gentle wipe-down while you’re up there.
Step 3: Remove the Old Bulb
Depending on the bulb type and your chosen access method:
- By Hand: Wearing gloves, grasp the old bulb firmly and twist it counter-clockwise until it unscrews. Be gentle, as some older bulbs might be stuck or fragile.
- With a Bulb Changer Pole: Carefully position the appropriate attachment over the bulb. Apply gentle pressure to engage the grip (suction cup) or enclose the bulb (cage). Twist the pole counter-clockwise to unscrew the bulb. Once loose, carefully lower the pole and bulb.
Place the old bulb directly into your bucket or bag. If a bulb breaks during removal, do not touch the broken glass with bare hands. Use pliers to carefully twist out the remaining base, ensuring the power is OFF.
Step 4: Clean the Socket (Optional but Recommended)
Before inserting a new bulb, gently inspect the socket. If there’s any visible dust or debris, you can use a small, dry brush or a can of compressed air to clean it out. Be very gentle and ensure no moisture is introduced.
Step 5: Insert the New Bulb
Still wearing gloves (especially for halogen and incandescent bulbs), carefully screw the new bulb into the socket by twisting clockwise. Do not overtighten, as this can damage the socket or the bulb. Twist until it feels snug but not forced. If using a bulb changer pole, reverse the removal process, carefully guiding the new bulb into the socket and twisting until secure.
Tip: If you’re replacing multiple bulbs, consider replacing all of them if they are of similar age. This often prevents having to repeat the process soon for another burnt-out bulb.
Step 6: Descend and Test the Light
Once all bulbs are replaced, carefully descend from your ladder or scaffolding. Clear away your equipment. Then, go back to your breaker box and flip the circuit breaker back to the “ON” position. Return to the room and flip the wall switch to test your newly illuminated chandelier. Marvel at its restored brilliance!
Maintenance and Longevity Tips
Once you’ve successfully learned *how to change light bulb in high ceiling chandelier*, you’ll want to avoid doing it again too soon. Here are some tips for maintenance and bulb longevity.
Consider Upgrading to LED Bulbs
If your chandelier currently uses incandescent, halogen, or CFL bulbs, seriously consider converting to LED. LEDs last significantly longer (often 15-25 times longer than incandescent bulbs), use far less energy, and produce less heat. This means fewer bulb changes, lower electricity bills, and reduced risk of heat-related damage to your fixture or ceiling. Always ensure the LED bulbs you choose are dimmable if your chandelier uses a dimmer switch.
Regular Cleaning of Your Chandelier
Dust and grime can accumulate on chandeliers, dimming their sparkle and potentially affecting bulb performance. While you have the access equipment out, it’s an opportune time to give the fixture a quick, gentle cleaning. Use a soft, lint-free cloth or a feather duster. For crystal chandeliers, specialized cleaning sprays (applied to the cloth, not directly to the chandelier) can restore their brilliance.
Professional Servicing
For very intricate or antique chandeliers, or if you notice any flickering, loose wiring, or other electrical issues, it might be time to call a professional electrician or chandelier specialist. They can perform routine maintenance, inspect wiring, and address any potential problems safely.
Proper Bulb Storage
Store spare bulbs in their original packaging in a cool, dry place. This protects them from damage and ensures they are ready for use when needed.
Conclusion
Congratulations! You’ve successfully learned *how to change light bulb in high ceiling chandelier* and brought light back to your beautiful fixture. While it might have seemed like a daunting task, with careful planning, the right tools, and an unwavering commitment to safety, it’s a perfectly manageable home maintenance project. Remember to always prioritize turning off the power, securing your access, and taking your time. Enjoy the renewed brilliance of your chandelier, knowing you tackled a challenging job with confidence and expertise!
Frequently Asked Questions
What’s the safest way to reach a very high chandelier?
For chandeliers in very high ceilings (15 feet or more), scaffolding is generally the safest option as it provides a wide, stable platform to work from. Alternatively, if your home has one, a motorized chandelier lift system is the safest and most convenient method.
Do I need an electrician to change a light bulb in a high ceiling chandelier?
No, for a simple bulb change, you typically don’t need an electrician. However, if you encounter flickering, loose wiring, or suspect electrical issues with the fixture itself, it’s always best to consult a qualified electrician for safety.
How can I avoid damaging the chandelier crystals or arms?
Work slowly and deliberately, especially when maneuvering around the fixture. Avoid leaning directly on the chandelier. If using a ladder, ensure it’s positioned so you have comfortable reach without having to push against the chandelier.
Are bulb changer poles effective for all chandelier bulbs?
Bulb changer poles are effective for many common bulb shapes (standard, floodlight, candelabra) but might not work for unusually shaped or very small bulbs, or those in extremely tight or delicate decorative housings. Practice is key, and sometimes direct hand access is still preferred.
What if I cannot reach the circuit breaker for my chandelier?
If you cannot locate the specific circuit breaker, turn off the main power breaker to your entire home as a last resort. This ensures no power is flowing to the chandelier. Always confirm the power is off with a non-contact voltage tester at the fixture if unsure.
Can I dim LED bulbs in my chandelier?
Yes, but you must purchase LED bulbs specifically labeled as “dimmable.” Also, ensure your existing dimmer switch is compatible with LED technology; older incandescent-only dimmers might cause flickering or poor performance with LED bulbs, so an upgrade might be necessary.