
Dimming a light bulb involves more than just flipping a switch; it requires understanding bulb types, dimmer compatibility, and safe installation practices. Whether you’re using traditional incandescent, modern LEDs, or smart bulbs, selecting the correct dimmer switch or leveraging smart home technology is crucial for achieving the desired ambiance without issues like flickering or buzzing. Always prioritize safety by cutting power before any electrical work and consider professional help for complex installations.
Ever walked into a room and wished you could just turn down the lights a little? Maybe you’re setting the mood for a cozy evening, trying to create a softer ambiance for dinner, or simply want to save a bit of energy. Learning how to dim a light bulb can transform your home, offering flexibility, comfort, and even a touch of elegance. It’s more than just a convenience; it’s about tailoring your environment to your exact needs at any given moment.
For many years, dimming a light bulb was a straightforward affair, mainly involving incandescent bulbs and simple dimmer switches. But the world of lighting has evolved dramatically! With the rise of energy-efficient options like LEDs and smart home technology, understanding how to dim a light bulb has become a bit more nuanced. It’s not just about swapping a switch anymore; it’s about compatibility, technology, and sometimes, a little bit of smart thinking. Don’t worry, though – we’re here to light the way and make it easy for you to understand.
This comprehensive guide will walk you through everything you need to know about dimming your lights, from the science behind it to choosing the right equipment and even troubleshooting common issues. We’ll cover different bulb types, dimmer switches, and alternative methods for achieving that perfect glow. So, let’s get started on your journey to mastering the art of illumination!
Key Takeaways
- Bulb Compatibility Matters: Not all light bulbs are dimmable. Incandescent and halogen bulbs are generally easy to dim, while LEDs require specific “dimmable” labels and compatible LED dimmers. Most CFLs are not dimmable.
- Choose the Right Dimmer: Dimmers are designed for specific bulb technologies. Using an incandescent dimmer with LED bulbs, for example, will likely lead to poor performance, flickering, or damage. Always match your dimmer to your bulb type.
- Safety First During Installation: Before attempting any electrical work, including installing a dimmer switch, always turn off the power at the circuit breaker to prevent electric shock. When in doubt, call a professional.
- Understand Load Capacity: Every dimmer switch has a maximum wattage rating. Ensure the total wattage of all bulbs connected to the dimmer does not exceed this capacity to prevent overheating and failure.
- Smart Solutions Offer Simplicity: Smart bulbs and smart dimmers allow for dimming control via apps, voice commands, or schedules, often without requiring traditional electrical wiring changes, making them an excellent option for existing fixtures.
- Troubleshooting Is Key: Common dimming issues like flickering, buzzing, or bulbs not dimming fully are usually caused by incompatible components, exceeding load limits, or loose wiring. A systematic approach to troubleshooting can resolve most problems.
- Consider Professional Help: If you’re uncomfortable with electrical work, dealing with complex wiring (like 3-way switches), or encountering persistent issues, a qualified electrician can ensure a safe and correct installation.
Quick Answers to Common Questions
Can I dim any LED light bulb?
No, only LED light bulbs explicitly labeled “dimmable” can be dimmed effectively. Attempting to dim non-dimmable LEDs can lead to flickering, buzzing, or damage to the bulb and the dimmer.
What causes light bulbs to flicker when dimmed?
Flickering when dimming is most commonly caused by an incompatibility between the light bulb (especially LEDs) and the dimmer switch. It can also be due to loose wiring, an overloaded dimmer, or the dimmer not meeting the minimum load requirement of the bulbs.
Do I need a special dimmer for LED bulbs?
Yes, you absolutely need a dimmer specifically designed to be “LED-compatible” for proper dimming of LED bulbs. Traditional incandescent dimmers will not work well with LEDs and can cause issues like flickering, buzzing, or premature bulb failure.
Can smart bulbs be dimmed with a regular dimmer switch?
It is generally not recommended to use a smart bulb with a traditional dimmer switch. Smart bulbs have their own internal dimming technology controlled via apps or voice, and applying external dimming voltage can interfere with their electronics, leading to erratic behavior or damage.
Is it safe to install a dimmer switch myself?
Yes, installing a dimmer switch can be a safe DIY project if you follow proper safety precautions, most importantly by turning off power at the circuit breaker first. However, if you are unsure about any steps or dealing with complex wiring (like 3-way switches), it is always best to consult a qualified electrician.
📑 Table of Contents
Understanding Dimming Technology & Bulb Types
Before you dive into buying a new switch, it’s crucial to understand that not all light bulbs are created equal, especially when it comes to dimming. The type of bulb you have will dictate the type of dimmer you need, or even if dimming is possible at all. Let’s break down the fundamentals of how to dim a light bulb based on its technology.
The Science of Dimming: Phase-Cut Control
Most traditional dimmers work on a principle called “phase-cut” dimming. Imagine your electricity as a wave. A standard dimmer rapidly turns the light circuit on and off, “cutting” a portion of that electrical wave. By reducing the amount of time the bulb is receiving power, the light output decreases, making it appear dimmer. Simple, right? Well, different bulb types react differently to this on-off cycling.
Incandescent and Halogen Bulbs: The Easy Dimmers
These are the classic bulbs we’re all familiar with. They produce light by heating a filament until it glows. Because their operation is relatively simple, incandescent and halogen bulbs are typically very easy to dim. They respond smoothly to standard dimmers, offering a wide range of brightness without flickering or buzzing. If you have these types of bulbs, you generally won’t encounter many issues when trying to dim a light bulb.
Compact Fluorescent Lamps (CFLs): The Tricky Ones
CFLs work by passing an electric current through a tube containing argon and a small amount of mercury vapor, which then excites a phosphor coating to produce visible light. This is a more complex process than an incandescent bulb, and as a result, most standard CFLs are NOT dimmable. Attempting to dim a non-dimmable CFL can damage the bulb, the dimmer, or both, and often results in flickering, buzzing, or complete failure. If you see a CFL explicitly labeled “dimmable,” it contains special circuitry to handle dimming, but it will still require a specific type of dimmer designed for CFLs, or more commonly, a universal dimmer that lists CFL compatibility.
Light Emitting Diodes (LEDs): The Modern Challenge
LEDs are fantastic for energy efficiency and longevity, but they’ve introduced new considerations for dimming. Unlike incandescents, LEDs don’t just glow; they use semiconductor technology. To properly dim a light bulb that is an LED, two things are crucial:
- “Dimmable” Label: The LED bulb itself MUST be explicitly labeled “dimmable.” A non-dimmable LED will likely flicker, buzz, or not dim at all when connected to a dimmer.
- Compatible LED Dimmer: Traditional incandescent dimmers are not designed for the low wattage and electronic nature of LED bulbs. They can cause flickering, limited dimming range, or premature bulb failure. You need a dimmer specifically designed for LEDs, often referred to as “LED-compatible” or “universal” dimmers. We’ll dive more into these in the next section.
Smart Bulbs: Dimming Through Technology
Smart bulbs, like those from Philips Hue, Kasa, or LIFX, offer dimming capabilities built right into the bulb’s electronics. You don’t need a special dimmer switch on your wall to dim a light bulb that’s smart. Instead, you control them through a smartphone app, voice assistant (like Alexa or Google Assistant), or a dedicated smart remote. This is a fantastic option if you want to add dimming functionality without touching any wiring. However, it’s generally recommended NOT to put a smart bulb on a traditional dimmer switch, as this can interfere with its internal electronics.
Choosing the Right Dimmer Switch
Once you know your bulb type, the next step is selecting the correct dimmer switch. This is where many people run into trouble if they don’t understand the compatibility requirements. Picking the right dimmer is vital for effective dimming and preventing issues.
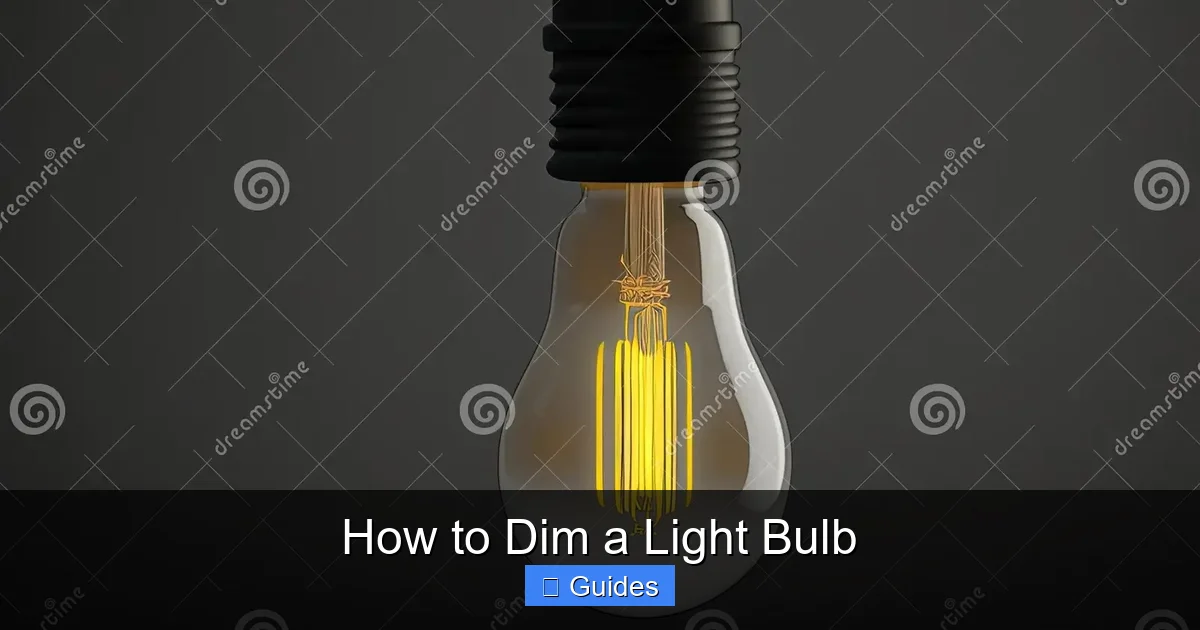
Visual guide about How to Dim a Light Bulb
Image source: thumbs.dreamstime.com
Traditional Dimmers: For Incandescent/Halogen Only
These are the most basic and oldest types of dimmers. They work perfectly with incandescent and halogen bulbs. They are often inexpensive and easy to find. However, attempting to use these with LED or non-dimmable CFLs will almost certainly lead to frustration, buzzing, flickering, and potentially damaged bulbs or dimmers. Always check the dimmer’s packaging for bulb type compatibility.
LED Dimmers – The Essential Match
To successfully dim a light bulb that’s an LED, you absolutely need an LED-compatible dimmer. These dimmers are designed to handle the lower wattage and different electrical load characteristics of LEDs. There are generally two types of LED dimmers:
- Forward-Phase (Leading-Edge) Dimmers: These are the most common type and are essentially modified incandescent dimmers. They work by cutting the “leading edge” of the AC waveform. Many dimmable LEDs are designed to work with these, but sometimes they can still cause flicker or limited dimming range with certain LED brands.
- Reverse-Phase (Trailing-Edge) Dimmers: These dimmers cut the “trailing edge” of the AC waveform and are generally considered more sophisticated. They often offer smoother dimming and better performance with a wider range of LED bulbs, especially those with magnetic transformers. They tend to be a bit more expensive but can be worth it for optimal performance.
Many modern LED dimmers are “universal,” meaning they claim to work with both forward-phase and reverse-phase LED loads. Always check the dimmer’s compatibility list or ask the manufacturer if you’re unsure, especially if you have a specific brand of LED bulb.
Smart Dimmers: Integrated Control for Smart Homes
Smart dimmers are the wall-mounted switches that integrate with your smart home system (like Apple HomeKit, Google Home, Amazon Alexa, or specific hubs like Zigbee or Z-Wave). These dimmers still require proper wiring, but they allow you to control your non-smart, dimmable light bulbs through an app or voice commands, even when you’re away from home. They offer a blend of traditional wall control with smart functionality, and you still need to ensure they are compatible with your bulb type (usually LED-compatible).
Load Capacity and Circuit Types
- Wattage Rating: Every dimmer switch has a maximum wattage rating (e.g., 600W for incandescents, 150W for LEDs). It’s crucial that the total wattage of all bulbs connected to the dimmer does not exceed this rating. For LEDs, the wattage rating is often lower because LEDs draw less power, but the dimmer is still designed for a specific electrical load type.
- Single-Pole vs. 3-Way/4-Way:
- Single-Pole: Controls lights from one location (e.g., a bedroom light controlled by one switch).
- 3-Way: Controls lights from two locations (e.g., a hallway light controlled from either end of the hall).
- 4-Way: Controls lights from three or more locations.
Make sure you buy the correct type of dimmer for your circuit. Installing a single-pole dimmer in a 3-way setup will not work correctly and can be a safety hazard.
Installing a Dimmer Switch: A DIY Guide (with Cautions)
Installing a dimmer switch can be a straightforward DIY project if you’re comfortable with basic electrical work. However, safety is paramount. If you’re unsure at any point, it’s always best to consult a qualified electrician. This guide offers a general overview of how to dim a light bulb by installing a dimmer switch.
Safety First: Preparations
This cannot be stressed enough: ALWAYS turn off the power to the circuit at your main electrical panel (breaker box) before you begin. Test the switch with a non-contact voltage tester to ensure the power is completely off. Once confirmed, leave a note on the breaker box so no one accidentally turns the power back on while you’re working.
Tools You’ll Need
- Non-contact voltage tester
- Screwdriver set (Phillips and flathead)
- Wire strippers/cutters
- Pliers (optional, for twisting wires)
- Electrical tape
- New dimmer switch (compatible with your bulbs and circuit type)
Step-by-Step Installation (General)
- Turn Off Power: As mentioned, this is step one.
- Remove the Old Switch: Carefully unscrew the wall plate and then the screws holding the old switch in the electrical box. Gently pull the switch out.
- Identify Wires: Before disconnecting anything, take a photo of how the old switch is wired. This is your reference! You’ll typically see:
- Line Wire (Hot): Brings power into the switch.
- Load Wire: Sends power to the light fixture.
- Ground Wire: Bare copper or green-insulated wire, for safety.
- Traveler Wires (for 3-way/4-way switches): These carry power between switches in multi-location setups.
- Disconnect Old Switch: Use your screwdriver to loosen the terminal screws and remove the wires from the old switch.
- Connect New Dimmer: Follow the wiring diagram provided with your new dimmer. Dimmer switches usually have color-coded wires (e.g., black for line/load, green for ground, red for travelers).
- Connect the ground wire from the wall box to the dimmer’s ground wire or green screw.
- Connect the line and load wires. If your dimmer has two black wires, one for line and one for load, you’ll need to identify which is which. Sometimes, a “line” wire is marked with a black screw or a label. If they are interchangeable, twist them to the corresponding wires from your wall box.
- For 3-way dimmers, you’ll connect the traveler wires to the dimmer’s designated traveler terminals.
- Secure Connections: Use wire nuts to secure all connections, ensuring they are tight and no bare wire is exposed. Wrap electrical tape around wire nuts for extra security.
- Mount the Dimmer: Carefully push the dimmer and wires back into the electrical box. Screw the dimmer into the box, ensuring it’s flush.
- Install Wall Plate: Screw on the new wall plate.
- Restore Power: Go back to your breaker box and turn the power back on.
Testing and Finishing Up
Once power is restored, test your new dimmer. Turn the lights on and off, and then try adjusting the brightness through its full range. If everything works smoothly and without flickering or buzzing (with dimmable bulbs, of course!), you’ve successfully learned how to dim a light bulb with a new switch!
Important Note: This is a general guide. Always refer to the specific instructions provided with your dimmer switch, as wiring can vary slightly between models and brands. If you encounter any issues or are uncertain about wiring, stop and call a professional electrician.
Dimming Without a Dimmer Switch: Alternative Approaches
What if you want to dim a light bulb but don’t want to mess with wiring, or you live in a rental and can’t make permanent changes? Good news! There are several excellent ways to achieve dimmable lighting without installing a traditional dimmer switch.
The Power of Smart Bulbs
As touched upon earlier, smart bulbs are arguably the easiest way to add dimming functionality to any existing fixture. Simply screw in a smart bulb (like a Philips Hue, GE Cync, or Kasa Smart Bulb) into your lamp or ceiling fixture, connect it to your Wi-Fi or smart home hub, and you’re good to go! You can then dim the light using:
- Smartphone App: Most smart bulb systems have intuitive apps that let you adjust brightness, color temperature, and even color.
- Voice Control: Pair your smart bulbs with a voice assistant like Amazon Alexa, Google Assistant, or Apple Siri for hands-free dimming (“Hey Google, dim the living room lights to 50%”).
- Smart Switches/Remotes: Many smart lighting ecosystems offer wireless, battery-powered dimming remotes or smart wall switches that can control your smart bulbs without any hardwiring.
This method is fantastic for renters or anyone who wants the convenience and advanced features (like scheduling and scene setting) that smart lighting offers.
Plug-in Dimmers (for Table/Floor Lamps)
If you have table lamps or floor lamps with traditional incandescent or halogen bulbs, a plug-in dimmer is a super simple solution. These devices plug directly into a standard wall outlet, and then your lamp plugs into the dimmer. The dimmer itself usually has a slider or knob to adjust the brightness. Make sure you get one rated for the wattage of your lamp and compatible with your bulb type.
Caveat: Plug-in dimmers typically work best with incandescent/halogen bulbs. While some might claim LED compatibility, always verify, as the performance with LEDs can be hit-or-miss compared to dedicated in-wall LED dimmers.
Layered Lighting: An Ambiance Hack
While not technically “dimming a light bulb,” layered lighting is an excellent strategy to create varying levels of illumination and ambiance without any dimmers at all. The idea is to use multiple light sources at different intensities:
- Ambient Lighting: Your main overhead lights (e.g., recessed lights, flush mounts).
- Task Lighting: Brighter lights for specific activities (e.g., desk lamps, under-cabinet lighting).
- Accent Lighting: Decorative lights to highlight features or create mood (e.g., picture lights, uplights, smaller table lamps).
By simply turning different combinations of these lights on or off, you can effectively change the overall brightness and feel of a room, achieving a similar effect to dimming. For instance, turning off your bright overhead lights and relying on a few softer table lamps can instantly create a cozier atmosphere.
Troubleshooting Common Dimming Problems
Even with the right components, you might occasionally run into issues when trying to dim a light bulb. Don’t despair! Most problems have relatively simple solutions. Here are some common troubleshooting tips.
Flickering Fiesta or Buzzing Bother?
This is probably the most common complaint, especially with LED bulbs.
- Incompatible Dimmer/Bulb: The number one culprit. Ensure your LED bulbs are explicitly “dimmable” and your dimmer is specifically “LED-compatible.” If you have incandescent bulbs, ensure you’re using an incandescent dimmer.
- Minimum Load Requirements: Some older dimmers or even some LED dimmers have a minimum wattage requirement. If you’re using very low-wattage LED bulbs, the combined load might be below this minimum, causing flicker. Try adding another dimmable bulb or replacing the dimmer with one designed for lower loads.
- Loose Wiring: Check the connections at the dimmer switch and the light fixture. Ensure all wire nuts are tight and wires are securely connected to terminals. (Remember to turn off power first!).
- Low-Quality Bulbs: Not all dimmable LEDs are created equal. Cheaper bulbs might have less sophisticated internal electronics, leading to poor dimming performance.
Not Dimming Enough (or at All)
- Non-Dimmable Bulb: Double-check that your bulb is actually labeled “dimmable.” If not, it won’t dim and might get damaged.
- Dimmer Compatibility: Again, ensure your dimmer is suitable for your bulb type. An incandescent dimmer won’t properly dim an LED.
- Dimmer Range Settings: Many LED-compatible dimmers have adjustment dials or settings (often hidden under the wall plate) that allow you to fine-tune the minimum and maximum dimming levels for optimal performance with your specific bulbs. Consult your dimmer’s manual.
- Overloaded Dimmer: If the total wattage of your bulbs exceeds the dimmer’s maximum rating, it might not function correctly or could trip its thermal protection.
Premature Bulb Burnout
If your bulbs are dying faster than they should when dimmed, especially LEDs, it’s often a sign of incompatibility.
- Wrong Dimmer Type: Using an incandescent dimmer with LED bulbs can overstress the LED’s driver electronics, leading to early failure.
- Overheating: Ensure your dimmer is properly installed in the electrical box with enough space for heat dissipation. Overloading the dimmer can also cause overheating for both the dimmer and the bulbs.
Ghosting or Glowing
Sometimes, dimmable LED bulbs will emit a faint glow even when the dimmer is switched off. This “ghosting” or “phantom glow” can be due to:
- Residual Current: Very small amounts of current (“leakage current”) can flow through the circuit even when the dimmer is off, just enough to faintly illuminate highly efficient LEDs.
- Dimmer Type: Some dimmers, especially older ones, are more prone to this. Installing a dimmer that requires a neutral wire (if your wiring supports it) can often eliminate ghosting.
- Dimmer Bypass: For persistent ghosting, a neutral wire LED dimmer, or sometimes a special “dimmer bypass” capacitor installed at the light fixture, can resolve the issue.
The Compatibility Conundrum
The biggest takeaway from all these troubleshooting points is compatibility. The best way to avoid most dimming issues is to ensure a perfect match between your dimmable bulbs and your dimmer switch. When in doubt, stick to reputable brands and check their compatibility lists, or choose a “universal” LED dimmer that is highly rated for a wide range of LED bulbs.
Conclusion
Learning how to dim a light bulb effectively is a fantastic way to enhance your home’s comfort, save energy, and control the mood of any room. While it might seem a little daunting with the variety of bulb types and dimmer technologies available today, breaking it down into manageable steps makes it much clearer.
Remember these key principles: always match your dimmer to your bulb type (especially for LEDs), prioritize safety during installation by cutting off power, and consider smart lighting solutions for easy, wire-free dimming. Don’t be afraid to experiment with different lighting levels and setups to discover what works best for your space and lifestyle. If you ever feel out of your depth with electrical work, a qualified electrician is always your best resource to ensure a safe and successful outcome.
With the right knowledge and tools, you’re now well-equipped to take control of your home’s illumination, creating environments that are perfectly lit for every occasion. Enjoy your newfound power to manipulate the light!
🎥 Related Video: Dimmer lights Switch #shorts
📺 RK Techsol
Dimmer lights Switch #shorts.
Frequently Asked Questions
Why won’t my old dimmer work with new LED bulbs?
Your old dimmer likely isn’t compatible with LED technology. Traditional dimmers are designed for the resistive load of incandescent bulbs, whereas LEDs require a dimmer specifically engineered for their low wattage and electronic circuitry to prevent flickering, buzzing, and ensure a smooth dimming range.
How do I know if a dimmer is compatible with my LED bulbs?
Check the dimmer’s packaging and specifications for explicit mention of “LED compatibility” or a list of compatible LED bulb brands/models. Reputable LED dimmers often specify if they are forward-phase (leading-edge) or reverse-phase (trailing-edge) and may include minimum/maximum wattage ratings for LED loads.
Can dimming save energy?
Yes, dimming lights can save energy. Reducing the light output directly correlates to a reduction in power consumption, especially with incandescent and halogen bulbs. For LEDs, the energy savings are still present, though often less dramatic than with older bulb types because LEDs are already highly efficient.
What’s the difference between a single-pole and a 3-way dimmer?
A single-pole dimmer controls a light fixture from one location, like a standard wall switch in a small room. A 3-way dimmer, conversely, is used when a single light fixture needs to be controlled from two separate locations, such as at opposite ends of a hallway or stairs, requiring specific wiring.
Why do my dimmable LEDs buzz?
LEDs buzzing when dimmed is a common issue often caused by an incompatibility between the LED bulb and the dimmer switch. It can also stem from an overloaded dimmer, loose wiring connections, or the dimmer operating outside its ideal load range, leading to audible vibration in the dimmer or the bulb’s driver.
Is it bad to leave lights dimmed all the time?
For most modern, dimmable LED bulbs, leaving them dimmed all the time is generally not bad and can even extend their lifespan due to reduced heat and electrical stress. For incandescent bulbs, dimming also prolongs life. However, ensure your dimmer and bulbs are compatible to avoid issues like flickering or buzzing.