Considering better indoor air quality? Installing a UV light in your HVAC system is a powerful step. This guide demystifies the process, helping you select the right germicidal UV-C light, gather essential tools, and follow a detailed step-by-step installation. Improve your home’s air by tackling mold, bacteria, and viruses directly within your HVAC unit, leading to a healthier living environment and a more efficient system.
How to Install Uv Light in Hvac?
Ever found yourself wondering if there’s more you could do to improve the air quality in your home? With increasing awareness of indoor pollutants, allergens, and airborne pathogens, many homeowners are seeking effective solutions beyond standard air filters. Dust, pollen, pet dander, and even invisible threats like mold spores, bacteria, and viruses can circulate throughout your home via your heating, ventilation, and air conditioning (HVAC) system, impacting your family’s health and comfort.
Enter UV-C light technology for your HVAC system – a game-changer in indoor air purification. Commonly used in hospitals and laboratories for sterilization, germicidal UV-C light can be integrated directly into your home’s air ducts or near the evaporator coil. This powerful light inactivates microorganisms, preventing them from reproducing and spreading. The result? Cleaner coils, a more efficient HVAC system, and significantly improved air quality for you and your loved ones. If you’re ready to take control of your home’s air, learning how to install UV light in HVAC is a fantastic step.
This comprehensive guide will walk you through everything you need to know about how to install UV light in HVAC. We’ll cover why it’s a smart investment, how to choose the right system for your home, the tools you’ll need, and a detailed, step-by-step installation process. By the end, you’ll be confident in your ability to enhance your home’s air quality and enjoy the benefits of a healthier living environment.
Key Takeaways
- Enhanced Air Quality: Installing a UV light in your HVAC system significantly reduces airborne mold spores, bacteria, and viruses, leading to a healthier indoor environment.
- System Efficiency & Longevity: UV lights prevent mold and bacterial growth on HVAC coils, improving system efficiency by maintaining optimal heat transfer and potentially extending the lifespan of your unit.
- Two Main Types: Choose between coil sterilization UV lights (targeting coils) and in-duct air purification UV lights (treating circulating air) based on your specific needs and system setup.
- Safety First: Always disconnect power to your HVAC system before beginning any installation. Wear appropriate personal protective equipment (PPE), including UV-blocking glasses and gloves, as direct UV-C exposure can be harmful.
- Proper Placement is Key: For coil sterilization, UV lights should be placed to shine directly on the evaporator coil. For whole-home air purification, place the UV light in the return air duct after the filter or in the supply air duct.
- DIY Friendly with Caution: While installing a UV light in your HVAC is a manageable DIY project for many homeowners, understanding your system and following instructions meticulously is crucial. When in doubt, consult a professional.
- Regular Maintenance: UV-C bulbs typically need replacement annually or every two years to maintain effectiveness. Mark your calendar for timely bulb changes to ensure continuous air purification benefits.
Quick Answers to Common Questions
Can UV light in HVAC remove dust?
No, UV lights are designed to kill microorganisms like mold, bacteria, and viruses, but they do not filter out dust, pollen, or pet dander. You still need a good quality air filter for particle removal.
How long do UV bulbs last in HVAC systems?
Most UV-C bulbs for HVAC systems have an effective lifespan of 9,000 to 18,000 hours, which typically translates to 1 to 2 years of continuous use. They should be replaced even if they still appear to be lit, as their germicidal effectiveness diminishes over time.
Is it safe to install UV light in HVAC yourself?
Yes, installing a UV light in your HVAC is generally safe for a confident DIYer, provided you follow all safety precautions, especially disconnecting power and wearing protective eyewear and gloves. If you’re uncomfortable with electrical work, it’s best to consult a professional.
Where is the best place to install UV light in HVAC for coil cleaning?
For coil sterilization, the UV light should be positioned to shine directly onto the evaporator coil and drain pan within the air handler. This is usually in the plenum directly above or below the coil.
Will UV light in HVAC help with pet odors?
While UV light itself doesn’t directly eliminate pet odors from dander, it can reduce musty smells caused by bacteria or mold often associated with pet dander buildup or humidity, indirectly contributing to fresher air.
📑 Table of Contents
Understanding UV Light in HVAC Systems
Before you dive into the installation process, it’s helpful to understand what UV light is and how it functions within your HVAC system. This knowledge will empower you to make informed decisions about your setup and appreciate the benefits it brings.
What is UV-C Light?
UV light is a spectrum of electromagnetic radiation, and UV-C is the specific wavelength (between 200 and 280 nanometers) known for its powerful germicidal properties. It’s the same type of light used in medical facilities to sterilize equipment. Unlike UV-A and UV-B, which are less harmful and present in sunlight, UV-C is extremely effective at destroying the DNA and RNA of microorganisms like bacteria, viruses, mold spores, and fungi. This makes them unable to reproduce and spread, essentially inactivating them.
How Does UV-C Light Work in Your HVAC?
When you install UV light in HVAC, you’re essentially setting up a silent, continuous purification system. The UV-C light fixture emits light that floods a specific area within your ductwork. When airborne contaminants pass through this illuminated zone, the UV-C energy penetrates their cellular structure, rendering them harmless. There are two primary ways UV lights are used in HVAC systems:
- Coil Sterilization: This is the most common application. A UV light is strategically placed to shine directly on your HVAC system’s evaporator coil and drain pan. These areas are often damp and dark, creating an ideal breeding ground for mold, mildew, and bacteria. The UV light continuously sterilizes these surfaces, preventing microbial growth, which is a major cause of foul odors and reduced system efficiency.
- In-Duct Air Purification: For whole-home air treatment, UV lights are installed within the ductwork, either in the return air plenum (after the filter) or the supply air plenum. As air circulates through the ducts, it passes through the UV-C field, sterilizing airborne pathogens before they enter your living spaces.
Benefits of Installing a UV Light in Your HVAC
The advantages of having a UV light in your HVAC system extend far beyond just killing germs:
- Improved Indoor Air Quality: This is the primary benefit. By eliminating mold, bacteria, and viruses, you reduce airborne allergens and irritants, leading to cleaner, healthier air throughout your home.
- Reduced Allergies and Asthma Symptoms: Less exposure to airborne allergens can significantly alleviate symptoms for allergy and asthma sufferers.
- Eliminates Odors: Many unpleasant musty smells in homes originate from mold and bacteria growing on the evaporator coil. UV lights eradicate these sources, leading to fresher air.
- Increased HVAC System Efficiency: A clean evaporator coil can transfer heat more effectively. When mold and grime accumulate, your system has to work harder, consuming more energy. UV lights keep coils clean, maintaining optimal efficiency and potentially lowering energy bills.
- Extends System Lifespan: By preventing buildup on coils and reducing the strain on your system, UV lights can contribute to the longevity of your HVAC unit components.
Is a UV Light Right for Your HVAC System?
While the benefits are clear, it’s wise to consider if installing a UV light in HVAC is the best solution for your specific needs and home environment. Not every home is the same, and understanding your circumstances will help you decide.
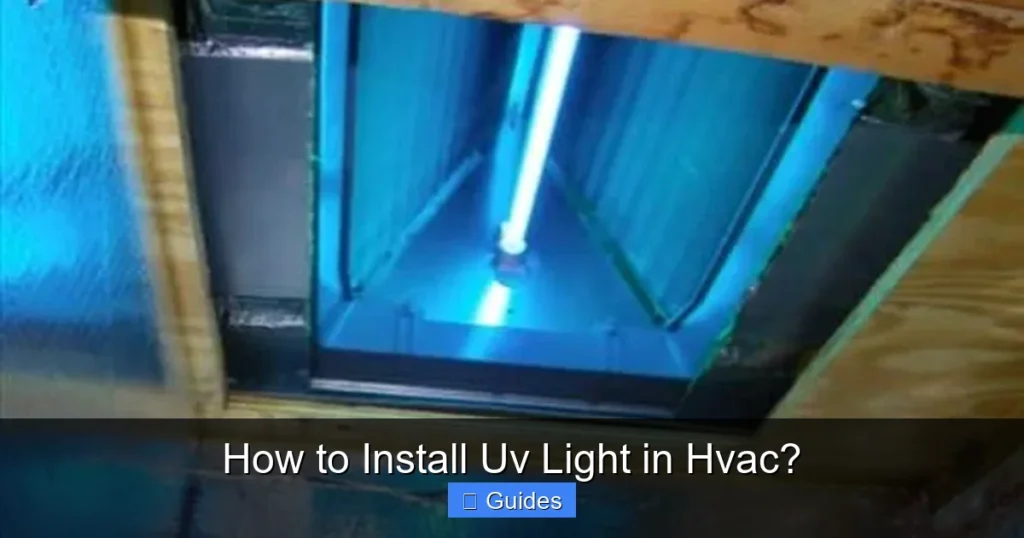
Visual guide about How to Install Uv Light in Hvac?
Image source: hvachowto.com
Assessing Your Needs
Ask yourself these questions:
- Do you or family members suffer from allergies, asthma, or respiratory issues? UV lights can significantly reduce airborne triggers.
- Have you noticed a musty smell coming from your vents? This is a strong indicator of mold or mildew growth on your evaporator coil, which a UV light can combat.
- Do you live in a humid climate? High humidity encourages mold growth, making UV light a particularly good investment.
- Do you have pets? Pet dander can be a major allergen, and while UV light doesn’t remove dander itself, it sterilizes other microorganisms that might contribute to poor air quality.
- Are you concerned about viruses and bacteria circulating in your home? Especially relevant in today’s world, UV-C can help mitigate this risk.
Compatibility with Different HVAC Systems
The good news is that most residential HVAC systems can accommodate a UV light installation. This includes:
- Furnaces and Air Handlers: These are the most common places for UV light installation, usually near the evaporator coil or within the ductwork directly above or below the unit.
- Heat Pumps: Similar to traditional air conditioners, UV lights can be installed to treat the indoor coil of a heat pump system.
- Mini-Splits (Ductless Systems): Some specialized UV light kits are available for mini-split indoor units, though they require specific installation tailored to the compact design.
Before you commit to installing a UV light in HVAC, it’s always a good idea to consult your HVAC system’s manual or a professional to confirm compatibility, especially if you have an older or less common setup.
Professional vs. DIY Considerations
Learning how to install UV light in HVAC is definitely within the realm of a confident DIYer. The process typically involves drilling a hole, mounting the lamp, and connecting to a power source. However, there are times when a professional might be preferred:
- If you are uncomfortable working with electrical wiring.
- If your HVAC unit is difficult to access.
- If you have a complex system or aren’t sure about the best placement.
- If your system is still under warranty and you’re concerned about voiding it with a DIY installation (though most reputable UV light kits are designed not to).
Potential Drawbacks and Misconceptions
While generally safe and effective, it’s important to address a few points:
- Ozone Production: Some older or cheaper UV lights can produce ozone, a lung irritant. Always choose “ozone-free” or “low-ozone” UV-C bulbs, which are now standard.
- Bulb Replacement: UV-C bulbs lose effectiveness over time and need to be replaced, typically annually or biennially. This is an ongoing maintenance cost.
- No Particle Removal: UV lights kill microorganisms but do not filter out dust, pollen, or pet dander. They work best in conjunction with a good quality air filter (MERV 8 or higher).
- Safety: Direct exposure to UV-C light can be harmful to skin and eyes. Proper safety precautions during installation and maintenance are crucial.
Choosing the Right UV Light System
The market offers various UV light systems, each designed for slightly different purposes. Knowing how to choose the right UV light in HVAC is crucial for maximizing its effectiveness.
Coil Sterilization vs. In-Duct Air Purification
- Coil Sterilization Systems: These are designed to keep your evaporator coil and drain pan free of mold and bacterial growth. They are typically smaller, single-bulb units mounted directly inside the air handler to shine on the coil. This is an excellent choice if your primary concern is musty odors, mold growth, or improving HVAC efficiency.
- In-Duct Air Purification Systems: These systems target airborne contaminants throughout your home. They are installed within the ductwork, usually in the return air plenum (after the filter) or the supply air plenum. They can be single or dual bulb units and often cover a larger area. This is ideal if your main goal is whole-home germ and virus reduction. Some advanced systems offer a combination of both.
Single vs. Dual Bulb Systems
The choice often depends on the size of your HVAC system and your desired level of purification. Dual bulb systems offer more comprehensive coverage and often greater germicidal power, making them suitable for larger homes or those with significant air quality concerns. For basic coil sterilization, a single bulb is usually sufficient.
UV-C Intensity and Coverage Area
Different UV lights have varying intensities, measured in microwatts per square centimeter. More intense bulbs can sanitize faster or cover a larger area. Manufacturers will typically specify the square footage or CFM (cubic feet per minute) rating their unit is designed for. Match this to your home’s size and your HVAC system’s capacity.
Power Supply
Most UV lights for HVAC systems come with two main power options:
- Plug-in (120V): These units simply plug into a standard wall outlet, often near the air handler. They are the easiest to install for DIYers.
- Hardwired: These units connect directly to your HVAC system’s 24V or 120V electrical supply. This usually requires tapping into existing wiring, which can be more complex and might necessitate professional installation if you’re uncomfortable with electrical work. Many systems include a low-voltage transformer for simpler wiring.
Safety Features
Look for UV light kits that include safety features, such as:
- Safety Interlock Switch: This automatically shuts off the UV light when the blower access panel is opened, preventing accidental UV-C exposure.
- Shielded Bulbs: Some units have protective grilles or casings around the bulb to prevent direct contact or accidental breakage.
- Indicator Light: A small external LED light that shows the UV lamp is functioning.
Reputable Brands and Warranties
Invest in a UV light system from a well-known manufacturer with good reviews and a solid warranty. This ensures you’re getting a quality product and support if issues arise. Read product descriptions carefully to ensure the unit is designed for HVAC use and specifies “ozone-free.”
Tools and Materials You’ll Need
Preparation is key for any successful DIY project. Before you begin to install UV light in HVAC, gather all the necessary tools and materials. Having everything on hand will make the installation process smoother and safer.
Essential Tools:
- Drill: A standard cordless drill is sufficient.
- Hole Saw Kit: You’ll need a hole saw bit that matches the diameter of the UV lamp’s mounting hole (usually 1.5 to 2.5 inches, check your kit’s instructions).
- Tape Measure or Ruler: For accurate placement and drilling.
- Marker or Pencil: To mark drilling locations.
- Screwdriver Set: Phillips and flathead, for mounting screws and potentially accessing electrical panels.
- Wire Strippers/Cutters: If you are hardwiring the unit.
- Pliers: Helpful for manipulating wires.
- Utility Knife or Snips: For opening packaging or trimming sealants.
- Shop Vacuum: To clean up metal shavings after drilling.
Materials You’ll Need:
- Your Chosen UV Light Kit: Ensure it includes the UV lamp, mounting hardware, and power supply.
- Silicone Sealant or HVAC Foil Tape: Crucial for sealing around the drilled hole to prevent air leaks.
- Electrical Tape: If you are hardwiring the unit, for securing connections.
- Zip Ties or Wire Clamps: For neat cable management.
- Optional: HVAC Disconnect Tool: If your system has a dedicated disconnect box and you want an extra layer of safety.
Safety Equipment (Non-Negotiable!):
- Safety Glasses or Goggles: Essential to protect your eyes from metal shavings during drilling and, more importantly, from accidental UV-C exposure.
- Work Gloves: To protect your hands from sharp sheet metal edges and UV-C light.
- Long Sleeves and Pants: To protect exposed skin from UV-C radiation if the lamp is accidentally activated.
Step-by-Step Installation Guide
Now that you’ve got your UV light system and all the necessary tools, it’s time to learn the practical steps of how to install UV light in HVAC. Follow these instructions carefully for a safe and effective setup.
Safety First!
This is the most critical step. Before touching any part of your HVAC system, you MUST disconnect its power. Locate your thermostat and set it to “OFF.” Then, go to your electrical panel (breaker box) and switch off the breaker(s) that control your furnace or air handler. If your outdoor unit has a dedicated disconnect box, switch that off too. Verify power is off by trying to turn on the system. Always wear your safety glasses and gloves throughout the installation process.
Choose the Installation Location
The placement of your UV light is key to its effectiveness:
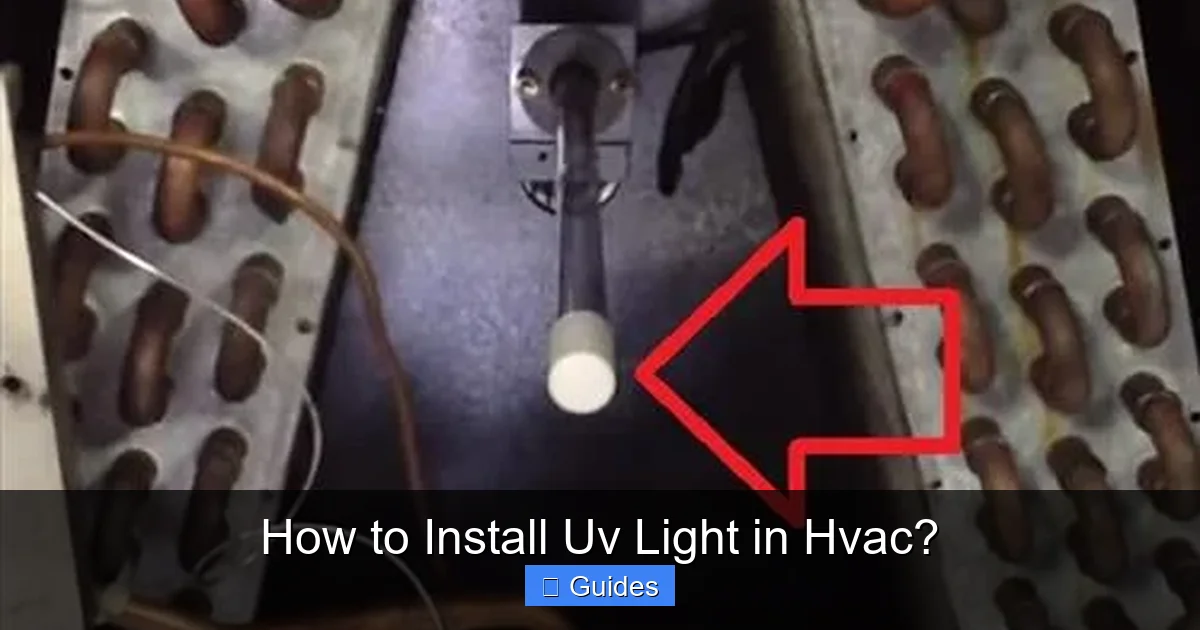
- For Coil Sterilization: The UV lamp should be positioned to shine directly onto the evaporator coil. This usually means installing it in the plenum directly above or below the coil, or even inside the coil access panel if space allows. Ensure there are no obstructions between the bulb and the coil.
- For In-Duct Air Purification:
- Return Air Plenum: Install after the air filter, but before the blower motor. This treats air entering the system.
- Supply Air Plenum: Install after the blower motor and heat exchanger/evaporator coil, where the air is pushed into your home’s ducts.
Choose a flat section of ductwork with enough clear space to mount the lamp securely and allow for future bulb replacement. Avoid placing it too close to sensitive components like wiring or plastic parts, although most modern UV lights are designed with appropriate shielding.
Mark and Drill the Hole(s)
- Once you’ve chosen your spot, use your measuring tape and marker to pinpoint the exact center for the hole where the UV lamp will enter the ductwork or air handler. Refer to your UV kit’s instructions for precise measurements and bulb orientation.
- Attach the correct size hole saw bit to your drill.
- Carefully drill the hole through the sheet metal. Apply steady pressure and let the saw do the work. Be mindful of any internal components.
- Use a shop vacuum to immediately clean up any metal shavings, preventing them from falling into your HVAC system.
Mount the UV Lamp
- Insert the UV lamp or its mounting base through the drilled hole. Ensure the bulb itself is positioned as per the manufacturer’s instructions – usually angled to maximize coverage over the coil or perpendicular to airflow in the duct.
- Secure the mounting flange or bracket to the exterior of the ductwork or air handler using the screws provided in your kit. Make sure it’s snug and stable.
Wiring the Unit
This step varies depending on whether your unit is plug-in or hardwired.
- Plug-in (120V): Simply route the power cord to a nearby accessible electrical outlet. Ensure the cord is secured with zip ties or clamps to prevent it from interfering with moving parts or creating a tripping hazard.
- Hardwired (e.g., to HVAC 24V or 120V):
- Most hardwired UV lights come with a transformer that converts 120V or 24V from your HVAC system to the voltage required by the UV bulb.
- Locate a suitable power source within your HVAC unit. Often, this is the 24V transformer that powers your thermostat, or a 120V junction box inside the air handler. Consult your HVAC wiring diagram or a professional if unsure.
- Carefully strip the ends of the UV light’s power wires.
- Connect the wires using wire nuts or appropriate connectors, following the color-coding (usually black to hot, white to neutral, green to ground for 120V; two wires for 24V). If connecting to 24V, ensure you don’t overload the existing transformer.
- Secure all wiring connections with electrical tape or within a junction box. Route the wires neatly and secure them away from hot surfaces or moving components.
Always double-check your wiring against the UV light manufacturer’s instructions and your HVAC system’s wiring diagram. When in doubt, call a licensed electrician or HVAC technician.
Seal and Test
- Once the lamp is mounted and wired, apply silicone sealant or HVAC foil tape around the edge of the mounting flange where it meets the ductwork. This prevents air leaks and maintains system efficiency.
- Carefully insert the UV bulb into the lamp housing (if it wasn’t already integrated). Avoid touching the glass portion of the bulb with bare hands, as oils can reduce its effectiveness and lifespan. Use gloves or a clean cloth.
- Close all access panels on your HVAC system.
- Return to your electrical panel and switch the HVAC breaker(s) back on.
- Turn on your HVAC system (heating or cooling). The UV light should illuminate. Many units have a small external indicator light to confirm operation. Never look directly at the activated UV-C bulb.
Maintenance Tips
To ensure your UV light in HVAC continues to provide clean air:
- Bulb Replacement: UV-C bulbs typically need to be replaced annually or every two years, as their germicidal output diminishes over time. Mark your calendar! Always disconnect power before handling the bulb.
- Regular Cleaning: Occasionally wipe down the bulb with a clean, dry cloth to remove any dust buildup that could obstruct UV-C output.
Troubleshooting Common Issues
Even with careful installation, sometimes issues can arise. Here are a few common problems you might encounter after you install UV light in HVAC and how to troubleshoot them:
UV Light Not Turning On
- Check Power: Ensure the HVAC system’s power is on at the breaker and the wall switch. If plug-in, check the outlet. If hardwired, re-check your electrical connections.
- Bulb Seating: Make sure the UV bulb is fully seated and securely twisted into its socket.
- Bulb Lifespan: If the bulb is old (over 1-2 years), it might need replacement.
- Safety Switch: Some units have a safety interlock switch on the access panel. Ensure the panel is fully closed and the switch is engaged.
- Fuse/Transformer: For hardwired units, check if a small fuse on the UV ballast or transformer has blown.
Strange Odors After Installation
Initially, you might notice a slight “clean” or “electrical” smell for a short period as the system runs. However, if there’s a strong metallic, burning, or chemical smell, immediately turn off the HVAC and UV light. Ensure the UV light is not directly touching any plastic components or wiring that could be overheating. Also, confirm you purchased an “ozone-free” bulb.
Decreased Airflow
A properly installed UV light should not restrict airflow. If you notice a decrease, re-check the mounting. Is anything obstructing the airflow pathway? Ensure the hole you drilled is sealed properly and not causing a major air leak that could reduce suction or pressure.
UV Light Not Effectively Cleaning / Odors Persist
- Placement: Double-check that the UV light is positioned optimally for its intended purpose (e.g., shining directly on the coil for sterilization).
- Bulb Effectiveness: The bulb might be old and its germicidal output reduced. Replace it if it’s past its recommended lifespan.
- System Size: Ensure the UV system’s capacity matches your HVAC system’s airflow and the size of your home.
- Other Issues: A UV light won’t solve all air quality issues. Ensure your air filter is clean and of appropriate MERV rating. Persistent mold issues might require professional HVAC cleaning before the UV light can maintain cleanliness.
Conclusion
Learning how to install UV light in HVAC is a smart investment in your home’s air quality and the efficiency of your heating and cooling system. By following the steps outlined in this guide, you can confidently undertake this DIY project, transforming your HVAC unit into a proactive defense against airborne pathogens and mold growth.
From understanding the germicidal power of UV-C light to carefully choosing the right system and executing a safe, step-by-step installation, you now have the knowledge to create a healthier indoor environment. Remember, safety, proper placement, and regular maintenance are key to unlocking the full benefits of your new UV light system.
Enjoy the peace of mind that comes with knowing your home’s air is cleaner, fresher, and healthier for everyone inside. Breathe easier, live better!
🎥 Related Video: Installing UV’s! Uv season is officially here!
📺 Air Quality AC & Electric
Frequently Asked Questions
Does UV light in HVAC produce ozone?
Most modern UV-C lamps designed for HVAC systems are “ozone-free” and do not produce harmful levels of ozone. It’s crucial to select a UV light kit explicitly labeled as “ozone-free” to avoid generating this respiratory irritant.
How often should I replace the UV bulb in my HVAC system?
UV-C bulbs typically need replacement every 12 to 24 months. Although the bulb might still emit visible light, its germicidal intensity diminishes over time, making it less effective at killing microorganisms. Check your specific manufacturer’s recommendations.
Can UV light damage my HVAC system?
When properly installed, UV lights are designed not to harm your HVAC system. However, improper placement that exposes sensitive plastic components or wiring to direct UV-C light could potentially cause degradation over many years. Always follow manufacturer guidelines for installation location.
Does UV light in HVAC consume a lot of electricity?
No, UV lights for HVAC systems are generally very energy-efficient. Most operate on low wattage, comparable to a small fluorescent light bulb, so their impact on your electricity bill is minimal, especially when considering the potential energy savings from a cleaner, more efficient HVAC unit.
Can I install a UV light in my existing HVAC system?
Yes, UV lights are designed to be retrofitted into most existing residential HVAC systems. They can be installed in the ductwork or directly inside the air handler near the evaporator coil, making them a versatile upgrade for improved indoor air quality.
What’s the difference between a UV light and an air purifier?
A UV light specifically uses germicidal UV-C radiation to inactivate airborne microorganisms (mold, bacteria, viruses) by destroying their DNA/RNA. A traditional air purifier typically uses filters (like HEPA) to physically capture particles such as dust, pollen, and pet dander. While both improve air quality, they target different types of pollutants, and they often work best in conjunction.