Installing a UV light in your HVAC system is a powerful way to improve indoor air quality and prevent mold growth. The most effective locations are near the evaporator coil to sterilize surfaces and within the ductwork to purify circulating air. Proper placement is crucial for maximum effectiveness, ensuring a healthier home environment for everyone.
Ever wonder about the invisible occupants of your home? We’re not talking about friendly ghosts, but rather the microscopic organisms – mold spores, bacteria, viruses, and allergens – that often hitch a ride through your HVAC system. While your heating and cooling system works hard to keep you comfortable, it can also inadvertently circulate these unwanted guests, impacting your indoor air quality and, by extension, your health.
That’s where UV light technology steps in. Adding a germicidal UV-C light to your HVAC system is like installing an invisible bodyguard, constantly working to neutralize these tiny threats. It’s a powerful, proactive step toward a cleaner, healthier home environment. But simply buying a UV light isn’t enough; its effectiveness hinges almost entirely on where you decide to install it within your HVAC setup.
Getting the placement right is the difference between a highly effective air purification system and a costly gadget that doesn’t deliver. In this comprehensive guide, we’ll walk you through the prime locations for installing a UV light in HVAC, explain why these spots are so effective, and give you all the practical tips you need to make an informed decision for your home.
Key Takeaways
- Evaporator Coil is Key: Installing a UV light directly above or beside the evaporator coil is paramount for preventing mold, mildew, and bacterial growth on this critical, damp surface.
- Ductwork for Air Purification: Placement in the return or supply air duct sterilizes circulating air, effectively neutralizing airborne pathogens like viruses, bacteria, and allergens before they spread throughout your home.
- UV-C Technology is Germicidal: HVAC UV lights use germicidal UV-C light, which disrupts the DNA of microorganisms, rendering them harmless and unable to reproduce.
- Consider System Specifics: The optimal installation of a UV light in HVAC depends on your system type, size, and primary air quality goals. Larger systems or more severe issues may benefit from dual-bulb setups.
- Safety and Accessibility are Crucial: UV-C light is harmful to skin and eyes, so ensuring the bulb is properly enclosed and accessible for safe, regular maintenance (bulb replacement) is vital.
- Professional Installation Recommended: While some DIY options exist, professional installation guarantees correct placement, safe wiring, and compliance with local codes, maximizing effectiveness and system longevity.
- Regular Maintenance is a Must: UV bulbs lose intensity over time and typically need replacement annually to maintain optimal germicidal efficacy, ensuring continuous protection for your indoor air quality.
Quick Answers to Common Questions
What is the main benefit of installing a UV light in my HVAC system?
The main benefit is significantly improved indoor air quality by preventing mold and bacterial growth on the evaporator coil and neutralizing airborne viruses, bacteria, and allergens as air circulates.
Where is the most common and effective installation spot for a UV light in HVAC?
The most common and highly effective installation spot is near the evaporator coil, as this dark, damp area is prone to mold and bacterial growth, which the UV light actively prevents.
Can I install a UV light in my HVAC system myself?
While some DIY kits exist, professional installation is strongly recommended. This ensures correct placement, safe electrical wiring, prevention of UV light leakage, and proper integration with your HVAC system.
How often do UV bulbs need to be replaced?
Most UV bulbs for HVAC systems need to be replaced annually, typically after about 9,000 hours of continuous operation, because their germicidal intensity diminishes over time even if they still appear to be glowing.
Is UV light in HVAC safe for pets and people?
Yes, when properly installed, a UV light in HVAC is completely safe for pets and people because the germicidal UV-C light is fully enclosed within the HVAC system or ductwork, preventing any direct exposure.
📑 Table of Contents
- Understanding UV-C Light Technology and Its HVAC Benefits
- The Prime Location: Near the Evaporator Coil
- Beyond the Coil: Ductwork Installation for Whole-Home Air Purification
- Strategic Placement for Maximum Impact: Single vs. Dual Bulb Systems
- Key Considerations Before You Install UV Light in HVAC
- The Installation Process and Essential Maintenance
- Conclusion
Understanding UV-C Light Technology and Its HVAC Benefits
Before we dive into installation spots, let’s briefly touch upon what makes UV-C light so special. UV-C is a specific wavelength of ultraviolet light that is naturally emitted by the sun but is mostly filtered out by Earth’s atmosphere. In controlled environments, however, it’s a potent germicide. This powerful light works by disrupting the DNA and RNA of microorganisms, including bacteria, viruses, mold, and fungi. Once their genetic material is compromised, these tiny invaders can no longer reproduce or spread, effectively rendering them harmless.
When integrated into your HVAC system, this germicidal power translates into several significant benefits:
- Mold and Mildew Prevention: The single biggest enemy of your HVAC system’s efficiency and your home’s air quality.
- Improved Indoor Air Quality (IAQ): By neutralizing airborne pathogens, you reduce the circulation of illness-causing microorganisms.
- Reduced Allergens and Irritants: Many allergens are biological; UV-C light helps diminish their presence.
- Enhanced HVAC System Efficiency: By preventing mold growth on coils, your system can operate more efficiently, potentially lowering energy bills.
- Odor Reduction: Odors caused by microbial growth or organic compounds can be minimized.
- Extended System Lifespan: A cleaner system experiences less strain and corrosion, potentially lasting longer.
The Prime Location: Near the Evaporator Coil
If there’s one location that almost every HVAC professional will recommend for a UV light installation, it’s near the evaporator coil. This area is often considered the most critical spot, and for good reason.
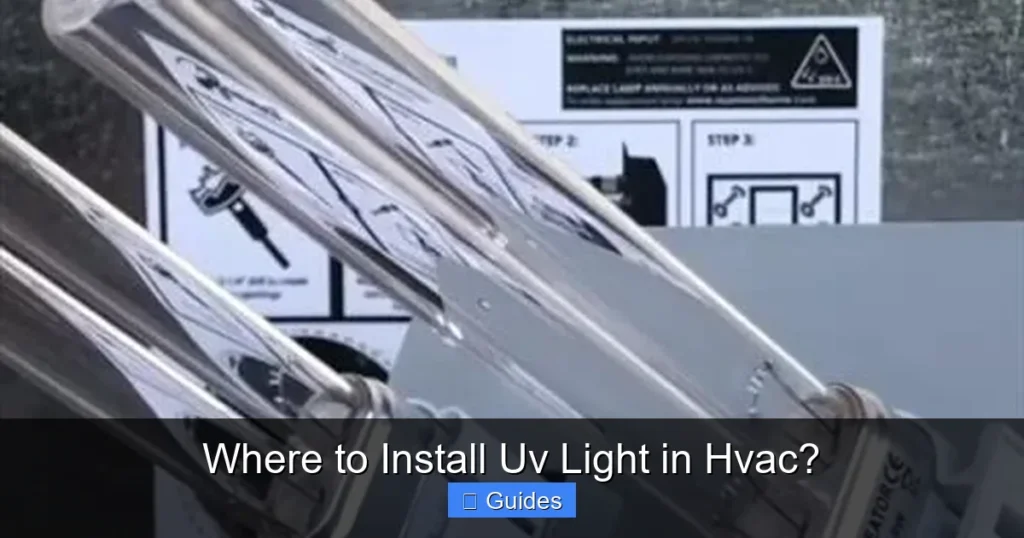
Visual guide about Where to Install Uv Light in Hvac?
Image source: hvachowto.com
Why the Evaporator Coil is a Mold Magnet
Think about your air conditioning cycle: warm, humid air from your home passes over a cold coil. This process causes condensation, meaning the coil is constantly wet. Couple that with the fact that this area is usually dark and often has dust and debris accumulating, and you’ve got the perfect breeding ground for mold, mildew, and bacteria. These microorganisms thrive in dark, damp environments, feeding on dust and organic particles.
- Constant Moisture: The primary ingredient for mold growth.
- Darkness: No sunlight to inhibit growth.
- Dust Accumulation: Provides nutrients for microbial colonies.
How a UV Light Works on the Coil
When you install a UV light here, it continuously bathes the evaporator coil and the drain pan in germicidal UV-C light. This constant exposure prevents mold and bacteria from forming and growing on these surfaces. If mold can’t grow on the coil, it can’t be picked up by the airflow and distributed throughout your home. Moreover, a clean coil ensures that your HVAC system can transfer heat efficiently, meaning it doesn’t have to work as hard to cool your home.
Most coil-mounted UV lights are “stick-style” bulbs, often placed either directly above the coil, aimed downwards, or positioned alongside it, ensuring maximum surface coverage. The goal is to illuminate as much of the coil and drain pan as possible.
Benefits of Coil Installation for UV Light in HVAC
- Direct Mold Prevention: This is the most effective way to stop mold and bacterial growth at its source within the HVAC unit.
- Improved HVAC Efficiency: A clean coil isn’t insulated by a layer of mold, allowing for better heat exchange and potentially lower energy bills.
- Reduced Musty Odors: Many unpleasant odors originate from mold and bacteria on the coil and in the drain pan.
- Healthier Air: Preventing mold growth means fewer mold spores circulating in your home’s air, which is a huge win for allergy and asthma sufferers.
Beyond the Coil: Ductwork Installation for Whole-Home Air Purification
While a UV light near the evaporator coil primarily addresses surface contamination, installing a UV light in HVAC ductwork focuses on sterilizing the air as it circulates throughout your home. This approach targets airborne pathogens, providing a broader scope of protection.
Return Air Duct: Catching Contaminants Early
The return air duct is where air from your home is drawn back into the HVAC system for conditioning. Placing a UV light here means that airborne contaminants from various rooms are exposed to germicidal light *before* they even reach the main HVAC unit. This can be an excellent strategy for killing bacteria, viruses, and allergens as they enter the system, preventing them from contaminating the coil or getting distributed further.
A UV light in the return air duct often works in conjunction with your existing air filter. While the filter catches larger particles, the UV light tackles the microscopic ones that often pass right through even high-MERV filters.
Supply Air Duct: Ensuring Clean Air Distribution
The supply air duct is where the conditioned air exits your HVAC system and is distributed to the various rooms in your house. Installing a UV light here ensures that the air reaching your living spaces is as clean and germ-free as possible. This location acts as a final purification stage, sterilizing any microorganisms that might have bypassed other defenses or developed within the system itself.
This is particularly effective for systems where the primary concern is delivering the cleanest possible air directly to occupants, for example, in homes with very sensitive individuals or in commercial settings.
Which Duct Location is Best for Your UV Light in HVAC?
The choice between return and supply duct often depends on your primary goal:
- Return Duct: Ideal for general air purification, killing contaminants *from* the home before they reach and potentially foul the HVAC unit itself. It’s often easier to install here as the ducting might be more accessible.
- Supply Duct: Best for ensuring the *delivery* of the cleanest possible air to your living spaces, providing a final sterilization step.
Many homeowners find that a combination of a coil-mounted UV light and a duct-mounted UV light (either return or supply, or sometimes both) offers the most comprehensive protection. This dual approach tackles both surface contamination within the unit and airborne pathogens circulating throughout the home.
Strategic Placement for Maximum Impact: Single vs. Dual Bulb Systems
When considering where to install UV light in HVAC, you’ll often encounter options ranging from single-bulb units to more elaborate dual-bulb or whole-house systems. The strategic choice here directly impacts the level of purification and protection your home receives.
Coil Purifier Systems: Focused Protection
These systems typically involve a single UV bulb designed specifically to target the evaporator coil and drain pan. They are mounted internally, often through a small drilled hole in the plenum or air handler cabinet, with the bulb positioned to shine directly onto the coil. This is your first line of defense against microbial growth within the unit itself.
- Installation Focus: Preventing mold and bacteria on surfaces.
- Best For: Homes primarily concerned with system efficiency, reducing maintenance, and mitigating mold-related odors and health issues originating from the HVAC unit.
Air Purifier Systems (Duct-Mounted): Broad Air Sterilization
An air purifier UV light in HVAC is designed to treat the moving air stream. These can be installed in either the return or supply ductwork. They typically feature a more powerful bulb or multiple bulbs to ensure that fast-moving air gets sufficient exposure time to the UV-C light for effective sterilization. Some advanced models might cycle on and off with the fan, while others run continuously.
- Installation Focus: Neutralizing airborne viruses, bacteria, and allergens.
- Best For: Homes looking to improve overall indoor air quality, reduce the spread of airborne illnesses, and alleviate allergy symptoms caused by airborne microbes.
Combined (Dual-Bulb or Whole-House) Systems: Comprehensive Protection
For the ultimate in indoor air quality, many homeowners opt for a system that combines both approaches. This usually involves installing one UV light near the evaporator coil for surface sterilization and another UV light in the ductwork (typically the return or supply plenum) for airborne purification. This setup provides comprehensive coverage, ensuring that your HVAC unit remains clean and the air circulating throughout your home is continuously sterilized.
- Installation Focus: Both surface decontamination and airborne pathogen neutralization.
- Best For: Individuals with severe allergies or asthma, homes with pets, homes in humid climates prone to mold, or anyone seeking the highest level of indoor air purification.
The decision to install UV light in HVAC as a single or dual system should align with your specific air quality concerns and budget. A professional HVAC technician can help you assess your needs and recommend the most effective strategic placement.
Key Considerations Before You Install UV Light in HVAC
Installing a UV light in your HVAC system isn’t a one-size-fits-all endeavor. Several important factors should guide your decision-making process to ensure optimal effectiveness, safety, and compatibility.
HVAC System Type and Size
Different HVAC systems have varying configurations, which will influence where and how a UV light can be installed. Whether you have a furnace, central air conditioner, heat pump, or mini-split system, the available space and airflow dynamics will differ. Larger systems may require more powerful bulbs or even multiple units to effectively treat the greater volume of air or larger coil surface area.
- Access Points: Some units offer easier access to the coil or ductwork than others.
- Airflow Volume: Bulb strength (measured in microwatts per square centimeter) needs to be sufficient to effectively treat the amount of air passing by at a given speed.
Accessibility for Maintenance
UV bulbs don’t last forever. Their germicidal intensity diminishes over time, and most manufacturers recommend replacing them annually. Therefore, the chosen installation spot must allow for relatively easy access for bulb replacement. A location that requires dismantling half your HVAC system for a bulb change is not practical or cost-effective in the long run.
- Bulb Life: Typically 9,000 hours, or about one year of continuous use.
- Ease of Access: Consider future bulb replacements when determining placement.
Safety First: UV Light Exposure
UV-C light is extremely powerful and can cause damage to human skin and eyes with direct exposure. It can also degrade certain plastics and electrical components over time. For this reason, any UV light in HVAC installation must ensure that the bulb is completely enclosed within the air handler or ductwork, with no visible light escaping. Installation should never expose occupants or internal non-UV-resistant components to direct UV-C radiation.
- Skin and Eye Protection: Never look directly at an operating UV bulb without proper eye protection.
- Material Degradation: Ensure the UV light is not directly shining on internal plastic components or wiring that are not UV-resistant.
Professional Installation is Recommended
While some DIY kits are available, professional installation of a UV light in HVAC is highly recommended. HVAC technicians have the expertise to:
- Determine Optimal Placement: Based on your specific system and air quality goals.
- Ensure Safe Wiring: UV lights need a power source, and proper wiring is crucial for safety and system longevity.
- Prevent UV Exposure: Professionals know how to install units securely within the system to prevent any light leakage.
- Maintain Warranty: Incorrect DIY installation might void your HVAC system’s warranty.
Power Source Availability
UV lights require a continuous power supply. This usually means tapping into the low-voltage wiring of your HVAC system or creating a dedicated electrical connection. A professional can ensure this is done safely and according to electrical codes, without overburdening your existing system’s electrical components.
The Installation Process and Essential Maintenance
Understanding the basics of installation and, more importantly, the ongoing maintenance, will help you appreciate the value and commitment associated with having a UV light in HVAC.
A Glimpse at the Installation Process (Professional Recommended)
While details vary, a typical professional installation involves these steps:
- Power Disconnection: The first and most crucial step is always to turn off the power to the entire HVAC unit at the circuit breaker. Safety is paramount.
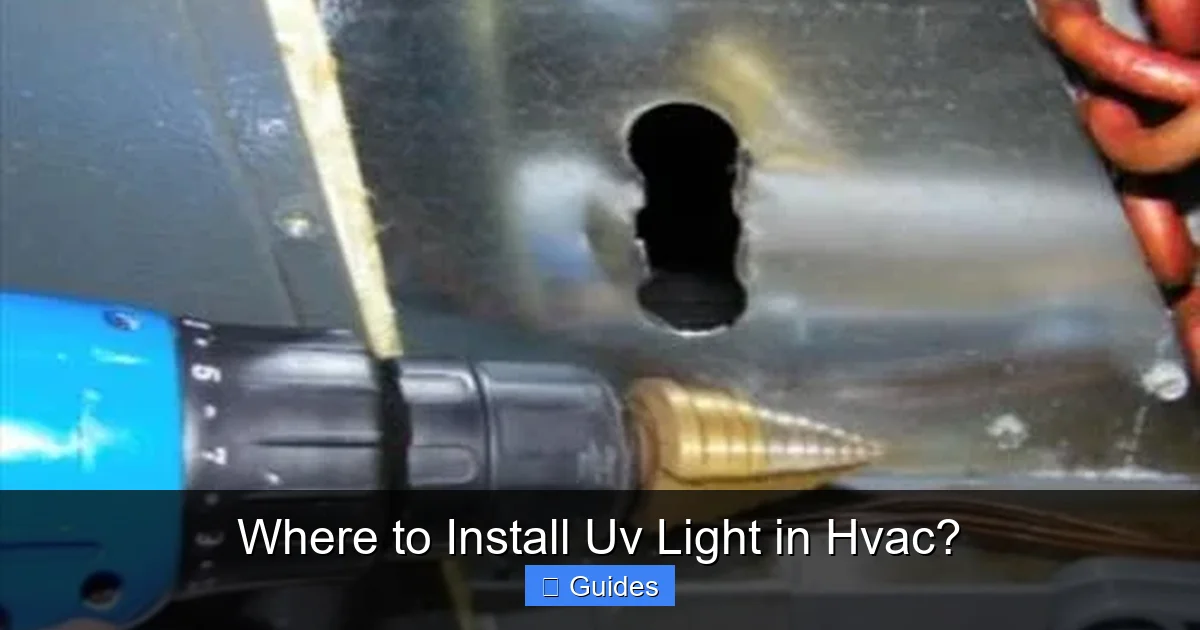
- Site Selection and Preparation: Based on the chosen location (coil or duct), the technician will identify the precise spot for mounting. This often involves drilling a small, precise hole into the plenum or air handler cabinet.
- Mounting the Fixture: The UV light fixture is securely mounted, often using self-tapping screws or specialized brackets.
- Wiring and Power Connection: The unit’s wiring is carefully connected to an appropriate power source within the HVAC system, often directly into the blower compartment’s power supply or a dedicated transformer.
- Bulb Insertion and Sealing: Once the fixture is mounted and wired, the UV-C bulb is carefully inserted. Any access holes are sealed to prevent air leaks and, more importantly, UV light leakage.
- Testing and Verification: The HVAC system’s power is restored, and the UV light’s operation is verified. Often, a small viewport or indicator light on the exterior of the unit confirms that the bulb is active.
Again, due to the electrical work, potential duct modifications, and safety concerns related to UV-C light, it’s strongly advised to have a certified HVAC professional handle the installation.
Essential Maintenance for Your UV Light in HVAC
Like any appliance, your UV light system requires a little attention to remain effective.
- Regular Bulb Replacement: This is the most critical maintenance task. UV-C bulbs degrade over time, losing their germicidal intensity even if they still appear to be glowing. Most manufacturers recommend replacing the bulb annually (typically after 9,000 hours of continuous operation). Mark your calendar or set a reminder!
- Keep the Bulb Clean: Over time, dust and debris can accumulate on the surface of the UV bulb, blocking the germicidal light. Periodically, (perhaps during your annual HVAC tune-up) gently wipe the bulb with a clean, soft cloth. *Always ensure the power is off and the bulb has cooled before touching it.*
- Check Indicator Lights: Many UV light systems include an indicator light on the exterior of your HVAC unit. This light usually signals that the UV bulb is working. If it goes out, it’s a sign that the bulb may need replacement or there’s a power issue.
Failing to replace the bulb annually is a common mistake that renders your UV light ineffective. Think of it like changing your car’s oil; it’s a small recurring cost that protects a much larger investment and ensures ongoing performance.
Conclusion
Installing a UV light in HVAC is a smart investment for improving indoor air quality, preventing costly mold growth, and enhancing the overall efficiency of your heating and cooling system. From safeguarding your evaporator coil against microbial invaders to sterilizing the air as it circulates through your ducts, the strategic placement of these germicidal lights can make a profound difference in the health and comfort of your home.
Remember, the effectiveness of your UV light system hinges on choosing the right location – whether it’s directly targeting the coil, purifying the air in the return duct, or providing a final sterilization in the supply duct. Considering your specific HVAC system, air quality goals, and opting for professional installation and regular maintenance will ensure you reap the full benefits of this powerful technology. Breathe easier, knowing your home’s air is cleaner and healthier, thanks to the silent, tireless work of your UV light in HVAC.
🎥 Related Video: Installing UV’s! Uv season is officially here!
📺 Air Quality AC & Electric
Frequently Asked Questions
Does UV light kill viruses in the air?
Yes, germicidal UV-C light is effective at killing viruses by damaging their DNA and RNA, rendering them unable to replicate. When properly installed in the ductwork, a UV light can significantly reduce the concentration of airborne viruses circulating through your home.
Will a UV light in HVAC help with my allergies?
Absolutely. Many common allergens, such as mold spores, bacteria, and dust mites, are biological and can be neutralized by UV-C light. By preventing mold growth on the coil and killing airborne pathogens, a UV light can significantly reduce allergy triggers in your home’s air.
How much does it cost to run a UV light in my HVAC system?
UV lights are generally very energy-efficient. They typically consume about as much electricity as a standard light bulb, meaning the operating cost is usually minimal, often just a few dollars per month on your electricity bill.
Can UV light damage my HVAC system components?
No, when properly installed, a UV light in HVAC will not damage your system. Manufacturers design these lights to be safely integrated, and professionals ensure the UV-C rays do not directly contact any plastic or electrical components that are not UV-resistant.
Are there different types of UV lights for HVAC systems?
Yes, there are primarily two types: coil sterilization lights, which are positioned to clean the evaporator coil, and air purification lights, installed in the ductwork to sterilize circulating air. Some systems combine both for comprehensive protection.
Does UV light in HVAC help eliminate odors?
Yes, UV light can help eliminate odors, particularly those caused by microbial growth. By killing mold, bacteria, and other microorganisms on the evaporator coil and in the air, it removes the source of many musty, stale, or unpleasant smells in your home.