Dealing with a broken light bulb can be daunting, but it’s a manageable task when approached with caution and the right technique. Prioritize safety by always turning off the power at the breaker first. Then, depending on how the bulb is broken, you can use common household items like a potato, needle-nose pliers, or a specialized broken bulb extractor tool to gently unscrew the remaining base. Always wear protective gear, including safety glasses and gloves, to prevent injury from glass shards or electrical shock.
There’s a specific kind of frustration that comes with a broken light bulb. You go to change a burnt-out bulb, give it a twist, and *crunch* – suddenly you’re left holding the glass part while the metal base remains stubbornly stuck in the socket. It’s a common occurrence, and it can feel a bit daunting, perhaps even dangerous. But don’t worry, you’re not alone, and tackling this issue is absolutely within your capabilities, as long as you approach it with caution and the right techniques.
Dealing with a broken light bulb in the socket isn’t just an annoyance; it poses real safety risks. The exposed metal base can be an electrical hazard, and the sharp remnants of glass can cause cuts. That’s why knowing how to remove a broken light bulb from the socket safely and effectively is a crucial skill for any homeowner. This guide will walk you through everything you need to know, from essential safety precautions to various methods and tools, ensuring you can resolve this common household mishap without stress or injury.
Key Takeaways
- Safety First: Always, without exception, turn off the power to the light fixture at the circuit breaker or fuse box before attempting to remove a broken light bulb. This is the most crucial step to prevent electrical shock.
- Wear Protective Gear: Don a pair of sturdy work gloves (preferably rubber-insulated) and safety glasses to protect your hands from sharp glass and your eyes from potential flying debris.
- Assess the Damage: Examine how the bulb is broken. If only the glass bulb is gone, leaving the metal base exposed, methods like using pliers or a potato will work. If glass shards remain, specialized tools or careful plier use might be needed.
- Utilize Household Tools: For a metal base without glass, a raw potato or apple can be firmly pressed onto the base and twisted counter-clockwise to unscrew it.
- Use Pliers for Exposed Bases: If the base is exposed and offers a grip, needle-nose pliers or locking pliers are excellent for grasping the edge of the metal base and twisting it out.
- Consider Specialty Tools: For difficult breaks or when you don’t want to risk further damage, a dedicated broken bulb extractor tool can be a very safe and effective option.
- Post-Removal Care: After successfully removing the broken base, thoroughly clean the socket area and inspect it for any remaining glass or damage before installing a new bulb.
Quick Answers to Common Questions
Can I just leave a broken light bulb in the socket?
No, you should never leave a broken light bulb in the socket. It poses a significant electrical shock risk, fire hazard, and the exposed sharp glass can cause injuries.
Is it safe to use a screwdriver to remove a broken bulb?
Using a screwdriver is generally not recommended as it can easily slip, damage the socket, or create a short circuit if the power isn’t completely off. Pliers or a specialized extractor are much safer options.
What if I can’t turn off the power at the breaker?
If you absolutely cannot turn off the power to the fixture, do NOT attempt to remove the broken bulb yourself. This is an extreme electrical hazard, and you should call a qualified electrician immediately.
Can I remove a broken bulb without gloves?
While technically possible, it is highly unsafe. Always wear sturdy work gloves to protect your hands from sharp glass shards and provide a layer of insulation against potential electrical shock.
How do I dispose of a broken light bulb?
Carefully wrap the broken glass and metal base in several layers of newspaper or cardboard, then place it in a sturdy bag. Check local regulations for glass or hazardous waste disposal, as some areas have specific guidelines.
📑 Table of Contents
- 1. Safety First: The Golden Rules for Broken Bulb Removal
- 2. Assessing the Damage and Gathering Your Tools
- 3. Method 1: The Potato or Apple Trick (for Glass-Free Bases)
- 4. Method 2: Using Pliers (for Exposed Metal Bases)
- 5. Method 3: The Broken Bulb Extractor Tool
- 6. Post-Removal & Prevention: Cleaning Up and Avoiding Future Breaks
1. Safety First: The Golden Rules for Broken Bulb Removal
Before you even think about touching that broken light bulb, your absolute top priority must be safety. Ignoring these initial steps can lead to serious electrical shock or injury from sharp glass. This isn’t just a suggestion; it’s a non-negotiable requirement for anyone attempting to remove a broken light bulb from the socket.
Always Turn Off the Power
This is the most critical step. Locate the circuit breaker panel in your home, which is usually in a basement, garage, or utility closet. Find the breaker that controls the light fixture you’re working on and flip it to the “OFF” position. If your breakers aren’t clearly labeled, you might need to flip the main breaker to cut power to your entire home, or carefully test each one until the light (if it still had power) goes out. For ceiling fixtures, you can often use a light switch tester to confirm the power is off. Don’t rely solely on the wall switch; sometimes, even with the switch off, residual current can be present, or the switch itself might be faulty. Double-check, triple-check if you have to!
Wear Protective Gear
Once the power is definitively off, it’s time to suit up. You’ll need:
- Safety Glasses or Goggles: Essential for protecting your eyes from any stray glass shards that might dislodge during the removal process.
- Sturdy Work Gloves: Opt for thick leather work gloves or rubber-insulated gloves. These will protect your hands from sharp glass and provide an extra layer of insulation against potential electrical current, just in case. Avoid thin gardening gloves or fabric gloves that can easily be penetrated by glass.
Having a flashlight handy is also a good idea, especially if you’ve killed the power to a large area or are working in a dimly lit space.
2. Assessing the Damage and Gathering Your Tools
Before diving into the removal process, take a moment to look at the broken bulb. How it broke will often dictate the best method and tools you’ll need. Gather your potential tools beforehand so you don’t have to stop mid-task.
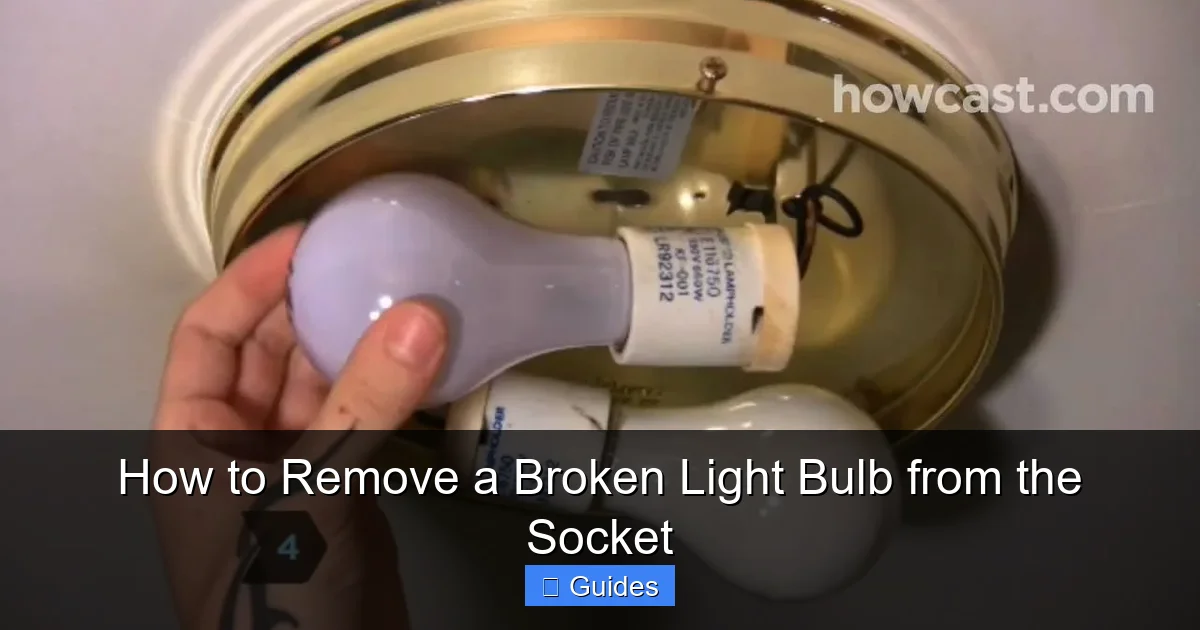
Visual guide about How to Remove a Broken Light Bulb from the Socket
Image source: i.ytimg.com
Types of Broken Bulbs
- Glass-Free Metal Base: This is the easiest scenario. The glass bulb has completely detached, leaving only the metal screw-in base in the socket, often with a small central contact. This is ideal for the potato or plier methods.
- Metal Base with Glass Shards: Some glass might still be stuck to the base, or small pieces could be inside the socket opening. This requires extra caution.
- Deeply Embedded Base: The base might be screwed in very tightly, or perhaps it’s an older socket, making removal more challenging.
Essential Tools You Might Need
- Flashlight: To illuminate the work area.
- Raw Potato or Apple: A surprising but effective tool for glass-free bases.
- Needle-Nose Pliers: Indispensable for gripping small, tight objects.
- Locking Pliers (Vise-Grips): Great for a stronger grip on metal bases.
- Broken Bulb Extractor Tool: A specialized tool designed specifically for this job, often inexpensive and highly effective.
- Flathead Screwdriver: Can sometimes be used carefully to pry or help with a grip.
- Vacuum Cleaner with Hose Attachment: For cleaning up glass shards.
- Duct Tape or Masking Tape: Useful for picking up tiny glass fragments.
3. Method 1: The Potato or Apple Trick (for Glass-Free Bases)
This method might sound unusual, but it’s surprisingly effective and often the safest for broken light bulbs where the glass has completely detached, leaving only the metal base exposed. It’s perfect for getting a broken light bulb out without metal tools that could short the socket.
Step-by-Step with a Potato (or Apple)
- Prepare Your Potato: Take a medium-sized raw potato (or a firm apple) and cut it in half. You want a flat, clean surface.
- Press Firmly: Carefully, but firmly, press the cut side of the potato onto the exposed metal base of the broken bulb. Twist the potato clockwise a little bit to ensure it gets a good, secure grip on the jagged edges inside the base. The potato’s starchy, firm flesh will conform to the shape and provide excellent friction.
- Twist Counter-Clockwise: With a firm grip on the potato, slowly and steadily twist it counter-clockwise. The potato should unscrew the metal base from the socket. Go slowly and maintain consistent pressure.
- Remove and Inspect: Once the base is free, carefully pull the potato and the attached base away from the socket. Dispose of the potato and the metal base safely.
- Clean Up: Inspect the socket for any remaining debris. Use a vacuum cleaner with a hose attachment or a piece of duct tape to pick up any tiny glass fragments.
Why it works: The potato provides a soft yet firm surface that can get a good grip on the metal base without risking further damage to the socket or shorting anything out (especially important if you were to somehow miss the breaker switch).
4. Method 2: Using Pliers (for Exposed Metal Bases)
Pliers are a handyman’s best friend, and they’re incredibly useful for how to remove a broken light bulb from the socket, particularly when the metal base is exposed and offers a lip or edge to grab onto. This method is often preferred when the base is screwed in tightly or the potato trick doesn’t give enough leverage.
Using Needle-Nose Pliers
Needle-nose pliers are excellent for their precision and ability to get into tight spaces.
- Grip the Base Edge: With your safety gear on and power off, carefully insert the tips of your needle-nose pliers into the socket. Try to grip the very edge or rim of the metal screw-in base. If there are small remnants of the glass collar, you might be able to grip the inside edge of the metal.
- Twist Gently: Once you have a secure grip, slowly twist the pliers counter-clockwise. Apply gentle, consistent pressure. You might need to adjust your grip multiple times if the base is stubborn or breaks apart in pieces.
- Extract and Clean: As the base loosens, continue to twist and pull it free. Once removed, inspect the socket for any remaining glass or debris and clean thoroughly.
Using Locking Pliers (Vise-Grips)
If the base is particularly stubborn or provides a more substantial grip point, locking pliers can offer superior leverage and a hands-free grip once clamped.
- Adjust and Clamp: Open the locking pliers and adjust them so they can firmly clamp onto the exposed metal rim of the broken bulb’s base. You want a very secure grip.
- Lock the Pliers: Once positioned, squeeze the handles to lock the pliers onto the base. This provides a strong, constant grip.
- Twist Counter-Clockwise: Use the handles of the locked pliers to twist the base counter-clockwise. The added leverage of locking pliers can often unscrew even very tight bases.
- Release and Clean: Once the base is free, release the pliers and carefully remove the base. Clean the socket as before.
Important Tip: When using pliers, be extremely careful not to touch the central contact point inside the socket or the internal threads. You want to focus solely on the metal base of the broken bulb.
5. Method 3: The Broken Bulb Extractor Tool
Sometimes, the safest and most efficient way to remove a broken light bulb from the socket is to use a tool specifically designed for the job. Broken bulb extractor tools are inexpensive, widely available at hardware stores, and highly effective, especially for trickier breaks or if you just want peace of mind.
How a Broken Bulb Extractor Works
These tools typically consist of a handle with a rubber-coated, tapered end or a threaded metal end. The idea is to create friction or screw into the remaining base to get a secure grip.
- Choose Your Extractor Type:
- Rubber-Coated Tapered Extractor: This type has a rubber end that you push firmly into the broken bulb’s base. The rubber creates friction.
- Threaded Metal Extractor: This type has threads that you gently screw into the remaining metal base of the broken bulb.
- Insert and Engage:
- For a rubber extractor: Firmly press the rubber-coated end into the center of the broken bulb’s metal base, ensuring a good, tight fit.
- For a threaded extractor: Carefully screw the tool clockwise into the metal base until it feels secure.
- Twist Counter-Clockwise: Once the tool is securely engaged with the base, slowly twist the handle counter-clockwise. The base should begin to unscrew from the socket.
- Remove and Dispose: Continue twisting until the base is completely free. Remove the tool with the attached base, and dispose of the broken components safely.
- Final Inspection and Cleaning: Always finish by inspecting the socket for any leftover glass or debris and clean it thoroughly before installing a new bulb.
Benefit of Extractors: These tools are designed to provide maximum grip and leverage while minimizing the risk of further damage to the socket. They are especially useful if you’re not comfortable using pliers or potatoes, or if the base is very fragmented.
6. Post-Removal & Prevention: Cleaning Up and Avoiding Future Breaks
You’ve successfully managed to remove a broken light bulb from the socket – congratulations! But the job isn’t quite finished yet. There are crucial steps to take after removal, and some smart habits you can adopt to prevent this frustrating situation from happening again.
Cleaning the Socket and Area
- Thorough Inspection: Even after the broken base is out, there might be tiny, almost invisible shards of glass inside the socket or on the fixture itself. Use your flashlight to carefully inspect the inside threads of the socket.
- Vacuum or Tape: A vacuum cleaner with a brush or crevice attachment is ideal for sucking up any small glass fragments around the fixture and inside the socket. Alternatively, wrap a piece of duct tape or masking tape around your finger (sticky side out) and gently dab it inside the socket to pick up any clinging shards. Be very careful not to push anything deeper.
- Wipe Down: With the power still off, you can use a slightly damp cloth to wipe down the exterior of the fixture to ensure no hidden glass pieces remain.
Inspecting the Socket for Damage
Before installing a new bulb, take a moment to inspect the socket itself:
- Threads: Are the internal threads of the socket intact and clean? If they’re stripped or damaged, the new bulb might not screw in properly or could become difficult to remove later.
- Central Contact Tab: The small metal tab at the very bottom of the socket provides power to the bulb. Ensure it’s not bent flat or broken. If it’s too flat, you can *gently* pry it up slightly with a small flathead screwdriver (again, only with the power OFF!) to ensure good contact with the new bulb.
- Cracks or Burn Marks: Look for any cracks in the plastic or ceramic of the socket, or any signs of burning or discoloration. If you see any of these, the socket itself might be damaged and should be replaced by a qualified electrician to prevent fire hazards.
Tips to Prevent Future Broken Bulbs
A little prevention goes a long way:
- Don’t Overtighten: When screwing in a new bulb, twist it until it’s snug, but don’t overtighten. Over-tightening can make it extremely difficult to remove later, increasing the chance of it breaking. Hand-tight is usually sufficient.
- Use the Right Bulb: Ensure the bulb’s wattage and type are compatible with the fixture. Using an oversized or incorrect bulb can generate too much heat, leading to premature failure or damage to the socket.
- Let Bulbs Cool: If you’re changing a bulb that has recently been on, let it cool down first. Hot glass is more fragile and prone to breaking when handled.
- Handle with Care: Always handle light bulbs by their bases or the strongest part of the glass, avoiding squeezing the bulb itself too hard.
- Regular Maintenance: Periodically check your light fixtures for any loose parts or corrosion, which can also contribute to bulbs breaking or getting stuck.
- Consider LED Bulbs: LED bulbs are generally more durable than traditional incandescent or CFLs. They don’t have filaments that can break easily, and their plastic/metal construction is often sturdier than glass, reducing the risk of a similar break.
Knowing how to remove a broken light bulb from the socket is an essential life skill that empowers you to handle a common household problem safely and efficiently. By prioritizing safety, choosing the right tools, and following these step-by-step methods, you can confidently tackle this task. Remember, always double-check that the power is off, wear your protective gear, and take your time. A little patience and caution will ensure your light fixture is back in working order without a hitch!
🎥 Related Video: Lightbulb broken off in socket. Best way to remove. Easy Hack!
📺 Sky Management
Cheap rubber bands: https://amzlink.to/az06XbUfUTMOA LED lightbulbs on Amazon: https://amzlink.to/az0Og708E88PV This is a …
Frequently Asked Questions
What is the most important safety precaution when removing a broken light bulb?
The absolute most important safety precaution is to turn off the power to the light fixture at the main circuit breaker or fuse box. This eliminates the risk of electrical shock, which can be severe or even fatal.
What if the broken bulb base is really stuck or corroded in the socket?
If the base is extremely stuck or corroded, it’s best to use a broken bulb extractor tool or locking pliers for maximum grip and leverage. If it still won’t budge or if the socket itself appears corroded or damaged, it might be safer to call a qualified electrician to prevent further damage to the fixture.
Can I use the potato method if there are small glass shards still attached to the base?
The potato method is generally best for a clean, glass-free metal base. If small glass shards are still present, they could embed in the potato and break off, or still pose a cutting hazard. In this scenario, it’s safer to use needle-nose pliers or a specialized broken bulb extractor tool, along with extra caution and protective gear.
How can I tell if the electrical socket itself is damaged after removing a broken bulb?
After successfully removing the broken base, carefully inspect the socket’s internal threads for any stripping, cracks, or deformation. Also, check the small metal contact tab at the very bottom for damage. Look for any scorch marks, discoloration, or burnt smells, which are all signs that the socket itself might be damaged and require professional replacement.
Are there any specific types of gloves that are best for this task?
Yes, sturdy work gloves, such as those made of thick leather or rubber-insulated material, are highly recommended. Avoid thin fabric or gardening gloves, as they may not offer adequate protection against sharp glass or potential electrical contact. The goal is both cut protection and some electrical insulation.
What should I do if the broken bulb situation seems too dangerous or complex for me to handle?
If at any point you feel unsafe, unsure, or if the situation seems overly complex (e.g., exposed wiring, deeply corroded socket, or inability to turn off power), it is always best to stop and contact a qualified electrician. Your safety is paramount, and a professional can safely address the issue.