Replacing a brake light bulb is a straightforward DIY task that saves money and ensures road safety. This comprehensive guide walks you through every step, from identifying a faulty bulb and gathering the right tools to safely accessing, removing, and installing the new bulb. With clear instructions and practical tips, you’ll gain the confidence to perform this essential maintenance yourself, keeping your vehicle compliant and preventing accidents.
How to Replace Brake Light Bulb
Imagine this: you’re driving, and a friendly (or sometimes not-so-friendly) driver behind you signals that your brake light is out. It’s a common occurrence, often leading to a moment of dread. What do you do? Head straight to the mechanic and pay a hefty labor fee for a seemingly simple fix? Or maybe, just maybe, you empower yourself to tackle this minor repair on your own? The good news is, learning how to replace a brake light bulb is one of the most accessible and rewarding DIY car maintenance tasks you can undertake.
Having properly functioning brake lights isn’t just about avoiding a traffic ticket; it’s a critical safety feature. They communicate your intentions to other drivers, signaling when you’re slowing down or stopping. A burnt-out bulb means a significant safety risk, as it reduces the time other drivers have to react to your actions. Plus, in many places, driving with a non-functional brake light is illegal and can result in fines. This guide is here to demystify the process, walking you through every step so you can confidently perform a brake light bulb replacement, save money, and keep yourself and others safe on the road.
So, grab a cup of coffee, clear your mind, and get ready to become a brake light bulb replacement pro. We’ll cover everything from identifying the problem and gathering your tools to the actual step-by-step process of installing a new bulb. By the end of this article, you’ll have all the knowledge and confidence you need to replace a brake light bulb like a seasoned pro, turning a potential headache into a simple weekend task.
Key Takeaways
- Safety First: Always prioritize safety by parking on a level surface, engaging the parking brake, and turning off the engine before starting any work.
- Identify the Right Bulb: Consult your car’s owner’s manual or check the old bulb’s markings to ensure you purchase the correct replacement brake light bulb type.
- Access Varies: How you access the brake light bulb assembly differs by vehicle; it could be from inside the trunk/hatch or by removing the exterior taillight housing.
- Handle with Care: When installing a new bulb, avoid touching the glass directly with bare hands, as oils can create hot spots and shorten the bulb’s lifespan.
- Test Before Reassembly: Always test the new brake light bulb before fully reassembling the taillight assembly to confirm it’s working correctly.
- Don’t Force It: If parts are stuck or excessively corroded, don’t force them. Seek professional help to avoid damaging components rather than risking damage.
Quick Answers to Common Questions
How often should I replace my brake light bulb?
Brake light bulbs don’t have a fixed replacement schedule; they should be replaced when they burn out or become dim. Their lifespan varies based on bulb type and usage, but they typically last several years.
Can I drive with one brake light out?
While you technically *can* drive with one brake light out, it is illegal in most places and highly unsafe. It significantly reduces your ability to signal stopping to drivers behind you, increasing the risk of a rear-end collision.
Do I need to disconnect the car battery before changing a brake light bulb?
No, you generally do not need to disconnect the car battery for this task. Simply turning off the engine and removing the keys from the ignition is sufficient to prevent accidental electrical activation and ensure safety.
What if the new brake light bulb doesn’t work after I install it?
If the new bulb doesn’t work, first recheck that it’s fully seated and the socket is locked. Next, check the vehicle’s fuse box for a blown brake light fuse. If both are fine, there might be a wiring issue or a faulty brake switch, which might require professional diagnosis.
Are all brake light bulbs the same?
No, brake light bulbs come in various types and sizes (e.g., 1157, 3157, 7443, etc.) and can be single or dual-filament. Always check your car’s owner’s manual or the markings on the old bulb to ensure you purchase the correct replacement for your specific vehicle.
📑 Table of Contents
Why Your Brake Light Bulb Needs Replacing (and How to Spot It)
Before you dive into replacing a brake light bulb, it’s crucial to understand why it might need attention and how to confirm it’s truly burnt out. Recognizing the signs early can prevent safety hazards and potential legal trouble.
Signs of a Failing Brake Light Bulb
The most obvious sign, of course, is that the bulb simply isn’t lighting up when you press the brake pedal. However, sometimes the issue can be more subtle:
- No Light: This is the clearest indicator. When you press the brake pedal, one or both of your brake lights don’t illuminate.
- Dim or Flickering Light: A bulb might be on its way out if it’s noticeably dimmer than the working brake light, or if it flickers inconsistently. This can happen when the filament inside the bulb is partially broken.
- Warning Light on Dashboard: Many modern vehicles have a “bulb out” warning light on the dashboard. If this illuminates, it’s a strong hint that a light, often a brake light, needs attention.
The Importance of Functional Brake Lights
Beyond convenience, functional brake lights are non-negotiable for several reasons:
- Safety: Your brake lights are your primary way of telling drivers behind you that you’re slowing down or stopping. Without them, there’s a significantly increased risk of a rear-end collision, especially in heavy traffic or bad weather.
- Legal Compliance: In almost every jurisdiction, it’s illegal to drive with a non-working brake light. You can be pulled over, issued a warning, or even receive a fine, adding an unnecessary expense to your day.
- Vehicle Inspection: If your vehicle requires periodic safety inspections, a non-functional brake light will cause it to fail, preventing you from registering your car until it’s fixed.
Quick Check Methods
How do you confirm a bulb is out if you’re driving alone? Here are a couple of tricks:
- The “Wall Test”: Park your car a few feet away from a wall (a garage door works perfectly) at dusk or in a dark area. Turn on your headlights, then press the brake pedal firmly. Look in your rearview mirror; you should see two bright red reflections on the wall. If one is missing or dim, you’ve found your culprit.
- Ask a Friend: The easiest way, if possible, is to ask a friend or family member to stand behind your car while you press the brake pedal. Have them tell you which light, if any, isn’t working.
Once you’ve confirmed that a brake light bulb is indeed out, you’re ready to proceed with replacing the brake light bulb yourself.
Gathering Your Tools and Supplies
Before you begin the process of replacing a brake light bulb, it’s crucial to have all your tools and supplies ready. This not only makes the job smoother but also ensures you don’t have to stop midway to search for something. Preparation is key to a successful DIY repair.
The Essential Toolkit
- New Brake Light Bulb(s): This is the most important item! You’ll need the correct type for your specific vehicle. Don’t guess. Check your car’s owner’s manual (usually found in the glove compartment), or simply remove the old bulb first and take it to an auto parts store for an exact match. It’s often a good idea to buy two, as if one bulb has gone, the other is likely to follow soon due to similar lifespans. Common bulb types include 1157, 3157, or 7443, but always confirm.
- Screwdrivers: You’ll most likely need a Philips head screwdriver for removing screws that hold the taillight assembly in place. A flathead screwdriver might also be useful for prying open clips or trim pieces.
- Pliers: Needle-nose pliers can be handy for gripping small wires or stubborn connectors, while regular pliers might help with tight fasteners.
- Nitrile or Latex Gloves: These aren’t just for cleanliness. The oils from your skin can transfer to the glass of a new bulb. When the bulb heats up, these oils can create hot spots, causing the bulb to burn out prematurely. Wearing gloves prevents this issue and keeps your hands clean.
- Plastic Trim Removal Tools (Optional but Recommended): If your vehicle requires removing interior trunk or hatch trim panels to access the taillight assembly, these plastic tools are invaluable. They help you gently pry off panels without scratching or damaging the plastic.
- Microfiber Cloth: Useful for cleaning any dirt or grime from the taillight housing or the new bulb before installation.
- Owner’s Manual: As mentioned, this is your bible for specific bulb types and, crucially, provides diagrams or instructions on how to access the taillight assembly for your particular car model. Don’t skip consulting it!
- Headlamp or Flashlight: Even in daylight, working in confined spaces can make it hard to see. A headlamp keeps your hands free and illuminates your workspace effectively.
Why Specificity Matters
Using the correct bulb type isn’t just a suggestion; it’s a necessity. Different bulbs have different wattages, base types, and even dual filaments (for brake and tail lights in one bulb). Using the wrong bulb can lead to:
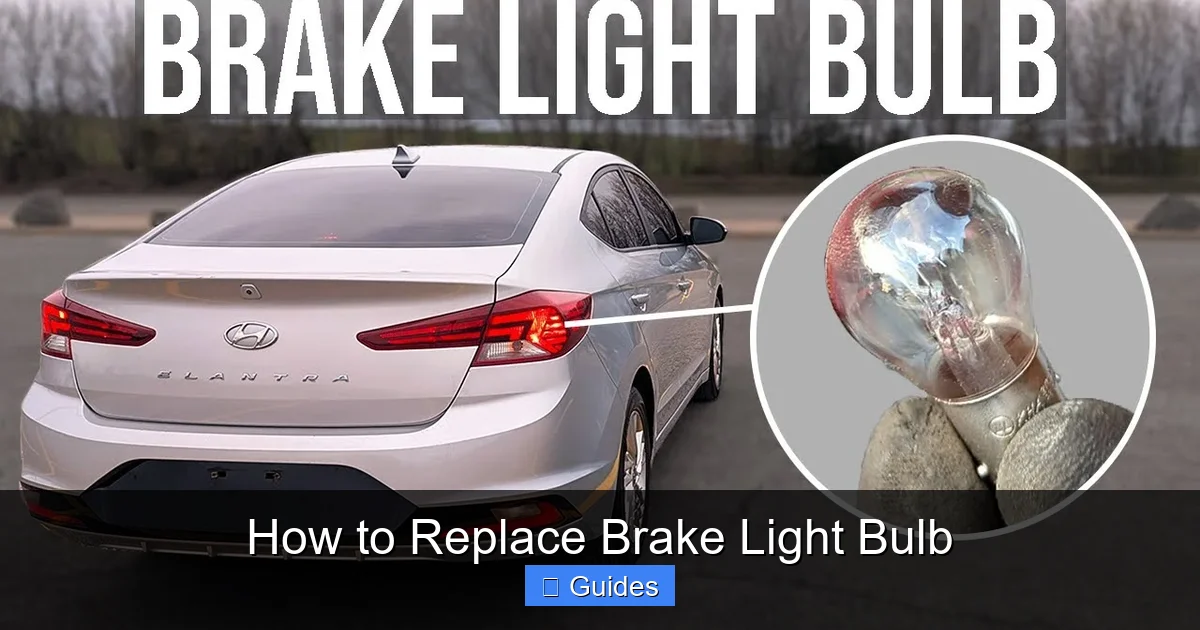
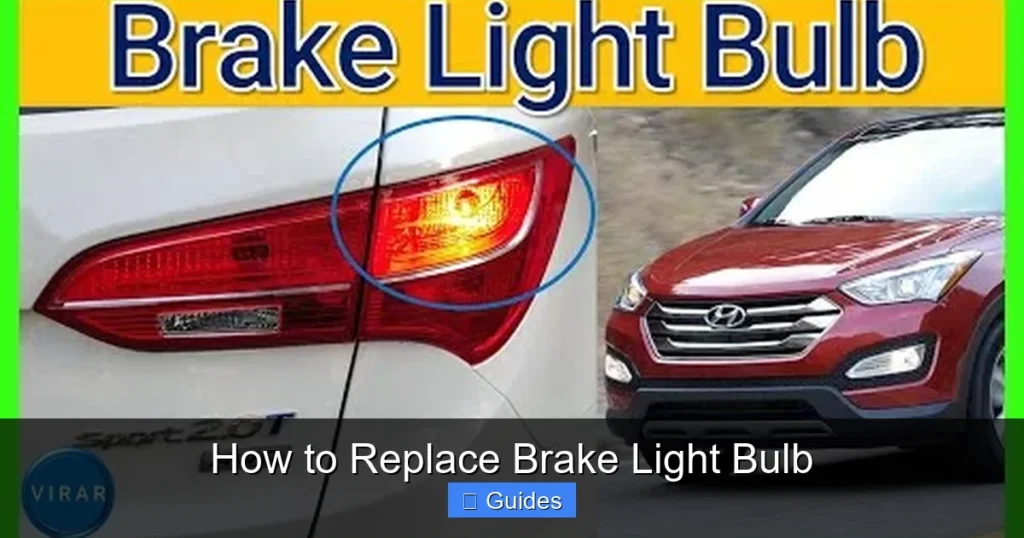
Visual guide about How to Replace Brake Light Bulb
Image source: i.ytimg.com
- Improper brightness (too dim or too bright).
- Damage to your vehicle’s electrical system.
- The bulb not fitting into the socket at all.
So, take the time to confirm the exact bulb number. This small effort will save you a lot of frustration during the brake light bulb replacement process.
Essential Safety Precautions Before You Start
Safety should always be your top priority, especially when working on any part of your vehicle. While replacing a brake light bulb is a relatively simple task, neglecting basic safety precautions can lead to unnecessary risks. Take a few moments to prepare your workspace and ensure your well-being.
Park on a Level Surface
Always park your car on a flat, level surface. Working on an incline can cause your car to roll, even if the parking brake is engaged, creating a hazardous situation. A garage, driveway, or a flat parking lot is ideal.
Engage the Parking Brake
Once parked, firmly engage your parking brake (also known as the emergency brake or handbrake). This provides an extra layer of security, ensuring your vehicle remains stationary throughout the brake light bulb replacement process.
Turn Off the Engine and Remove Keys
Before you even think about touching the taillight assembly, turn off your car’s engine completely. For extra safety, remove the keys from the ignition. This prevents any accidental activation of electrical systems and ensures the vehicle is completely powered down, eliminating any risk of electrical shock while you’re handling the wiring and bulb sockets. It also prevents anyone from accidentally starting the car while you’re working.
Wear Protective Gear
As mentioned in the tools section, wearing gloves (nitrile or latex) is highly recommended. They protect your hands from dirt, grime, and potential sharp edges, and most importantly, prevent natural skin oils from getting on the new bulb’s glass. If you’re sensitive to dust or working in an area where debris might fall, safety glasses can also be a good idea, though often not strictly necessary for this specific task.
Work in a Well-Lit Area
Good visibility is crucial. Work in a well-lit environment, whether that’s natural daylight or with the aid of a work light or headlamp. Being able to clearly see what you’re doing will prevent mistakes, speed up the process, and reduce frustration. Remember, some car parts can be hidden or hard to reach, and a good light source makes a significant difference.
Gather All Tools Before Starting
Ensure all your tools and the new brake light bulb are within arm’s reach. This prevents you from having to repeatedly get up, search for tools, and potentially losing focus on the task at hand. Having everything organized makes the job flow much more smoothly.
By following these simple safety steps, you create a secure environment for yourself and your vehicle, making the brake light bulb replacement a safe and stress-free experience.
Step-by-Step Guide to Replacing Your Brake Light Bulb
Now that you’re prepared with your tools and safety measures, it’s time to get your hands a little dirty and tackle the actual brake light bulb replacement. Remember, every car is a little different, so use these steps as a general guide, referring to your owner’s manual for specific details on your vehicle.
Locate the Tail Light Assembly
First things first, identify which brake light is out. Most vehicles have a dedicated taillight assembly on each side at the rear of the car. These usually house the brake light, tail light, and turn signal bulbs. You’ll be working on the side where the bulb is malfunctioning.
Access the Bulb (Exterior vs. Trunk/Hatch)
This is where vehicle designs vary the most. There are generally two primary ways to access the brake light bulb:
-
From Inside the Trunk or Hatch: Many vehicles allow access to the back of the taillight assembly from inside the trunk or cargo area.
- Open the Trunk/Hatch: Pop open your trunk or rear hatch.
- Locate the Access Panel: Look for a small plastic or carpeted access panel on the interior trim, directly behind the taillight assembly. This panel might be held in place by plastic clips, screws, or just friction.
- Remove the Panel: Gently pry open or unscrew the panel. You might use your plastic trim removal tool or a flathead screwdriver wrapped in cloth to avoid scratching. Once removed, you should see the back of the taillight assembly, with various wires and bulb sockets.
-
By Removing the Exterior Taillight Housing: Other vehicles require you to remove the entire taillight assembly from the exterior of the car.
- Locate Retaining Screws/Nuts: Look for screws, bolts, or plastic clips on the exterior of the taillight housing, typically visible around the edges or inside the trunk lip. There are usually two or three.
- Remove Fasteners: Use your screwdriver or wrench to remove these fasteners. Be careful not to drop them into hard-to-reach places!
- Gently Pull the Assembly: Once all fasteners are removed, the taillight assembly might still be held in place by small alignment pins or clips. Gently but firmly pull the assembly straight back, away from the vehicle. Wiggle it slightly if it’s stubborn. Be mindful of the wiring harness still connected.
Disconnect the Wiring Harness (if necessary)
If you’ve removed the entire exterior taillight assembly, you’ll likely need to disconnect the main wiring harness to get the assembly free. This is usually a plastic connector with a tab that you press or squeeze to release. Gently pull the connector apart.
Twist and Remove the Bulb Socket
Once you have access to the back of the taillight assembly (either directly or by having removed the whole unit), you’ll see several bulb sockets, each with wires running to it. The brake light bulb socket will usually be red or clear, but again, consult your manual if unsure.
- Identify the Brake Light Socket: If there are multiple, look for the one connected to the brake light function (often a dual-filament bulb for brake and tail lights).
- Twist to Unlock: Grip the base of the bulb socket (the plastic part, not the wires) and twist it counter-clockwise about a quarter turn. It should then pull straight out of the taillight housing.
Remove the Old Bulb
Now that the socket is out, you’ll see the old, burnt-out brake light bulb.
- Push and Twist (Bayonet-style): For many bulbs (like the 1157), you’ll need to gently push the bulb into the socket, twist it counter-clockwise, and then pull it straight out. This is a “bayonet” style bulb.
- Pull Straight Out (Wedge-style): Other bulbs (like the 3157 or 7443) are “wedge” type bulbs. These simply pull straight out of the socket without twisting.
Dispose of the old bulb responsibly. Note any markings on the base of the bulb to confirm it matches your new one, just in case.
Insert the New Bulb
This is where your gloves come in handy!
- Avoid Touching Glass: With your gloves on, carefully take your new brake light bulb. Avoid touching the glass portion with your bare skin.
- Insert into Socket:
- Bayonet-style: Align the pins on the bulb’s base with the slots in the socket, push in gently, and twist clockwise until it locks into place.
- Wedge-style: Simply push the bulb straight into the socket until it’s firmly seated.
- Ensure Proper Fit: Make sure the bulb is seated snugly and correctly in the socket. It shouldn’t feel loose.
Test the New Bulb
Before putting everything back together, it’s crucial to test your work.
- Reconnect Harness (if disconnected): If you disconnected the main wiring harness from the taillight assembly, reconnect it now.
- Get Help or Use the Wall Test: Turn on your car (or at least the ignition, without starting the engine), and have a friend press the brake pedal. Alternatively, use the wall test trick described earlier.
- Confirm Illumination: Verify that the new brake light bulb is illuminating brightly and correctly when the brakes are applied. If not, double-check that the bulb is fully seated, the socket is twisted in securely, and that you have the correct bulb type. If it still doesn’t work, you might have a blown fuse (which we’ll cover in troubleshooting).
Reassemble the Tail Light Assembly
Once you’ve confirmed the new bulb works, it’s time to put everything back together in reverse order.
- Insert Bulb Socket: Push the bulb socket back into its opening in the taillight housing, aligning the tabs, and twist it clockwise until it locks securely.
- Reinstall Taillight Housing (if removed): Carefully guide the taillight assembly back into its position on the vehicle. Ensure any alignment pins or tabs slot correctly into their holes. Gently push it flush against the car body.
- Secure Fasteners: Reinstall all screws, bolts, or clips that hold the taillight assembly in place. Don’t overtighten, especially plastic screws, to avoid stripping them.
- Replace Interior Trim Panel (if removed): Reattach any interior access panels or trim pieces that you removed in the trunk or hatch.
Final Check
With everything reassembled, perform one last check. Stand behind your car, press the brake pedal, and confirm both brake lights (and ideally, your third brake light, if applicable) are working perfectly. Congratulations, you’ve successfully learned how to replace a brake light bulb!
Common Challenges and Troubleshooting Tips
Even with a detailed guide, you might encounter a few bumps along the road when replacing a brake light bulb. Don’t get discouraged! Most challenges have straightforward solutions.
Stubborn Screws or Clips
Sometimes, screws can be seized with rust or overtightened, making them difficult to remove. Plastic clips can also be brittle or tricky to disengage.
- Solution: For rusted screws, apply a penetrating oil (like WD-40) and let it sit for a few minutes before trying again. Ensure you’re using the correct size screwdriver to avoid stripping the screw head. For plastic clips, try gently prying with a plastic trim tool. If a clip breaks, they are usually inexpensive to replace at an auto parts store. Never force a screw or clip excessively, as this can cause more significant damage.
Corroded Sockets
Over time, moisture and dirt can lead to corrosion on the electrical contacts inside the bulb socket. This can prevent the new bulb from making a good connection and illuminating.
- Solution: If you see green or white powdery residue inside the socket, gently clean it. You can use a small wire brush, a flathead screwdriver wrapped in a fine-grit sandpaper, or even a specialized electrical contact cleaner spray. Be gentle to avoid bending or breaking the contacts. Ensure the socket is completely dry before inserting the new bulb.
New Bulb Not Lighting Up After Replacement
You’ve done everything right, but the new brake light bulb still isn’t working. This is a frustrating but often fixable issue.
- Solution:
- Double-Check Seating: Ensure the bulb is fully and correctly seated in its socket. Twist-in bulbs must be locked, and wedge bulbs pushed all the way in.
- Inspect the Filament: Sometimes, new bulbs can be faulty. Carefully remove the new bulb and inspect its filament. If it’s broken, you have a bad bulb.
- Check the Fuse: A blown fuse is a common reason a brake light won’t work, even with a new bulb. Consult your owner’s manual to locate your vehicle’s fuse box (often under the hood or under the dashboard) and identify the fuse for your brake lights. Use a fuse puller (usually found in the fuse box) or needle-nose pliers to remove the fuse and visually inspect it. A blown fuse will have a broken wire inside. Replace it with a new fuse of the exact same amperage rating.
- Wiring Issues: Less common for a single bulb, but sometimes a wire leading to the taillight assembly can be damaged. If all else fails and fuses are good, this might require professional diagnosis.
Different Bulb Types and Functions
Some vehicles use a single bulb for both the tail light (dim constant light) and the brake light (bright when pressed), known as a dual-filament bulb. Others use separate bulbs. Your owner’s manual will confirm.
- Solution: Always ensure you’re replacing the bulb with the correct type and understanding its function. If your brake light also acts as a tail light, ensure the replacement is a dual-filament bulb if required. If it’s a dedicated brake light, it will be a single-filament bulb. Misidentifying can lead to either the bulb not working or not performing its full function.
Stripped Fasteners
If you’ve stripped a screw head, making it impossible to remove with a screwdriver:
- Solution: Small stripped screws can sometimes be removed with specialized screw extractors or by carefully cutting a new slot with a Dremel tool for a flathead screwdriver. If it’s a bolt, locking pliers might provide enough grip. This is a trickier situation and, if you’re not confident, it might be a good time to call a professional to avoid further damage.
By approaching these challenges systematically and with patience, you can overcome most obstacles during your brake light bulb replacement.
When to Call a Professional
While replacing a brake light bulb is often a straightforward DIY task, there are situations where calling in a professional mechanic is the wiser choice. Knowing when to stop and seek expert help can save you time, frustration, and potentially more expensive damage.
Complex Taillight Designs
Some modern vehicles feature highly integrated taillight assemblies that are more complex than simple screw-in bulbs. These might involve intricate clips, hidden fasteners, or even require specialized tools for removal. If you’ve consulted your owner’s manual and the process seems overly complicated, or if you encounter excessive resistance when trying to access the bulb, it’s best to let a professional handle it. Forcing components can lead to costly damage to the taillight housing or surrounding bodywork.
Integrated LED Units
Many newer cars are equipped with LED (Light Emitting Diode) brake lights. Unlike traditional incandescent bulbs, individual LEDs are usually not designed to be user-replaceable. If your vehicle has LED brake lights and one or more segments are out, it typically means replacing the entire LED taillight assembly, which can be an expensive part and often requires specific diagnostic tools or programming after installation. If you’re unsure if your car uses replaceable bulbs or integrated LEDs, your owner’s manual will specify, or a quick call to a dealership can confirm.
Persistent Electrical Issues
You’ve replaced the brake light bulb, checked the fuse, and confirmed the bulb is good, but it still won’t light up. This indicates a deeper electrical issue, such as a faulty wiring harness, a problem with the brake light switch, or a more complex circuit fault. Diagnosing and repairing these issues often requires specialized diagnostic equipment and a thorough understanding of automotive electrical systems. Attempting to fix complex wiring problems without the proper knowledge can inadvertently cause further electrical damage to your vehicle.
Corrosion or Damage to the Socket/Wiring
While minor corrosion on a bulb socket can be cleaned, severe corrosion that has damaged the socket itself or the attached wiring harness might require replacement of the socket or repair of the wiring. This job can be more involved, especially if it requires splicing wires or replacing specific connectors, making it a task better suited for a professional.
Lack of Time, Tools, or Confidence
Ultimately, if you lack the time, the necessary tools, or simply don’t feel confident performing the repair yourself after reviewing the steps, there’s no shame in taking your car to a mechanic. Your safety and peace of mind are paramount. While a professional replacement will incur labor costs, it ensures the job is done correctly, safely, and efficiently.
Knowing your limits and when to hand over the reins to an expert is a sign of a responsible car owner. For most, replacing a brake light bulb is a manageable task, but these situations highlight when professional intervention is the safest and most practical course of action.
Conclusion
Congratulations! You’ve made it through this comprehensive guide on how to replace a brake light bulb. By now, you should feel equipped with the knowledge and confidence to tackle this common car maintenance task yourself. Remember, this isn’t just about saving a few bucks; it’s about taking charge of your vehicle’s safety and ensuring you’re a responsible driver on the road.
We’ve covered everything from identifying a faulty bulb and gathering the right tools to executing a step-by-step replacement, along with crucial safety precautions and troubleshooting tips. The process, while varying slightly by vehicle, generally involves accessing the taillight assembly, carefully removing the old bulb, installing the new one, testing it, and then reassembling everything.
The next time a friendly driver alerts you to a burnt-out brake light, you won’t dread it. Instead, you’ll know exactly what to do. You’ll have the power to quickly fix the problem, avoiding potential fines and, more importantly, keeping yourself and those around you safer. So go ahead, grab your tools, and put your newfound knowledge to good use. Happy driving, and remember: well-maintained lights lead to safer journeys for everyone.
🎥 Related Video: Remove brake light/turn signal bulb. Replace with new bulb. Installation is reverse of removal
📺 Mr. Delray
Frequently Asked Questions
How do I know which type of brake light bulb my car needs?
The easiest way to determine the correct brake light bulb type is to consult your vehicle’s owner’s manual, which will list the specific bulb numbers for all exterior lights. Alternatively, you can carefully remove the old, burnt-out bulb and check the numerical code printed on its base or glass, then purchase an exact match from an auto parts store.
Can I use an LED bulb to replace my incandescent brake light bulb?
While it’s technically possible, simply swapping an incandescent brake light bulb for an LED equivalent often requires additional steps. LEDs draw less power, which can confuse your car’s electrical system, potentially causing a “bulb out” warning on your dashboard or hyper-flashing turn signals. You may need to install load resistors or a special LED-compatible flasher relay to ensure proper function and avoid error messages.
What tools do I need to replace a brake light bulb?
For most vehicles, you’ll typically need a Philips head screwdriver, possibly a flathead screwdriver or plastic trim removal tool, and the new brake light bulb. Wearing gloves is also recommended to prevent oils from your skin from contacting the bulb’s glass, which can shorten its lifespan. Always check your owner’s manual for specific tools or access procedures.
How long does it typically take to replace a brake light bulb?
Replacing a brake light bulb is generally a quick process, often taking anywhere from 10 to 30 minutes for a beginner. The exact time can vary depending on your vehicle’s design (how easy it is to access the bulb) and whether you encounter any unforeseen challenges like stubborn screws or corroded sockets.
What if my car has a third brake light (center high mount stop lamp)?
Your car’s third brake light, also known as the CHMSL, usually has its own bulb or integrated LED unit. If it goes out, the replacement process might differ from your main brake lights. Consult your owner’s manual for specific instructions, as access often involves removing trim panels from the inside of the trunk or hatch, or sometimes even the spoiler assembly.
Is it expensive to have a mechanic replace a brake light bulb?
While the bulb itself is inexpensive (typically a few dollars), mechanics usually charge for labor, which can range from $20 to $100 or more for what is often a 10-15 minute job. This is why replacing the brake light bulb yourself is a popular DIY task, offering significant savings for a relatively simple repair.