Replacing a light bulb in your Whirlpool refrigerator doesn’t have to be a headache! This comprehensive guide walks you through every step of how to remove the light bulb cover in your Whirlpool refrigerator, identifying different cover types (snap-fit, screw-on, clip-on), ensuring safety, and providing practical tips for successful bulb replacement and reinstallation.
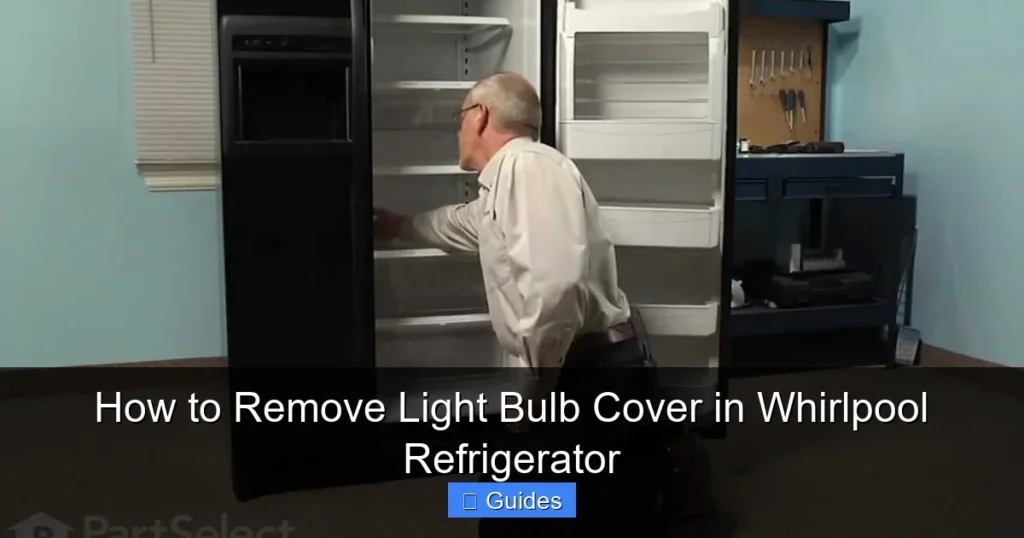
How to Remove Light Bulb Cover in Whirlpool Refrigerator
There’s nothing quite as frustrating as opening your refrigerator door, expecting a bright, welcoming light, only to be met with darkness. A burnt-out light bulb can make finding your midnight snack a real challenge, not to mention making your fridge feel a bit gloomy. Before you resign yourself to fumbling around in the dark or calling a costly repair technician, know that replacing a refrigerator light bulb is a common and usually straightforward DIY task. The main hurdle? Figuring out exactly how to remove the light bulb cover in your Whirlpool refrigerator.
Whirlpool refrigerators are known for their reliability and diverse range of models. While the overall quality is consistent, the specific design for accessing the light bulb can vary quite a bit from one model to another. This means that what works for your neighbor’s Whirlpool might not be the exact method for yours. But don’t worry! This comprehensive guide is designed to walk you through the various methods and provide practical advice on how to remove the light bulb cover in your Whirlpool refrigerator safely and effectively, getting your fridge back to its illuminated glory in no time. We’ll cover everything from identifying different cover types to the essential safety precautions you need to take.
Understanding Your Whirlpool Refrigerator’s Lighting System
Before diving into the removal process, it’s helpful to understand a little about how your Whirlpool refrigerator’s lighting works and the different types of covers you might encounter. This knowledge will empower you to approach the task with confidence and prevent accidental damage.
Different Types of Lighting: Incandescent vs. LED
Historically, refrigerators used incandescent bulbs, which are the traditional glass bulbs that get hot when on. Many older Whirlpool models still use these. Newer and more energy-efficient Whirlpool refrigerators, however, often feature LED lighting. LEDs are cooler, last much longer, and typically come in a panel or strip format rather than a single bulb. While both have covers, the mechanism to access them can differ slightly. For incandescent bulbs, you’re usually replacing a screw-in bulb. For LEDs, you might be replacing an entire LED module or strip, which is a bit more involved, but the cover removal principles often remain the same. Knowing whether you have an incandescent bulb or an LED assembly can help you mentally prepare for what’s inside once you remove the light bulb cover in your Whirlpool refrigerator.
Common Light Cover Designs: Snap-Fit, Screw-On, Clip-On
Whirlpool, like many appliance manufacturers, uses a few primary designs for their light bulb covers. Recognising your specific type is the first critical step in learning how to remove light bulb cover in your Whirlpool refrigerator.
- Snap-Fit Covers: These are perhaps the most common. They typically have small plastic tabs or clips that “snap” into place. You usually need to apply gentle pressure or pry slightly at specific points to release these tabs. They often look like a simple plastic dome or rectangle.
- Screw-On Covers: Less common in newer models but still found, especially in freezer sections or older refrigerator compartments. These covers are held in place by one or more screws. You’ll need a Philips head or flathead screwdriver to remove them.
- Clip-On/Tab-Release Covers: Similar to snap-fit, but often with more visible or accessible clips that you might need to depress or push aside. These can sometimes be found on side-mounted light strips or more complex overhead assemblies.
Why Removing the Cover is Necessary
Beyond just replacing a burnt-out bulb, you might need to remove the light bulb cover in your Whirlpool refrigerator for a few other reasons. Cleaning is a big one; dust and grime can accumulate on the cover, dimming your light. You might also want to access the wiring for troubleshooting, though this is less common for a DIY project. In any case, knowing how to safely remove and reattach the cover is a valuable skill for any homeowner.
Safety First: Preparing for Light Bulb Cover Removal
Before you even think about touching the light bulb cover in your Whirlpool refrigerator, it is absolutely paramount to prioritize safety. Working with electricity and sharp edges (even plastic ones) without proper precautions can lead to injury or damage to your appliance.
Unplugging the Refrigerator
This is the single most important step. Always, always, *always* unplug your Whirlpool refrigerator from the wall outlet before beginning any work that involves internal components, especially electrical ones. Even if the light is off, there’s still a live current running to the socket. Skipping this step risks electric shock, which can be severe or even fatal. Find the power cord, typically at the back of the unit, and pull it firmly from the wall. Don’t just flip the circuit breaker unless you cannot access the plug, as someone else might inadvertently flip it back on.
Gathering Your Tools
Having the right tools at hand makes the job smoother and reduces the chance of damaging your refrigerator. Here’s what you might need:
- Screwdrivers: A set of Philips head and flathead screwdrivers (various sizes) will cover most screw types if your cover is screw-on.
- Plastic Pry Tool: Sometimes called a trim removal tool or spudger. These are incredibly useful for snap-fit or clip-on covers, as they provide leverage without scratching or marring the plastic like a metal screwdriver might.
- Gloves: Thin work gloves or even rubber gloves can provide a better grip, especially if the plastic is slippery or oddly shaped. They also offer a slight layer of protection for your hands.
- New Light Bulb/LED Module: Have your replacement ready! Ensure it’s the correct type, wattage, and base size for your Whirlpool refrigerator model. Check your owner’s manual for specifications if you’re unsure.
- Small Container: Handy for holding any screws you remove so they don’t get lost.
- Soft Cloth: For cleaning the cover and surrounding area while it’s accessible.
Creating a Safe Workspace
Ensure you have enough light (a flashlight or headlamp is great) to see what you’re doing. Clear any food items or shelves that might obstruct your view or movement. If you need to lean into the fridge, make sure your footing is stable. Taking a moment to prepare your area will save you time and frustration later.
Step-by-Step Guide: How to Remove Specific Light Bulb Cover Types
Now that you’re prepped and safe, let’s get down to the nitty-gritty of how to remove the light bulb cover in your Whirlpool refrigerator. Remember to be gentle and patient, as plastic components can be fragile, especially when cold.
Method 1: Snap-Fit Covers (Common in Top/Rear)
This is the most frequent type you’ll encounter.
- Locate the Edges/Tabs: Examine the plastic cover carefully. Look for seams, slight indentations, or small tabs around its perimeter where it meets the refrigerator’s interior. Sometimes there are specific “press here” indicators or arrow marks.
- Apply Gentle Pressure: Using your fingers, apply gentle, even pressure around the edges. You might need to slightly push inwards, outwards, or slide it in one direction. Some covers require you to push up and then slide back.
- Use a Pry Tool (If Needed): If finger pressure isn’t enough, carefully insert a plastic pry tool into the seam between the cover and the refrigerator housing. Gently twist or lever the tool. Work your way around the cover, releasing each tab one by one. Avoid using a metal screwdriver directly against the plastic, as it can scratch or crack it.
- Release and Remove: Once all tabs are released, the cover should come free. Hold onto it firmly as it detaches. You’ve successfully managed to remove the light bulb cover in your Whirlpool refrigerator!
Pro Tip: Cold plastic can be more brittle. If your fridge has been running, the plastic might be very cold. Letting the door stay open for a few minutes (with the fridge unplugged, of course) can slightly warm the plastic, making it more flexible.
Method 2: Screw-On Covers (Often in Older Models or Freezer Sections)
If your cover has visible screws, this is your method.
- Identify Screw Type: Determine whether the screws are Philips head or flathead.
- Choose the Right Screwdriver: Select the screwdriver that perfectly fits the screw head. Using the wrong size can strip the screw, making removal much harder.
- Unscrew Carefully: Turn the screws counter-clockwise to loosen them. Support the cover with your free hand as you remove the last screw to prevent it from falling.
- Store Screws Safely: Place the removed screws in your small container so they don’t get lost.
- Remove the Cover: Once all screws are out, the cover should come right off.
Method 3: Clip-On/Tab-Release Covers (Side-Mounted, Specific Models)
These often involve a more direct interaction with visible clips.
- Locate the Clips: These covers typically have obvious clips or latches that need to be squeezed, pushed, or pulled. They might be at the sides or ends of the cover.
- Engage the Clips: Depending on the design, you might need to press two clips simultaneously, push a single tab inwards, or slide a latch mechanism.
- Gentle Wiggle and Pull: As you engage the clips, gently wiggle or pull the cover away from the housing. It should release with minimal force.
Method 4: Light Assemblies with Multiple Components (Newer LED Setups)
Some modern Whirlpool refrigerators have larger light assemblies that might have an outer decorative shell and an inner protective cover for the LED module.
- Examine the Entire Assembly: Look for any visible screws, tabs, or seams on the outer housing.
- Remove Outer Shell: This usually follows one of the methods above (snap-fit or screw-on). Be extra gentle as these larger pieces can be more expensive to replace if broken.
- Access Inner Cover/Module: Once the outer shell is off, you might see the LED module directly, or there might be another, smaller cover over it. If there’s another cover, use the appropriate method to remove it.
- Identify the Part to Replace: For LEDs, you might need to replace an entire module that plugs in, rather than unscrewing a bulb. Consult your owner’s manual for specific instructions on how to remove light bulb cover in your Whirlpool refrigerator with LED lighting.
Replacing the Bulb and Reattaching the Cover
Once the light bulb cover in your Whirlpool refrigerator is successfully removed, the hard part is over! Now it’s time to replace the old bulb and put everything back together.
Choosing the Right Bulb
This is crucial. Always use the specified bulb type and wattage for your Whirlpool refrigerator. Using a bulb with higher wattage can generate too much heat, potentially damaging the fridge’s interior plastic or even causing a fire risk.
- Incandescent Bulbs: Check the old bulb for its wattage (e.g., 40W). Ensure the base type (e.g., standard E26/E27) matches. Appliance bulbs are often designed to withstand colder temperatures and vibrations.
- LED Modules: For LED systems, you typically need to replace the entire module. Match the part number exactly. This information can usually be found in your refrigerator’s owner’s manual or by cross-referencing your model number online with Whirlpool’s parts diagram.
Installing the New Bulb
- Remove the Old Bulb: For incandescent bulbs, simply unscrew it counter-clockwise. For LED modules, they often have a clip or a small connector that you gently pull to release.
- Install the New Bulb/Module: For incandescent bulbs, screw the new bulb in clockwise until it’s snug, but don’t over-tighten. For LED modules, connect the new one by pushing it firmly into its connector until it clicks into place.
Reattaching the Cover
This process is essentially the reverse of removal.
- Align Carefully: Line up the cover with its housing. For snap-fit or clip-on covers, ensure all tabs or clips are properly aligned with their corresponding slots. For screw-on covers, align the screw holes.
- Apply Gentle, Even Pressure: For snap-fit covers, press firmly and evenly around the edges until you hear or feel the tabs click into place. For clip-on covers, engage the clips until they secure.
- Reinstall Screws: For screw-on covers, insert the screws and tighten them clockwise. Don’t over-tighten, as this can strip the plastic or crack the cover. Just snug is enough.
Testing the Light
Once the cover is securely back in place, plug your Whirlpool refrigerator back into the wall outlet. Open the door and check if the new light bulb illuminates correctly. If it doesn’t, unplug the fridge again, double-check the bulb’s installation, and ensure the cover is properly seated. If the issue persists, you might have a faulty bulb or a deeper electrical problem (see troubleshooting).
Troubleshooting Common Issues and Pro Tips
Even with the best instructions on how to remove light bulb cover in your Whirlpool refrigerator, sometimes things don’t go perfectly. Here are some common issues and tips to help you out.
Cover Stuck? What to Do.
If the cover just won’t budge, first, take a deep breath. Don’t force it with excessive strength, as this is how plastic tabs break.
- Consult Your Manual: The absolute best resource for model-specific instructions is your Whirlpool refrigerator’s owner’s manual. It will often have diagrams or very precise directions for how to remove light bulb cover in your particular model. If you don’t have a physical copy, most manuals are available for free download on the Whirlpool website by entering your model number.
- Wiggle and Pry: Sometimes, a combination of gentle wiggling and carefully prying with a plastic tool at different points can help loosen stubborn covers.
- Warm It Up: As mentioned, cold plastic is brittle. If your fridge has been off for a bit, letting it sit at room temperature for 15-20 minutes with the door open (still unplugged) can make the plastic more pliable.
Dealing with Broken Tabs or Screws
- Broken Tabs: If a tab breaks, the cover might still hold with the remaining tabs, but it could be less secure. You might need to order a replacement cover from Whirlpool parts, or in some cases, a small amount of appliance-safe adhesive could be used to secure it if it’s not structural.
- Stripped Screws: If a screw head strips, try a screw extractor kit. These are designed to remove damaged screws. As a last resort, you might need to carefully drill out the screw, but this is best left to professionals if you’re not experienced.
When to Call a Professional
While removing the light bulb cover in your Whirlpool refrigerator is a DIY-friendly task, there are times when professional help is warranted:
- If the light still doesn’t work after replacing the bulb/module, and you’ve double-checked all connections. This could indicate a wiring issue or a faulty light switch.
- If you encounter complex wiring that you’re uncomfortable dealing with.
- If you’ve broken critical components and are unsure how to replace them.
- If your manual explicitly states that certain parts should only be serviced by qualified technicians.
Regular Maintenance Tips
Once your light is fixed, keep it bright! Periodically wipe down the light bulb cover with a mild, damp cloth to prevent dust and grime buildup. This simple habit will help maximize the brightness and lifespan of your refrigerator light.
Conclusion
There you have it! Knowing how to remove light bulb cover in your Whirlpool refrigerator is a simple skill that can save you time, money, and the frustration of a dark fridge. By following these steps, prioritizing safety, and using the right tools, you can confidently tackle this common household repair. Remember to identify your cover type, be gentle, and consult your owner’s manual if you hit a snag. A well-lit refrigerator not only makes finding ingredients easier but also makes your kitchen feel more inviting. Enjoy your brightly lit fridge once more!
Key Takeaways
- Safety First: Always unplug your Whirlpool refrigerator before attempting to remove the light bulb cover or replace any electrical component to prevent shocks and ensure safety.
- Identify Your Cover Type: Whirlpool refrigerators use various light bulb cover designs, including snap-fit, screw-on, and clip-on. Understanding which type you have is crucial for correct and damage-free removal.
- Gather the Right Tools: While many covers can be removed by hand, some may require a flathead screwdriver, Philips head screwdriver, or a plastic pry tool for leverage, along with gloves for a better grip.
- Gentle Pressure is Key: Avoid excessive force when removing the light bulb cover. Applying gentle, even pressure is essential to prevent breaking delicate plastic tabs or stripping screws.
- Choose the Correct Replacement Bulb: Ensure you replace the old bulb with one of the correct wattage, type (incandescent or LED), and base size specified for your specific Whirlpool refrigerator model.
- Reinstallation is a Reversal: Putting the light bulb cover back on typically involves reversing the removal steps. Ensure all tabs align or screws are securely tightened without over-tightening.
- Troubleshooting: If the cover is stubborn, check your appliance’s user manual for specific instructions, or try applying slight wiggling motions while applying pressure.
Quick Answers to Common Questions
Can I remove the light bulb cover in my Whirlpool refrigerator without unplugging it?
No, you absolutely should not. Always unplug your Whirlpool refrigerator from the wall outlet before attempting to remove the light bulb cover or work with any internal electrical components to prevent the risk of electric shock.
What tools do I need to remove the light bulb cover in a Whirlpool refrigerator?
You might need a flathead or Philips head screwdriver for screw-on covers, or a plastic pry tool for snap-fit/clip-on covers. Gloves can also be helpful for grip and protection.
My Whirlpool refrigerator light cover is stuck. What should I do?
First, consult your refrigerator’s owner’s manual for model-specific instructions. If it’s still stuck, try gently wiggling it while applying pressure with a plastic pry tool. Cold plastic can be brittle, so letting the fridge warm up slightly (unplugged) might help.
How do I know what type of replacement bulb to get for my Whirlpool refrigerator?
Check the wattage and base type of the old bulb. If it’s an LED, you’ll likely need to replace an entire module, so note the part number. Your Whirlpool refrigerator’s owner’s manual or Whirlpool’s parts website (using your model number) will provide the exact specifications.
Can I use a regular household light bulb in my Whirlpool refrigerator?
No, it’s best to use appliance-specific bulbs. Regular household bulbs might not withstand the cold temperatures and vibrations inside a refrigerator, and using the wrong wattage can cause heat damage or be a fire hazard.
🎥 Related Video: Removing the led light unit from the Whirlpool refrigerator.
📺 Stephen South
Frequently Asked Questions
What are the common types of light bulb covers in Whirlpool refrigerators?
Whirlpool refrigerators typically feature snap-fit (most common, uses tabs), screw-on (held by screws, often in older models), or clip-on covers (visible clips to depress). Identifying the correct type is the first step in safely removing it.
Is it safe to use a metal screwdriver to pry off a snap-fit light cover?
While a metal screwdriver can offer leverage, it’s generally not recommended for plastic covers. Metal tools can easily scratch, mar, or even crack the plastic, potentially damaging the cover or the refrigerator’s interior. A plastic pry tool is a much safer alternative.
My new light bulb isn’t working after I replaced it. What could be wrong?
First, ensure the bulb is properly screwed in or the LED module is securely connected. If it still doesn’t work, double-check that you’ve used the correct bulb type and wattage for your model. If the problem persists, there might be a deeper electrical issue, such as a faulty socket or door switch, which might require professional diagnosis.
How often should I check or replace my Whirlpool refrigerator light bulb?
Light bulbs in refrigerators typically last a long time, especially LED ones. You usually only need to replace them when they burn out. However, periodically checking and wiping down the cover for dust can help maintain brightness and prevent premature failure due to heat buildup.
Can I clean the light bulb cover while it’s removed?
Absolutely! This is an excellent time for cleaning. Use a mild soap solution and a soft cloth to gently wipe down the cover. Ensure it’s completely dry before reattaching it to prevent moisture from getting into the electrical components.
Where can I find my Whirlpool refrigerator’s model number for specific instructions?
The model number is typically located on a label inside the refrigerator compartment. Common locations include the upper left or right side wall, near the top hinges, or behind the crisper drawers. This number is vital for finding your specific owner’s manual or ordering the correct replacement parts.