Replacing a light bulb is a common household task that anyone can master with the right knowledge and precautions. This comprehensive guide will walk you through essential safety steps, help you choose the correct replacement bulb, and provide clear instructions for removal and installation, ensuring your home stays safely illuminated. Learn to confidently replace a light bulb and brighten up your space.
There’s a special kind of dread that sets in when you flip a light switch and nothing happens. That familiar click, but no comforting glow. Whether it’s the living room lamp, the kitchen fixture, or a tricky recessed light, a burnt-out bulb is a common occurrence in every home. But don’t fret! Learning how to replace a light bulb is one of the simplest yet most empowering DIY skills you can master. It saves you money, keeps your home bright, and boosts your confidence in tackling minor household tasks.
Many people find themselves intimidated by even this basic electrical job. Perhaps they worry about getting shocked, choosing the wrong bulb, or even breaking the fixture. But with a few straightforward steps, some basic tools, and a little common sense, you’ll be a light bulb replacement pro in no time. This guide is designed to be your friendly companion, walking you through every aspect of how to replace a light bulb safely and effectively, ensuring your spaces stay illuminated and inviting.
We’ll cover everything from the crucial safety precautions you need to take before you even touch a bulb, to understanding the different types of bulbs available today, and finally, the step-by-step process of removing the old and installing the new. So, grab a fresh cup of coffee, get ready to brighten up your home, and let’s dive into the ultimate guide on how to replace a light bulb!
Key Takeaways
- Safety First: Always turn off the power at the switch or circuit breaker and allow the bulb to cool down before handling to prevent electric shock or burns.
- Match the Bulb Type: Correctly identify the base type (e.g., E26, GU10) and wattage/lumens of the old bulb to ensure compatibility and proper illumination for your fixture.
- Understand Bulb Technologies: Familiarize yourself with incandescent, CFL, LED, and halogen bulbs, noting their energy efficiency, lifespan, and light characteristics.
- Handle with Care: Use a stable ladder if needed, and wear gloves to protect your hands and prevent oils from skin contact, especially with halogen bulbs, which can reduce their lifespan.
- Gentle Removal and Installation: Turn counter-clockwise to loosen and clockwise to tighten for screw-in bulbs. For bayonet or pin-type bulbs, understand their specific twist-and-pull or push-and-twist mechanisms.
- Proper Disposal is Key: Incandescent and halogen bulbs can often go into regular trash, but CFL and LED bulbs require special recycling due to hazardous materials or electronic components.
Quick Answers to Common Questions
Can I touch a halogen bulb with my bare hands?
It’s best to avoid touching a halogen bulb with your bare hands. The oils from your skin can create hot spots on the bulb’s surface, leading to premature failure and a significantly reduced lifespan. Always use a clean cloth or gloves when handling halogen bulbs.
What do lumens mean on a light bulb?
Lumens (lm) measure the total amount of visible light produced by a bulb, indicating its brightness. Instead of watts, which measure energy consumption, lumens are the best way to compare how bright one bulb is to another, especially when choosing energy-efficient options like LEDs.
How do I know what size base my light bulb has?
The easiest way to determine the base size is to look for markings on the old bulb itself, usually near the metal screw or pin base (e.g., E26, E12, GU10). If not visible, you can compare it to common base charts online or take the old bulb to a hardware store for identification.
Is it safe to replace a light bulb in a wet bathroom fixture?
Yes, but extreme caution is advised. Always ensure the power is completely off at the circuit breaker. Additionally, make sure the replacement bulb is rated for damp or wet locations if the fixture requires it, and always ensure your hands and the area are dry.
What should I do if a light bulb breaks in the socket?
First, immediately turn off the power at the circuit breaker. Wear thick gloves and eye protection. Carefully remove any large glass pieces. Then, use needle-nose pliers or even a raw potato (cut flat and pressed into the broken base) to grip the metal base and twist it counter-clockwise to remove it from the socket. Vacuum any remaining glass shards.
📑 Table of Contents
Safety First: Essential Precautions Before You Begin
Before you even think about touching that old, burnt-out bulb, remember that you’re dealing with electricity. Safety is paramount when you replace a light bulb. Skipping these initial steps can lead to electric shock, burns, or even damage to your fixture. Always prioritize your well-being over haste.
Turn Off the Power
This is the golden rule, no exceptions! The first and most critical step when you go to replace a light bulb is to cut off its power source. Simply flipping the light switch to the “off” position is a good start, but for maximum safety, especially with ceiling fixtures or hard-to-reach lights, you should take an extra step:
- Flip the light switch OFF: This is your immediate action. Ensure the room is dark before proceeding.
- Turn off the circuit breaker: For an added layer of security, locate your home’s electrical panel (usually in a basement, garage, or utility closet). Find the breaker that controls the room or fixture you’re working on and switch it to the “off” position. If your panel isn’t clearly labeled, you can turn off the main breaker, but this will kill power to your entire home, so only do this if you’re comfortable with it. A quick way to test if you’ve killed the right circuit is to try another light switch or plug something into an outlet in the same room.
- Unplug the lamp: If you are replacing a light bulb in a portable lamp, simply unplugging it from the wall outlet is sufficient to cut the power.
Once you’ve cut the power, you can proceed with confidence that you won’t encounter an unexpected jolt.
Let it Cool Down
Light bulbs, especially traditional incandescent and halogen types, get incredibly hot during operation. Touching a hot bulb can cause severe burns. Give the bulb ample time to cool down before attempting to remove it. Depending on the bulb type and how long it was on, this could take anywhere from a few minutes to half an hour. LED and CFL bulbs generally run cooler, but it’s still wise to let them rest for a few minutes.
Use Proper Equipment
Having the right tools on hand not only makes the job easier but also safer:
- Ladder or Step Stool: If the light fixture is out of arm’s reach, use a sturdy ladder or step stool. Never stand on a shaky chair or attempt to reach precariously. Ensure the ladder is placed on a stable, level surface.
- Gloves: Wearing work gloves (cotton or rubberized) can protect your hands from residual heat, broken glass (if the bulb shatters), and help you get a better grip on a stubborn bulb. For halogen bulbs, gloves are essential to prevent skin oils from reducing the bulb’s lifespan.
- Eye Protection: If there’s any risk of the bulb shattering (e.g., it’s stuck, or you’re applying force), safety glasses are a good idea.
- Cloth or Paper Towel: This can help grip a smooth bulb and protect your hands.
Identifying the Right Replacement Bulb
Replacing a light bulb isn’t just about unscrewing the old one and screwing in a new one. Modern lighting offers a vast array of choices, and selecting the right bulb is crucial for functionality, aesthetics, and energy efficiency. Before you replace a light bulb, take a moment to understand what you’re replacing.
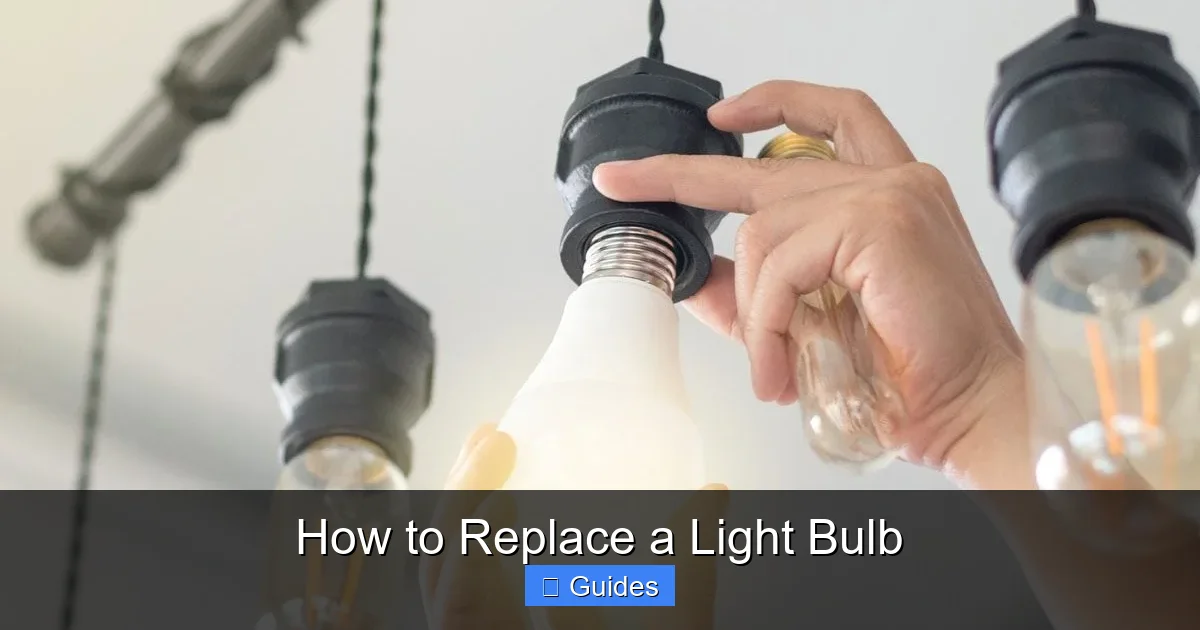
Visual guide about How to Replace a Light Bulb
Image source: familyhandyman.com
Understanding Bulb Types
Gone are the days when most bulbs were simple incandescent filaments. Today, you have several primary technologies:
- Incandescent: The classic bulb, producing a warm, yellowish light. They are inexpensive but inefficient, converting most energy into heat. They are being phased out in many regions.
- Halogen: A more efficient version of incandescent, producing a brighter, whiter light. Still generates a lot of heat and is less efficient than CFLs or LEDs. Often found in spotlights or task lighting.
- Compact Fluorescent Lamp (CFL): Energy-efficient spirals or tubes that last longer than incandescents. They contain a small amount of mercury and require specific disposal. They take a moment to reach full brightness.
- LED (Light Emitting Diode): The most energy-efficient and longest-lasting option. They come in various shapes, sizes, and color temperatures, produce minimal heat, and are mercury-free. While typically more expensive upfront, their longevity and low energy consumption make them the most cost-effective over time. If you often replace a light bulb, switching to LED will significantly reduce how often you need to do so.
Matching Base Types
The base is the part of the bulb that connects to the fixture. This is non-negotiable – the new bulb must have the same base type as the old one and the fixture. The most common types include:
- Edison Screw (E-type): Designated by “E” followed by a number indicating the diameter in millimeters. E26 (standard in North America), E27 (standard in Europe), and E12 (candelabra base) are common. Simply screw them in.
- Bayonet Cap (B-type): Designated by “B” followed by a number (e.g., B22). These have two pins on the sides that twist into slots in the fixture. Common in the UK and Australia.
- Pin Base (G-type): Designated by “G” followed by a number (e.g., GU10, G4, G9). These have two or more pins that either push straight in or push and twist into the fixture. Often used for spot lighting, under-cabinet lighting, or decorative fixtures.
Always check the base type on the old bulb or the fixture itself. It’s usually printed or easily identifiable.
Lumens vs. Watts: Brightness and Energy Consumption
When you replace a light bulb, don’t just look at watts anymore. Watts measure energy consumption, not brightness. Lumens (lm) are the true measure of light output.
- Watts (W): For traditional incandescent bulbs, higher wattage meant brighter light. For example, a 60W incandescent bulb produces about 800 lumens.
- Lumens (lm): This is the crucial number. To replace a light bulb with an equivalent brightness, match the lumens. An LED bulb that uses only 9-10 watts can produce 800 lumens, equivalent to a 60W incandescent!
Most packaging will indicate the “equivalent wattage” to help you choose, but always prioritize lumens for brightness.
Color Temperature (Kelvin Scale)
The “color” of light, or its warmth/coolness, is measured in Kelvins (K):
- 2700K – 3000K: Warm White (similar to incandescent, cozy feel)
- 3500K – 4100K: Cool White/Neutral White (good for kitchens, offices)
- 5000K – 6500K: Daylight (bright, blue-white light, good for task lighting or simulating natural light)
Choose a color temperature that suits the room’s function and your personal preference.
Special Features
Consider if you need a dimmable bulb (ensure both the bulb and your dimmer switch are compatible), a smart bulb (connects to Wi-Fi for control via apps or voice assistants), or a specialized bulb for outdoor use or enclosed fixtures.
Removing the Old Light Bulb
With safety precautions in place and your replacement bulb ready, it’s time to tackle the old one. The removal process largely depends on the type of base.
Standard Screw-In Bulbs (Edison Base)
This is the most common and easiest to remove.
- Grip the Bulb: Hold the bulb firmly but gently. If it’s a smooth globe, a clean cloth can provide a better grip.
- Turn Counter-Clockwise: Twist the bulb counter-clockwise (lefty-loosey) until it loosens from the socket. It might take a few turns.
- Pull Gently: Once loose, gently pull the bulb straight down and out of the fixture.
If the bulb is stuck, don’t force it with excessive strength, as it might shatter. Instead, try applying steady pressure, or for very stubborn bulbs, a rubber glove might help. Ensure you’ve followed the safety steps!
Bayonet Bulbs (B-Type)
These have a slightly different mechanism.
- Push and Twist: Gently push the bulb upwards into the fixture.
- Turn Counter-Clockwise: While pushing, twist the bulb counter-clockwise until the pins align with the wider part of the slots.
- Pull Down: The bulb should then easily pull straight down and out.
Pin-Type Bulbs (e.g., GU10, G9, G4)
These require specific handling to avoid bending or breaking pins.
- GU10 (Twist-Lock): Push the bulb inwards slightly and twist counter-clockwise, similar to a bayonet, but often with a shorter, firmer twist.
- G9/G4 (Push-In): Simply pull the bulb straight out from the socket. Be gentle but firm. The pins should slide out.
Recessed Lighting and Fixtures with Covers
Many ceiling lights have a cover or housing around the bulb. You’ll need to remove these first.
- Glass or Plastic Domes: These often unscrew counter-clockwise or are held by clips. Gently twist or unclip them.
- Track Lighting: Bulbs on a track are usually pin-type or screw-in and accessible once the fixture is adjusted.
- Spring Clips: Some recessed lights have spring clips. Carefully pull down on the trim ring (the visible part) until you can access the springs, then squeeze them to release the fixture.
What if the Bulb Breaks?
This can happen, especially with old or overtightened bulbs. Remain calm and follow these steps:
- Ensure Power is OFF: Double-check the circuit breaker!
- Protect Yourself: Put on thick gloves and eye protection.
- Remove Remaining Glass: Carefully pick up any large pieces of broken glass.
- Remove the Base: The metal base of the bulb might still be screwed into the socket. Use needle-nose pliers or a potato (yes, a potato!) to grip the base and twist it counter-clockwise. Insert the cut end of a raw potato into the broken base, twist, and remove.
- Clean Up: Use a vacuum cleaner (not a broom, which can spread fine glass particles) to pick up any tiny shards.
Installing the New Light Bulb
Now for the satisfying part: putting in the new bulb and bringing light back to your space. The installation process is essentially the reverse of removal, but with a few crucial tips.
Gentle Handling
Always handle new bulbs, especially LED and halogen, by their base or the non-glass/non-illuminating part. Oils from your skin can create hot spots on halogen bulbs, leading to premature failure. For LEDs, handling them roughly can damage the internal components.
Proper Alignment
- Screw-In Bulbs: Gently align the screw base with the socket opening. Don’t force it. If it doesn’t align easily, adjust the angle until it catches the threads.
- Bayonet Bulbs: Insert the pins into the wider part of the fixture slots, push upwards gently, and then twist clockwise until the bulb locks into place.
- Pin-Type Bulbs: For push-in types (G4, G9), align the pins with the holes and push straight in until secure. For twist-lock types (GU10), align the pins, push gently, and twist clockwise until it locks.
Secure, But Not Overtightened
Once the bulb is aligned, turn it clockwise until it’s snug. There’s no need to overtighten it. Overtightening can make it difficult to remove next time, damage the socket, or even cause the bulb to crack. A gentle turn until you feel resistance is enough.
After installation, if you removed any covers or housings, replace them securely. Then, head back to your circuit breaker, flip the power back on, and finally, flip the light switch. Enjoy your newly illuminated space!
Disposal and Recycling
Knowing how to properly dispose of old light bulbs is an important, often overlooked, part of the replacement process. Different bulb types require different methods due to their environmental impact.
Incandescent and Halogen
These bulbs are generally safe to dispose of in your regular household trash. They don’t contain hazardous materials. However, if they are broken, wrap them in newspaper or place them in a bag before discarding to prevent injury to waste handlers.
CFL Bulbs (Compact Fluorescent Lamps)
CFLs contain a small amount of mercury, which is a hazardous material. They should NOT be thrown into regular trash. Instead, they require special recycling. Many home improvement stores (like Lowe’s or Home Depot), local waste management facilities, and some hardware stores offer free CFL recycling programs. Check your local municipality’s website for specific guidelines in your area.
LED Bulbs (Light Emitting Diodes)
While LEDs don’t contain mercury, they are considered electronic waste (e-waste) because they contain circuit boards and other electronic components. Many communities and retailers offer e-waste recycling programs. Check with your local recycling center or an electronics retailer for proper disposal options. Recycling LEDs helps recover valuable materials and prevents harmful components from entering landfills.
Troubleshooting Common Issues After Replacing a Light Bulb
Sometimes, even after carefully following the steps to replace a light bulb, things don’t go as planned. Here are a couple of common issues and how to troubleshoot them.
Bulb Still Not Working
If you’ve installed the new bulb and it still doesn’t light up, don’t panic. Here’s a checklist:
- Check the Power: Did you remember to turn the circuit breaker back on? Is the lamp plugged in? Is the wall switch flipped to “on”?
- Tightness: Is the bulb securely screwed or pushed into the socket? Sometimes it just needs another gentle turn.
- Wrong Bulb Type: Is the new bulb the correct base type and wattage/lumen equivalent for the fixture? Some fixtures might have specific requirements.
- Test the Bulb: Try the new bulb in a different, known-working fixture. If it lights up there, the problem isn’t the bulb.
- Check the Socket/Fixture: If the new bulb works elsewhere, the issue might be with the fixture itself. The socket might be faulty, or there could be a loose wire. At this point, if you’re uncomfortable with electrical work, it might be time to call a qualified electrician.
Flickering Bulbs
A flickering bulb, especially an LED, can be annoying. Common causes include:
- Incompatible Dimmer Switch: Many LED bulbs require “LED compatible” dimmer switches. Using a traditional incandescent dimmer with an LED can cause flickering.
- Loose Connection: The bulb might not be fully tightened, or there could be a loose connection within the fixture or wiring.
- Bulb Quality: Sometimes, it’s just a faulty bulb. Try a different brand or another new bulb.
- Voltage Fluctuations: Less common, but sometimes flickering can indicate broader electrical issues in your home or even on the grid.
Replacing a light bulb is an everyday task, but understanding the nuances ensures safety, efficiency, and a perfectly lit home. From choosing the right type to proper disposal, each step contributes to a brighter, more sustainable living space. By following this guide, you’ve gained the confidence and knowledge to tackle this essential household chore whenever a light goes out.
So next time you’re faced with darkness, you’ll know exactly what to do. You’ll not only bring light back into your room but also gain satisfaction from completing a practical task on your own. Keep these tips handy, and you’ll always be ready to replace a light bulb with ease and expertise!
Frequently Asked Questions
How often should I replace a light bulb?
The frequency depends entirely on the bulb type and its usage. Incandescent bulbs might last 750-2,000 hours, while CFLs typically last 8,000-10,000 hours. LEDs are the longest-lasting, often rated for 15,000-50,000 hours or more, meaning you might replace a light bulb with an LED only once every decade or two.
Can I replace an incandescent bulb with an LED bulb?
Yes, in most cases, you can replace a traditional incandescent bulb with an LED bulb, provided the base type (e.g., E26) and voltage are compatible. Make sure the LED bulb’s lumen output matches your desired brightness and that if you have a dimmer switch, the LED bulb is labeled as dimmable and compatible with LED dimmers.
Why do my light bulbs keep burning out quickly?
Frequent bulb burnout can be caused by several factors, including voltage surges, loose connections in the fixture or wiring, installing a bulb with too high a wattage for the fixture, or excessive vibration. Sometimes, it’s just a batch of faulty bulbs, or if it’s an incandescent, its normal short lifespan.
What is “color temperature” when choosing a light bulb?
Color temperature, measured in Kelvins (K), describes the perceived color of the light emitted. Lower Kelvin values (e.g., 2700K-3000K) produce a warm, yellowish light, while higher values (e.g., 5000K-6500K) create a cool, bluish-white light, often referred to as “daylight.” Choose based on the mood and function of the room.
Do I need an electrician to replace a light bulb?
Generally, no. Replacing a standard light bulb is a simple DIY task that most homeowners can safely perform by following basic safety precautions like turning off the power. However, if the bulb is broken and stuck, or if the fixture itself appears damaged or faulty, then consulting an electrician is recommended.
How do I dispose of CFL bulbs safely?
CFL bulbs contain a small amount of mercury, so they should not be thrown in regular trash. They need to be recycled as hazardous waste. Many major home improvement stores (like Lowe’s or Home Depot), local waste management facilities, and some hardware stores offer free drop-off recycling programs for CFLs. Check your local municipality’s waste disposal guidelines.