Don’t let a burnt-out bulb dim your holiday spirit! Learning how to replace Christmas light bulbs is a simple, cost-effective way to restore your festive glow. This guide covers everything from understanding different bulb types and essential safety precautions to a step-by-step replacement process and troubleshooting common issues, ensuring your decorations shine brightly throughout the season.
There’s nothing quite like the magic of Christmas lights. The warm glow emanating from homes, trees, and festive displays instantly conjures feelings of joy and holiday cheer. But then, it happens. A strand goes dark. A section flickers out. Or worse, a single, offending burnt-out bulb breaks the perfect chain of light, casting a shadow (quite literally!) over your holiday decorations.
Before despair sets in and you consider tossing an entire string of lights, take a deep breath! Often, the solution is much simpler and far more economical than you think. Learning how to replace Christmas light bulbs is a basic skill that can save you money, reduce waste, and keep your festive spirit bright throughout the season. It’s a common scenario, and thankfully, a very fixable one.
This comprehensive guide will walk you through everything you need to know about how to replace Christmas light bulbs, from understanding different types of lights to a step-by-step replacement process and even some handy troubleshooting tips. Think of it as your personal guide to becoming a holiday light repair guru. Let’s get those lights sparkling again!
Key Takeaways
- Safety First: Always unplug your Christmas lights before attempting any bulb replacement to prevent electric shock.
- Identify Your Bulb Type: Know whether your lights are incandescent or LED, and what size/voltage replacement bulbs you need for compatibility.
- Series vs. Shunt Circuits: Understand how different circuit types affect troubleshooting; often, one bad bulb can turn off a whole section in series circuits.
- Use the Right Tools: A light tester, mini pliers, and specific replacement bulbs are crucial for an efficient and successful repair.
- Proper Removal and Insertion: Gently remove old bulbs and firmly seat new ones, ensuring good contact, and always use the bulb base if possible.
- Troubleshoot Persistently: If a single bulb replacement doesn’t work, systematically check adjacent bulbs or use a light tester to pinpoint the exact issue.
- Prevent Future Issues: Store lights carefully, avoid pulling on cords, and consider LED lights for their longevity and energy efficiency.
Quick Answers to Common Questions
What’s the first thing I should do before replacing a Christmas light bulb?
Always unplug the entire string of lights from the electrical outlet. This is the most crucial safety step to prevent electric shock.
Can I use any replacement bulb for my Christmas lights?
No, you must use replacement bulbs that match the voltage, wattage, and base type of your original bulbs. Check the light string’s tag or the original spare bulbs for specifications.
How do I know if an incandescent mini light bulb is bad if it doesn’t look visibly burnt?
A light tester is the most efficient way to identify a faulty bulb. Alternatively, you can systematically replace bulbs in the dark section or gently wiggle each bulb to see if it flickers.
My entire string of LED lights is out; is it a bulb problem?
While possible, it’s less common for a single LED bulb to cause an entire string to fail. First, check the plug’s fuses, the power source (like a GFCI outlet), and the controller if your lights have one.
What if I replace the bad bulb, but the section of lights still doesn’t work?
This could mean there’s another bad bulb in the same section, a loose connection in a socket, a non-working internal shunt (for incandescent lights), or even a broken wire in the string. Use a light tester to re-verify or check surrounding bulbs.
📑 Table of Contents
Understanding Your Christmas Lights
Before you dive into replacing bulbs, it’s helpful to understand a little about the types of Christmas lights commonly available. This knowledge will guide you in choosing the correct replacement bulbs and understanding how your particular light string works.
Incandescent vs. LED Lights
The two main types of Christmas lights you’ll encounter are incandescent and LED (Light Emitting Diode).
- Incandescent Lights: These are the traditional lights that have been around for decades. They use a small filament that heats up to produce light. They tend to be cheaper to buy initially but consume more energy, get hot to the touch, and have a shorter lifespan. When an incandescent bulb burns out, it often breaks the circuit in a series string, causing a whole section or the entire string to go out. Knowing how to replace Christmas light bulb of this type is crucial for many older sets.
- LED Lights: LED lights are newer, more energy-efficient, and have a much longer lifespan. They produce light differently, using semiconductors, which means they stay cool to the touch and use significantly less electricity. Many LED strings are designed with “shunt” technology, meaning if one bulb goes out, the rest of the string typically stays lit, making it easier to pinpoint the faulty bulb. However, even with LEDs, sometimes a single failure can impact a segment.
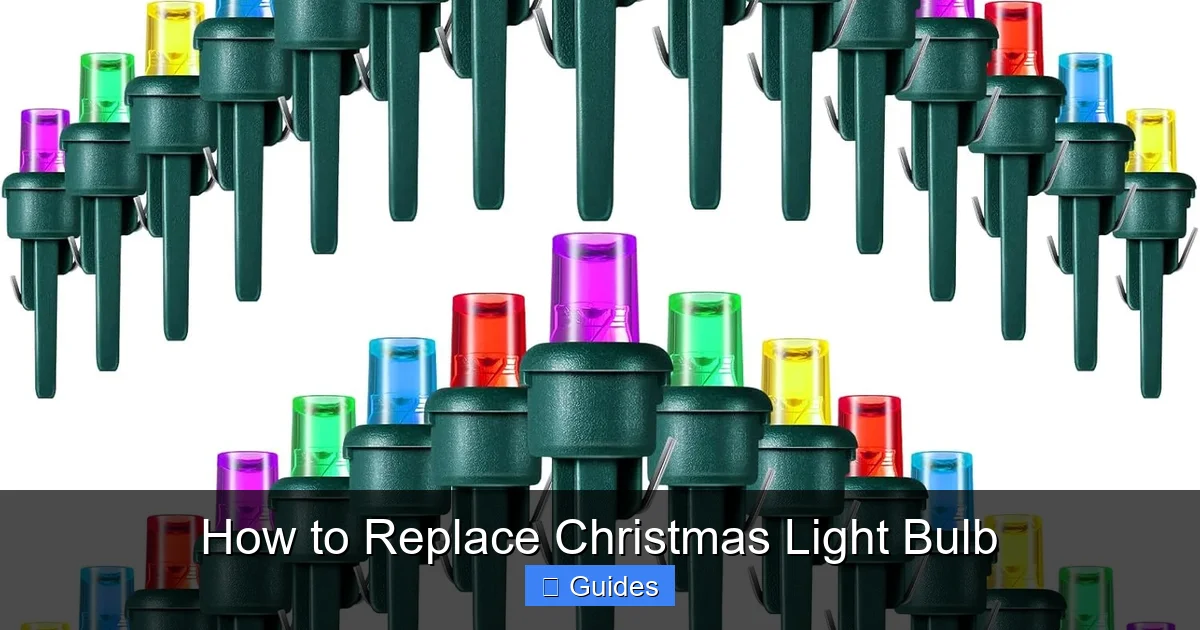
Mini Lights, C7, C9, and Specialty Bulbs
Beyond the technology, bulbs come in different sizes and shapes:
- Mini Lights: These are the most common small, incandescent bulbs, often found on indoor trees and wreaths. They come in various wattages (e.g., 2.5V, 3.5V, 6V) depending on how many bulbs are in the string.
- C7 and C9 Bulbs: These are larger, typically outdoor-rated bulbs with screw-in bases. C7 bulbs are candelabra-sized, while C9 are slightly larger and often used for rooflines and large displays.
- Specialty Bulbs: You might also have novelty lights like bubble lights, icicle lights, or string lights with unique covers. The underlying bulb mechanism often falls into one of the above categories, but the replacement might involve an additional cover.
When you’re ready to replace Christmas light bulb, ensure you have the correct type and voltage. Check the label on your light string or the spare bulbs that came with the set for guidance.
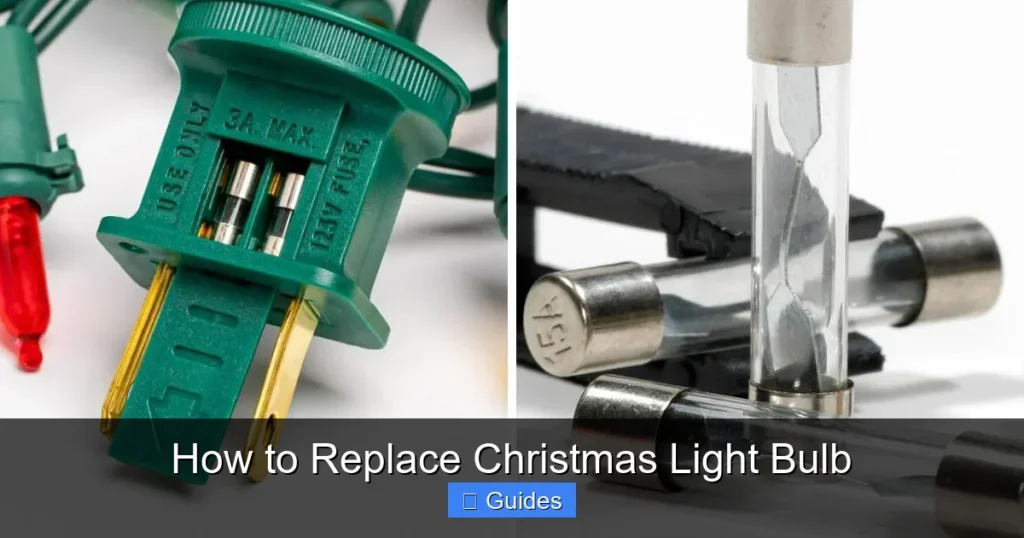
Safety First! Essential Precautions
Working with electricity, even low-voltage Christmas lights, always requires caution. Before you even think about how to replace Christmas light bulb, prioritize safety. These steps are non-negotiable.
Visual guide about How to Replace Christmas Light Bulb
Image source: m.media-amazon.com
Always Unplug Your Lights
This might seem obvious, but it’s the most critical step. Never attempt to replace a bulb on a string of lights that is plugged into an electrical outlet. Unplug the entire string from the wall before you touch any part of it. This eliminates any risk of electric shock and protects you from potential short circuits.
Work in a Well-Lit Area
Good lighting is essential for identifying burnt-out bulbs and performing the delicate task of removal and insertion. If you’re working outdoors at night, use a powerful flashlight or a portable work light.
Use Protective Gear (Optional but Recommended)
While not always strictly necessary, wearing thin work gloves can offer several benefits:
- Protection from Heat: If you forget to unplug the lights (which you won’t, right?), gloves offer some protection from hot bulbs.
- Grip: Gloves can provide a better grip on tiny bulbs and bases, preventing slips.
- Sharp Edges: Occasionally, a broken bulb might leave sharp glass, and gloves offer a layer of protection.
Use a Sturdy Ladder for High Displays
If your lights are on a tree, roofline, or other high area, always use a stable ladder. Have someone spot you if possible. Do not overreach or stand on unstable furniture. Your safety is more important than a perfectly lit display.
Gathering Your Tools and Supplies
Having the right tools makes the job of how to replace Christmas light bulb much easier and quicker. Most of these items are inexpensive and readily available.
Replacement Bulbs
This is the most crucial supply. Always try to use replacement bulbs that came with your light set. If you don’t have them, check the light string’s tag for the bulb specifications (voltage, amperage, and type). When buying new bulbs, bring an old one with you to ensure a match in size, base, and voltage. Using the wrong voltage bulb can cause it to burn out quickly or damage the entire string.
Christmas Light Tester (Highly Recommended)
A Christmas light tester is a game-changer. These inexpensive devices can quickly identify which bulb is burnt out or if there’s a break in the wire. Some testers also have a “shunt” repair feature that can temporarily fix a non-working section of incandescent lights by bypassing a bad bulb (allowing you to then find and replace it).
Small Pliers or Tweezers
Mini light bulbs often have a plastic base that can be tricky to remove. Small needle-nose pliers or even sturdy tweezers can provide the necessary grip without damaging the wire or the socket. Some light testers also come with a small plier function built in.
Gloves (as mentioned)
For grip and protection.
The Step-by-Step Guide to Replacing Incandescent Bulbs
This section focuses on the most common type of repair: replacing a mini incandescent bulb. The general principles apply to larger screw-in bulbs as well.
Step 1: Unplug the Light String
Seriously, do it now. We can’t stress this enough when learning how to replace Christmas light bulb. Safety first!
Step 2: Locate the Culprit
If an entire section of your incandescent string is out, finding the single bad bulb can be the trickiest part. Here’s how to approach it:
- Visual Inspection: First, look for obvious signs. A bulb with a dark, blackened filament or a visible break in the glass is a clear candidate.
- The Wiggle Test: Gently wiggle each bulb in the dark section. Sometimes a loose connection is the problem, and a wiggle can temporarily restore light. If it flickers, you’ve found a likely suspect.
- The Light Tester: This is where a light tester shines. For most testers, you’ll plug one end of the light string into the tester, and then touch the bulb’s tip to a contact point on the tester. It will indicate if the bulb is good or bad. For strings with shunt technology, this is even easier. For series strings, you might need to test bulbs in segments. Some advanced testers allow you to test directly through the socket without removing the bulb.
- Systematic Approach: If you don’t have a tester, start at one end of the dark section and work your way to the middle, replacing bulbs one by one until the section lights up. This is time-consuming, but effective. A good strategy is to test bulbs from both ends of the dark section towards the middle.
Step 3: Gently Remove the Old Bulb
Once you’ve identified the faulty bulb, it’s time to remove it. Many mini bulbs are attached to a small plastic base that slides into the socket.
- Grip the Base: Do not pull directly on the glass bulb itself. This can break the bulb, leaving the metal wires in the socket, which is much harder to remove. Instead, grip the plastic base of the bulb firmly.
- Pull Straight Out: Gently but firmly pull the bulb and its base straight out of the socket. Some bases might have small locking tabs, so a slight wiggle or twist might be needed, but avoid excessive force. If it’s stubborn, a pair of mini pliers can help.
- Screw-in Bulbs: For C7 or C9 bulbs, simply unscrew them counter-clockwise from their socket.
Step 4: Insert the New Bulb
Now that you know how to replace Christmas light bulb that’s burnt out, it’s time for the new one.
- Transfer the Base (if necessary): Many replacement mini-bulbs come without a plastic base. You’ll need to carefully remove the tiny wire leads from the old plastic base and insert the leads of the new bulb into the same holes in the old base. Ensure the wires are fully seated and not touching each other.
- Insert into Socket: With the new bulb secured in its base (or using a pre-based replacement bulb), align the base with the socket and push it straight in until it’s snug. For C7/C9 bulbs, screw the new bulb in clockwise until it’s finger-tight.
- Ensure Contact: Sometimes, the tiny wires at the bottom of the bulb base can get flattened, preventing good contact. You can gently bend them out slightly before inserting them into the socket.
Step 5: Test the Lights
Plug the light string back into the outlet. If you’ve successfully replaced the correct bulb, the section (or the entire string) should light up! If not, don’t worry, move on to troubleshooting.
Replacing LED Light Bulbs
The process for how to replace Christmas light bulb that is LED is largely similar to incandescent bulbs, but there are a few key differences:
LED Bulb Longevity
LED bulbs are designed to last for tens of thousands of hours, meaning individual bulb failures are less common than with incandescents. If an entire section of LED lights goes out, it’s often due to a loose connection, a damaged wire, or a power supply issue rather than a single burnt-out bulb.
Polarity Matters
Unlike incandescent bulbs, LED bulbs are polarized, meaning they need to be inserted in the correct orientation. If you insert an LED replacement bulb and it doesn’t light up, try flipping it 180 degrees in its base or socket.
Integrated Components
Some LED light strings have bulbs that are permanently sealed into the wire and are not designed to be replaced individually. In these cases, if a bulb goes out, you might need to replace the entire string or a segment if it’s modular. Always check the manufacturer’s instructions.
Using a Tester for LEDs
Many Christmas light testers are compatible with both incandescent and LED bulbs. Always check your tester’s instructions to ensure it can test LED circuits correctly.
Troubleshooting Common Issues
You’ve learned how to replace Christmas light bulb, but sometimes a single replacement isn’t enough. Here are some common problems and solutions:
“I Replaced the Bulb, But the Section is Still Out!”
This is a common frustration. It means you either didn’t find the *only* bad bulb, or there’s another issue.
- Multiple Bad Bulbs: In a series circuit, if two bulbs are out, replacing just one won’t fix it. You might need to systematically check surrounding bulbs with your light tester.
- Loose Connection: The problem might not be a burnt filament but a loose connection in the socket itself. Gently jiggle the bulb. If it flickers, try reseating it or gently squeezing the metal contacts inside the socket (with the string unplugged!) with tiny needle-nose pliers to ensure a tighter grip on the bulb’s wires.
- Shunt Not Working (Incandescent): In incandescent mini lights, when a bulb burns out, a tiny internal wire (a “shunt”) is supposed to activate and keep the circuit closed, allowing the rest of the string to stay lit. Sometimes this shunt fails. A light tester with a shunt repair feature can often “pop” the shunt back into place.
- Broken Wire: Inspect the wiring along the dark section for any visible nicks, cuts, or breaks. A damaged wire will interrupt the flow of electricity. Unfortunately, a broken wire usually means replacing the entire string or carefully splicing the wire (which requires more advanced electrical knowledge and is not recommended for novices).
“The Whole String is Dead!”
If the entire string of lights is out, even after you think you know how to replace Christmas light bulb:
- Check the Fuse: Most Christmas light strings have a small fuse in the plug. Carefully slide open the fuse compartment (usually a small plastic door on the side of the plug) and check the tiny glass fuses. If they’re blackened or the wire inside is broken, replace them with fuses of the exact same amperage (spares usually come with the lights). Always unplug the string before checking or replacing fuses.
- GFCI Tripped: If your outdoor lights are plugged into a Ground Fault Circuit Interrupter (GFCI) outlet, check if it has tripped. Simply press the “reset” button on the outlet.
- Extension Cord Issue: Test your extension cord by plugging another working appliance into it. If the extension cord is faulty, replace it.
- Controller Malfunction: If your lights have a controller for different flashing patterns, the controller itself might be faulty. Try bypassing it if possible or replacing the entire string.
Preventative Maintenance
To reduce the need to frequently learn how to replace Christmas light bulb, consider these tips:
- Gentle Storage: Untangle and store lights carefully at the end of the season. Use spools, light reels, or wrap them loosely around cardboard to prevent kinks and broken wires.
- Avoid Pulling: Never pull on the light string by the wire. Always pull from the plug or the bulb base when handling.
- Check for Damage: Before decorating, inspect all light strings for frayed wires, cracked sockets, or loose bulbs.
- Consider LEDs: While the initial cost is higher, LED lights last much longer, consume less power, and are more durable, often reducing the need for bulb replacement.
Conclusion
Don’t let a few burnt-out bulbs dim your holiday cheer. Learning how to replace Christmas light bulbs is a straightforward and rewarding task that empowers you to keep your decorations shining brightly year after year. By following these safety guidelines, understanding your light types, using the right tools, and systematically troubleshooting, you’ll be able to fix most common light problems with ease.
So, gather your supplies, take a deep breath, and get ready to restore that magical glow. Your efforts will not only save you money but also contribute to a more sustainable holiday season by extending the life of your beloved Christmas decorations. Happy sparkling!
Frequently Asked Questions
How often should I replace Christmas light bulbs?
The frequency depends on the bulb type and usage. Incandescent bulbs typically last for about 1,000-3,000 hours and may need replacing more often, especially if used extensively. LED bulbs can last for 25,000-50,000 hours or more, meaning individual bulb replacements are much rarer.
What voltage are most mini Christmas light bulbs?
Most incandescent mini Christmas light bulbs are low voltage, typically ranging from 2.5 volts to 6 volts. The specific voltage depends on how many bulbs are in the series circuit (e.g., 50-bulb strings often use 2.5V, while 35-bulb strings might use 3.5V). Always check the label or spare bulbs for your specific string.
Can I mix LED and incandescent replacement bulbs?
Generally, no. It’s best practice to replace bulbs with the exact same type and specifications. Mixing incandescent and LED bulbs on the same string is not recommended as they have different power requirements and circuit designs, which can lead to rapid burnout of the new bulb or damage to the string.
Is it worth replacing bulbs, or should I just buy new strings?
For most minor issues like a few burnt-out bulbs or a blown fuse, replacing them is definitely worth it. It’s much more cost-effective and environmentally friendly than discarding an entire string. However, if there’s extensive wire damage or multiple sections are failing, a new string might be a more practical solution.
Do Christmas light testers work for all types of lights?
Most modern Christmas light testers are designed to work with both incandescent and LED mini lights. However, always check the product description or instructions for your specific tester to ensure compatibility with your light types, especially if you have specialty or larger C7/C9 bulbs.
How can I prevent Christmas light bulbs from burning out quickly?
To extend bulb life, handle strings gently during setup and storage to avoid stressing filaments or wires. Avoid excessive pulling or bending, and ensure you’re using the correct voltage and wattage replacement bulbs. Also, consider upgrading to LED lights, which are inherently more durable and long-lasting.