
Embark on an illuminating DIY adventure and discover how to make a light bulb work with common materials! This guide covers everything from the basic science of incandescence to crucial safety precautions and step-by-step instructions. You’ll learn the magic behind converting electricity into light, giving you a deeper appreciation for this everyday invention.
How to Make a Light Bulb
Have you ever stopped to think about the incredible magic that happens every time you flip a switch? In an instant, darkness is banished, replaced by a warm, welcoming glow. This everyday miracle, the incandescent light bulb, is a testament to human ingenuity and our endless quest to harness light. While modern lighting has evolved dramatically with LEDs, understanding the humble incandescent bulb reveals fundamental principles of electricity and light that are still incredibly relevant.
Imagine the thrill of creating your own source of light, much like Thomas Edison did over a century ago. This isn’t just a science experiment; it’s a journey into the heart of electrical engineering and physics. When you learn how to make a light bulb, you’re not just assembling parts; you’re recreating a piece of history and gaining a profound understanding of how energy transforms into visible light. It’s a fantastic project for students, curious minds, and anyone who loves to get hands-on with science.
In this comprehensive guide, we’re going to break down exactly how to make a light bulb, step by step. We’ll cover the basic science, essential safety precautions, and all the materials you’ll need. Don’t worry, we’ll keep the language simple and friendly, just like we’re chatting over coffee. By the end, you’ll have a much clearer picture of what makes a light bulb glow and perhaps even have built your own!
Key Takeaways
- Fundamental Principle: A light bulb works on the principle of incandescence, where electricity heats a filament to such high temperatures that it glows, emitting light.
- Essential Components: To make a light bulb, you need a filament (like thin resistance wire), a sealed enclosure (bulb), electrodes to carry current, and a power source.
- The Role of a Vacuum/Inert Gas: Air inside the bulb would cause the hot filament to oxidize and burn out quickly. Removing air (creating a vacuum) or filling it with an inert gas significantly prolongs the filament’s life.
- Safety First: Working with electricity, glass, and potentially high temperatures requires strict adherence to safety guidelines, including using appropriate voltage, protective eyewear, and insulating materials.
- DIY is for Learning: While a homemade light bulb won’t be as efficient or long-lasting as a commercial one, the process of how to make a light bulb offers invaluable hands-on learning about electrical circuits, thermodynamics, and vacuum technology.
- Patience and Experimentation: Success in making a light bulb often comes with trial and error. Don’t be afraid to experiment with different materials and techniques to achieve the best results.
Quick Answers to Common Questions
What is the main principle behind an incandescent light bulb?
The main principle is incandescence, where a material (the filament) heats up to such a high temperature due to electrical resistance that it emits light.
Why can’t I just use a regular wire as a light bulb filament?
Regular wires (like copper) have very low electrical resistance. They don’t heat up enough to glow brightly, and if they did, they would melt quickly due to their lower melting point compared to specialized filament materials.
Is it dangerous to make a homemade light bulb?
Yes, it can be dangerous if proper safety precautions are not followed. Working with electricity and glass requires caution, protective gear, and adult supervision, especially with higher voltages or attempting a vacuum.
What is the purpose of removing air from a light bulb?
Removing air (creating a vacuum) or replacing it with an inert gas prevents the hot filament from rapidly oxidizing and burning out. Oxygen would quickly destroy the filament.
How long does a DIY light bulb typically last?
A DIY light bulb made without a proper vacuum or inert gas will usually glow for only a few seconds to a minute before the filament burns out. With careful vacuuming, it might last longer, but not like a commercial bulb.
📑 Table of Contents
- Understanding the Basics: How a Light Bulb Works
- Safety First: Essential Precautions for Your DIY Project
- Gathering Your Materials: What You’ll Need
- Step-by-Step Guide: Assembling Your Light Bulb
- Troubleshooting and Enhancements: Making It Better
- The Science Behind the Glow: What’s Happening?
- Conclusion
Understanding the Basics: How a Light Bulb Works
Before we dive into the “how-to,” let’s quickly understand the “why.” How does a simple wire in a glass bulb create light? It all comes down to a phenomenon called incandescence.
The Principle of Incandescence
Incandescence is the emission of light from a body due to its temperature. Think about a glowing ember in a campfire or a blacksmith heating metal until it glows red-hot. When enough electrical current passes through a resistant material, it heats up. If it gets hot enough, it starts to emit light – first infrared, then red, orange, yellow, and eventually white light as the temperature increases. This is the core principle behind how to make a light bulb produce light.
The Role of the Filament
The heart of any incandescent light bulb is its filament. This is the thin, coiled wire that gets super hot. For your DIY light bulb, selecting the right filament material is crucial. It needs to have high electrical resistance so it heats up effectively, and a high melting point so it doesn’t just melt away. Tungsten is used in commercial bulbs because it has the highest melting point of all metals (around 3,422°C or 6,192°F). In our DIY project, we’ll look at more accessible alternatives.
Protecting the Filament: Vacuum vs. Inert Gas
Here’s a critical point: if you just ran electricity through a filament in open air, it would quickly oxidize (react with oxygen) and burn out in a bright flash. To prevent this and make the filament last longer, commercial bulbs either have a vacuum inside or are filled with an inert gas like argon or nitrogen.
- Vacuum: A vacuum means almost all the air has been removed. With no oxygen present, the filament can’t oxidize.
- Inert Gas: Inert gases don’t react chemically with the hot filament. They also help to slow down the evaporation of the filament material, making the bulb last longer.
For our DIY project on how to make a light bulb, trying to create a true vacuum can be challenging, but even a partial vacuum or a sealed environment helps significantly.
Safety First: Essential Precautions for Your DIY Project
Before you even think about gathering materials or starting to build, let’s talk about safety. Working with electricity, glass, and heat carries risks. Your safety is the absolute top priority. This project is educational, but it demands respect for the materials and processes involved.
Handling Electricity Safely
You will be working with electrical circuits. Even low voltages can cause a shock if not handled properly, and higher voltages are dangerous. When figuring out how to make a light bulb, remember to:
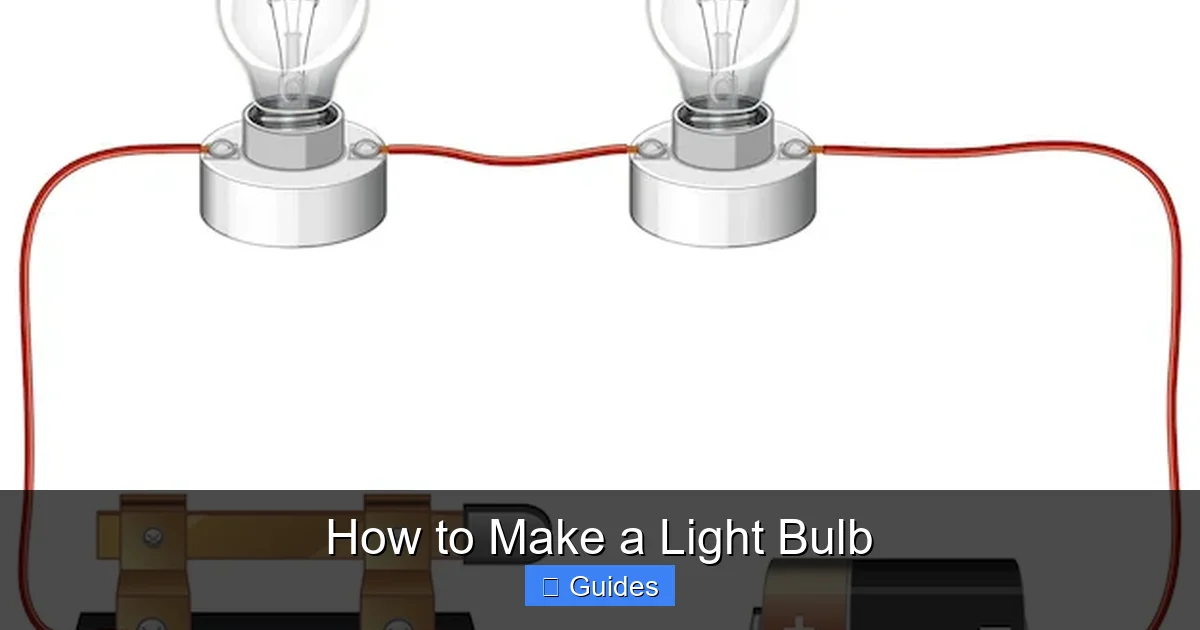
Visual guide about How to Make a Light Bulb
Image source: i1.wp.com
- Use Low Voltage DC Power: For your first attempt, stick to low-voltage DC power sources like batteries (e.g., 9V, 12V, or multiple D-cell batteries). Avoid plugging anything directly into a wall outlet (AC) unless you are an experienced electrician.
- Insulate Connections: Ensure all exposed wires and connections are properly insulated with electrical tape or heat shrink tubing.
- Never Touch Live Wires: Always disconnect power before making any adjustments to your circuit.
- Supervise Children: If children are involved, adult supervision is absolutely mandatory.
Working with Glass
Glass is fragile and can break, creating sharp edges. Be mindful when handling glass jars or bottles:
- Wear Protective Eyewear: Safety glasses are a must to protect your eyes from flying glass shards.
- Handle with Care: Be gentle when drilling or manipulating glass.
- Clean Up Carefully: If glass breaks, use gloves and a brush and dustpan to clean up, never your bare hands.
Heat and Vacuum Safety
The filament will get extremely hot, and if you attempt a vacuum, there are additional considerations:
- Beware of Hot Components: The filament and surrounding glass will become very hot when the bulb is on. Do not touch them immediately after turning off the power.
- Implosion Risk (Vacuum): If you try to create a significant vacuum, remember that a glass enclosure under vacuum is under external pressure. If the glass has flaws or is too thin, it could implode violently. Use thick-walled glass and be extremely cautious.
Gathering Your Materials: What You’ll Need
To learn how to make a light bulb, you’ll need a collection of common household items and some specific components. The exact materials can vary depending on your ambition and resources, but here’s a general list.
The Filament Material
- Pencil Lead (Graphite): A very common and easy-to-use filament for quick demonstrations. It glows brightly but burns out quickly in air. For better longevity, look for very thin mechanical pencil lead (0.5mm or 0.7mm).
- Nichrome Wire: Often used in toasters or heating elements, nichrome wire (available at electronic hobby stores) is a good choice. It has higher resistance and melting point than graphite.
- Steel Wool (Fine Grade): Can be used for a very brief, dramatic flash of light.
- (Advanced) Tungsten Wire: If you can source very thin tungsten wire (e.g., from an old halogen bulb, but be careful as it’s brittle), it’s the ideal choice.
The Bulb Enclosure
- Clear Glass Jar with Lid: A small, sturdy, clear glass jar (like a baby food jar or spice jar) will serve as your bulb.
- Epoxy or Hot Glue: For sealing the jar and holding components in place.
- Drill with Glass or Ceramic Bit: To make holes in the lid or base of the jar for electrodes.
Power Source and Connections
- Batteries: A power source. A 9V battery, a 12V battery, or a series of D-cell batteries (e.g., 4x 1.5V D-cells for 6V) will work. You might need several in series to get enough voltage for your chosen filament.
- Battery Connectors/Clips: To connect to your batteries.
- Insulated Copper Wire: To make electrical connections.
- Alligator Clips: Very useful for temporary connections during testing.
- Electrical Tape: For insulation.
Sealing and Vacuum Components (Optional but Recommended for Longevity)
- Two Electrode Wires: Sturdy, stiff wires (e.g., paper clips straightened, or thick copper wire) that will pass through the jar’s lid/base to hold the filament and conduct electricity.
- Non-Conductive Stopper/Plug: If not using the original jar lid, a rubber stopper to create a seal.
- Vacuum Pump (Optional): A small hand-operated vacuum pump or a basic electric pump can be used to remove air from the jar. This is the most challenging part of how to make a light bulb last more than a few seconds.
- Vacuum Gauge (Optional): To monitor the vacuum level.
- Vacuum Grease/Sealant: To ensure an airtight seal around wires and connections if attempting a vacuum.
Step-by-Step Guide: Assembling Your Light Bulb
Now for the fun part! Let’s walk through how to make a light bulb step by step. Remember to take your time and follow safety guidelines.
Step 1: Preparing the Filament
This is where your light will come from. Let’s make sure it’s ready.
- Choose Your Filament: For a beginner, a thin piece of pencil lead (graphite) or a strand of very fine steel wool is a good starting point. If using steel wool, separate a single, very fine strand about 1-2 inches long. If using pencil lead, break off a piece about 1-1.5 inches long. For Nichrome wire, cut a piece about 2-3 inches long.
- Shape (Optional): If your filament is long enough (like Nichrome), you might try coiling it into a small spiral. This increases its resistance in a smaller space and makes it glow more brightly.
Step 2: Constructing the Electrode Assembly
The electrodes will hold your filament and carry the electricity to it.
- Prepare the Lid/Base: Take the metal lid of your glass jar (or a rubber stopper if you prefer).
- Drill Holes: Carefully drill two small holes (just large enough for your electrode wires) through the lid. Space them about 1/2 to 3/4 inch apart. If using a glass jar with a flat bottom you want to drill through, use a specific glass drill bit, lots of water for lubrication, and extreme caution.
- Insert Electrodes: Straighten two sturdy paper clips or use two pieces of stiff copper wire. Insert one end of each wire through the holes in the lid. Ensure about 1-2 inches of wire extends into the jar.
- Secure the Filament: Carefully attach your chosen filament between the two electrode wires inside the jar. You can do this by wrapping the ends of the filament around the electrodes or by making small hooks at the end of the electrodes to hold the filament. Make sure it’s taut but not stretched, and not touching anything else.
- Seal the Electrodes: From the outside of the lid, use epoxy or strong glue to seal around where the electrode wires pass through the holes. This prevents air from entering later and also secures the wires. Let it dry completely.
Step 3: Initial Sealing of the Bulb
Now we’re closing up our bulb.
- Attach Lid to Jar: Carefully screw the lid with the attached filament and electrodes onto the glass jar. Make sure the filament isn’t touching the sides of the jar.
- Seal the Lid: For a better seal (especially if attempting a vacuum), apply a bead of epoxy or strong sealant around the rim where the lid meets the jar. Let it cure.
Step 4: Evacuating the Air (Optional but Best Practice)
This step is crucial for longevity but adds complexity. If you skip this, your bulb will likely only glow for a few seconds to a minute.
- Add a Vacuum Port: This requires drilling a third small hole in the lid or jar, through which a thin tube (e.g., from an old pen, sealed around with epoxy) can be inserted and connected to a vacuum pump.
- Connect Vacuum Pump: Attach your vacuum pump to this tube.
- Pump Out Air: Operate the vacuum pump to remove as much air as possible from the jar. This might take several minutes or longer, depending on your pump. You might even see the filament glow very briefly during this process if a tiny current is accidentally applied.
- Seal Vacuum Port: Once you’ve removed as much air as you can, quickly seal the vacuum port (e.g., by clamping the tube and then applying epoxy, or having a one-way valve).
Step 5: Final Sealing and Testing
Time to see if your hard work pays off!
- Connect Power: Using insulated copper wires, connect the external ends of your electrode wires (the ones sticking out of the lid) to your battery terminals. Use alligator clips for easy connection and disconnection.
- Observe: Watch closely! If everything is connected correctly and your filament is suitable, it should begin to glow. Depending on your filament and power source, it might be a soft red glow or a brighter yellow-orange light.
- Troubleshoot if Needed: If it doesn’t glow, disconnect power immediately. Recheck all connections, ensure the filament isn’t broken, and verify your power source is working. We’ll cover more troubleshooting below.
Troubleshooting and Enhancements: Making It Better
Don’t worry if your first attempt doesn’t produce a brilliant glow. That’s part of the learning process!
Common Problems and Solutions
- Filament Doesn’t Glow:
- Check Connections: Are all wires securely connected? Are the battery terminals making good contact?
- Is the Filament Broken? Sometimes a fragile filament (especially graphite or steel wool) can break during handling or when current is applied.
- Insufficient Power: Your battery might be too weak, or you might need more batteries in series to provide enough voltage for your chosen filament. Different filaments require different power levels.
- Short Circuit: Ensure no wires or the filament itself are touching each other or the metal lid in a way that bypasses the filament.
- Filament Burns Out Instantly:
- Too Much Oxygen: This is the most common reason. Your seal isn’t airtight, or you didn’t evacuate enough air. Improving your seal or adding a vacuum step is key.
- Too Much Power: While less common with low voltage, too much current can literally vaporize the filament. Try reducing the voltage if this is happening repeatedly with a good seal.
- Filament Too Thin/Weak: Some materials just aren’t suited for prolonged glowing. Experiment with thicker filaments or more robust materials.
- Dull Glow:
- Not Enough Power: Try increasing the voltage slightly (add another battery in series).
- Filament Material: Some materials just don’t get as bright as others.
- Air Present: Even a small amount of oxygen can hinder the glow.
Experimenting with Filaments
The beauty of learning how to make a light bulb is the room for experimentation:
- Pencil Lead: Try different grades of pencil lead (e.g., 2B, HB, H). Harder leads (higher H numbers) have more graphite and might last slightly longer.
- Nichrome Wire: Experiment with different gauges (thicknesses) and lengths. A longer, thinner piece will have higher resistance and heat up more.
- Toaster/Heater Elements: If you have access to old, broken appliances, you might carefully salvage nichrome wire from their heating elements.
Exploring Inert Gas Fillings
For a more advanced project, after evacuating the air, you could attempt to fill the bulb with an inert gas. This is tricky but rewarding:
- Argon or Nitrogen: You can sometimes find small canisters of these gases (e.g., welding supplies, or specialty gas suppliers).
- Procedure: After evacuating the bulb, connect the gas source and allow a small amount of inert gas to flow in, then quickly seal the port. This creates a more stable environment for the filament than a simple vacuum.
The Science Behind the Glow: What’s Happening?
When you connect your homemade light bulb to a power source, electrons begin to flow through the circuit, including your filament. Because the filament material has electrical resistance, it opposes this flow of electrons. This opposition causes the electrons to collide with the atoms of the filament, converting their kinetic energy into thermal energy. This is known as Joule heating (or resistive heating).
As the filament heats up, its atoms vibrate more intensely. At a certain temperature, these vibrations cause the atoms to emit photons – tiny packets of light energy. The hotter the filament gets, the more photons it emits, and the higher the energy of those photons, shifting the emitted light from infrared (heat) into the visible spectrum (red, then orange, yellow, and eventually white). This is the captivating science behind how to make a light bulb glow!
The goal is to get the filament hot enough to glow brightly without melting or vaporizing. This delicate balance is why filament material, bulb atmosphere (vacuum or inert gas), and power input are so critical.
Conclusion
Congratulations! You’ve just taken a journey into the heart of illumination, from understanding the basic principles of incandescence to the practical steps of how to make a light bulb. Whether your homemade bulb glows for a second or a minute, the experience of creating light from electricity is incredibly rewarding and profoundly educational.
This project isn’t just about building a device; it’s about connecting with scientific principles, appreciating the genius of past inventors, and understanding the technology that powers our modern world. You’ve learned about electrical resistance, thermal energy, oxidation, and the crucial role of a controlled environment.
So, go ahead, experiment, troubleshoot, and enjoy the process. Every flicker and every glow from your handmade light bulb is a testament to your curiosity and your ability to bring a little bit of light into the world, one filament at a time. Who knows what other scientific discoveries your newfound understanding might spark?
Frequently Asked Questions
What materials are commonly used for DIY light bulb filaments?
Common materials for homemade light bulb filaments include pencil lead (graphite), fine steel wool, or thin Nichrome wire. Each offers different levels of resistance and durability, with Nichrome wire generally providing a more stable and longer-lasting glow.
Can I use household batteries to power my homemade light bulb?
Yes, household batteries are an excellent and safe power source for a DIY light bulb. You might need to use several batteries in series (e.g., multiple D-cells or a 9V battery) to achieve enough voltage and current to make your chosen filament glow brightly.
Why do commercial light bulbs use tungsten for their filaments?
Commercial light bulbs use tungsten because it has the highest melting point of all metals, allowing it to reach extremely high temperatures without melting. This results in a very bright, white light and a longer lifespan compared to other filament materials.
Is it possible to make a vacuum in a glass jar at home?
Creating a true, high-quality vacuum at home is very challenging without specialized equipment. However, you can achieve a partial vacuum using a hand-operated vacuum pump or even by sealing the jar while a small amount of water boils, letting the steam displace the air before cooling and sealing.
What is the difference between an incandescent bulb and an LED bulb?
An incandescent bulb produces light by heating a filament until it glows (incandescence), while an LED (Light Emitting Diode) bulb produces light through electroluminescence, where a semiconductor material emits light when current passes through it. LEDs are far more energy-efficient and last much longer than incandescent bulbs.
What are some safety tips for drilling holes in glass for this project?
When drilling glass, always wear safety glasses and gloves. Use a specific glass or ceramic drill bit, apply constant, gentle pressure, and keep the drilling area cool with water to prevent the glass from overheating and cracking. Start with a small pilot hole if possible, and work slowly.