Replacing a light bulb is a fundamental home maintenance task that everyone can master with the right guidance. This guide emphasizes safety first, detailing crucial steps like cutting power and using proper tools to prevent accidents. We’ll walk you through identifying your bulb type, safely removing the old one, and correctly installing its replacement, ensuring your space is illuminated again quickly and securely.
Let’s face it: a dark room is no fun. One minute you’re enjoying a well-lit space, and the next, *poof!* — darkness descends. A burnt-out light bulb is one of those minor inconveniences that can bring your daily routine to a halt, making simple tasks like reading or cooking surprisingly difficult. But don’t fret! Learning how to replace a light bulb is one of the most basic, yet essential, home maintenance skills you can master. It’s a quick fix that often feels more intimidating than it actually is.
This comprehensive guide is designed to empower you with the knowledge and confidence to tackle any light bulb replacement, safely and effectively. We’ll cover everything from crucial safety precautions to understanding different bulb types, gathering your simple tools, and walking you through a clear, step-by-step process. By the time you’re done, you’ll be a pro at bringing light back into your life, literally! So, let’s roll up our sleeves and illuminate the path to a brighter home.
Key Takeaways
- Safety is paramount: Always turn off the power to the fixture at the switch and the circuit breaker before attempting to replace a light bulb to prevent electrical shock.
- Identify your bulb type: Knowing if you have an incandescent, CFL, or LED bulb, and its specific base, is crucial for selecting the correct replacement and understanding proper handling.
- Use appropriate tools and gear: A stable ladder, work gloves, and sometimes eye protection are essential for safely reaching and handling bulbs, especially if they are broken or hot.
- Handle with care: Modern bulbs like CFLs and LEDs can be sensitive. Avoid touching the glass of halogen or some LED bulbs with bare hands, and always dispose of old bulbs, particularly CFLs, responsibly.
- Don’t overtighten: Screw the new bulb in just until it’s snug. Overtightening can damage the bulb’s base, the fixture’s socket, or make future removal difficult.
- Clean as you go: A quick wipe of the fixture’s socket area can remove dust and debris, improving conductivity and potentially extending the life of your new light bulb.
Quick Answers to Common Questions
How do I know if a bulb is incandescent, CFL, or LED?
Incandescent bulbs have a visible filament. CFLs are typically spiral or U-shaped tubes. LEDs often have a plastic or metal base and a diffused cover, without a visible filament or tube shape.
Can I replace an incandescent bulb with an LED?
Yes, in most cases, you can replace an incandescent bulb with an LED bulb of the same base type, as long as the LED’s actual wattage does not exceed the fixture’s maximum wattage rating.
What if I accidentally break a CFL bulb?
Open windows and leave the room for 10-15 minutes. Wear gloves to carefully scoop up all glass fragments and powder using stiff paper or cardboard. Place all materials in a sealed plastic bag and dispose of it at a local hazardous waste collection site.
Do I need to turn off the main power for every bulb change?
For most standard screw-in bulbs in good working condition, turning off the wall switch and waiting for the bulb to cool is often sufficient. However, if the bulb is broken, stuck, or if you’re working in a damp area, turning off the circuit breaker is strongly recommended for added safety.
Why do some bulbs say “dimmable” and others don’t?
Dimmable bulbs are designed to work with dimmer switches, allowing you to adjust their brightness. Non-dimmable bulbs, especially many CFLs and some LEDs, can be damaged or flicker if used with a dimmer switch.
📑 Table of Contents
Safety First! Why It Matters When You Replace Light Bulb
Before you even think about reaching for that faulty light bulb, let’s talk about safety. This isn’t just a suggestion; it’s a non-negotiable rule. Electricity can be dangerous, and a simple oversight can lead to serious injury. Taking a few moments to ensure your safety will make the entire process of replacing a light bulb smooth and stress-free.
Turning Off the Power: Your #1 Rule
This is the single most important step. Never, ever attempt to replace a light bulb while the power to the fixture is still on.
- At the Switch: First, flip the wall switch that controls the light fixture to the “off” position. This is your immediate first line of defense.
- At the Circuit Breaker: For an extra layer of safety, especially if you’re working with an older fixture, a damp environment (like a bathroom), or if the bulb is broken, head to your home’s electrical panel (breaker box) and switch off the circuit breaker that controls that specific room or fixture. If you’re unsure which breaker it is, it’s always safest to turn off the main breaker for your entire home. It might cause a temporary inconvenience, but your safety is worth it. You can usually find the breaker box in a garage, basement, or utility closet.
- Testing for Power: After turning off the breaker, go back to the fixture and try flipping the wall switch on and off. If the light doesn’t flicker or show any sign of life, you’re good to go. You can also use a non-contact voltage tester (available at any hardware store) to confirm that no current is flowing to the fixture.
Stable Surfaces and Ladders
Many light fixtures are out of arm’s reach. Don’t risk a fall by standing on wobbly chairs or makeshift platforms.
- Choose a Stable Ladder: If you need to reach up, use a sturdy step stool or a ladder appropriate for the height. Ensure the ladder is placed on a flat, stable surface.
- Have a Helper: If possible, ask a friend or family member to steady the ladder for you, especially if you’re reaching for an awkward angle or working on a high ceiling.
- Maintain Three Points of Contact: When climbing or working on a ladder, always keep three points of contact (two hands and one foot, or two feet and one hand) with the ladder for maximum stability.
Protecting Your Hands and Eyes
Old bulbs, especially incandescent ones, can get incredibly hot. They can also break, leaving sharp glass shards.
- Wear Gloves: Always wear work gloves. They protect your hands from heat, sharp edges if a bulb breaks, and the oils from your skin, which can damage certain types of bulbs (like halogens).
- Consider Eye Protection: If you’re dealing with a broken bulb, or one that’s high up and might shatter upon removal, safety glasses are a smart precaution to protect your eyes from falling debris.
- Allow for Cooling: Give a recently used bulb time to cool down before touching it. This might mean waiting 10-15 minutes after turning off the power.
Understanding Your Light Bulb: Types and Bases
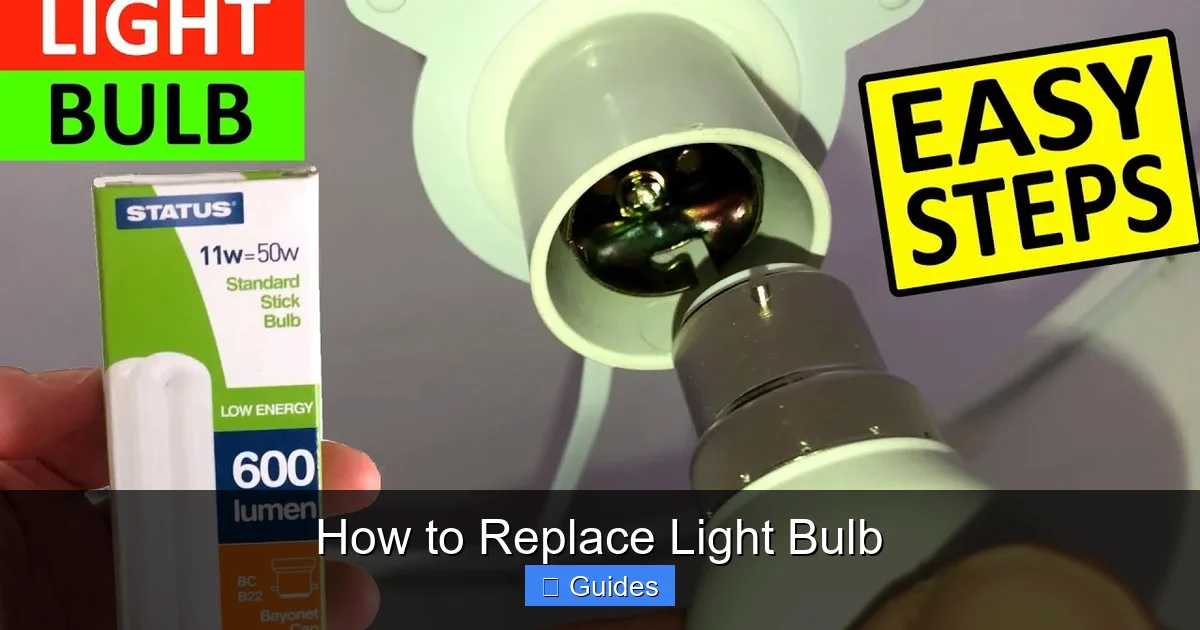
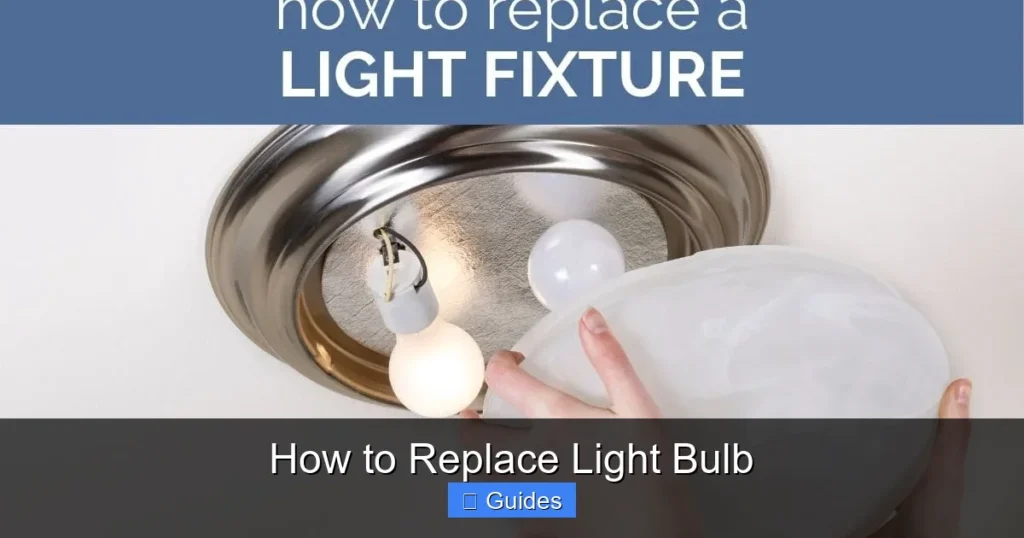
Visual guide about How to Replace Light Bulb
Image source: i.ytimg.com
Before you replace a light bulb, it helps to know what kind you’re dealing with. Not all bulbs are created equal, and knowing the type will guide your choice for a replacement.
The Incandescent Classic
These are the traditional bulbs with a wire filament that glows when heated. They produce a warm, yellowish light but are very inefficient, converting most of their energy into heat rather than light. They’re becoming less common due to energy regulations.
Energy-Saving CFLs
Compact Fluorescent Lamps (CFLs) are those spiral-shaped or U-shaped bulbs. They’re much more energy-efficient than incandescents and last longer. However, they contain a small amount of mercury, which means they require special disposal. They can also take a moment to reach full brightness.
Long-Lasting LEDs
Light Emitting Diodes (LEDs) are the current standard for energy efficiency and longevity. They use very little power, last for years, and come in a wide range of colors and brightness levels. They are the most expensive upfront but save the most money in the long run.
Spotting the Right Base
The “base” is the part of the bulb that screws into the fixture. It’s crucial to match the base type to your fixture.
- Edison Screw Bases (E26/E27, E12, E17): These are the most common screw-in bases.
- E26 (Standard/Medium): Found in most lamps and ceiling fixtures in North America.
- E27: The European equivalent, often interchangeable with E26.
- E12 (Candelabra): Smaller base, common in chandeliers and decorative fixtures.
- E17 (Intermediate): Less common, but seen in some smaller lamps.
- Pin Bases (GU10, GU24, Bi-Pin): These bulbs don’t screw in; they push and twist or simply push into place.
- GU10: Common in track lighting and recessed fixtures, they have two small pins with flattened ends that twist into place.
- GU24: Two larger pins that twist and lock. Often seen in energy-efficient fixtures.
- Bi-Pin (G4, G6.35, G9, etc.): Used in landscape lighting, under-cabinet lighting, and some halogen spotlights. They have two straight pins that push into the socket.
- Bayonet Bases (B22d, BA15d): Less common in North America, these have two pins that push into slots and twist.
Always check the old bulb for markings or consult your fixture’s manual to determine the correct base type and wattage.
Gathering Your Tools and Supplies
Good news! You don’t need a toolbox full of specialized equipment to replace a light bulb. Most of what you need you probably already have around the house.
The Right Bulb for the Job
- Match the Type: Ideally, replace your old bulb with the same type (incandescent, CFL, LED) if you’re happy with its performance. However, you can often upgrade an incandescent to an LED for energy savings, as long as the base matches and the LED’s “equivalent wattage” doesn’t exceed the fixture’s maximum wattage rating.
- Check Wattage/Equivalent: Your fixture will have a maximum wattage rating (e.g., “Max 60W”). Never exceed this. If you’re using an LED bulb, look for its “incandescent equivalent” (e.g., “9W LED = 60W equivalent”). The actual wattage of the LED is what matters for the fixture’s limit, which will be much lower than the equivalent.
- Consider Lumens and Color Temperature:
- Lumens: This indicates brightness. More lumens mean a brighter light.
- Color Temperature (Kelvin – K): This describes the “warmth” or “coolness” of the light.
- 2700K-3000K: Warm White (like traditional incandescents, cozy feel)
- 3500K-4100K: Neutral White (good for kitchens, offices)
- 5000K-6500K: Daylight/Cool White (bright, bluish-white, good for task lighting)
Essential Safety Gear
- Work Gloves: A must-have for protection and grip.
- Stable Ladder or Step Stool: As discussed, crucial for reaching high fixtures.
- Safety Glasses: Recommended, especially if dealing with fragile or broken bulbs.
Cleaning Supplies
- Soft, Dry Cloth: For wiping dust and debris from the fixture’s socket and sometimes the new bulb. A microfiber cloth works great.
- Glass Cleaner (Optional): If the fixture’s glass shade needs a good cleaning while you’re there.
Step-by-Step Guide: How to Replace a Light Bulb Safely and Easily
With your safety precautions in place and your new bulb ready, let’s get that light back on!
Step 1: Power Down and Cool Off
First, flip the wall switch to the OFF position. Then, head to your circuit breaker panel and switch off the breaker controlling the light fixture. If the bulb was recently on, wait 10-15 minutes for it to cool down before touching it. This is a critical step to ensure you can safely replace a light bulb.
Step 2: Removing the Old Bulb
- For Screw-In Bulbs: With gloves on, firmly grasp the old bulb. Turn it counter-clockwise until it unscrews completely from the socket. If the bulb is stuck or difficult to turn, apply firm, even pressure. If the glass breaks and the base remains in the socket, *do not touch the metal base with bare hands*. Use pliers (non-metallic if possible, or ensure power is absolutely off) to grip the edge of the base and twist it out.
- For Pin-Base Bulbs (e.g., GU10, Bi-Pin): For GU10s, push the bulb gently into the socket and twist counter-clockwise to unlock it, then pull it straight out. For straight bi-pin bulbs, simply pull them straight out of the socket.
- For Fluorescent Tubes: Rotate the tube 90 degrees to align the pins with the slots in the fixture, then gently pull it down.
Place the old bulb in a safe spot, especially if it’s a CFL that requires special disposal.
Step 3: Cleaning the Fixture
With the old bulb out and the power off, this is a great time for a quick cleaning. Use a soft, dry cloth to gently wipe away any dust, dirt, or debris from the inside of the socket and the surrounding fixture. A clean socket ensures good electrical contact for your new light bulb and can even extend its lifespan. Avoid using wet cloths or cleaners directly on the electrical components.
Step 4: Installing the New Bulb
- For Screw-In Bulbs: Carefully screw the new light bulb clockwise into the socket. Turn it just until it’s snug. *Do not overtighten!* Overtightening can damage the bulb’s base, the socket, or make it difficult to remove next time. If you’re using a halogen bulb or some specialized LEDs, avoid touching the glass or clear plastic with your bare hands, as oils can create hot spots and shorten bulb life. Hold it by the base or wear gloves.
- For Pin-Base Bulbs: Align the pins of the new bulb with the holes in the socket. For GU10s, push and twist clockwise until it locks into place. For bi-pins, simply push the pins straight into the socket until they are secure.
- For Fluorescent Tubes: Align the pins on each end of the new tube with the slots in the fixture. Push the tube into the slots and then rotate it 90 degrees until it locks securely.
Step 5: Testing and Enjoying
Once the new light bulb is securely installed, head back to your circuit breaker panel and flip the breaker back on. Then, return to the wall switch and turn it on. Voila! You should now have light. If the light doesn’t come on, double-check that the bulb is screwed in properly (not too loose, not too tight) and that the breaker is definitely on.
Troubleshooting Common Issues
Sometimes, even after following all the steps, a light bulb replacement can have a hiccup. Here’s what to do if things don’t go perfectly.
My Bulb is Stuck!
An old bulb might be stuck due to heat expansion, corrosion, or overtightening.
- Apply Firm, Even Pressure: Wear gloves for better grip and try twisting firmly but gently counter-clockwise.
- Lubricant (Carefully!): If it’s really stuck, spray a tiny amount of WD-40 or a similar lubricant *onto a cloth* and wipe it around the metal base of the bulb, *making sure no liquid gets into the socket itself*. Let it sit for a few minutes, then try again. Ensure power is OFF!
- Broken Bulb Base: If the glass bulb breaks off, leaving the metal base in the socket, use needle-nose pliers or a potato (cut in half and pressed onto the base for grip) to twist the base out. Again, ensure the power is OFF at the breaker!
New Bulb Won’t Light Up
This can be frustrating, but it’s usually a simple fix.
- Check the Bulb: Is the new bulb defective? Try it in another working fixture to rule out a faulty bulb.
- Check the Connection: Is the bulb screwed in properly? Not too loose, not too tight.
- Check the Power: Is the wall switch on? Is the circuit breaker for that room or fixture flipped to “on”?
- Inspect the Socket: With the power OFF, look into the socket. Are the metal tabs inside bent down or corroded? Gently pry the center tab up slightly with a non-metallic tool (like a popsicle stick or small plastic knife) to ensure it makes contact with the bulb’s base. If there’s corrosion, gently scrape it away with a small brush.
- Fixture Issues: If all else fails, the problem might be with the fixture itself (e.g., a loose wire). At this point, it’s best to consult an electrician.
Flickering or Dimming Issues
- Loose Connection: Often caused by a bulb that isn’t screwed in all the way or a loose connection within the fixture or wall switch. Ensure the bulb is snug.
- Incompatible Dimmer: Many LED bulbs require specific “dimmable” drivers and compatible dimmer switches. If your LED flickers on a dimmer, you might need to replace the dimmer switch with one designed for LEDs.
- Bulb Quality: Cheap bulbs can sometimes flicker or dim inconsistently. Investing in a reputable brand can prevent this.
Proper Disposal and Environmental Considerations
Once you successfully replace a light bulb, don’t just toss the old one in the trash without a thought. Different bulb types require different disposal methods.
Recycling CFLs and LEDs
- CFLs: Because they contain small amounts of mercury, CFLs should *never* be thrown directly into household trash. Many hardware stores (like Home Depot, Lowe’s) and some municipal recycling centers offer free CFL recycling programs. Check with your local waste management facility for specific guidelines.
- LEDs: While LEDs don’t contain mercury, they do contain electronic components and other materials that are best recycled. Many electronic waste (e-waste) recycling centers accept LEDs. Some retail stores also have collection points. While often permissible to put in regular trash, recycling helps recover valuable materials and prevents landfill waste.
Incandescent Bulb Disposal
Old incandescent bulbs do not contain hazardous materials and can typically be safely disposed of in your regular household trash. It’s a good idea to wrap them in newspaper or place them in a small bag to prevent glass shards from cutting trash handlers if the bulb breaks.
Replacing a light bulb is a simple yet satisfying task that empowers you to keep your home bright and functional. By following these safety guidelines and step-by-step instructions, you’ll be able to tackle any bulb replacement with confidence. Remember, a little preparation goes a long way in ensuring a safe and successful outcome. So go ahead, shine a light on your next home project!
Frequently Asked Questions
How often should I replace a light bulb?
The lifespan of a light bulb varies significantly by type. Incandescent bulbs typically last 750-1,000 hours, CFLs around 8,000-10,000 hours, and LEDs can last anywhere from 25,000 to 50,000 hours or more. You should replace a light bulb whenever it burns out or starts to flicker consistently.
What does “wattage equivalent” mean for LED bulbs?
“Wattage equivalent” on an LED bulb tells you how bright it is compared to a traditional incandescent bulb. For example, a 9-watt LED might be labeled “60W equivalent,” meaning it produces similar light output to an old 60-watt incandescent, but uses far less actual power.
Can I touch LED bulbs with bare hands?
Generally, it’s fine to touch the plastic or metal casing of an LED bulb with bare hands when installing. However, it’s still a good habit to handle any bulb by its base, as oils from your skin can potentially leave residue that may affect light output or attract dust over time on the light-emitting surface.
What should I do if the new bulb doesn’t screw in easily?
If a new bulb doesn’t screw in easily, do not force it. First, double-check that you have the correct base type for your fixture. Gently check for any debris in the socket or bent metal tabs that might be obstructing the bulb. If the issue persists, the socket itself might be faulty and may require professional inspection.
Is it safe to replace a light bulb while standing on a chair?
It is generally safer to use a sturdy step stool or a ladder designed for reaching higher areas than a regular chair. Chairs can be unstable, especially if they have wheels or if you need to reach at an awkward angle, increasing the risk of falls and injury.
Why does my light fixture keep burning out bulbs quickly?
If your light fixture consistently burns out bulbs quickly, it could be due to several reasons, such as using a bulb with a wattage higher than the fixture’s maximum rating, loose connections in the socket, voltage fluctuations in your home, or excessive vibration. It’s often wise to have an electrician inspect the fixture if the problem persists.