
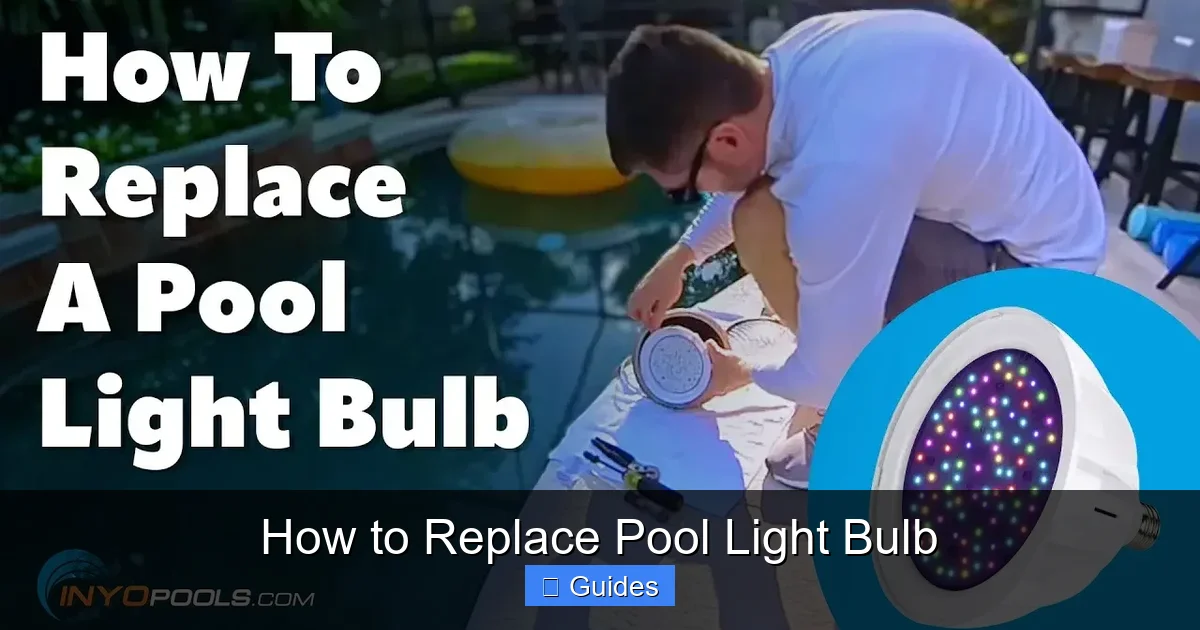
Replacing your pool light bulb is a common maintenance task that can be safely accomplished by any homeowner with the right approach. The most critical step is always to prioritize electrical safety by turning off all power to the pool circuit at the breaker. Following a few clear steps, including gathering the right tools, accessing the fixture, carefully swapping the bulb, and ensuring a watertight seal, will have your pool sparkling again in no time.
Is your swimming pool looking a little dim after dark? Perhaps that inviting glow is gone, or maybe your underwater light has completely fizzled out. It’s a common issue for pool owners, and thankfully, knowing how to replace a pool light bulb is a task you can absolutely tackle yourself! You don’t necessarily need to call in a professional for this specific job, which can save you time and money.
Picture this: it’s a warm summer evening, and you’re hosting a pool party. The music is playing, the snacks are out, and everyone is having a great time. But as the sun dips below the horizon, instead of your pool transforming into a shimmering oasis, it becomes a dark, uninviting void. A burnt-out pool light bulb isn’t just an aesthetic problem; it can also be a safety concern, making it harder to see swimmers in the water at night. That’s why learning how to replace pool light bulb efficiently and safely is such a valuable skill for any pool owner.
This comprehensive guide will walk you through every step of the process. We’ll cover everything from the crucial safety precautions you need to take, to gathering your tools, accessing the fixture, actually replacing your pool light bulb, and finally, getting it all back in place. We’ll keep things simple, clear, and friendly, so you feel confident diving into this DIY project. Let’s get that beautiful, illuminated pool back in action!
Key Takeaways
- Safety First: Always turn off the power to your pool light circuit at the main breaker before attempting any work to prevent serious electrical shock.
- Gather the Right Supplies: You’ll need the correct replacement bulb, a new gasket, a screwdriver, and possibly a specialty tool to open the fixture.
- Accessing the Fixture: Most pool lights can be pulled out of their niche and onto the deck without draining the pool, but some older models might require partial water level reduction.
- Watertight Seal is Crucial: Always replace the old gasket with a new one to prevent water from entering the fixture and damaging the new bulb or causing an electrical hazard.
- Handle with Care: Be gentle when removing the old bulb and installing the new one, especially if it’s a halogen type, to avoid breakage or transferring oils from your skin.
- Pre-test and Reinstall: Before fully securing the fixture back into the wall niche, briefly submerge it and turn on the power to check for leaks and confirm the bulb works.
Quick Answers to Common Questions
Can I replace my pool light bulb with the pool full of water?
Yes, most modern pool light fixtures are designed with enough cord slack that you can pull them out of their wall niche and onto the pool deck to replace the bulb without needing to drain the pool. Always ensure the power is completely off at the breaker first.
How do I know what kind of pool light bulb to buy?
Check your old bulb for its wattage (e.g., 300W, 500W), voltage (12V or 120V), and base type. If the old bulb is unreadable, consult your pool light fixture’s owner’s manual or look for identifying marks on the fixture itself.
Do I need a new gasket every time I replace pool light bulb?
Absolutely yes! The gasket creates a crucial watertight seal. Old gaskets harden, crack, and lose their elasticity, making them unreliable. Always use a new gasket to prevent water from entering the fixture and damaging the bulb or causing electrical issues.
What if I see bubbles when testing the new light?
Bubbles mean water is leaking into the fixture, indicating a failed seal. Immediately turn off the power at the breaker, pull the fixture out, and carefully re-check how the gasket is seated and ensure all screws are tightened evenly and firmly. You will need to re-seal it.
Can I upgrade my old incandescent pool light to LED?
In many cases, yes! Many manufacturers offer LED replacement bulbs that fit into existing incandescent fixtures. This can offer significant energy savings and color-changing options. Always confirm the new LED bulb is compatible with your fixture’s voltage and size before purchasing.
📑 Table of Contents
Safety First: The Golden Rule for Pool Light Bulb Replacement
Before you even think about touching your pool light fixture, there’s one non-negotiable step: electrical safety. Water and electricity are a dangerous combination, and your pool light is connected directly to your home’s electrical system. Skipping this step can lead to severe injury or even be fatal. Please take this seriously.
Always Turn Off the Power at the Breaker
This is the single most important piece of advice you’ll get for how to replace pool light bulb. Locate your home’s main electrical panel. Inside, you’ll find a series of labeled breakers. You need to find the one that controls your pool equipment, specifically your pool light. It might be labeled “Pool Light,” “Pool,” “Filter,” or something similar. If you’re unsure, it’s always safest to turn off the main breaker for your entire house.
Pro Tip: Once you’ve flipped the breaker, test the light switch for your pool light multiple times to ensure the power is completely off. You can also use a non-contact voltage tester (available at any hardware store) near the light fixture for extra peace of mind. No reading means no power, which is exactly what you want.
Understand GFCI Protection
Most modern pool light circuits are protected by a Ground Fault Circuit Interrupter (GFCI). This device is designed to trip and cut power immediately if it detects an imbalance in the electrical current, preventing electrical shock. Even with GFCI protection, *always* turn off the breaker first. The GFCI is a safety net, not a primary safety measure for planned maintenance. Never rely solely on the GFCI button for turning off power when working on the light.
Gathering Your Tools and Supplies
Preparation is key to a smooth pool light bulb replacement. Having everything you need within arm’s reach will make the job much easier and faster. Before you start, check your existing pool light bulb to determine the correct replacement.
The Right Replacement Bulb
This is obviously crucial! Pool light bulbs come in various types and wattages:
- Incandescent/Halogen: These are traditional bulbs, often 300W or 500W. They provide a warm, yellowish light but are less energy-efficient and have a shorter lifespan.
- LED: Light Emitting Diode bulbs are the modern choice. They are highly energy-efficient, last much longer, and often come with color-changing capabilities. They might be more expensive upfront but save money in the long run.
Make sure you get the correct voltage (usually 12V or 120V) and base type for your fixture. Check your old bulb or your pool light owner’s manual for specifications. When you replace pool light bulb, upgrading to LED is often a smart move if your fixture allows it.
Visual guide about How to Replace Pool Light Bulb
Image source: ik.imagekit.io
Essential Tools and Accessories
- New Gasket/Lens O-ring: This is absolutely non-negotiable! The gasket creates a watertight seal. Old gaskets harden and crack, so a new one is vital to prevent water from entering the fixture. Most replacement bulbs come with a new gasket, but if not, buy one separately.
- Screwdriver: You’ll likely need a Phillips-head or flat-head screwdriver to open the fixture and remove the light’s retaining screw from the niche.
- Silicone-based Lubricant: A small amount on the new gasket can help create a better seal and make reassembly easier.
- Clean Cloth or Towel: For wiping down the fixture and lens.
- Heavy-Duty Gloves: Protect your hands.
- Non-contact Voltage Tester: For confirming the power is off.
- Bucket or Small Container: To hold screws and small parts.
- Safety Goggles: Always a good idea when working with tools.
Accessing Your Pool Light Fixture
Now that safety is covered and your tools are ready, it’s time to get to the light itself. The good news is that most pool lights are designed to be serviced without draining your entire pool!
Pulling the Fixture to the Deck (Most Common Method)
For the vast majority of pool lights, you won’t need to lower your pool’s water level. Pool light fixtures have enough slack in their electrical cord to be pulled out of their niche in the pool wall and brought onto the pool deck.
- Locate the Niche Screw: Look at the top of the pool light fixture, usually at the 12 o’clock position. You’ll see a single screw holding the light housing into its niche in the pool wall. This screw might be rusty or a bit difficult to see underwater.
- Remove the Screw: Carefully use your screwdriver to loosen and remove this screw. Be gentle, as you don’t want to strip the head. If it’s very stubborn, sometimes a little gentle persuasion or a specialized screwdriver can help. Make sure you don’t drop the screw into the pool! A magnetic-tipped screwdriver can be very helpful here.
- Pull the Fixture Out: Once the screw is removed, the fixture should become loose. Gently pull it forward and then upward, carefully feeding the electrical cord out of the niche. Continue pulling until the entire fixture is out of the water and resting on the pool deck.
Important Note: Do *not* pull hard on the cord. If it feels stuck, check for any other hidden fasteners or consult your pool light’s manual. The goal is to get the fixture onto the deck without damaging the cord or its connection.
When You Might Need to Lower the Water Level
While less common, some older or less flexible installations might require you to lower the water level slightly. This is usually only necessary if:
- The cord is too short to pull the fixture completely out of the water.
- The niche screw is located in such a way that it’s impossible to access underwater.
- You have a very old, non-standard light design.
If you do need to lower the water, use your pool’s pump to drain water until the light fixture is fully exposed and above the water line. Remember to turn off the pump and all other pool equipment before proceeding.
Replacing the Bulb: The Heart of the Project
With the fixture safely on the deck, it’s time for the main event: to replace pool light bulb! This is where precision and care are important to ensure a lasting, watertight repair.
Opening the Lens and Removing the Old Bulb
Most pool light fixtures are designed with a heavy glass lens and a rubber gasket, held in place by clamps or screws around the edge.
- Lay the Fixture Flat: Place the fixture face down on a clean towel on the deck.
- Remove the Clamps/Screws: Carefully undo the clamps or screws that hold the front lens assembly to the main housing. There are usually several of these. Keep them organized in your bucket so you don’t lose them.
- Separate the Lens: Gently lift off the metal clamping ring (if present), the glass lens, and the old gasket. Inspect the inside of the fixture. If you find water inside, it means your old gasket failed, which is why a new one is so important!
- Remove the Old Bulb: The bulb will be screwed into a socket, similar to a regular light bulb. Unscrew it counter-clockwise. If it’s a halogen bulb, try to avoid touching the glass directly with your bare hands, as oils from your skin can create hot spots and shorten the new bulb’s life. Use gloves or a clean cloth.
Check for Water Damage: If there was water inside the fixture, inspect the socket and wiring for corrosion. If you see significant rust or damage, it might be a sign of a deeper issue, and professional help might be needed.
Installing the New Bulb and New Gasket
This is where you bring back that bright light! When you replace pool light bulb, remember these steps.
- Screw in the New Bulb: Carefully screw the new pool light bulb into the socket, turning clockwise until it’s snug but not overly tight. Again, if it’s halogen, use gloves or a cloth.
- Clean the Fixture: Wipe down the inside of the fixture and the glass lens with a clean, damp cloth to remove any debris, dirt, or old gasket residue. Ensure both surfaces are completely dry.
- Install the New Gasket: This is critical! Take your new gasket and lightly coat it with a silicone-based lubricant or sealant. Place the new gasket carefully into its groove around the edge of the glass lens. Make sure it’s seated perfectly without any twists or pinches. This new gasket is your primary defense against water intrusion.
- Reassemble the Lens: Place the clean glass lens over the gasket, then the metal clamping ring (if applicable). Align everything carefully.
Sealing the Fixture
This step determines if your new bulb will stay dry and last. A proper seal is everything when you replace pool light bulb.
- Secure the Clamps/Screws: Start re-tightening the clamps or screws around the edge of the fixture. Do this in a crisscross pattern, like you would tighten lug nuts on a car tire, or alternately from opposite sides. This ensures even pressure around the gasket.
- Tighten Evenly: Don’t overtighten one screw before partially tightening others. You want even compression on the gasket all the way around. Overtightening can actually warp the housing or crack the lens, compromising the seal. Tighten them firmly but not excessively.
- Inspect the Seal: Once all screws or clamps are tight, visually inspect the entire perimeter of the lens and gasket to ensure it looks evenly seated and compressed. There should be no visible gaps.
Testing and Reinstallation
You’re almost there! Before you fully put the light back into its niche, you’ll want to perform a quick leak test.
The Leak Test
This step can save you a lot of trouble by catching a faulty seal before you’ve fully reinstalled the light.
- Submerge Partially: Gently lower the reassembled fixture back into the pool water, but don’t push it all the way into the niche yet. Let it hang freely in the water.
- Restore Power (Temporarily): Go back to your breaker panel and turn the power back ON to the pool light circuit.
- Turn On the Light: Flip your pool light switch ON. The new bulb should illuminate!
- Observe for Leaks: Let the light sit submerged for a few minutes while it’s on. Watch for any tell-tale bubbles rising from the fixture. Bubbles mean water is getting in, indicating a leak. If you see bubbles, immediately turn off the power at the breaker, pull the fixture out, and re-check your gasket and the tightness of the screws. You’ll need to re-seal it.
- Turn Off Power Again: Once you’ve confirmed no leaks and the bulb is working, immediately return to the breaker panel and turn the power OFF again. Do NOT work on the light while the power is on.
Securing the Fixture Back into the Niche
With a successful leak test, you can now complete the pool light bulb replacement.
- Coil the Cord: Gently guide the electrical cord back into the niche, coiling it neatly around the fixture. This ensures there’s no tension on the cord and it doesn’t get pinched.
- Seat the Fixture: Push the light fixture back into its niche in the pool wall. It should fit snugly.
- Reinstall the Screw: Insert the retaining screw back into the top of the fixture and tighten it firmly. This holds the light securely in place.
- Final Power Up: Go back to your breaker panel and turn the power ON for good. Now, turn on your pool light switch and enjoy your beautifully illuminated pool!
Troubleshooting Common Issues
Even with the best instructions, sometimes things don’t go exactly as planned. Here are a few common issues you might encounter when you replace pool light bulb:
Bulb Still Not Working
If your new pool light bulb doesn’t light up after installation and testing:
- Check the Breaker: Did you remember to turn the power back on? Is the GFCI tripped?
- Check the Bulb: Is the bulb screwed in properly? Is it the correct voltage and wattage for your fixture? Did you accidentally get a faulty bulb? (It happens!)
- Inspect the Socket: If there was water in the fixture before, corrosion might have damaged the socket itself. Sometimes you can gently clean corrosion with a small brush, but severe damage might require a professional.
- Wire Connection: Though less common, check that the wires connecting to the socket are secure and not corroded.
Water Inside the Fixture Again
This is usually a sign of a failed seal.
- Gasket Issue: The most common culprit is the gasket. Was it installed correctly? Was it pinched? Is it the right size? Did you lubricate it?
- Overtightening/Undertightening: Either extreme can cause leaks. Re-open the fixture, reposition the gasket, and re-tighten the screws evenly and firmly.
- Cracked Lens or Housing: Inspect the glass lens and the plastic/metal housing for any cracks or damage that could be letting water in. If found, these parts will need replacement, which might require a new fixture.
Stripped Niche Screw
If the screw that holds the fixture in the niche is stripped, you might have trouble getting the light out or securing it back in. You can try:
- Using a screw extractor kit.
- Using a different size or type of screwdriver (e.g., trying a flat-head if a Phillips is stripped).
- If all else fails, you may need to consult a pool professional to replace the niche screw insert.
Conclusion: Enjoy Your Illuminated Oasis!
Congratulations! You’ve successfully learned how to replace pool light bulb, tackled a common pool maintenance task, and restored the beautiful glow to your swimming pool. This DIY project not only saves you money but also gives you a deeper understanding of your pool’s components. Remember, safety is paramount, and patience is a virtue, especially when dealing with pool equipment.
Now, as dusk falls, you can flick that switch and watch your pool come alive, ready for evening swims, backyard gatherings, or simply a tranquil view from your patio. Knowing how to replace pool light bulb ensures your pool remains a sparkling highlight of your home, day or night. Enjoy the fruits of your labor and the renewed ambiance of your illuminated swimming haven!
Frequently Asked Questions
What is the most important safety precaution when replacing a pool light bulb?
The absolute most critical safety precaution is to always turn off the power to your pool light circuit at the main electrical breaker before you begin any work. This prevents the risk of severe electrical shock, which can be fatal when working with water and electricity.
How often do pool light bulbs typically need to be replaced?
The lifespan varies significantly by bulb type. Incandescent and halogen bulbs might last 1-3 years with regular use. LED pool light bulbs, on the other hand, are much more durable and can last 10-20 years or even longer, making them a popular and cost-effective upgrade.
What tools are essential for replacing a pool light bulb?
You’ll primarily need a new replacement bulb (with a new gasket), a Phillips-head or flat-head screwdriver to access the fixture, and a clean cloth. A non-contact voltage tester for confirming power is off, and a silicone-based lubricant for the new gasket are also highly recommended.
Why should I avoid touching halogen bulbs with my bare hands?
Oils from your skin, even in tiny amounts, can create hot spots on the surface of a halogen bulb when it heats up. These hot spots can lead to premature bulb failure or even cause the bulb to shatter. Always handle halogen bulbs with gloves or a clean, dry cloth.
Can I use a regular household bulb in my pool light fixture?
No, absolutely not. Pool light bulbs are specifically designed to withstand being submerged in water and are built with heavy-duty glass and specific seals. Using a regular household bulb would be extremely dangerous and could lead to electrocution or fixture damage.
What if my pool light fixture is completely full of water when I open it?
If you find your fixture completely filled with water, it indicates a significant gasket failure that likely occurred some time ago. Before replacing the bulb, thoroughly inspect the socket and wiring for corrosion. If there’s extensive damage, you might need to replace the entire fixture or consult a professional.