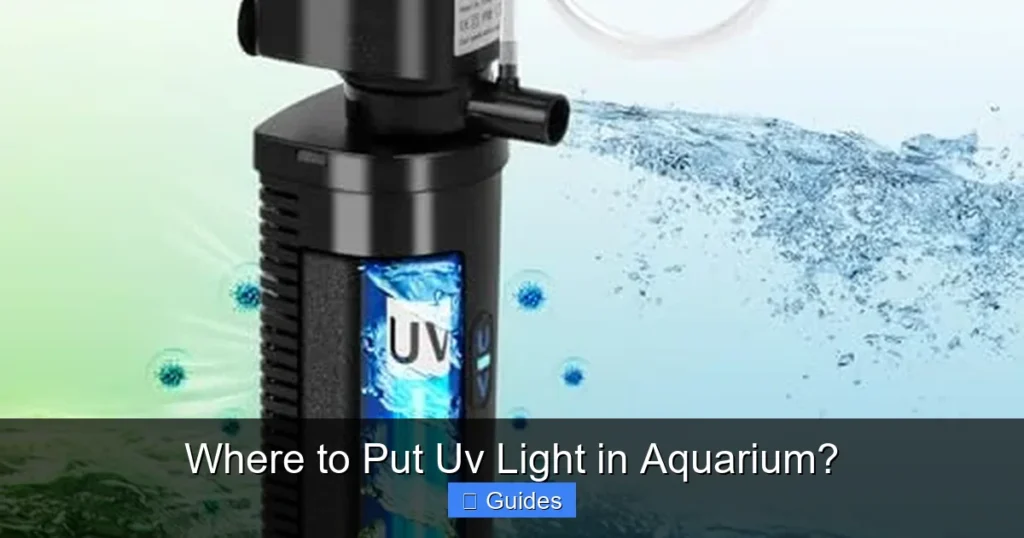
Proper placement of your UV light in an aquarium is crucial for its effectiveness. The ideal spot is typically *in-line with your filtration system*, specifically *after mechanical and biological filtration but before the water returns to the tank*. This ensures the water is clear enough for the UV light to penetrate effectively and target harmful pathogens, leading to a healthier, clearer aquatic environment.
Welcome, fellow fish enthusiast! If you’re pondering the best way to achieve crystal-clear aquarium water and a healthier environment for your aquatic friends, you’ve likely come across the marvel of UV sterilizers. These nifty devices harness the power of ultraviolet-C (UV-C) light to zap away free-floating algae, harmful bacteria, viruses, and even some parasites in your tank water. They’re a game-changer for many aquarists struggling with persistent green water or unexplained fish illnesses.
But here’s the thing: simply owning a UV sterilizer isn’t enough. Its effectiveness hinges almost entirely on one critical factor: where to put UV light in aquarium setups. Just like placing a filter or a heater, strategic positioning is paramount. Get it right, and you’ll enjoy pristine water and robust fish health. Get it wrong, and you might as well be shining a regular flashlight at your tank, wondering why it’s not working.
This guide will dive deep into the science, practicalities, and common pitfalls associated with UV light placement. We’ll explore the best practices for both external and internal units, discuss the importance of flow rate, and arm you with the knowledge to make your UV sterilizer an indispensable part of your aquarium’s health regimen. So, let’s unlock the full potential of your UV sterilizer and ensure your finned companions thrive in the clearest, healthiest water possible!
Key Takeaways
- Strategic Placement is Key: For optimal results, place your UV light *after* mechanical and biological filtration to ensure the water passing through is as clear as possible, allowing the UV-C light to penetrate effectively.
- Flow Rate Matters Significantly: The water flow rate through the UV sterilizer must be carefully matched to the unit’s specifications and your tank size. Too fast, and pathogens won’t get enough contact time; too slow, and it won’t process enough water.
- External vs. Internal Units: External UV sterilizers typically connect to the output of canister filters or dedicated pumps, while internal units are submerged and strategically positioned in areas with good water movement.
- Avoid Heat Interference: It’s best to place the UV sterilizer *before* any heaters in the return line to prevent potential heat degradation of plastic components over time, though modern units are generally robust.
- Regular Maintenance is Non-Negotiable: Clean the quartz sleeve regularly to prevent mineral buildup and replace the UV bulb every 6-12 months (as per manufacturer guidelines) to maintain its germicidal effectiveness.
- Not a Cure-All, But a Powerful Tool: A UV sterilizer is an excellent preventative and reactive tool for water clarity and disease control, but it doesn’t replace good husbandry, proper filtration, and regular water changes.
Quick Answers to Common Questions
Can I put a UV light directly into my aquarium?
Yes, internal UV sterilizers are designed to be fully submersible and can be placed directly inside your aquarium, often in a less visible area with good water flow, or within a sump.
Does UV light kill beneficial bacteria in the filter?
No, UV light primarily targets free-floating microorganisms in the water column. Beneficial nitrifying bacteria mostly live in colonies attached to filter media and surfaces, so they are generally safe from the UV light.
How long should I run my UV sterilizer?
For initial green water outbreaks or disease treatment, continuous 24/7 operation is often recommended. For maintenance or prevention, some aquarists run them continuously, while others use them intermittently (e.g., 8-12 hours a day).
What is the most important factor for UV sterilizer effectiveness?
The most important factor is ensuring the water passing through the unit is clear (post-mechanical filtration) and flows at the correct rate to allow sufficient contact time for the UV-C light to inactivate microorganisms.
Can a UV sterilizer replace water changes?
No, a UV sterilizer does not replace the need for regular water changes. It removes free-floating pathogens and algae but does not remove nitrates, phosphates, or other dissolved organic compounds that accumulate over time.
📑 Table of Contents
- Understanding Your UV Sterilizer: How It Works and Why Placement Matters
- The Ideal Placement: In-line with Your Filtration System
- Flow Rate: The Unsung Hero of UV Sterilization
- External vs. Internal UV Sterilizers: Placement Differences
- Common Mistakes and How to Avoid Them
- Maintenance and Monitoring: Ensuring Long-Term Effectiveness
Understanding Your UV Sterilizer: How It Works and Why Placement Matters
Before we pinpoint exactly where to put UV light in aquarium systems, it’s helpful to understand what a UV sterilizer does and how its internal workings dictate optimal placement. Think of it as a specialized tool; knowing its function helps you use it correctly.
What is a UV Sterilizer?
At its core, a UV sterilizer for aquariums is a device that houses a special UV-C lamp, typically encased in a waterproof quartz sleeve. Water from your aquarium is pumped through this unit, exposing it to the UV-C light. This particular wavelength of ultraviolet light is germicidal, meaning it’s capable of inactivating microorganisms by disrupting their DNA or RNA, preventing them from reproducing or causing harm.
- Clarification: Primarily targets free-floating algae, clearing up green water.
- Sterilization: Inactivates bacteria, viruses, and protozoa (like ich, velvet, or columnaris in their free-swimming stages).
It’s important to note that a UV sterilizer only affects organisms that pass directly through its chamber. It doesn’t sterilize the tank water itself, nor does it magically remove debris or cure diseases already established on fish.
The Science Behind UV-C Light
UV-C light (specifically around 254 nanometers) is incredibly effective at disrupting the genetic material of single-celled organisms. When these microscopic invaders are exposed to UV-C for a sufficient amount of time and intensity, their DNA or RNA is damaged, rendering them unable to replicate. Without the ability to reproduce, they can no longer cause infections or bloom into massive algae outbreaks. This makes understanding where to put UV light in aquarium setups so critical, as it directly impacts the “sufficient amount of time and intensity” part.
Why Placement is Crucial for Effectiveness
Imagine trying to clean a dusty room with a light beam. If the light is blocked by furniture or the dust particles are too thick, the light won’t hit all the dust. The same principle applies to your UV sterilizer. For the UV-C light to work its magic:
- Water Clarity: The water passing through the unit needs to be as clear as possible. Turbidity (cloudiness from debris, uneaten food, or detritus) can shield microorganisms from the UV-C light, rendering the sterilizer less effective. This is a primary reason where to put UV light in aquarium is so important.
- Contact Time: Microorganisms need a certain amount of exposure time to the UV-C light to be inactivated. This is directly related to the flow rate through the unit and the unit’s power.
- Accessibility: The unit needs to be accessible for maintenance, such as cleaning the quartz sleeve or replacing the bulb.
Incorrect placement can lead to wasted electricity, short bulb life, and most importantly, an ineffective sterilizer that doesn’t deliver the clean, healthy water you expect.
The Ideal Placement: In-line with Your Filtration System
When considering where to put UV light in aquarium systems, the golden rule for most setups is to integrate it directly into your existing filtration loop. This approach maximizes efficiency and ensures the UV sterilizer works in conjunction with your other filtration components.
Visual guide about Where to Put Uv Light in Aquarium?
Image source: m.media-amazon.com
Post-Filter, Pre-Heater: The Golden Rule
The generally accepted best practice for where to put UV light in aquarium systems is to install it *after* your mechanical and biological filtration, but *before* the water is returned to the main aquarium. If you have an in-line heater, the UV sterilizer should typically come before the heater.
- After Mechanical Filtration: This is paramount. Your mechanical filter (e.g., filter floss, sponges) removes larger particulate matter, ensuring the water is physically clear before it enters the UV sterilizer. This prevents debris from coating the quartz sleeve, which would block the UV-C light from reaching microorganisms.
- After Biological Filtration: While UV sterilizers target free-floating organisms, they don’t significantly harm beneficial bacteria attached to filter media. Placing it after biological filtration ensures the biological filter has processed nitrates and ammonia, and the UV unit can then sterilize the water without interfering with the biological process within the filter itself.
- Before Water Return: This ensures that the treated water is directly introduced back into the display tank, maximizing the immediate benefits of sterilization.
Why After Mechanical and Biological Filtration?
Think of it as a multi-stage cleaning process. Your mechanical filter acts as the first line of defense, straining out larger gunk. If this isn’t done, that gunk can stick to the UV lamp’s quartz sleeve, creating shadows and significantly reducing the UV-C light’s ability to penetrate the water. This is why when asking where to put UV light in aquarium, the answer always involves proper pre-filtration.
Biological filtration, on the other hand, converts harmful ammonia and nitrite into less harmful nitrate. The UV sterilizer doesn’t target these chemical compounds, nor does it negatively impact the established colonies of beneficial bacteria *within* your biological filter media. By placing the UV after both these stages, you’re treating water that is already mechanically clean and biologically stable, allowing the UV sterilizer to focus solely on pathogen and algae control.
Avoiding Heat Interference
While most modern UV sterilizers are built to withstand typical aquarium temperatures, some aquarists prefer to place the UV unit before the heater in the return line. This is a minor consideration, but the rationale is that prolonged exposure to high heat might theoretically degrade the plastic components of the UV sterilizer over many years. In practice, this is less of a concern with quality units, but it’s a simple consideration for optimal long-term setup when deciding where to put UV light in aquarium.
Flow Rate: The Unsung Hero of UV Sterilization
You can have the most powerful UV sterilizer and perfect physical placement, but if your flow rate is off, you’re not getting the full benefit. Flow rate is a critical, often overlooked, aspect of where to put UV light in aquarium setups.
The Goldilocks Zone: Not Too Fast, Not Too Slow
The effectiveness of a UV sterilizer is directly tied to the “contact time” – how long the target microorganisms are exposed to the UV-C light. This contact time is determined by the flow rate of water through the unit.
- Too Fast: If the water rushes through the UV sterilizer too quickly, microorganisms won’t receive sufficient exposure to the UV-C light. They’ll pass through unharmed, rendering the unit largely ineffective against sterilization, though it might still help with clarification.
- Too Slow: If the flow is too slow, the water gets excellent sterilization, but the overall volume of water processed in your tank might be insufficient. This means it takes longer to treat the entire tank, potentially allowing pathogens to multiply faster than they are being inactivated.
The goal is to find that “just right” flow rate, balancing sufficient contact time with adequate overall turnover of your tank water. This is a key part of answering where to put UV light in aquarium effectively.
Matching UV Sterilizer GPH to Your Tank Volume
Every UV sterilizer comes with a recommended flow rate, often expressed in Gallons Per Hour (GPH) or Liters Per Hour (LPH). Manufacturers usually provide two GPH ratings: one for “clarification” (killing algae) and one for “sterilization” (killing bacteria, viruses, and parasites). The sterilization GPH is always lower because it requires longer contact time.
- For Algae Control (Clarification): You generally want to turn over your tank’s entire volume roughly 1 to 2 times per hour through the UV sterilizer.
- For Pathogen Control (Sterilization): For effective sterilization against bacteria, viruses, and parasites, you typically need a slower flow rate, turning over your tank’s volume about 0.5 to 1 time per hour through the UV sterilizer.
Check your UV sterilizer’s manual for specific recommendations. You may need a separate pump or a valve on your existing filter’s output to control the flow precisely.
Adjusting Flow for Optimal Contact Time
Many canister filters offer variable flow rates, or you can use a flow control valve (ball valve) on the tubing leading into the UV sterilizer. If you’re using a dedicated pump for the UV unit, choose one with a GPH rating that matches your sterilizer’s requirements for your desired outcome (clarification vs. sterilization). Remember, when considering where to put UV light in aquarium, optimizing flow is just as important as physical location.
External vs. Internal UV Sterilizers: Placement Differences
UV sterilizers come in different forms, and their design dictates specific placement strategies. Understanding these differences is crucial when deciding where to put UV light in aquarium setups.
External UV Sterilizers: Where to Connect Them
External UV sterilizers are the most common type and are typically integrated into the plumbing of an external filter system, such as a canister filter. They are not submerged in the tank itself.
- Canister Filter Output: The most popular method is to connect the UV sterilizer to the output hose of a canister filter. The water flows from the tank, through the canister filter (mechanical and biological stages), then into the UV sterilizer, and finally back to the tank. This aligns perfectly with the “post-filtration” rule.
- Dedicated Pump: For larger tanks, or if your canister filter’s flow rate isn’t ideal for the UV sterilizer, you can use a small, dedicated submersible pump inside the tank to feed water directly to the external UV unit. The pump’s output should be matched to the UV sterilizer’s recommended flow rate, and the UV unit’s output returns water to the tank. This setup still follows the “post-filtration” idea if the pump intake is clear of large debris.
- Sump Integration: If you have a sump, an external UV sterilizer can be plumbed into the return line from the sump back to the display tank. This is an excellent place to put UV light in aquarium systems with sumps, as the sump typically houses all mechanical and biological filtration.
Ensure that all hose connections are secure with clamps to prevent leaks, and place the unit in an accessible location, often inside the aquarium cabinet.
Internal UV Sterilizers: Strategic Submersion
Internal UV sterilizers are submersible units that are placed directly inside the aquarium or sump. They often have a small integrated pump.
- Inside the Display Tank: If placed directly in the tank, position the internal UV sterilizer in an area with good water flow but where it’s not highly visible. Near the main filter’s output or an internal powerhead can help draw water into the unit. Ensure its intake isn’t blocked by decor or substrate. While convenient, they often have smaller capacities and lower flow rates than external units.
- Inside a Sump: A sump is an ideal place to put UV light in aquarium systems that use them. Internal UV sterilizers can be placed in a dedicated chamber within the sump, often after the filter socks/mechanical filtration and before the return pump chamber. This keeps the unit out of sight and allows it to treat water that has already undergone mechanical and biological filtration.
Always ensure the entire unit is submerged as per the manufacturer’s instructions. Exposure of the bulb housing to air can lead to overheating or damage.
All-in-One Filter/UV Combos
Some aquarium filters, particularly hang-on-back (HOB) or internal power filters, come with integrated UV lights. These units simplify placement since the UV sterilizer is already part of the filter’s design. The manufacturer has typically engineered the flow path to optimize UV exposure within the unit. With these, your main concern when deciding where to put UV light in aquarium is simply placing the filter itself in an appropriate spot within your tank, following the filter’s instructions for optimal water circulation.
Common Mistakes and How to Avoid Them
Even with the best intentions, it’s easy to make mistakes when setting up a UV sterilizer. Knowing where to put UV light in aquarium and how to operate it correctly involves avoiding these common pitfalls.
Incorrect Flow Rate
As discussed, too fast or too slow a flow rate renders the UV unit less effective. Always refer to your specific model’s GPH recommendations for your desired outcome (clarification or sterilization). Use a flow control valve or a suitable pump to achieve the correct flow. Don’t assume your filter’s maximum output is automatically the right flow for the UV sterilizer.
Placing Before Mechanical Filtration
This is a major no-no. If your UV sterilizer is placed before your mechanical filter, particulate matter will quickly coat the quartz sleeve, blocking the UV-C light and drastically reducing its germicidal power. This is a common mistake when learning where to put UV light in aquarium setups. Always ensure mechanical filtration precedes the UV unit.
Insufficient Maintenance
A UV sterilizer isn’t a “set it and forget it” device. The quartz sleeve *will* accumulate mineral deposits and debris over time, even with proper pre-filtration. This buildup acts like a shield, preventing the UV light from reaching the water. Clean the quartz sleeve regularly (e.g., monthly or bi-monthly, depending on water parameters) using a soft brush and a mild acidic solution (like white vinegar or a diluted citric acid solution) to dissolve deposits. Neglecting this makes where to put UV light in aquarium almost irrelevant.
Running Continuously Without Need
While some aquarists run their UV sterilizers 24/7, it’s not always necessary, especially if you have a well-established, healthy tank and are primarily targeting algae. Running it continuously shortens bulb life and consumes electricity. For green water, you might run it until clear, then intermittently. For disease prevention, continuous operation might be desired. Understand *why* you’re running it and adjust accordingly. However, for initial clear-up or during an outbreak, continuous operation is often recommended.
Ignoring Bulb Lifespan
UV-C bulbs degrade over time, even if they still visibly glow. Their germicidal effectiveness diminishes long before they burn out completely. Most manufacturers recommend replacing the UV bulb every 6 to 12 months of continuous operation. Mark your calendar! An old bulb, even if shining, is essentially just a warm light bulb doing little to sterilize your water. This is an important part of making where to put UV light in aquarium useful.
Maintenance and Monitoring: Ensuring Long-Term Effectiveness
Once you’ve mastered where to put UV light in aquarium and set up the flow, ongoing maintenance is vital to keep your system performing optimally. A well-maintained UV sterilizer is a highly effective one.
Regular Cleaning of Quartz Sleeve
As mentioned, the quartz sleeve encasing the UV bulb needs to be cleaned regularly. The frequency depends on your water parameters and how quickly scale or algae builds up. Disconnect the unit, carefully remove the quartz sleeve, and gently scrub it with a soft brush or cloth using a dilute acid solution (like vinegar). Rinse thoroughly before reassembly. This ensures maximum UV-C light penetration.
Timely Bulb Replacement
Always follow the manufacturer’s recommendations for bulb replacement. Most UV-C bulbs have an effective germicidal life of 6 to 12 months of continuous use. Beyond this, their ability to inactivate pathogens significantly decreases, even if they still emit visible light. It’s a small investment for continuous clear water and disease prevention. Always use replacement bulbs specifically designed for your UV sterilizer model.
Checking for Leaks and Damage
Periodically inspect your UV sterilizer and its plumbing for any signs of leaks, cracks, or damage. UV-C light is harmful to human eyes and skin, so ensure the unit is always sealed correctly when in operation. If you notice any damage, disconnect the unit immediately and consult the manufacturer or replace the affected parts.
Monitoring Water Clarity
One of the easiest ways to gauge the effectiveness of your UV sterilizer is to observe your aquarium’s water clarity. If green water or cloudiness persists despite the UV sterilizer running, it’s a strong indicator that something is amiss. Revisit your placement, flow rate, quartz sleeve cleanliness, and bulb age. If your goal is disease prevention, you won’t see direct visual cues, but consistent water parameters and healthy fish are good signs that your UV sterilizer, placed correctly, is doing its job.
Mastering where to put UV light in aquarium is the first step towards a healthier, clearer tank. By understanding the principles of UV-C light, adhering to best practices for placement and flow, and committing to regular maintenance, you’ll empower your aquarium with an incredibly effective tool for water quality and disease control. Your fish will thank you with vibrant colors and robust health, and you’ll enjoy the pristine view of a truly thriving aquatic ecosystem.
🎥 Related Video: Will a UV Sterilizer Hurt Your Aquarium? | How UV Sterilizer Work | KaveMan Aquatics
📺 KaveMan Aquatics
Will a UV Sterilizer Hurt Your Aquarium? | How UV Sterilizer Work | KaveMan Aquatics Thinking about adding a UV sterilizer to …
Frequently Asked Questions
How does water clarity affect UV light effectiveness?
Water clarity is crucial because any particles or cloudiness in the water can shield microorganisms from the UV-C light, preventing it from reaching and inactivating them. This significantly reduces the sterilizer’s effectiveness, making clear water essential for optimal performance.
Should the UV light be before or after the aquarium heater?
It’s generally recommended to place the UV light before the aquarium heater in the return line. While not strictly necessary for most modern units, this can prevent potential long-term heat degradation of the UV sterilizer’s plastic components.
How often should I clean the quartz sleeve of my UV sterilizer?
The quartz sleeve should be cleaned regularly, typically every 1-3 months, or whenever you notice a visible buildup of mineral deposits or debris. This ensures that the UV-C light can penetrate the water effectively without being blocked by scale.
What is the difference between clarification and sterilization with a UV unit?
Clarification refers to the UV unit’s ability to kill free-floating algae, leading to clearer water, which requires a faster flow rate. Sterilization, on the other hand, involves inactivating harmful bacteria, viruses, and parasites, requiring a slower flow rate for longer contact time and higher UV exposure.
Can a UV sterilizer harm my fish or plants?
No, a properly installed UV sterilizer will not harm your fish or live plants. The UV-C light is completely contained within the unit, and only water passes through it. It does not alter water chemistry or remove beneficial nutrients for plants.
Why is the flow rate so important for UV sterilizers?
The flow rate is critical because it dictates the “contact time” organisms have with the UV-C light. If the flow is too fast, pathogens won’t be exposed long enough to be inactivated; if it’s too slow, the unit won’t process enough water to effectively treat the entire tank, especially for larger volumes.