Removing a fluorescent light bulb requires careful attention to safety and specific techniques depending on the bulb type. Always prioritize safety by turning off the power, wearing protective gear, and using a stable ladder. Different bulbs—linear tubes, circline, and CFLs—have distinct removal methods, typically involving a gentle twist-and-pull action. Proper disposal is also crucial due to mercury content.
Welcome! If you’ve found yourself staring up at a flickering or dead fluorescent light bulb, wondering “how do you remove a fluorescent light bulb?” without breaking it or getting zapped, you’re in the right place. Swapping out a fluorescent bulb might seem intimidating at first, especially with their unique shapes and sizes compared to traditional incandescent bulbs. But don’t worry, it’s a straightforward process once you understand the few key steps and, most importantly, the crucial safety precautions.
Fluorescent lighting has been a popular choice for homes, offices, and workshops for decades due to its energy efficiency and long lifespan. However, like all good things, even these bulbs eventually reach the end of their useful life. Whether you’re upgrading to more efficient LED tubes, replacing a burned-out bulb, or just need to clean the fixture, knowing how to safely and effectively remove a fluorescent light bulb is a valuable skill. This comprehensive guide will walk you through the process for various types of fluorescent bulbs, from the common linear tubes to the more unique circular and compact fluorescent (CFL) varieties.
Throughout this guide, we’ll emphasize safety, provide step-by-step instructions for each bulb type, and offer tips for proper handling and disposal. By the time you’re done reading, you’ll be confident in tackling any fluorescent bulb replacement task. So, let’s grab our tools (mostly just our hands!) and get started on learning how do you remove a fluorescent light bulb the right way!
Key Takeaways
- Safety First is Paramount: Before attempting to remove any fluorescent light bulb, always turn off the power at the circuit breaker and use appropriate personal protective equipment like gloves and eye protection.
- Identify Your Bulb Type: Fluorescent bulbs come in various forms (linear tubes, circline, screw-in CFLs, pin-based CFLs), and each requires a slightly different removal technique.
- Linear Tubes (T8, T12): Twist and Rotate: For standard linear fluorescent tubes, gently rotate the bulb about 90 degrees in its fixture until the pins align with the slots, then pull it straight out.
- Circline and Pin-Based CFLs: Disconnect and Release: Circular fluorescent bulbs often have a central connector that needs to be unplugged, and pin-based CFLs require a twist-and-pull or a squeeze-and-pull motion after disconnecting from their ballast.
- Handle with Care: Fluorescent bulbs contain a small amount of mercury. Always handle them gently to prevent breakage and release of mercury vapor.
- Proper Disposal is Essential: Never throw fluorescent bulbs in regular household trash. They must be recycled at designated facilities or hazardous waste collection sites due to their mercury content.
- Patience Prevents Damage: If a bulb feels stuck, avoid excessive force. Gentle, consistent pressure and ensuring the correct motion for its type will prevent breakage and damage to the fixture.
Quick Answers to Common Questions
How do you remove a fluorescent light bulb if it’s stuck?
If a fluorescent bulb feels stuck, first ensure the power is off. Re-evaluate your technique – are you twisting 90 degrees for linear bulbs or looking for a release button for pin-based CFLs? Apply gentle, consistent pressure; avoid excessive force, which can cause breakage. Sometimes, very slight wiggling helps.
Can you remove a fluorescent light bulb with the power on?
No, you absolutely should NOT remove a fluorescent light bulb with the power on. This poses a significant risk of electrical shock and potential injury if the bulb breaks. Always turn off the power at the wall switch and, ideally, at the circuit breaker before attempting removal.
Do all fluorescent bulbs twist out?
Not all fluorescent bulbs twist out. While linear tubes (T8, T12) typically require a 90-degree twist, and some pin-based CFLs use a quarter-turn, screw-in CFLs simply unscrew, and some pin-based CFLs or T5 tubes might just pull straight out. Always identify your bulb type first.
What should I do if a fluorescent bulb breaks during removal?
If a fluorescent bulb breaks, immediately turn off the power at the breaker, evacuate the area for 15 minutes, and ventilate the room. Wear gloves and eye protection. Do not vacuum. Use stiff paper/cardboard and sticky tape to collect debris, then seal it in a rigid container and dispose of it at a hazardous waste facility.
Can I replace a fluorescent bulb with an LED bulb?
Yes, you can often replace fluorescent bulbs with LED equivalents. Some LED tubes are “plug-and-play” and work with your existing ballast, while others are “ballast-bypass” and require direct wiring (often best done by an electrician). Always check the LED bulb’s specifications and compatibility with your fixture.
📑 Table of Contents
- Safety First: Your Non-Negotiable Step Before Removal
- Removing Linear Fluorescent Tubes (T8, T12, T5)
- Dealing with Circline (Circular) Fluorescent Bulbs
- Handling Compact Fluorescent Lights (CFLs): Screw-in vs. Pin-based
- Safe Handling and Disposal of Used Fluorescent Bulbs
- Troubleshooting Common Hurdles and Tips
Safety First: Your Non-Negotiable Step Before Removal
Before you even think about touching that fluorescent light bulb, safety must be your absolute top priority. Skipping these steps can lead to electrical shock, injury from broken glass, or a fall. Don’t take chances!
1. Turn Off the Power
This is the single most important step. You absolutely must turn off the power to the light fixture before doing any work on it.
- At the Wall Switch: Flip the light switch to the “off” position. This is a good first step, but not always enough.
- At the Circuit Breaker: For ultimate safety, go to your home’s electrical panel (breaker box) and switch off the circuit breaker that controls the light fixture. If you’re unsure which breaker it is, it’s always safest to turn off the main breaker for the entire house, though this is often unnecessary if you can correctly identify the specific circuit. Test the light switch after turning off the breaker to confirm the power is truly off.
2. Gather Your Personal Protective Equipment (PPE)
Having the right gear on hand will protect you from potential hazards.
- Gloves: Wear work gloves or nitrile gloves. These will protect your hands from sharp edges if the bulb accidentally breaks and will also provide a better grip.
- Eye Protection: Safety glasses or goggles are highly recommended. If a bulb shatters, flying glass shards can cause serious eye injury.
- Stable Ladder or Step Stool: Never stand on unstable chairs or boxes. Use a sturdy ladder or step stool that allows you to comfortably reach the fixture without overextending. Have someone spot you if possible.
3. Allow the Bulb to Cool (If Recently On)
While fluorescent bulbs don’t get as hot as incandescent bulbs, they can still be warm to the touch if they’ve been on recently. Give them a few minutes to cool down before handling them.
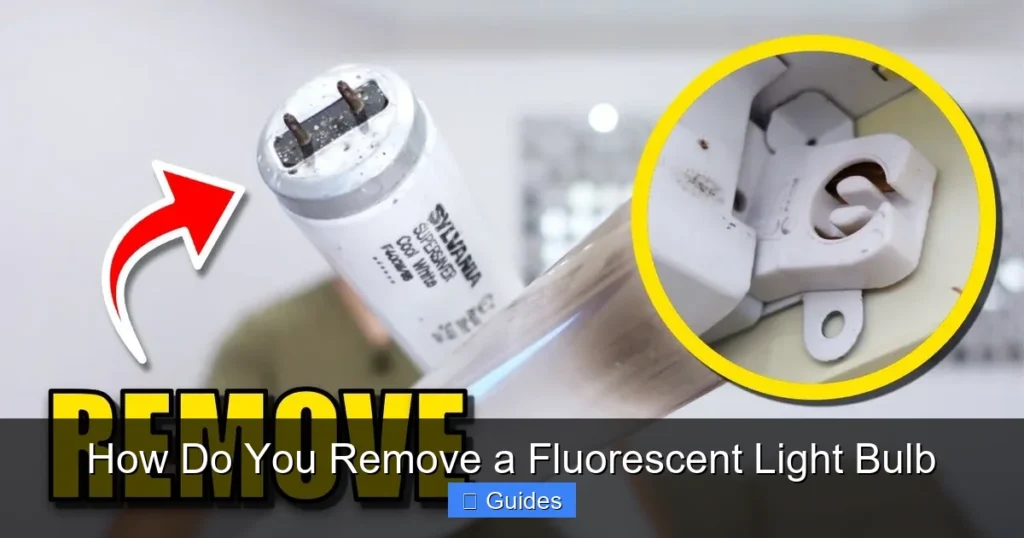
Removing Linear Fluorescent Tubes (T8, T12, T5)
Visual guide about How Do You Remove a Fluorescent Light Bulb
Image source: i.ytimg.com
These are the most common types of fluorescent bulbs, typically found in kitchens, garages, and workshops. They are long, straight tubes with pins at each end.
1. Identifying Linear Tubes
Most linear tubes are labeled with their diameter:
- T12: 1.5 inches in diameter (older, thicker tubes)
- T8: 1 inch in diameter (newer, more common)
- T5: 5/8 inch in diameter (thinner, often found in modern fixtures or under-cabinet lighting)
While their sizes differ, the general removal method is similar for most bi-pin linear tubes. T5 bulbs sometimes have slightly different end caps, but the principle remains.
2. Step-by-Step Removal for Bi-Pin Tubes (T8, T12)
This is the classic “how do you remove a fluorescent light bulb” method for the long straight ones.
- Position Yourself Safely: Stand on your stable ladder directly beneath the bulb, ensuring you have a good reach without straining.
- Grasp the Bulb Firmly: Hold the fluorescent tube with both hands, one near each end. Use a firm but gentle grip. Avoid gripping too tightly in the middle, as this can cause the tube to flex and potentially break.
- Rotate the Bulb: Gently rotate the bulb about 90 degrees (a quarter turn) in either direction. You should feel the pins at the ends of the tube disengage from the slots in the lampholders (the white plastic sockets on either end).
- Pull Straight Out: Once the pins are disengaged, gently pull the entire tube straight down and away from the fixture. Do not try to bend or twist it while pulling.
- Lower Carefully: Carefully lower the bulb and set it aside in a safe place, ideally immediately placing it into its replacement’s packaging or an old box for transport for disposal.
3. Special Notes for T5 Tubes
Some T5 fixtures use a different style of lampholder, often a single “shove-in” pin or a small twist-lock mechanism.
- Shove-in Type: For these, simply pull the bulb straight out from the lampholder. They usually don’t require the 90-degree twist.
- Twist-Lock T5s: If it feels like it has a slight twist-lock, give it a small turn (less than 90 degrees, perhaps 45) and then pull it straight out. Always err on the side of gentleness.
Dealing with Circline (Circular) Fluorescent Bulbs
Circline fluorescent bulbs are circular tubes often found in ceiling fixtures, sometimes with multiple circles nestled together. The question “how do you remove a fluorescent light bulb” becomes a bit more interesting here.
1. What Makes Circline Different?
Circline bulbs usually connect to the fixture via a central plug or connector, in addition to resting in clips or slots.
- Central Connector: Look for a small plastic connector, often with 4 pins, near the inner circle of the bulb. This is crucial.
- Holding Clips: The circular tube itself will usually sit in small spring-loaded clips or grooves around its circumference.
2. The Twist-and-Pull Method for Circline
- Access the Bulb: Many circline fixtures have a diffuser cover (a plastic or glass dome) that needs to be removed first. Gently unlatch or twist this cover off.
- Locate the Central Connector: Carefully identify the central connector plug that powers the bulb.
- Disconnect the Connector: Gently grasp the connector and pull it straight out from its receptacle on the ballast or fixture. Do not pull on the wires directly. This might require a slight wiggle.
- Release the Bulb from Clips: Once the connector is unplugged, gently lift the circular tube out of the clips that hold it in place. There might be 2-4 clips holding it. Don’t force it; the clips usually give way with a slight upward or outward push.
- Lower and Dispose: Carefully lower the bulb and prepare it for safe disposal.
Handling Compact Fluorescent Lights (CFLs): Screw-in vs. Pin-based
CFLs were a popular energy-saving alternative to incandescent bulbs, though many are now being replaced by LEDs. Understanding “how do you remove a fluorescent light bulb” applies here too, but with two distinct variations.
1. Screw-in CFLs: Just Like Incandescents
These are the spiral or folded tube bulbs with a standard Edison screw base (E26 or E27) that fit into regular light bulb sockets.
- Turn Off Power: As always, flip the light switch off and ideally the circuit breaker too.
- Allow to Cool: If the bulb has been on, give it a moment to cool down.
- Grasp the Base (Not the Glass!): The crucial tip here: always grasp the *plastic or metal base* of the CFL, not the glass spiral or folds. The glass is fragile and can easily break.
- Unscrew Counter-Clockwise: Twist the bulb counter-clockwise to unscrew it from the socket, just like you would with a traditional incandescent bulb.
- Lower and Dispose: Carefully remove the bulb and prepare it for recycling.
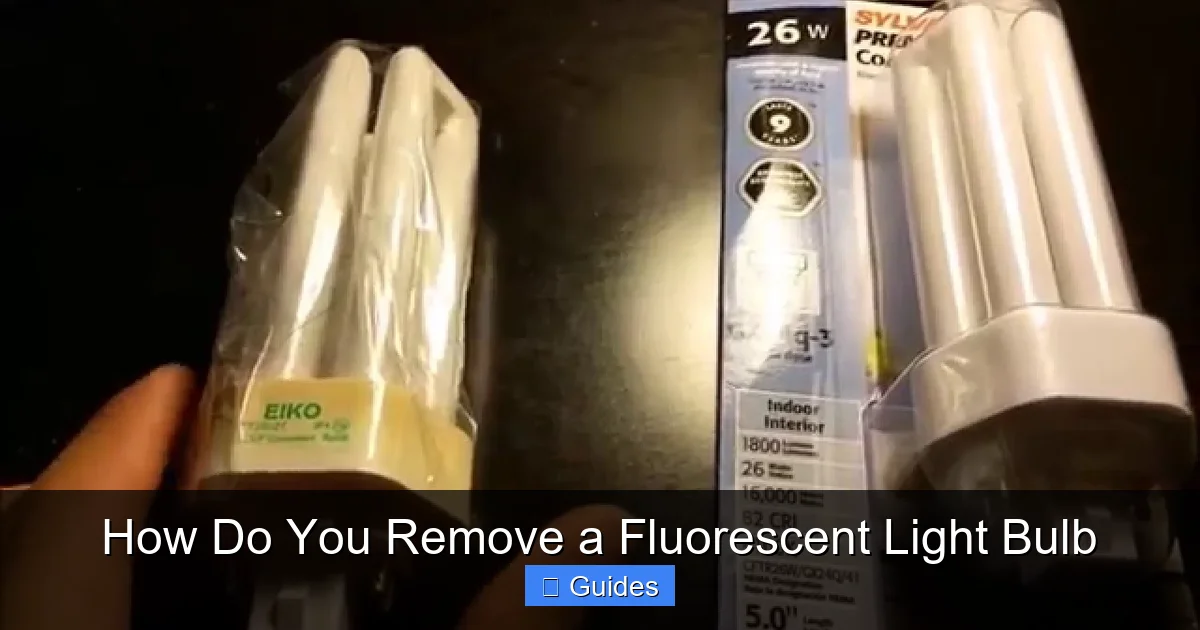
2. Pin-Base CFLs: A Little More Nuance
These CFLs are often found in recessed downlights, wall sconces, or dedicated fixtures. They have 2 or 4 pins that plug into a socket. Common types include GX23, G24q, GX24q, G23, etc.
- Turn Off Power: Crucial safety step.
- Remove Any Diffuser (If Present): Some fixtures might have a cover or grille that needs to be removed to access the bulb.
- Locate the Pin Connector: The pins on the CFL plug into a specialized socket.
- Press and Pull, or Twist and Pull:
- For 2-pin CFLs (e.g., GX23): These often require a gentle pull straight out. Sometimes there’s a small spring clip on the side of the socket that you might need to depress slightly.
- For 4-pin CFLs (e.g., G24q, GX24q): These typically use a quarter-turn (90-degree) twist-and-pull method. Gently twist the bulb a quarter turn and then pull it straight down and out of the socket. Some may have a small release button or tab on the side of the socket that needs to be pressed.
The key here is *gentleness*. If it resists, look for a latch or button before applying more force.
- Lower and Dispose: Carefully handle the bulb and arrange for proper recycling.
Safe Handling and Disposal of Used Fluorescent Bulbs
Learning how do you remove a fluorescent light bulb is only half the battle; knowing how to dispose of it responsibly is equally important.
1. Why Proper Disposal Matters (Mercury)
All fluorescent light bulbs (linear, circline, and CFLs) contain a small amount of mercury, typically a few milligrams. While this amount is very small and poses no risk when the bulb is intact, if a bulb breaks, the mercury can be released as vapor and absorbed into the environment. Mercury is a neurotoxin, and improper disposal contributes to environmental pollution.
2. Recycling Options and Best Practices
Never throw fluorescent bulbs in regular household trash.
- Designated Recycling Centers: Many municipalities have household hazardous waste (HHW) collection sites or dedicated recycling centers that accept fluorescent bulbs. Check your local government’s waste management website for details.
- Retailer Take-Back Programs: Some major retailers (e.g., Home Depot, Lowe’s, IKEA, Batteries Plus Bulbs) offer free recycling for fluorescent bulbs, especially CFLs. Call ahead to confirm their current policy.
- Professional Recyclers: For large quantities (e.g., from businesses), there are specialized companies that provide bulb recycling services.
- Safe Transport: When transporting bulbs for recycling, keep them in their original sleeves or a sturdy box to prevent breakage.
3. What to Do if a Bulb Breaks
Despite your best efforts, sometimes a bulb breaks. Don’t panic, but act quickly and carefully.
- Clear the Area: Immediately evacuate people and pets from the room. Ventilate the room by opening windows and doors for at least 15 minutes.
- Don’t Vacuum: Do NOT use a vacuum cleaner, as it can spread mercury vapor and fine glass powder.
- Collect Debris Safely: Put on gloves and use stiff paper or cardboard to scoop up large pieces of glass. Use sticky tape (like duct tape) to pick up small glass fragments and powder. Wipe the area with a damp paper towel.
- Seal Waste: Place all collected materials (glass, tape, paper towels) in a rigid, sealable container (like a glass jar with a lid or a heavy-duty plastic bag).
- Dispose Properly: Take the sealed container to a local household hazardous waste facility. Do not put it in regular trash.
Troubleshooting Common Hurdles and Tips
Even with the best instructions, you might encounter a few snags when asking “how do you remove a fluorescent light bulb.”
1. Stuck or Stubborn Bulbs
If a bulb feels stuck, avoid excessive force.
- Re-Check Your Technique: Are you sure you’re using the correct twist-and-pull motion for your bulb type? Sometimes a slight wiggle helps dislodge linear pins.
- Check for Corrosion: In old or damp fixtures, pins or sockets can corrode. A very gentle, slightly firmer twist might be needed, but be extremely careful.
- Lubrication (Extreme Caution!): In rare cases, a tiny, *tiny* amount of dielectric grease (non-conductive) on the pins of *new* bulbs can prevent sticking in the future, but never on old bulbs or in sockets themselves. This is more for installation, not removal.
2. Dealing with Broken Glass
If a bulb breaks while still in the fixture, turn off the power at the breaker *immediately*.
- Use Pliers: With thick work gloves and safety glasses on, use needle-nose pliers to grasp the plastic or metal base of the broken bulb. Carefully twist it counter-clockwise to remove it from the socket.
- Clean Up: Follow the broken bulb cleanup procedure mentioned above for mercury.
3. Replacing with New Bulbs (LED Upgrades)
When you remove an old fluorescent bulb, consider your replacement options.
- Direct Replacement: Many fluorescent fixtures can simply accept a new fluorescent bulb of the same type.
- LED Retrofit: This is a popular and energy-efficient upgrade.
- “Plug-and-Play” LED Tubes: These are designed to work with your existing fluorescent ballast. You simply remove the old fluorescent bulb and insert the LED tube. Confirm compatibility with your ballast type first.
- Ballast-Bypass LED Tubes (Direct Wire): These require bypassing or removing the existing ballast and wiring the fixture directly to line voltage. This typically requires an electrician or someone with electrical wiring experience. Always follow manufacturer instructions.
- New Fixture: Sometimes, the easiest and most effective upgrade is to replace the entire fluorescent fixture with a new, integrated LED fixture.
Removing a fluorescent light bulb, regardless of its type, is a task that prioritizes safety and requires a bit of finesse. By taking the necessary precautions—always cutting the power, wearing protective gear, and using a stable ladder—you ensure a safe working environment. Understanding whether you have a linear tube, a circline, or a CFL (screw-in or pin-based) dictates the specific removal technique. A gentle twist, a careful pull, or a precise disconnection are the keys to success.
Remember that fluorescent bulbs contain mercury and must never be tossed into regular household trash. Seek out local recycling centers or retailer take-back programs to dispose of them responsibly. With the knowledge gained from this guide, you’re now equipped to confidently tackle the task of removing any fluorescent light bulb, making way for new, brighter, and often more energy-efficient lighting solutions in your space. Good luck, and stay safe!
🎥 Related Video: How to Remove Fluorescent Light Bulbs
📺 Daddicated
How to remove fluorescent light bulbs. Learn the easy and safe way to remove fluorescent light bulbs with our step-by-step guide.
Frequently Asked Questions
Is it dangerous to remove a fluorescent light bulb?
Removing a fluorescent light bulb can be dangerous if proper safety precautions are not followed. The main risks include electrical shock if the power isn’t turned off, cuts from broken glass, and exposure to mercury vapor if the bulb shatters. However, by following safety guidelines like cutting power and wearing PPE, it’s a very safe process.
Do fluorescent bulbs contain mercury?
Yes, all fluorescent light bulbs, including linear tubes, circline bulbs, and compact fluorescent lights (CFLs), contain a small amount of mercury. This mercury is essential for their operation but requires careful handling and proper disposal to prevent environmental contamination if the bulb breaks.
How do I dispose of old fluorescent light bulbs?
Old fluorescent light bulbs should never be thrown in regular household trash due to their mercury content. You should take them to a designated household hazardous waste (HHW) collection facility, a local recycling center that accepts them, or participate in retailer take-back programs offered by some hardware stores.
What is the difference between a T8 and a T12 fluorescent bulb?
The primary difference between T8 and T12 fluorescent bulbs is their diameter. A T12 bulb is 1.5 inches (3.8 cm) in diameter, while a T8 bulb is 1 inch (2.5 cm) in diameter. T8s are generally more energy-efficient and common in newer fixtures, while T12s are typically found in older installations.
Can I use my bare hands to remove a fluorescent bulb?
It’s generally not recommended to use bare hands to remove a fluorescent bulb. Wearing gloves provides a better grip, protects your hands from potential cuts if the bulb breaks, and prevents oils from your skin from affecting the bulb’s surface, which can lead to premature failure or hot spots on new bulbs.
How often should fluorescent bulbs be replaced?
The lifespan of fluorescent bulbs varies by type and usage, but they typically last much longer than incandescent bulbs, often between 10,000 to 20,000 hours. They should be replaced when they start flickering consistently, take a long time to warm up, dim significantly, or simply fail to turn on.