Removing a light bulb that is stuck can be tricky, but it’s a manageable DIY task with the right approach. Always prioritize safety by turning off the power and wearing protective gear. This comprehensive guide provides step-by-step instructions, from gentle twisting to handling broken glass, ensuring you can safely remove a stuck light bulb and get your lights back on.
How Do You Remove a Light Bulb That Is Stuck
Ever found yourself in that frustrating predicament? You’re trying to change a dead light bulb, but it just won’t budge. You twist, you turn, you pull, but it feels like it’s fused to the socket. It’s not just annoying; it can be a little intimidating, especially if you’re worried about breaking the glass or damaging the fixture. But don’t worry, you’re not alone, and it’s a very common household challenge.
A stuck light bulb, whether it’s just tight or completely seized, doesn’t have to lead to calling an electrician or replacing an entire fixture. With the right tools, a bit of patience, and most importantly, a focus on safety, you can successfully tackle this DIY task. This comprehensive guide will walk you through everything you need to know about how do you remove a light bulb that is stuck, from understanding why it happens to step-by-step instructions for various scenarios, including when the bulb breaks.
We’ll cover essential safety precautions, the simple tools that will make your life easier, and practical techniques to free that stubborn bulb. Even if you’re dealing with a bulb that has shattered, leaving only the metal base behind, we have solutions for you. So, let’s get that light working again!
Key Takeaways
- Safety First: Always turn off power at the breaker and wear eye protection and gloves before attempting to remove a light bulb that is stuck.
- Assess the Situation: Determine if the bulb is intact, cracked, or completely shattered before choosing a removal method. This dictates your approach and necessary tools.
- Gentle Approach for Intact Bulbs: For a bulb that is stuck but still whole, try gentle twists, applying slight pressure, and using rubber gloves or a bulb changer for a better grip.
- Lubrication Can Help: A small amount of electrical contact cleaner or WD-40 (applied carefully to avoid the filament) can loosen corroded threads, making it easier to remove a light bulb that is stuck.
- Handling Broken Glass: If the bulb breaks, use pliers, needle-nose pliers, or even a potato/apple to grip the remaining metal base. Exercise extreme caution to avoid cuts.
- Clean the Socket: After successfully removing a light bulb that is stuck, clean the socket thoroughly with a non-abrasive cleaner to prevent future sticking and ensure proper electrical connection.
- Prevention is Key: Avoid overtightening bulbs, apply a thin layer of dielectric grease to threads, and periodically check fixtures to prevent bulbs from getting stuck in the future.
Quick Answers to Common Questions
How do you remove a light bulb that is stuck and won’t turn?
First, turn off the power at the breaker. Wear safety glasses and gloves. If the bulb is intact, try gripping it with rubber gloves or duct tape for better traction, and twist gently counter-clockwise. If it’s still stuck, apply a small amount of WD-40 or electrical contact cleaner to the threads and let it sit for a few minutes before trying again.
What do you do if your light bulb breaks off in the socket?
Immediately turn off the power at the circuit breaker. Don safety glasses and thick gloves. Use needle-nose pliers to grip the inside of the metal base and twist it counter-clockwise to unscrew. If the base is too broken for pliers, firmly press the cut half of a potato or apple onto the base and twist it out.
Is it safe to use WD-40 to remove a stuck light bulb?
Yes, it can be safe if used correctly and with extreme caution. Ensure the power is completely off before applying. Spray only a very small amount directly onto the threads where the bulb meets the socket, avoiding the central contact point or filament. Allow it to penetrate for a few minutes, then proceed with removal. Thoroughly wipe the socket clean after the bulb is removed.
Can a light bulb get stuck due to overtightening?
Absolutely. Overtightening is one of the most common reasons why a light bulb gets stuck. The pressure, combined with heat expansion and contraction over time, can cause the metal base to seize firmly within the socket threads, making it very difficult to unscrew.
How can I prevent light bulbs from getting stuck in the future?
To prevent future stuck bulbs, avoid overtightening new bulbs—screw them in until they are just snug. For fixtures in humid areas, apply a thin layer of dielectric grease or petroleum jelly to the threads of the bulb before installation. Also, periodically check and gently re-snug bulbs to prevent them from seizing.
📑 Table of Contents
Safety First: Your Non-Negotiable Starting Point
Before you even think about touching that stuck light bulb, safety must be your absolute priority. Working with electricity always carries risks, and a stuck bulb can escalate them if not handled correctly. Taking a few moments to prepare can prevent shocks, cuts, and further damage.
Turn Off the Power
This is the most critical step. Do not attempt to remove a light bulb that is stuck while power is still flowing to the fixture. Locate the circuit breaker box for your home and identify the breaker that controls the lighting circuit you’re working on. Flip it to the “OFF” position. If you’re unsure which breaker it is, it’s always safer to turn off the main breaker for your entire home. Confirm the power is off by trying to flip the light switch or using a non-contact voltage tester.
Protect Yourself
- Gloves: Wear thick work gloves or rubber-coated gloves. These will not only give you a better grip but also protect your hands from potential cuts if the bulb shatters.
- Eye Protection: Safety glasses or goggles are non-negotiable. If the bulb breaks, small shards of glass can fly, and protecting your eyes is paramount.
- Footwear: Avoid working barefoot or in socks. Wear sturdy, closed-toe shoes to protect your feet from any falling glass.
Allow the Bulb to Cool
If the light bulb was recently on, it will be hot, especially older incandescent or halogen types. Attempting to remove a hot bulb can lead to burns and can also make the glass more brittle, increasing the chance of it breaking. Give it at least 15-20 minutes to cool down completely before you begin.
Why Do Light Bulbs Get Stuck Anyway?
Understanding the root cause can sometimes inform your removal strategy and, more importantly, help you prevent future incidents. There are several common reasons why a light bulb might become stuck in its socket.
Overtightening
This is probably the most frequent culprit. Many people, in an effort to ensure a good connection, overtighten bulbs. Over time, the pressure combined with heat can cause the metal base of the bulb to seize within the socket threads.
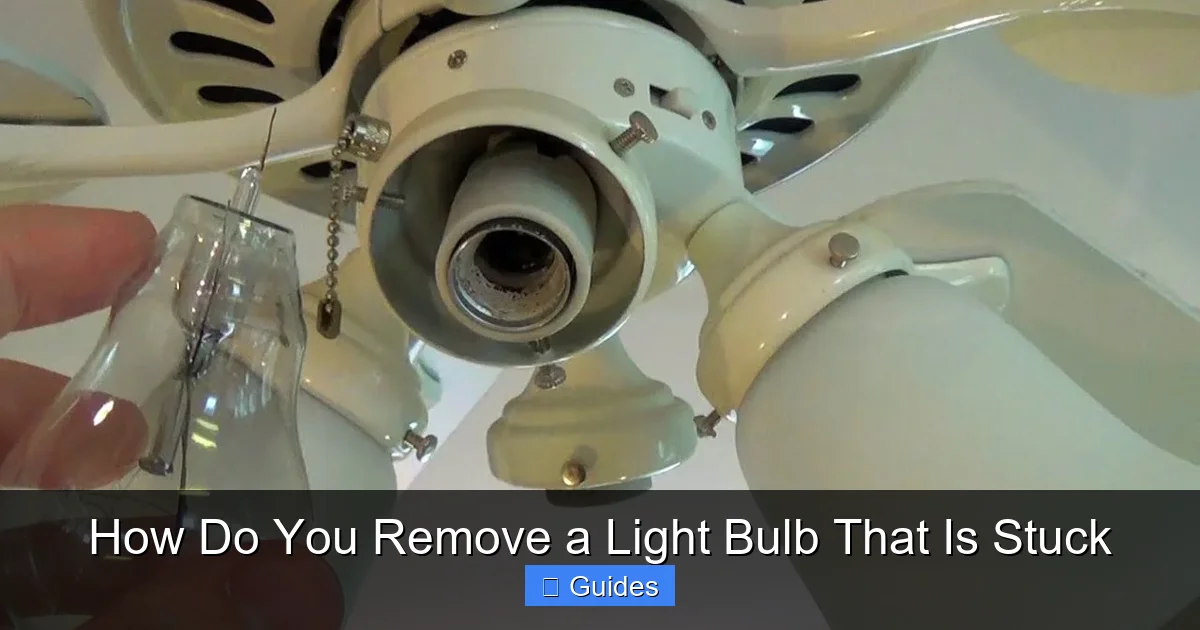
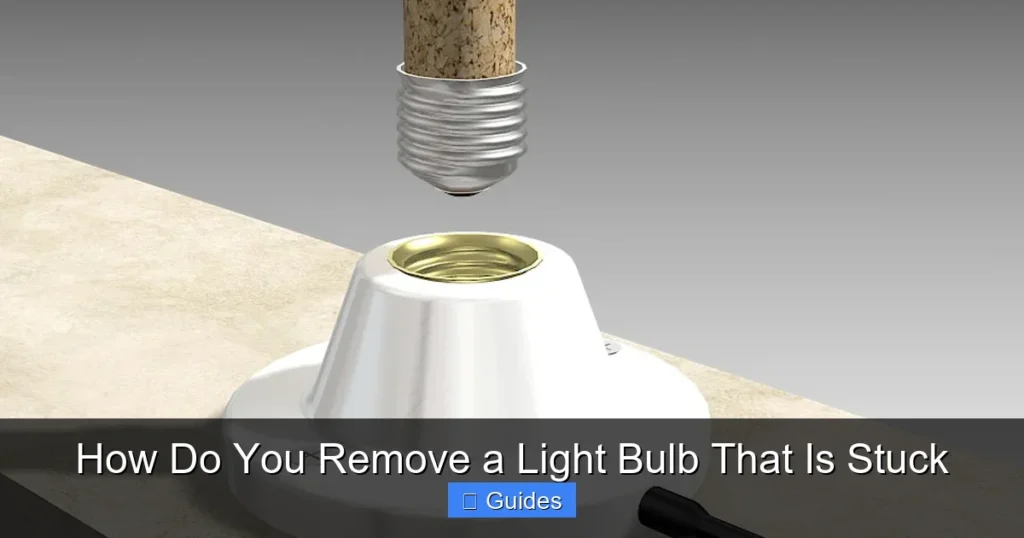
Visual guide about How Do You Remove a Light Bulb That Is Stuck
Image source: i.ytimg.com
Corrosion or Rust
Moisture, humidity, or even chemical fumes in the air can lead to corrosion or rust forming between the metal base of the bulb and the metal threads of the socket. This “welds” the two together, making it incredibly difficult to remove a light bulb that is stuck.
Heat Expansion and Contraction
Light bulbs generate heat. As the bulb heats up, its metal base expands slightly. When it cools down, it contracts. Over many cycles, this expansion and contraction can cause the bulb to ‘lock’ itself into the socket, especially if there’s any rust or dirt present.
Plastic Fatigue
Some sockets, particularly in older fixtures, might have plastic or composite components that degrade over time due to heat. This can cause the material to soften or become brittle, making removal tricky or contributing to the bulb seizing.
Gathering Your Tools: What You’ll Need
Having the right tools on hand will make the job much safer and easier. You likely have most of these items already in your home.
- Rubber Gloves or Work Gloves: For grip and protection.
- Safety Glasses: Essential for eye protection.
- Non-Contact Voltage Tester: To confirm power is off.
- Pliers (Standard and/or Needle-Nose): Crucial for gripping broken bases.
- Bulb Changer/Remover Tool: A specialized tool with a suction cup or gripping mechanism for intact bulbs (optional but very helpful, especially for recessed or high-up lights).
- WD-40 or Electrical Contact Cleaner: For lubricating corroded threads.
- Soft Cloth or Paper Towels: For cleaning and wiping.
- Potato or Apple: A surprisingly effective tool for broken bases (more on this later).
- Small Vacuum Cleaner (handheld preferred): For cleaning up glass shards.
- Dustpan and Brush: For sweeping up debris.
- New Light Bulb: Don’t forget this!
Removing an Intact But Stuck Light Bulb
If your light bulb is stuck but still in one piece, this is the best-case scenario. You can often remove it with a bit of leverage and persistence.
The Classic Twist-and-Pull
Once power is off and you’re wearing protective gear, try the standard method:
- Grip the bulb firmly with your gloved hand.
- Apply a very gentle, steady inward pressure towards the socket.
- Slowly twist the bulb counter-clockwise. Don’t force it with sudden jerks; steady pressure is key.
- If it starts to turn, continue twisting until it’s fully loose.
Sometimes, a little lateral wiggle while twisting can help break it free.
When Grip Is the Problem
Smooth glass bulbs can be hard to grip.
- Rubber Gloves: As mentioned, rubber-coated work gloves significantly improve grip.
- Bulb Changer Tool: If the bulb is recessed or hard to reach, a bulb changer with a suction cup or pincers can provide excellent grip and leverage. These tools are designed to grip various bulb shapes securely.
- Duct Tape: For a quick DIY grip aid, wrap a few layers of strong duct tape (sticky side out) around the bulb. Press firmly to ensure good adhesion, then use the excess tape to create a handle or extra grip for twisting.
Lubrication to the Rescue
If the bulb won’t budge even with a good grip, corrosion or rust is likely the culprit.
- WD-40 or Electrical Contact Cleaner: With the power OFF, spray a very small amount of WD-40 or electrical contact cleaner directly onto the threads where the bulb meets the socket. Avoid saturating the entire bulb.
- Wait: Let the lubricant penetrate for 5-10 minutes. This gives it time to work its way into the corroded threads.
- Try Again: With your gloved hand, try the twist-and-pull method once more. The lubricant should help break the corrosion bond.
- Wipe Clean: After removal, thoroughly wipe down the socket and fixture to remove any excess lubricant, which can attract dust or create a fire hazard if not cleaned.
Dealing with a Broken Light Bulb Base
This is where things can get a bit more challenging and require extra caution. If the glass bulb shatters, leaving only the metal base screwed into the socket, don’t panic. You can still remove it safely.
If Just the Glass is Gone, Base is Exposed
If the bulb has broken cleanly, leaving the metal screw-in base fully exposed, this is the easiest broken-bulb scenario.
- Power OFF and Protection ON: Reiterate safety glasses and thick gloves.
- Needle-Nose Pliers: Gently insert the tips of needle-nose pliers into the exposed metal base.
- Expand and Twist: Lightly expand the pliers to create pressure against the inside of the metal base. This helps to grip it.
- Slowly Unscrew: With a firm grip, slowly twist the base counter-clockwise. It should start to unscrew.
- Remove and Clean: Once loose, pull the base out. Vacuum up any glass shards and clean the socket.
When the Base is Partially Broken or Deeply Stuck
Sometimes, the base isn’t perfectly exposed, or it’s extremely stuck.
- Standard Pliers: If needle-nose pliers aren’t working, try standard pliers. You might need to gently crush the side of the metal base slightly inward to get a better grip. Be very careful not to apply too much pressure and damage the socket.
- Electrical Tape Method: You can try wrapping electrical tape (sticky side out) around the *inside* of the remaining base. Press it firmly against the metal. Leave a tail of tape to grab onto and twist. This creates a makeshift handle and provides friction.
- Lubrication: A very small amount of WD-40 around the outer edge of the base can still help here, but be extra cautious to apply only to the metal threads and avoid spraying into the central contact point of the socket.
The Potato/Apple Method for a Challenging Base
This might sound unusual, but it’s a time-tested trick when you need to remove a light bulb that is stuck and broken, leaving only the base.
- Safety First: Confirm power is OFF. Wear safety glasses and gloves.
- Get a Potato or Apple: Cut a potato or a firm apple in half.
- Press and Twist: Firmly press the cut side of the potato or apple onto the broken metal base. The rough surface and slight moisture of the potato/apple will mold to the shape of the base, creating an excellent grip.
- Slowly Unscrew: Once you have a good grip, slowly twist the potato/apple counter-clockwise. The base should start to unscrew.
- Remove and Discard: Once the base is out, dispose of the potato/apple and the broken base.
- Clean Thoroughly: Wipe any moisture from the socket and clean up any glass.
This method is particularly effective because it conforms to the irregular edges of a broken base and provides a non-slip surface, reducing the risk of further breakage or cuts.
Post-Removal Care and Prevention
Once that stubborn light bulb is finally out, you’re not entirely done. A little clean-up and preventative maintenance can save you a headache down the road.
Cleaning the Socket
After successfully removing the old bulb, it’s a good idea to clean the socket.
- Ensure Power is OFF: Double-check the breaker.
- Inspect for Damage: Look for any signs of corrosion, charring, or bent metal tabs inside the socket. If you see significant damage, it might be time to replace the socket or fixture itself.
- Wipe Down: Use a dry cloth or paper towel to wipe away any dust, dirt, or lubricant residue from the socket threads and central contact point. For more stubborn grime or corrosion, a cotton swab dipped in rubbing alcohol or electrical contact cleaner can be used, ensuring it dries completely before installing a new bulb.
Preventing Future Stuck Bulbs
An ounce of prevention is worth a pound of cure!
- Don’t Overtighten: When installing a new bulb, screw it in until it’s just snug. There’s no need to crank it down. A gentle twist until it’s making contact and feels stable is enough.
- Apply Dielectric Grease: For fixtures in high-humidity areas (bathrooms, outdoors) or those prone to sticking, apply a thin layer of dielectric grease or petroleum jelly to the threads of the new bulb before screwing it in. This acts as a barrier against corrosion and helps with easier removal in the future.
- Periodic Checks: Every so often, give your bulbs a gentle wiggle or slight turn. If they feel a bit tight, unscrew them a quarter turn and re-snug them. This can prevent them from seizing entirely.
When to Call in a Pro
While removing a light bulb that is stuck is often a DIY task, there are times when it’s best to call a qualified electrician.
- Damaged Socket: If, after removing the bulb, you notice significant damage to the socket itself – cracks, melted plastic, or severely bent/broken metal contacts – it needs professional attention. Attempting to install a new bulb in a damaged socket can be a fire hazard.
- Persistent Electrical Issues: If you experience flickering, buzzing, or circuit breaker trips even after removing the old bulb and before installing a new one, there might be a deeper electrical problem with the fixture or wiring.
- High or Inaccessible Fixtures: If the stuck bulb is in a fixture that’s extremely high up, awkwardly positioned, or requires specialized equipment to reach safely, don’t risk a fall. Call a professional with the right tools and expertise.
- Lack of Confidence: If you’re uncomfortable at any point, or unsure about your ability to safely handle the situation, don’t hesitate to call an electrician. Your safety is more important than saving a few dollars.
Conclusion
Dealing with a light bulb that is stuck can be a minor annoyance, but it’s a very common one. By following the steps outlined in this guide, you now have a comprehensive understanding of how do you remove a light bulb that is stuck, whether it’s intact or broken. Remember, safety is always the priority: always turn off the power, wear protective gear, and take your time.
From simple twisting techniques and the clever use of lubrication to the ingenious potato trick for broken bases, you have a toolkit of solutions at your disposal. And once that stubborn bulb is out, a little preventative care will help ensure your next bulb change is a breeze. Don’t let a stuck bulb dim your day – with a little know-how, you can quickly get your lights shining brightly again!
Frequently Asked Questions
What causes light bulbs to get stuck in their sockets?
Light bulbs primarily get stuck due to overtightening, which creates excessive pressure. Over time, heat expansion and contraction, combined with potential corrosion from humidity or dust between the bulb’s metal base and the socket’s threads, can cause them to seize together.
Can I try to remove a stuck bulb while the power is still on?
No, absolutely not. Attempting to remove a stuck light bulb while the power is on is extremely dangerous and can lead to electric shock, severe burns, or even electrocution. Always turn off the power at the circuit breaker before beginning any work on light fixtures.
What if I don’t have needle-nose pliers for a broken bulb?
If you don’t have needle-nose pliers, you can try using standard pliers by gently crushing the sides of the metal base inward to get a grip, or use the “potato/apple method.” Cut a firm potato or apple in half, press the cut side firmly onto the broken base, and twist counter-clockwise.
Should I lubricate the socket threads before installing a new bulb?
Yes, it’s a good preventative measure, especially in areas prone to humidity or corrosion. Apply a thin layer of dielectric grease or petroleum jelly to the threads of the new bulb’s base before screwing it into the socket. This helps prevent future sticking and ensures easier removal.
What if the light fixture itself is old or damaged?
If the light fixture itself appears old, corroded, cracked, or damaged in any way, or if you notice any burnt spots or frayed wires after removing the stuck bulb, it’s best to call a qualified electrician. A damaged fixture can be a significant fire hazard and should be replaced by a professional.
Are there specialized tools for removing stuck light bulbs?
Yes, there are specialized bulb remover tools available. These often feature a suction cup or gripping pincers designed to securely hold intact light bulbs, especially useful for recessed lighting or bulbs in hard-to-reach locations. They can provide better leverage and grip than bare hands or gloves.