Changing a 2-pin fluorescent light bulb is a straightforward DIY task, but safety is paramount. Always disconnect power before handling, and use proper tools and protective gear. Our comprehensive guide walks you through each step, from understanding your fixture to removing the old bulb and installing a new one, ensuring a quick and successful replacement and offering valuable troubleshooting tips for a bright, functional space.
How to Change 2 Pin Fluorescent Light Bulb
Is your kitchen flickering, your garage light refusing to turn on, or your workshop dimly lit? If you’re dealing with a fluorescent light fixture, chances are a dead bulb is the culprit. While these long, tubular lights have been a staple in homes and businesses for decades, the thought of changing one might seem a bit daunting to some. After all, they’re not your typical screw-in incandescent bulb!
But don’t fret! Learning how to change a 2 pin fluorescent light bulb is a common household task that’s much simpler than it appears. With a few basic tools and a clear understanding of the steps involved, you can restore brilliant light to your space safely and efficiently. This comprehensive guide is designed to walk you through every aspect of the process, from understanding your fixture to proper disposal, ensuring you feel confident tackling this DIY project.
Let’s demystify the process of replacing that burnt-out 2-pin fluorescent tube. We’ll cover everything you need to know to get your lights shining brightly again, safely and without hassle. Whether you’re a seasoned DIYer or just starting out, this guide will provide the practical steps and tips you need to successfully change 2 pin fluorescent light bulb in any fixture.
Key Takeaways
- Prioritize Safety: Always turn off the power at the circuit breaker before attempting to change a 2-pin fluorescent light bulb to prevent electrical shock.
- Understand Your Bulb Type: Most 2-pin fluorescent bulbs are either T8 or T12. Knowing your bulb type is crucial for purchasing the correct replacement and understanding your fixture’s components like ballasts.
- Gentle Removal and Installation: Fluorescent tubes are fragile. Use a gentle twist and pull motion for removal and a careful insertion for installation to avoid breakage.
- Troubleshooting is Key: If your new bulb doesn’t light up, common issues include a faulty starter (if present), a worn-out ballast, or simply not being seated correctly in the tombstone sockets.
- Consider LED Upgrades: Modern LED alternatives for 2-pin fluorescent bulbs offer energy efficiency and longer lifespans, often requiring a simple swap or a minor wiring adjustment.
- Proper Disposal is Important: Fluorescent bulbs contain mercury and should not be thrown in regular trash. Recycle them at designated facilities to protect the environment.
- Gather the Right Tools: Before starting, have a ladder, gloves, safety glasses, and a non-contact voltage tester ready to ensure a safe and efficient replacement process.
Quick Answers to Common Questions
How do you remove a 2-pin fluorescent light bulb?
To remove a 2-pin fluorescent light bulb, first ensure the power is off. Then, grasp the bulb firmly, gently rotate it a quarter turn (90 degrees) until the pins disengage from the tombstone sockets, and carefully pull it straight down and out.
Can I replace a T12 fluorescent bulb with a T8 LED?
Yes, you can often replace a T12 fluorescent bulb with a T8-sized LED tube, but you must ensure compatibility with your existing ballast (for “plug-and-play” LEDs) or bypass the ballast entirely (for “ballast-bypass” LEDs). Always check the LED product’s specifications.
What does it mean if my fluorescent light makes a buzzing sound?
A buzzing sound from a fluorescent light usually indicates an issue with the ballast. Older magnetic ballasts commonly buzz, especially as they age. A new or louder buzz might signal a failing ballast or loose components within the fixture.
Do I need to turn off the power at the breaker to change a fluorescent bulb?
Absolutely, yes. You must always turn off the power at the circuit breaker before attempting to change any fluorescent light bulb to prevent the risk of electrical shock. Use a non-contact voltage tester to confirm the power is off.
How do I know if my fluorescent fixture has a starter?
Older fluorescent fixtures, particularly those with magnetic ballasts, often have a separate, small cylindrical starter unit that twists into the fixture, typically near one of the bulb ends. Newer fixtures with electronic ballasts do not use a separate starter.
📑 Table of Contents
- Understanding Your 2-Pin Fluorescent Bulb and Fixture
- Safety First: Essential Precautions Before You Begin
- Step-by-Step Guide: How to Change a 2-Pin Fluorescent Light Bulb
- Troubleshooting Common Issues After Changing Your Bulb
- Upgrading to LED: A Smarter Alternative
- Proper Disposal of Old Fluorescent Bulbs
- Conclusion
Understanding Your 2-Pin Fluorescent Bulb and Fixture
Before you even think about touching the old bulb, it helps to understand what you’re working with. Fluorescent lighting systems, particularly those using 2-pin bulbs, consist of a few key components that work together to produce light. Knowing these parts will help you choose the right replacement and troubleshoot if needed.
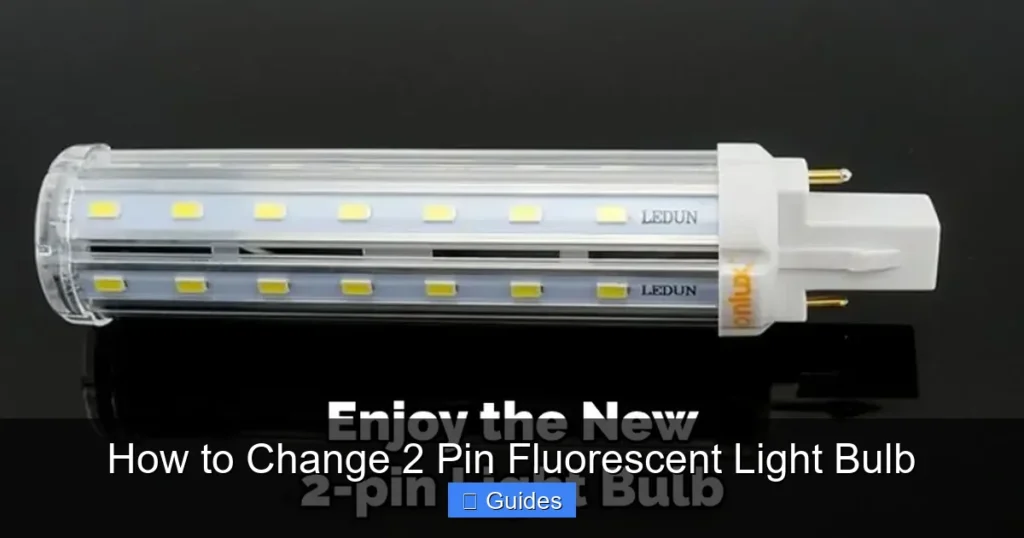
T8 vs. T12 Bulbs
The most common types of 2-pin fluorescent bulbs you’ll encounter are T8 and T12. The “T” stands for tubular, and the number refers to the diameter of the bulb in eighths of an inch. So, a T8 bulb is 1 inch in diameter (8/8ths), and a T12 bulb is 1.5 inches in diameter (12/8ths).
While they might look similar, T8 and T12 bulbs are not always interchangeable without considering the ballast. T8 bulbs are generally more energy-efficient and use electronic ballasts, while T12 bulbs often use older magnetic ballasts. The length of these bulbs also varies, typically from 2 to 8 feet. Always check the markings on your existing bulb to ensure you purchase the correct size and type when you need to change 2 pin fluorescent light bulb.
The Role of the Ballast
The ballast is a crucial component in any fluorescent light fixture. Think of it as the heart of the system. Its primary job is to provide the initial high voltage surge needed to ignite the gases inside the fluorescent tube and then to regulate the current flow, preventing the bulb from overheating and burning out prematurely.
Older T12 fixtures typically use magnetic ballasts, which can sometimes hum or buzz and are less energy-efficient. Newer T8 fixtures and many modern fluorescent lights use electronic ballasts, which are quieter, more efficient, and provide instant start-up without flickering. If your light often flickers or makes a buzzing sound, a failing ballast might be the issue, even after you successfully change 2 pin fluorescent light bulb.
Starters (If Applicable)
Some older fluorescent fixtures, particularly those with magnetic ballasts, also use a separate component called a starter. The starter helps to preheat the filaments at the ends of the tube and then momentarily opens the circuit, causing the ballast to generate the high voltage kick needed to light the bulb. If your fixture has a small, cylindrical component that twists into the fixture, that’s likely your starter. Modern electronic ballasts usually integrate the starting function, so you won’t find a separate starter in newer fixtures. If you’re trying to figure out how to change 2 pin fluorescent light bulb and it just hums or flashes once and then goes out, a bad starter could be the problem.
Safety First: Essential Precautions Before You Begin
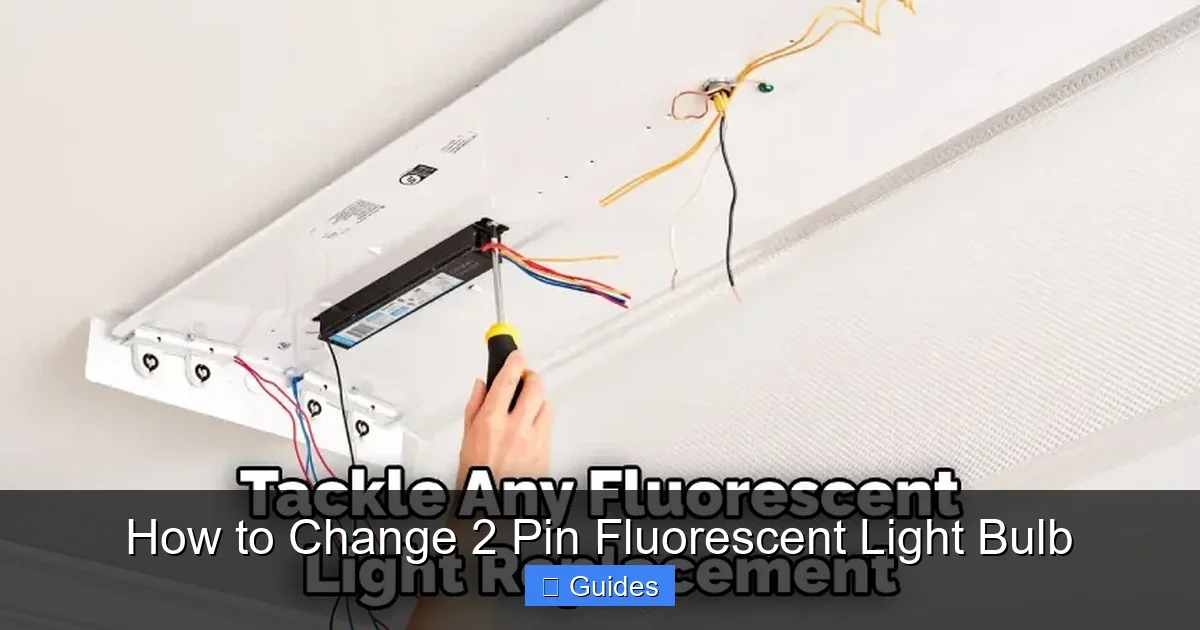
Visual guide about How to Change 2 Pin Fluorescent Light Bulb
Image source: lightenify.com
Electrical work, no matter how minor, always demands respect for safety. Before you even think about touching your fluorescent fixture, you must take the proper precautions. Safety is non-negotiable when you change 2 pin fluorescent light bulb.
Always Kill the Power!
This is the single most important step. Never attempt to remove or install a fluorescent bulb (or any electrical component) with the power still on.
1. Locate Your Circuit Breaker: Go to your home’s main electrical panel.
2. Identify the Correct Breaker: Look for the breaker that controls the lighting circuit for the room you’re working in. It might be labeled (e.g., “Kitchen Lights,” “Garage”). If not labeled, you might need to flip breakers one by one until the light in question goes out.
3. Flip the Breaker to “OFF”: Ensure it’s completely off. It’s a good practice to put a piece of tape over the breaker switch or a note indicating that you’re working on that circuit, especially if others are home.
4. Verify No Power: Before touching anything in the fixture, use a non-contact voltage tester. Touch the tip of the tester to the wiring inside the fixture or even against the tombstone sockets (the plastic holders for the bulb pins). If the tester remains silent or doesn’t light up, the power is off. If it beeps or lights up, the power is still on somewhere, and you need to investigate further.
The Right Tools for the Job
Having the right tools makes the job easier and safer.
* New Fluorescent Bulb: Make sure it’s the correct type (T8 or T12) and length.
* Ladder or Sturdy Step Stool: Essential for reaching ceiling-mounted fixtures safely.
* Gloves: Protect your hands from sharp edges, glass, and provide a better grip.
* Safety Glasses: Protect your eyes from falling dust or accidental bulb breakage.
* Non-Contact Voltage Tester: As mentioned, crucial for verifying power is off.
* Screwdriver (Phillips or Flathead): May be needed to remove a diffuser cover.
* Rag or Paper Towels: For cleaning or handling broken glass if an accident occurs.
Personal Protective Equipment (PPE)
Don’t skip on wearing gloves and safety glasses. Fluorescent bulbs, while generally safe, can shatter if dropped or handled roughly. Small glass fragments can be very sharp. Additionally, older bulbs might have dust and debris that you don’t want in your eyes. Taking these simple precautions ensures a safe environment for you while you successfully change 2 pin fluorescent light bulb.
Step-by-Step Guide: How to Change a 2-Pin Fluorescent Light Bulb
With safety first and your tools ready, you’re now prepared to tackle the actual bulb replacement. Follow these steps carefully to ensure a smooth and successful swap.
Step 1: Power Down the Fixture
As emphasized, this is paramount. Go to your electrical panel and turn off the circuit breaker that controls the light fixture. Use your non-contact voltage tester to confirm that no power is present at the fixture. This step should never be rushed or skipped.
Step 2: Gather Your Supplies
Make sure your new bulb is the correct type and size (T8 or T12, and the right length). Have your ladder, gloves, and safety glasses within reach. Place a drop cloth or old sheet on the floor below your workspace, especially if you anticipate dust or if there’s a chance of dropping something.
Step 3: Remove the Diffuser (If Present)
Many fluorescent fixtures, especially in kitchens or offices, have a plastic or acrylic cover (diffuser) that softens the light and protects the bulbs. This needs to be removed before you can access the bulbs.
* Snap-on Covers: These usually have clips along the sides that you can gently unlatch.
* Hinged Covers: Some covers hinge down and might have latches or screws holding them up on the opposite side.
* Frame-Mounted Covers: Others might be held in place by a surrounding frame, which may require unscrewing a few small screws.
Carefully set the diffuser aside in a safe place where it won’t get damaged.
Step 4: Carefully Remove the Old Bulb
This is where the technique comes in. Fluorescent bulbs are held in place by “tombstone” sockets at each end. These sockets often have a rotating or spring-loaded mechanism.
1. Grasp the Bulb Firmly: With gloved hands, hold the bulb near one end, being careful not to apply too much pressure that could cause it to shatter.
2. Rotate the Bulb: Gently rotate the fluorescent tube about a quarter turn (90 degrees). You should feel the two pins at each end disengage from the slots in the tombstone sockets.
3. Slide the Bulb Out: Once the pins are disengaged, gently pull the bulb straight down and away from the tombstone sockets. If the fixture has multiple bulbs, remove them one by one.
4. Handle with Care: Be mindful of the length of the bulb, especially if you’re on a ladder. Slowly lower it and place it in a safe spot for proper disposal. Avoid letting it swing or hit anything.
Step 5: Install the New Bulb
Now for the exciting part – getting that new light in!
1. Inspect the New Bulb: Before installing, visually inspect the new bulb for any cracks or damage.
2. Align the Pins: Hold the new bulb near one end. Carefully align the two pins on each end of the bulb with the slots in the tombstone sockets.
3. Insert Gently: Gently push the pins into the slots. You might need to compress the spring-loaded socket slightly to get both ends in.
4. Rotate to Secure: Once the pins are fully seated in the slots, gently rotate the bulb a quarter turn (90 degrees) until it locks into place. You should feel it “click” or firmly seat. Ensure the bulb is snug and straight in the fixture.
Step 6: Replace the Diffuser and Restore Power
Once the new bulb is securely in place, carefully reattach the diffuser cover. Make sure it’s properly seated and secured to prevent it from falling. Double-check any latches or screws.
Step 7: Test the New Bulb
Head back to your electrical panel and flip the circuit breaker back to the “ON” position. Return to the room and test the light switch. Your new fluorescent bulb should now light up brightly! If it doesn’t, don’t panic; proceed to the troubleshooting section.
Troubleshooting Common Issues After Changing Your Bulb
Sometimes, even after you successfully change 2 pin fluorescent light bulb, it still doesn’t work perfectly. Don’t worry, many common issues have simple solutions.
Bulb Doesn’t Light Up
* Check Power: Double-check that the circuit breaker is on and the wall switch is in the “ON” position. It sounds obvious, but it’s often overlooked.
* Reseat the Bulb: Turn off the power again, then gently remove the bulb and re-install it, ensuring the pins are fully seated and rotated correctly in the tombstone sockets. Sometimes, a loose connection is all it takes.
* Inspect Tombstone Sockets: Look for any bent pins or melted plastic in the sockets. If they look damaged, they might need replacing (a job for an electrician).
* Check the Starter (If Applicable): If your fixture uses a separate starter, try replacing it. They are inexpensive and can be a common point of failure. Turn off the power, twist out the old starter, and twist in a new one.
* Ballast Failure: If none of the above work, and you hear humming but no light, or the light flashes once and dies, the ballast might be faulty. Replacing a ballast is a more involved electrical task and often requires professional help, or it might be time to consider a new fixture.
Flickering or Dim Bulb
* New Bulb Break-In: Sometimes, brand new fluorescent bulbs might flicker slightly for the first few hours of operation as they “break in.”
* Cold Temperatures: Fluorescent bulbs perform best in moderate temperatures. In very cold environments (like an unheated garage in winter), they might flicker or appear dim until they warm up.
* Aging Ballast: A ballast on its way out can cause flickering or dimming, even with a new bulb.
* Loose Connections: Ensure the bulb is seated firmly.
Buzzing Noise
* Magnetic Ballast: Older fixtures with magnetic ballasts are notorious for humming or buzzing, especially as they age. This might be normal for your fixture type.
* Loose Fixture Components: Sometimes, a loose cover or screw in the fixture itself can vibrate and cause noise.
* Ballast Issues: If the buzzing is new or excessively loud, it could indicate a failing ballast.
Upgrading to LED: A Smarter Alternative
While knowing how to change 2 pin fluorescent light bulb is valuable, many people are now opting to upgrade their fixtures to LED technology. LEDs offer significant advantages in terms of energy efficiency, lifespan, and light quality.
Plug-and-Play LED Tubes
These are the easiest upgrade. They are designed to work directly with your existing fluorescent ballast. You simply remove the old fluorescent bulb and insert the LED tube. Always check the LED tube’s specifications to ensure it’s compatible with your ballast type (electronic or magnetic). This is a simple, no-wiring-required way to get the benefits of LED.
Ballast-Bypass LED Tubes
These LED tubes require you to remove or bypass the existing fluorescent ballast. This involves some basic wiring (connecting the line voltage directly to the tombstone sockets). While it’s a slightly more involved DIY project, bypassing the ballast eliminates a potential point of failure and makes the system even more energy-efficient, as the ballast itself consumes some power. If you’re comfortable with basic electrical wiring, this is a great long-term solution. If not, consider hiring an electrician. Always ensure the power is off when performing any wiring changes.
Proper Disposal of Old Fluorescent Bulbs
This is a critical, often overlooked step. Fluorescent bulbs contain small amounts of mercury, a hazardous material. They should *not* be thrown into your regular household trash.
* Recycling Centers: Most communities have designated recycling centers or household hazardous waste collection sites that accept fluorescent bulbs.
* Retailer Take-Back Programs: Some large hardware stores or home improvement centers offer take-back programs for used fluorescent bulbs.
* Environmental Protection Agency (EPA): Check your local EPA guidelines or website for specific disposal instructions in your area.
By disposing of old fluorescent bulbs properly, you help protect the environment and prevent mercury from entering landfills and potentially contaminating soil and water.
Conclusion
Changing a 2-pin fluorescent light bulb doesn’t have to be a complicated or intimidating task. By following the clear steps outlined in this guide – prioritizing safety, understanding your fixture, carefully removing and installing the bulb, and troubleshooting any issues – you can easily restore light to your home or workspace. Remember, the key is always to disconnect power before starting and to handle the bulbs with care.
Whether you’re sticking with traditional fluorescent tubes or exploring the benefits of an LED upgrade, you now have the knowledge and confidence to tackle this common home maintenance project. So go ahead, brighten up your space, and enjoy the satisfaction of a successful DIY job! Knowing how to change 2 pin fluorescent light bulb is a valuable skill that will save you time and money.
Frequently Asked Questions
What tools do I need to change a 2 pin fluorescent light bulb?
You’ll primarily need a new fluorescent bulb of the correct type and size, a sturdy ladder or step stool, gloves, safety glasses, and a non-contact voltage tester. A screwdriver might also be needed if your fixture has a diffuser cover secured by screws.
Why is my new fluorescent bulb flickering?
Flickering in a new fluorescent bulb can be due to a few reasons, including a “break-in” period for the bulb, cold ambient temperatures, or a failing ballast that isn’t providing stable power. Ensure the bulb is also seated correctly in its sockets.
How do I dispose of old fluorescent light bulbs?
Old fluorescent bulbs contain mercury and should not be thrown in regular trash. You should recycle them at designated household hazardous waste collection sites, local recycling centers, or through retailer take-back programs that accept fluorescent bulbs.
Can I touch a fluorescent bulb with my bare hands?
While it’s not strictly dangerous to touch the glass with bare hands, it’s generally recommended to wear gloves. Oils from your skin can leave residue on the bulb, which might affect its performance or create hot spots. Gloves also offer protection against accidental breakage.
What are “tombstone” sockets in a fluorescent fixture?
“Tombstone” sockets are the plastic holders at each end of a fluorescent light fixture where the two pins of the bulb are inserted. They are often spring-loaded or designed to allow a quarter-turn rotation of the bulb to secure it in place.
Is it worth upgrading from fluorescent to LED?
Yes, upgrading from fluorescent to LED is generally a worthwhile investment. LED tubes consume significantly less energy, last much longer, produce less heat, and often offer better light quality and instant-on functionality without flickering or buzzing. The long-term savings on energy bills and replacement costs make it a smart choice.