Changing a light bulb in your ceiling might seem daunting, but it’s a straightforward task with the right approach and proper safety measures. Always prioritize safety by turning off the power at the circuit breaker and using a stable ladder. Carefully identify your ceiling light fixture type and the correct replacement bulb, gather your tools, then follow our simple, step-by-step instructions to safely remove the old bulb and install the new one, restoring light to your space efficiently and safely.
How to Change Light Bulb in Ceiling
We’ve all been there: you flip the switch, and instead of a cheerful glow, you’re met with darkness. That familiar “pop” or gradual dimming signal means one thing – it’s time to change a light bulb in the ceiling. While it might seem like a simple task, especially if your ceiling is high or the fixture is unusual, tackling a ceiling light bulb replacement requires a bit of know-how to ensure safety and prevent frustration. But don’t worry, it’s a task anyone can master!
This comprehensive guide will walk you through every step of how to change a light bulb in ceiling, from the essential safety precautions to identifying different fixture types and troubleshooting common hiccups. Whether you’re dealing with a standard screw-in bulb, a tricky recessed light, or a long fluorescent tube, we’ve got you covered. By the end of this article, you’ll feel confident and capable, ready to bring light back into any room of your home, safely and efficiently.
Changing a light bulb in your ceiling is more than just swapping out a part; it’s about understanding your home’s electrical systems, using the right tools, and taking the necessary precautions. We’ll demystify the process, turning what might seem like a daunting chore into a quick and easy job. So, grab a cup of coffee, read through these tips, and let’s get that light working again!
Key Takeaways
- Safety First: Always turn off the power to the fixture at the circuit breaker or wall switch before attempting to change any light bulb in the ceiling to prevent electrical shock.
- Stable Support is Crucial: Use a sturdy ladder or step stool that is rated for your weight and height. Never stand on unstable furniture to reach a ceiling light.
- Identify Your Fixture Type: Different ceiling light fixtures (standard screw-in, recessed, fluorescent tube, bi-pin, track lighting) require specific methods for bulb removal and installation. Knowing your type prevents damage.
- Have the Right Tools and Bulb: Ensure you have the correct replacement bulb (matching wattage, base, and type), gloves, safety glasses, and potentially a screwdriver or a specialized bulb changer for recessed or high-reach fixtures.
- Handle with Care: Support glass covers, gently twist bulbs counter-clockwise to remove and clockwise to install. Avoid over-tightening and allow hot bulbs to cool before touching them.
- Troubleshoot Common Issues: Be prepared for stuck or broken bulbs by having pliers or a potato on hand. If a new bulb doesn’t work, check power, connections, and bulb compatibility.
- Consider LED Upgrades: When changing a light bulb in the ceiling, consider upgrading to energy-efficient LED bulbs for longer life and lower energy consumption, but ensure they are compatible with your fixture.
Quick Answers to Common Questions
Can I change a light bulb in ceiling without turning off the power?
No, absolutely not. Always turn off the power at the circuit breaker or fuse box to prevent electrical shock, which can be dangerous or even fatal.
What if the light bulb is stuck in the ceiling fixture?
First, ensure the power is off. Wear gloves or use a rubber jar opener for better grip. Apply firm, consistent counter-clockwise pressure while gently wiggling the bulb to loosen it. For very stubborn bulbs, a small amount of penetrating oil around the base (carefully, with power off) might help.
How do I know what type of replacement light bulb to buy?
Check the old bulb itself for wattage, voltage, and base type (e.g., E26, GU10). If the old bulb is gone, look for a sticker inside the fixture or consult your fixture’s manual for specifications. When in doubt, take a photo of the fixture and base to the store.
Is it safe to touch a hot light bulb?
No, you should never touch a hot light bulb with bare hands. Incandescent and halogen bulbs, especially, can reach very high temperatures and cause severe burns. Always allow the bulb to cool down completely before attempting to remove it.
What’s the main difference between a CFL and an LED bulb for ceiling lights?
LED bulbs are generally more energy-efficient and last significantly longer than CFLs, consuming less power for the same light output. LEDs also reach full brightness instantly and don’t contain mercury, unlike CFLs, making them a more environmentally friendly and convenient choice for changing a light bulb in ceiling.
📑 Table of Contents
1. Safety First! Your Non-Negotiable Pre-Steps
Before you even think about touching that ceiling light fixture, safety must be your absolute top priority. Electricity is powerful, and taking shortcuts can lead to serious injury. Think of these steps as your essential pre-flight checklist for changing a light bulb in ceiling.
Turn Off the Power: The Golden Rule
The single most important step when you need to change a light bulb in ceiling is to cut the power to the fixture. This prevents accidental electrical shocks, which can be dangerous or even fatal.
- At the Wall Switch: First, flip the wall switch controlling the light fixture to the “off” position. This is a good initial step, but it’s not enough on its own.
- At the Circuit Breaker: Head to your home’s electrical panel (usually in a basement, garage, or utility closet). Locate the breaker that controls the room or specific light fixture you’re working on. It should be labeled, but if not, you might need to flip breakers one by one until the light (if still partially working) goes out. Once identified, flip the breaker to the “off” position. Consider placing a piece of tape over the switch or a “DO NOT TOUCH” sign if others are in the house.
- Test for Power: To be absolutely sure, if you have a non-contact voltage tester, briefly touch it to the light fixture. If it doesn’t light up or beep, the power is indeed off. If you don’t have one, proceed with caution and assume it’s still live if unsure, going back to the breaker.
Choose the Right Ladder or Step Stool
Reaching a ceiling light safely requires a stable platform. Do NOT stand on chairs, wobbly boxes, or anything that isn’t designed for climbing.
- Stability is Key: Use a sturdy step stool for lower ceilings or an A-frame ladder for higher ones. Ensure the ladder is fully opened and locked into place.
- Proper Height: Choose a ladder that allows you to comfortably reach the fixture without having to overextend or stand on the very top rung. Your head should be slightly below the ceiling for easy access.
- Secure Placement: Place the ladder on a flat, level surface. If you’re on uneven ground, consider having someone spot the ladder for you.
Personal Protective Equipment (PPE)
A few simple items can provide significant protection.
- Gloves: Wearing work gloves (especially those with a good grip) can protect your hands from sharp edges, hot bulbs, or broken glass. They also help with a better grip on a slippery bulb.
- Eye Protection: Safety glasses or goggles are highly recommended, especially when working with older bulbs that might shatter, or if dust and debris could fall from the fixture.
- Wait for Cooling: If the bulb has been on recently, allow it to cool down completely before touching it. Hot bulbs can cause severe burns. Incandescent and halogen bulbs get particularly hot.
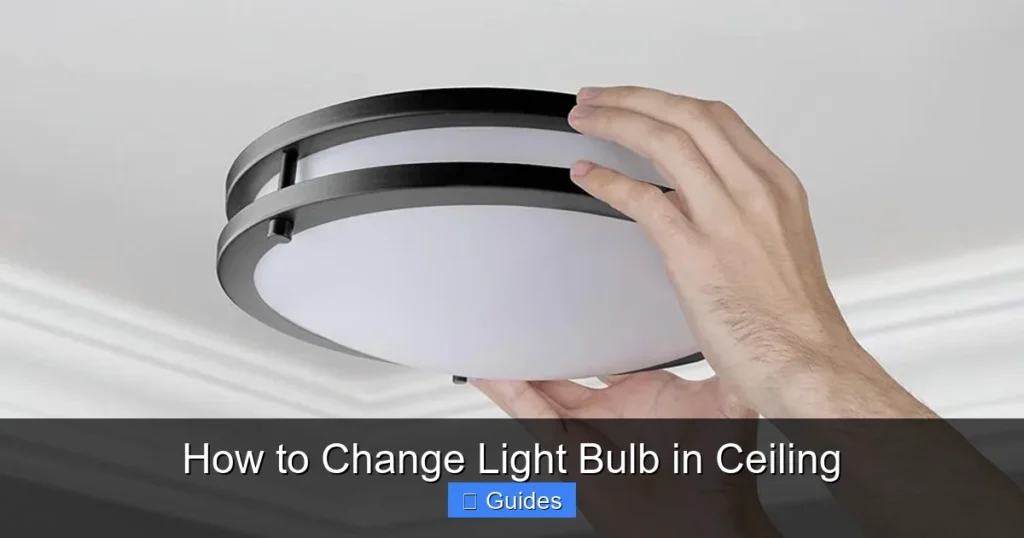
2. Identifying Your Ceiling Light Fixture Type
Visual guide about How to Change Light Bulb in Ceiling
Image source: guide-images.cdn.ifixit.com
Before you can confidently change a light bulb in ceiling, you need to understand what kind of fixture you’re dealing with. Different fixtures use different bulbs and have unique ways of securing them. Misidentifying can lead to frustration or even damage. Take a good look at your ceiling light and compare it to these common types.
Standard Screw-In (Incandescent, CFL, LED)
This is the most common and probably the easiest type. These fixtures usually have a visible bulb that screws into a socket.
- Appearance: Often found in pendant lights, flush mount fixtures (where a glass cover is directly against the ceiling), or bare bulb fixtures.
- Bulb Types: Originally designed for incandescent bulbs, these sockets now accommodate compact fluorescent lamps (CFLs) and screw-in LED bulbs. The base is usually an E26 (standard US) or E27 (standard EU) medium screw base.
Recessed Lighting (Pot Lights/Can Lights)
These fixtures are installed directly into the ceiling, creating a sleek, flush look.
- Appearance: The light source is “recessed” into a can-shaped housing in the ceiling. You might see a trim ring and then the bulb within.
- Bulb Types: Often use PAR (Parabolic Aluminized Reflector) or BR (Bulged Reflector) bulbs, GU10 bi-pin twist-lock bulbs, or sometimes standard screw-in bulbs. Some newer LED recessed lights have integrated LEDs where the entire fixture is replaced.
- Covers: Some recessed lights have a glass or plastic cover over the bulb that needs to be removed first (often held by spring clips or a twist mechanism).
Track Lighting
Track lighting consists of individual light heads attached to a track, allowing for adjustable positioning.
- Appearance: A linear track (often metal) with multiple small light fixtures “tracking” along it.
- Bulb Types: Commonly use GU10, MR16 (multi-faceted reflector) bi-pin bulbs, or small screw-in candelabra bulbs.
Fluorescent Tube Lights
These fixtures provide broad, even illumination and are common in kitchens, garages, and utility areas.
- Appearance: Long, cylindrical glass tubes (T8, T12, etc.) that fit into a fixture with pins on each end. They may have a plastic diffuser cover.
- Bulb Types: Fluorescent tubes come in various lengths and diameters, identified by a “T” followed by a number (e.g., T8, T12). They require a specific ballast in the fixture to operate.
Halogen Capsule/Bi-Pin Bulbs
Small, bright bulbs often found in specialty fixtures, under-cabinet lighting, or decorative pendants.
- Appearance: Tiny glass capsules or bulbs with two small pins at the base (e.g., G4, G9, GZ4, MR16).
- Bulb Types: These can be tricky due to their small size and the need to avoid touching the glass with bare hands (oils from skin can cause premature failure).
Integrated LED Fixtures (When *Not* to Change)
Modern LED technology sometimes means the light source isn’t a “bulb” you can unscrew.
- Appearance: Often very sleek, low-profile fixtures where there’s no obvious bulb to remove. The LEDs are built directly into the fixture itself.
- Replacement: If your fixture specifies “integrated LED” and there’s no visible bulb socket, you usually can’t simply change a light bulb in ceiling. Instead, the entire fixture or a specific LED module needs to be replaced. Consult the manufacturer’s instructions or a qualified electrician.
3. Gathering Your Tools and Supplies
Once you’ve safely cut the power and identified your fixture type, it’s time to gather everything you’ll need. Having all your tools ready before you start climbing that ladder will make the process much smoother and safer. It’s frustrating to be halfway through changing a light bulb in ceiling only to realize you need another tool!
The New Light Bulb
This is the most critical item!
- Match the Type: Ensure the new bulb matches the old one in terms of base type (screw-in, bi-pin, fluorescent), size, and voltage.
- Check Wattage: Always match or go *below* the fixture’s maximum recommended wattage. Over-wattage can overheat the fixture, posing a fire risk. This information is usually printed on the fixture itself or on a sticker inside.
- Consider LED: If replacing an incandescent or CFL, consider an LED equivalent. They are energy-efficient, last much longer, and often provide better light quality. Just ensure the LED bulb is “dimmable” if your fixture is on a dimmer switch.
Ladder or Step Stool
As discussed in the safety section, a stable platform is non-negotiable.
Gloves and Eye Protection
To protect your hands and eyes from cuts, heat, or debris.
Screwdriver (Various Types)
You might need a screwdriver if there’s a cover or trim that needs to be removed.
- Phillips-head: For screws with a cross-shaped indentation.
- Flathead: For screws with a single slot.
- Small electrical screwdriver: For delicate work or very small screws, common in track lighting or specialty fixtures.
Pliers (Needle-nose, Regular)
Useful for gripping stubborn bulb bases, bending small wires, or extracting broken bulb remnants.
Cloth or Paper Towels
For cleaning the fixture or wiping away dust. Also useful for gripping slippery bulbs or protecting your hand if a bulb breaks.
Bulb Changer/Gripper Tool
For recessed lights or very high ceilings, a specialized pole-mounted bulb changer can be a lifesaver. These tools often have suction cups or gripping mechanisms to remove bulbs without a ladder.
4. Step-by-Step Guide to Changing Your Ceiling Light Bulb
Now that all your preparations are complete, you’re ready to learn how to change a light bulb in ceiling, step-by-step, for various common fixture types. Remember to stay calm and gentle.
Step-by-Step for Standard Screw-In Bulbs (Most Common)
This applies to flush mounts, pendant lights, and any fixture with a visible screw-in bulb.
- Ensure Power is Off: Double-check the breaker.
- Access the Bulb: If there’s a glass shade or cover, carefully remove it. Many are secured by small thumbscrews, a decorative finial, or spring clips. Support the glass with one hand as you loosen the fasteners. Place the cover somewhere safe.
- Remove the Old Bulb: Grip the old bulb firmly (with gloves if preferred) and turn it counter-clockwise. It should loosen easily. If it’s stiff, gentle, consistent pressure should work.
- Inspect the Socket: Briefly look into the socket for any signs of corrosion or damage. If you see any, consult an electrician.
- Install the New Bulb: Take your new bulb and gently screw it into the socket clockwise. Tighten it just until it’s snug – *do not* over-tighten, as this can make it difficult to remove next time or damage the socket.
- Replace the Cover: Carefully reattach the glass shade or cover, securing it exactly as you removed it.
- Restore Power and Test: Go back to your circuit breaker, flip it on, then turn on the wall switch. Enjoy your light!
Step-by-Step for Recessed Lighting Bulbs
Recessed lights can be a bit trickier due to their various holding mechanisms.
- Ensure Power is Off: Critical for safety.
- Remove the Trim/Bulb:
- Spring Clips: Many recessed bulbs are held by two metal spring clips that push into the sides of the can. Gently pull the bulb (or its trim ring) straight down, and the clips will release.
- Friction Fit: Some bulbs are simply held by friction in the socket. Pull straight down.
- Twist & Lock (GU10/Bi-Pin): For GU10 bulbs, push the bulb slightly upwards into the socket, then twist counter-clockwise about a quarter turn and pull down.
- Suction Cup Tool: If the bulb is flush or hard to grip, a suction cup bulb changer on a pole can be invaluable. Press it firmly onto the bulb’s face, twist, and pull.
- Glass Cover: If there’s a glass lens over the bulb, you’ll need to remove the entire trim assembly first. Look for spring clips that hold the trim into the can. Pull down gently, disconnect any wiring if necessary (usually a quick plug-in), then remove the bulb.
- Remove the Old Bulb: Once the bulb is exposed, unscrew it counter-clockwise (for screw-in types) or follow the twist/pull method for bi-pin bulbs.
- Install the New Bulb:
- Screw-in: Screw the new bulb in clockwise until snug.
- GU10/Bi-Pin: Align the pins with the holes in the socket, push up slightly, and twist clockwise a quarter turn until it locks.
- Reattach Trim/Cover: Push the trim assembly back into the can, ensuring any spring clips securely hold it in place.
- Restore Power and Test: Flip the breaker and wall switch back on.
Step-by-Step for Fluorescent Tube Bulbs
Long tubes require a specific technique.
- Ensure Power is Off: Absolutely essential.
- Remove the Diffuser (if present): Many fluorescent fixtures have a plastic cover. Gently squeeze the sides or slide it out of its tracks to remove it.
- Remove the Old Tube: Grip the fluorescent tube near one end. Rotate the tube about 90 degrees (a quarter turn) so the pins at the ends disengage from the slots in the tombstone holders. Then, gently pull the tube straight down and out of the fixture.
- Install the New Tube: Align the pins of the new tube with the slots in the tombstone holders on both ends of the fixture. Push the pins into the slots, then rotate the tube 90 degrees until it clicks into place and feels secure.
- Replace the Diffuser: Carefully reattach the plastic cover.
- Restore Power and Test: Flip the breaker and wall switch. Fluorescent lights might flicker for a moment before fully lighting up.
Step-by-Step for Bi-Pin/Halogen Capsule Bulbs (G4, G9, MR16, etc.)
These small bulbs are delicate.
- Ensure Power is Off: Always.
- Remove Protective Cover (if present): Some fixtures have a glass shield that protects these bulbs. Carefully remove it by twisting or unclipping.
- Remove the Old Bulb:
- Push-in (G4, G9): Simply grip the bulb (use a cloth or glove to avoid skin oils) and pull it straight out of its socket.
- Twist & Pull (GU10, MR16): For GU10, push up slightly and twist counter-clockwise. For MR16s, they usually pull straight out after a retaining clip is opened or springs are compressed.
- Install the New Bulb:
- Push-in: Align the pins of the new bulb with the holes in the socket. Gently push the bulb straight in until it’s fully seated. Avoid touching the glass capsule with bare hands as oils can create hot spots and shorten bulb life. Use the packaging or a clean cloth to handle it.
- Twist & Lock: For GU10, align pins, push up, and twist clockwise.
- Replace Protective Cover: Reattach any covers.
- Restore Power and Test: Turn the power back on and check the light.
Step-by-Step for Track Lighting Bulbs
Similar to recessed, but often more accessible.
- Ensure Power is Off: Always!
- Remove the Old Bulb: Depending on the bulb type (GU10, MR16, small screw-in), follow the removal instructions for that specific bulb as listed above. You might need to rotate the track head to access the bulb easily.
- Install the New Bulb: Insert the new bulb following the specific installation method for its type.
- Restore Power and Test: Turn the power back on.
5. Troubleshooting Common Issues and Pro Tips
Even when you know how to change a light bulb in ceiling, things don’t always go perfectly. Here are some common problems you might encounter and how to deal with them, along with some helpful tips.
Stuck Bulbs
Sometimes a bulb is just too tight or has corroded in the socket.
- Use Grip: Wear rubber-palmed work gloves or use a rubber jar opener for extra grip.
- Gentle Wiggling: Apply firm, constant counter-clockwise pressure while gently wiggling the bulb.
- Lubricant (Carefully): For extremely stuck bulbs (and *only* if the power is off and the fixture is completely dry), a tiny spray of WD-40 or a similar penetrating oil around the base of the bulb can sometimes help. Wait a few minutes, then try again. Clean thoroughly afterward to prevent fire hazards.
Broken Bulbs
A bulb can shatter, leaving the metal base stuck in the socket. This is dangerous!
- POWER OFF: Emphasizing again – ensure the power is absolutely off at the breaker.
- Gloves and Eye Protection: Essential for this task.
- Needle-nose Pliers: Carefully use needle-nose pliers to grasp the metal base from the inside and twist it counter-clockwise to remove.
- The Potato Trick: If the base is too far in for pliers, push the cut end of a raw potato firmly into the broken base, twist counter-clockwise, and pull out. The potato will grip the shards and metal. Discard the potato and glass safely.
- Vacuum: Use a handheld vacuum to clean up any glass shards.
Bulb Doesn’t Light Up After Changing
Don’t panic! It could be a simple fix.
- Check Power: Is the circuit breaker on? Is the wall switch on?
- Re-seat the Bulb: Gently unscrew and re-screw the bulb, ensuring it’s snug but not over-tightened. For bi-pin bulbs, remove and re-insert.
- Try Another Bulb: The new bulb might be faulty. Try it in another working fixture, or try a known good bulb in the current fixture.
- Check Fixture: Inspect the socket for corrosion or bent tabs. You might be able to gently bend a contact tab up with a non-conductive tool (with power OFF!) to improve contact. If the fixture itself seems damaged, it might need replacement or professional repair.
Choosing the Right Bulb Wattage and Type
Always refer to the fixture’s maximum wattage rating. Going over can cause overheating and damage. When changing a light bulb in ceiling, this is a crucial safety factor.
- Lumens vs. Watts: For modern LED bulbs, focus on lumens (brightness) rather than watts (energy consumption). An LED that uses 10 watts might provide the same light as a 60-watt incandescent.
- Color Temperature (Kelvin): Decide on the light “color” you prefer:
- 2700K-3000K: Warm White (like traditional incandescents, cozy)
- 3500K-4000K: Neutral White (brighter, good for kitchens/workspaces)
- 5000K-6500K: Daylight (very bright, blue-ish, good for task lighting or simulating natural light)
- Dimmability: If your fixture is on a dimmer switch, make sure your new LED or CFL bulb is explicitly labeled “dimmable.” Standard LEDs will often flicker or hum on a dimmer.
Cleaning Your Fixture
While you’re up there, take a moment to clean the fixture.
- Dust and Debris: Wipe down glass covers, trim rings, and the inside of the fixture with a damp cloth (ensure fixture is off and dry). This improves light output and prevents dust buildup.
- Bugs: It’s common for small bugs to collect inside enclosed fixtures. Clean them out!
Changing a light bulb in your ceiling is a maintenance task that becomes effortless with practice. By following these guidelines, you ensure that every replacement is safe, efficient, and effective.
Conclusion
Congratulations! You now have a comprehensive understanding of how to change a light bulb in ceiling, no matter the type of fixture you encounter. From the initial critical step of cutting the power to the nuances of handling different bulb types and troubleshooting common issues, you are equipped with the knowledge to safely and effectively restore light to any room.
Remember, safety is paramount. Always double-check that the power is off, use a stable ladder, and wear appropriate protection. By taking a methodical approach, you can confidently tackle this common household task, ensuring your home remains well-lit and comfortable. Don’t let a burnt-out bulb leave you in the dark – empower yourself with this guide and keep your home shining bright!
Frequently Asked Questions
How often should I change a light bulb in ceiling?
The frequency depends heavily on the bulb type and usage. Traditional incandescent bulbs last about 750-2,000 hours, CFLs around 8,000-10,000 hours, while LED bulbs can last significantly longer, often 25,000-50,000 hours or more, meaning years of use without needing a replacement.
What if my ceiling light fixture is very high and I can’t reach it with a standard ladder?
For very high ceilings, consider using a telescoping ladder, an articulating ladder, or a specialized pole-mounted bulb changer with a suction cup or gripper attachment. These tools allow you to remove and install bulbs from the ground, eliminating the need for excessively tall ladders.
Can I use a higher wattage bulb for more light when changing a light bulb in ceiling?
No, you should never exceed the maximum wattage recommended by the fixture manufacturer. Using a higher wattage bulb can cause the fixture to overheat, potentially damaging the wiring, melting insulation, and creating a fire hazard. Always match or go below the specified wattage.
How do I dispose of old light bulbs properly?
Incandescent and halogen bulbs can generally be disposed of in regular household trash. However, Compact Fluorescent Lamps (CFLs) and fluorescent tubes contain small amounts of mercury and should be recycled at designated collection points or household hazardous waste facilities. LED bulbs are generally safe for regular trash, but recycling them is often preferred to recover valuable materials; check local guidelines.
My new bulb isn’t working after I changed the light bulb in ceiling, what could be wrong?
First, double-check that the power is on at both the wall switch and the circuit breaker. Ensure the bulb is screwed in snugly but not overtightened. The new bulb itself might be faulty, so try it in another fixture or try a known-good bulb in the problem fixture. Sometimes, the fixture’s socket can be corroded or damaged, requiring professional attention.
Are all LED bulbs compatible with old ceiling light fixtures?
Most screw-in LED bulbs are designed to be “retro-fit” and are compatible with standard incandescent sockets. However, if your fixture has a dimmer switch, you must use an LED bulb specifically labeled “dimmable.” Also, very old or specialized fixtures might have specific voltage or ballast requirements, so always check the fixture’s specifications and the bulb’s compatibility before purchasing.