Replacing a pool light bulb might seem daunting, but it’s a manageable DIY project with the right precautions. Always prioritize safety by turning off the power at the breaker before starting, and gather essential tools like a new bulb, gasket, and screwdriver. Following our detailed steps will ensure you successfully change your pool light bulb and enjoy a beautifully illuminated swimming experience once again.
There’s nothing quite like the inviting glow of a swimming pool at night, transforming your backyard into a serene oasis. But what happens when that magical light flickers, dims, or simply goes out? Don’t let a burnt-out bulb cast a shadow over your evening swims! While the idea of tackling electrical work near water might sound intimidating, knowing how to change pool light bulb is actually a very achievable DIY task for most homeowners.
Replacing your pool light bulb can save you money on professional service calls and give you a great sense of accomplishment. With the right tools, a clear understanding of the steps, and, most importantly, a steadfast commitment to safety, you can restore your pool’s nighttime brilliance. Let’s dive in and light up your pool again!
Key Takeaways
- Safety First: Always turn off the circuit breaker for your pool light before starting any work to prevent electrical shock.
- Gather the Right Tools: You’ll need a new bulb (matching type and wattage), a new gasket, a screwdriver, and potentially silicone lubricant or sealant.
- Handle with Care: Pool light fixtures are delicate. Pull them gently from the niche and handle the wiring carefully to avoid damage.
- Replace the Gasket: A new gasket is crucial for preventing water from entering the fixture and causing shorts or corrosion. Never reuse the old one.
- Test for Leaks: After reassembly, submerge the fixture briefly before fully reinstalling it to check for any air bubbles, indicating a leak.
- Consider LED Upgrades: While changing a traditional bulb, consider upgrading to an LED for greater longevity, energy efficiency, and vibrant color options.
Quick Answers to Common Questions
Do I need to drain my pool to change the light bulb?
No, in most cases, you do not need to drain your pool. Pool light fixtures are designed with enough cord slack to be pulled onto the deck for bulb replacement while the pool remains full.
How do I know what kind of bulb to buy?
Check the wattage, voltage (12V or 120V), and type (incandescent, halogen, or LED) of your existing bulb or the label on your light fixture. Always purchase a new bulb that matches these specifications and is rated for underwater pool use.
Why is replacing the gasket so important?
The gasket creates a watertight seal, preventing water from entering the light fixture. Reusing an old gasket risks leaks, which can damage the new bulb, corrode the fixture, or create an electrical hazard, so always install a new one.
What if my pool light still doesn’t work after changing the bulb?
First, double-check the circuit breaker and light switch. If they are on, inspect the bulb to ensure it’s fully screwed in. If the issue persists, there might be a wiring problem, a faulty socket, or a malfunctioning transformer, in which case it’s best to call a professional.
Can I upgrade to an LED bulb from an incandescent one?
Yes, often you can! LED pool bulbs are more energy-efficient and last longer. Just ensure the LED replacement bulb is compatible with your fixture’s voltage (12V or 120V) and fits correctly. Some systems may require a new transformer if converting from 120V incandescent to 12V LED, so always check manufacturer specifications.
📑 Table of Contents
Safety First: Essential Precautions Before You Begin
Working with electricity and water demands your utmost attention to safety. This isn’t a step to rush or overlook. Seriously, your well-being depends on it!
Turn Off the Power – Absolutely Critical!
This is the most crucial step in learning how to change pool light bulb. You absolutely must turn off the power to your pool light at the circuit breaker. Don’t just flip a light switch; go to your main electrical panel, often located near your pool equipment or in your garage. Look for the breaker labeled “Pool Light,” “Pool Pump,” or “Lighting.” If you’re unsure which one it is, turn off the main breaker for your entire pool system to be safe. It’s always better to be overly cautious than to risk electrical shock.
- Locate Your Breaker Box: Find the electrical panel that controls your pool equipment.
- Identify the Correct Breaker: Look for a breaker specifically marked for your pool light. If unsure, trip the main breaker for the entire pool system.
- Confirm Power is Off: A non-contact voltage tester can provide extra assurance. Touch it to the light fixture (if accessible without getting wet) or even a nearby outlet controlled by the same breaker to ensure no power is flowing.
Once you’ve flipped the breaker, consider placing a piece of tape or a “DO NOT OPERATE” sign over it. This prevents anyone from accidentally turning the power back on while you’re working.
Working with Water and Electricity
Even with the power off, you’re still working in an environment where water is present. Keep your work area as dry as possible. Avoid touching metal parts of the fixture with wet hands. Wearing rubber-soled shoes can also add an extra layer of insulation.
Wear Protective Gear
While not strictly necessary for every step, wearing work gloves can protect your hands from sharp edges or minor scrapes. Safety glasses are always a good idea when dealing with anything that might crack, break, or splash. Old pool light bulbs can be surprisingly fragile, and you don’t want glass fragments in your eyes.
Gathering Your Tools and Supplies
Preparation is key for any successful DIY project, and knowing how to change pool light bulb is no exception. Having all your materials ready before you start will make the process much smoother and prevent frustrating interruptions.
Visual guide about How to Change Pool Light Bulb
Image source: i.ytimg.com
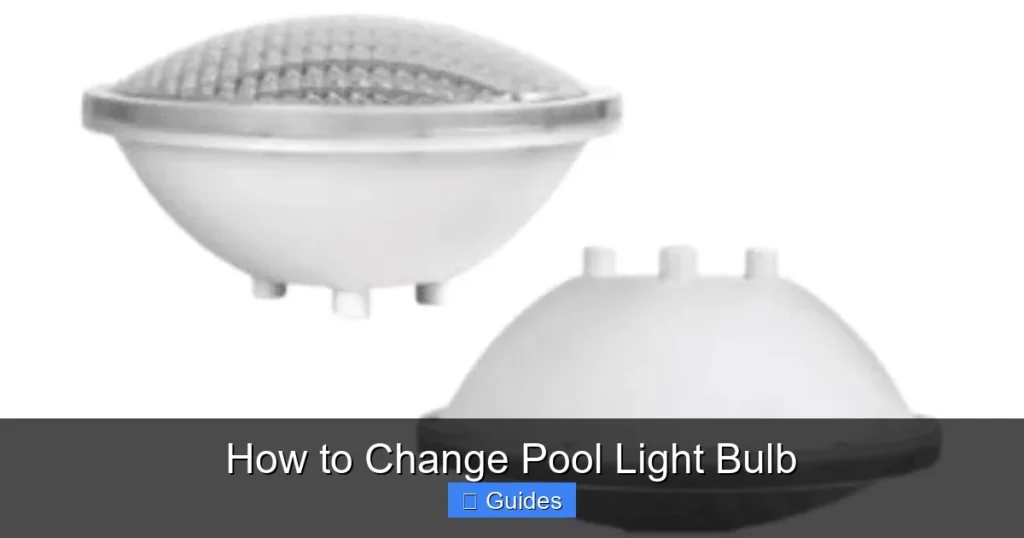
The New Pool Light Bulb
This might seem obvious, but getting the *right* new bulb is paramount. Pool lights come in various types, wattages, and voltages. Check your existing bulb or the light fixture’s specifications for this information.
- Type: Is it incandescent (traditional filament), halogen, or LED? If you’re replacing an older incandescent or halogen bulb, consider upgrading to an LED bulb. LEDs are more energy-efficient, last much longer, and often offer vibrant color-changing options. Just make sure the LED bulb you choose is designed for *your specific fixture* and is rated for underwater use.
- Wattage: Match the wattage of your old bulb precisely, or ensure your new LED bulb’s equivalent wattage doesn’t exceed the fixture’s maximum rating. Over-wattage can overheat and damage the fixture or wiring.
- Voltage: Most pool lights are 12V (low voltage) or 120V (standard household voltage). Confirm this on your old bulb or fixture. Installing a 120V bulb in a 12V system won’t work, and installing a 12V bulb in a 120V system will cause it to burn out instantly.
When purchasing, ensure the bulb is specifically marked for “pool” or “spa” use and is submersible. Generic outdoor bulbs are not suitable.
Essential Tools
- Screwdriver: You’ll likely need a Phillips-head screwdriver, possibly a flat-head, to remove the single screw that holds the light fixture in its niche.
- New Gasket/O-Ring: This is arguably as important as the new bulb! The gasket creates a watertight seal for your fixture. They degrade over time and *must* be replaced every time you open the fixture. Do not reuse the old gasket. Make sure you get the correct size and shape for your specific light fixture model. Often, a new gasket comes with the bulb, but always check.
- Silicone Lubricant or Sealant: A small amount of silicone-based lubricant applied to the new gasket can help create a better seal and make reassembly easier. Some fixtures might require a specific sealant.
- Towels: For drying hands and cleaning the fixture.
- Bucket or Small Tub: Useful for draining water from the light fixture once it’s out of the niche.
- Wire Brush or Cleaning Cloth: For cleaning the gasket channel and fixture interior.
Optional, but Helpful
- Non-Contact Voltage Tester: For extra peace of mind to confirm the power is off.
- Wet/Dry Vacuum: If you need to lower the water level slightly (though often not necessary).
- Flashlight or Headlamp: Can be useful for seeing into the niche, especially if it’s dark outside.
The Step-by-Step Process of Removing the Old Light
With safety measures in place and your tools gathered, you’re ready to carefully remove the existing light fixture. Patience is key here to avoid damaging your equipment.
No Need to Drain Your Pool (Usually!)
A common misconception is that you need to drain your pool to change the light bulb. For most modern pool lights, this isn’t the case! Pool light fixtures are designed to be pulled out of a recessed niche while the pool is full. The power cord typically has enough slack (around 8-10 feet) to allow you to bring the fixture onto the deck.
However, if your pool light cord is too short, or if the light niche is unusually deep, you might need to lower the water level slightly. You can do this by running your pool filter on “waste” or by using a submersible pump. Lower the water just enough so the light fixture is about 6-12 inches above the water line when pulled onto the deck.
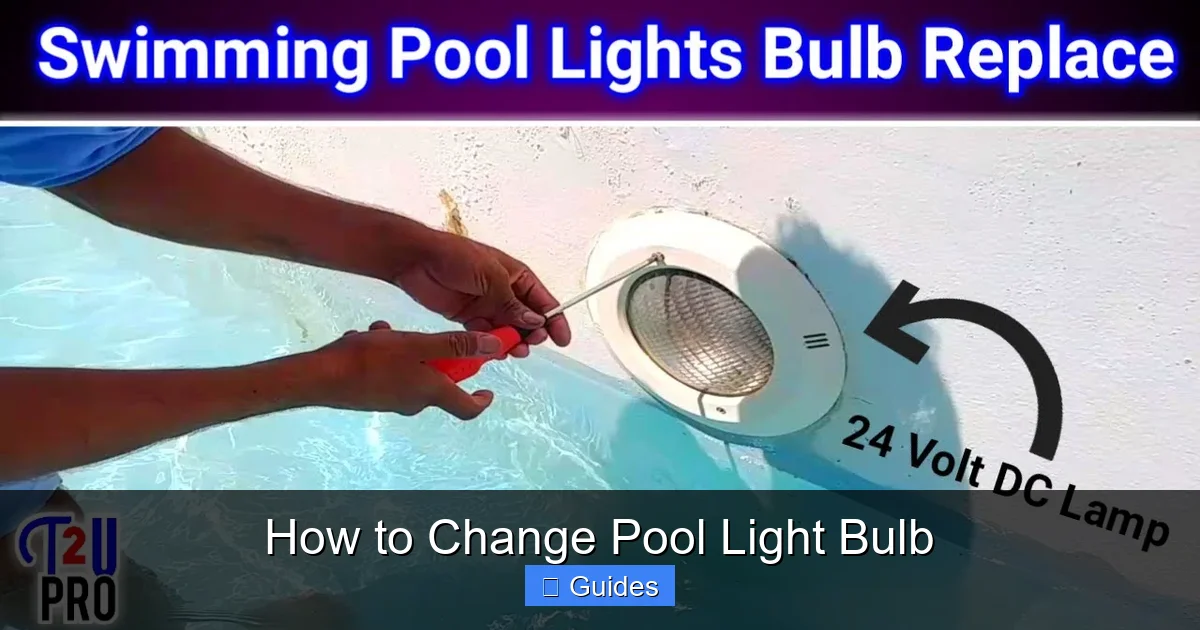
Locating and Accessing the Light Fixture
The light fixture is usually located on the wall of your pool, often about 18-24 inches below the water’s surface. Carefully feel around the bottom edge of the fixture for a single screw that holds it in place. This screw typically secures a small retaining tab or clip.
Removing the Retaining Screw
Using your Phillips-head screwdriver, carefully unscrew the single screw that secures the light fixture. Be extremely careful not to drop the screw into the pool! It’s a good idea to bring a small magnetic retriever if you’re worried about this, or at least have a small bucket nearby to place it into immediately. Sometimes, these screws can be a bit corroded, so apply gentle, steady pressure.
Once the screw is loose, you might need to gently pry or wiggle the retaining tab or clip to fully release the fixture from its niche.
Pulling the Fixture Out of the Niche
After the retaining screw is removed, the entire light fixture should be free. Gently pull the fixture forward and upward out of its niche. Remember that long cord? It’s there to allow you to carefully pull the fixture onto the pool deck. Don’t yank it! Slowly and steadily guide the fixture out of the water and onto a clean, dry towel placed near the edge of the pool.
Be mindful of the cord’s path as you pull. You don’t want it to snag on anything or get kinked. Take your time to bring the entire fixture, including the cord and sealed conduit fitting, completely out of the water.
Draining Water from the Fixture (If Any)
Even though the fixture is sealed, some water might have seeped into the outer casing, or simply collected on the surface. Once the fixture is on the deck, hold it over your bucket or tub and let any residual water drain off.
Opening the Fixture
Now that the fixture is on the deck, you need to open it to access the bulb and gasket. Most fixtures are held together by several small screws around the perimeter of the faceplate. Carefully remove these screws and place them in your bucket or a small container so they don’t get lost. Once all screws are removed, gently separate the faceplate from the housing. The old bulb and gasket will now be exposed.
Replacing the Bulb and Gasket
This is where the actual swap happens. Being meticulous in this section ensures a watertight seal and proper function.
Removing the Old Bulb
Carefully unscrew the old bulb counter-clockwise from its socket. If it’s a traditional incandescent or halogen bulb, it might be a standard screw-in base. Some specific halogen bulbs might have two pins that pull straight out. If the bulb is stuck or corroded, a bit of gentle wiggling might help. Dispose of the old bulb properly, as some may contain mercury (especially older types) or simply be sharp glass.
Inspecting and Cleaning the Fixture
With the bulb removed, take a moment to inspect the inside of the fixture. Look for any signs of corrosion, rust, or water damage. If you see significant rust or signs of water intrusion (like calcification inside), it might indicate a compromised fixture that needs more than just a bulb replacement – perhaps even a full fixture replacement. Clean any debris, dirt, or old gasket residue from the gasket channel using a wire brush or a clean cloth. A clean channel is essential for a good seal.
Installing the New Gasket
As mentioned, *always* use a new gasket. The old one is likely compressed, brittle, or cracked, and won’t provide an effective seal. Carefully place the new gasket into the gasket channel of the fixture. Ensure it sits perfectly flat and is not twisted or pinched. If your new gasket came with a small tube of silicone lubricant, apply a thin, even coat to both sides of the gasket. This helps with the seal and makes closing the fixture easier.
Make sure the gasket is properly aligned. Many gaskets have a specific orientation or a small tab that aligns with a notch in the fixture. Double-check your fixture’s instructions if available.
Installing the New Bulb
Now, carefully screw in your new pool light bulb clockwise until it’s snug. Don’t overtighten, as this can damage the socket or the bulb itself. If it’s a pin-type bulb, gently push the pins into the corresponding holes until it’s secure. Handle the bulb by its base or use a clean cloth/gloves to avoid getting oils from your skin on the glass, which can create hot spots and shorten the bulb’s life.
Closing the Fixture
Carefully align the faceplate with the housing, making sure the new gasket stays perfectly in place. Once aligned, reinsert all the screws around the perimeter. Tighten them evenly and gradually, going around the fixture multiple times in a star pattern (like tightening a car tire’s lug nuts) rather than tightening one screw fully at a time. This ensures even pressure on the gasket and a proper watertight seal. Don’t overtighten, as this can strip the screws or crack the plastic/metal housing, but ensure they are firm and secure.
Reinstallation and Testing
You’re almost there! This final stage involves carefully putting everything back and making sure your new light works and is fully sealed.
The “Bubble Test” – Submerging for Leaks
Before you fully secure the light fixture back into its niche, perform a quick “bubble test.” Gently lower the light fixture back into the water, holding it just below the surface for a minute or two. Observe it closely. Do you see a stream of small bubbles continuously rising from anywhere on the fixture? If you do, it means your seal isn’t watertight. Pull the fixture back out, re-inspect the gasket, clean the channel again, ensure the screws are evenly tightened, and re-test.
A few initial bubbles from trapped air are normal, but a persistent stream indicates a leak. Don’t proceed until you’ve resolved any leaks. Water intrusion will quickly destroy your new bulb and potentially damage the fixture or even lead to electrical hazards.
Securing the Fixture
Once you’re confident there are no leaks, carefully guide the fixture back into its recessed niche. Align the retaining tab or clip with the screw hole. Reinsert the single retaining screw you removed earlier and tighten it securely. Again, be careful not to drop the screw!
Refilling the Pool (If Drained)
If you had to lower your pool’s water level, now is the time to refill it back to its normal operating level.
Turning Power Back On and Testing
Head back to your electrical panel and remove any tape or signs you placed on the breaker. Flip the breaker for your pool light back to the “ON” position. Now, flip the switch for your pool light. Voila! Your pool should now be beautifully illuminated.
Troubleshooting Common Issues
- Light Doesn’t Turn On: Double-check the breaker. Is the switch on? Is the bulb screwed in properly? Is the bulb compatible (voltage, wattage)? Did you forget to remove any plastic caps from the bulb?
- Light Flickers: This could indicate a loose connection, an incompatible bulb, or a failing transformer (if you have a low-voltage system).
- Light is Dim: Ensure the wattage is correct. If it’s an older system, wiring issues or a failing transformer could be culprits.
- Bubbles Continue After Reinstallation: This is a serious issue. Turn off the power immediately and remove the fixture to re-inspect the gasket and sealing. A continuous leak means your fixture is not watertight.
Tips for Longevity and Maintenance
Now that you know how to change pool light bulb, a few extra tips can help keep your pool glowing brightly for seasons to come.
Consider an LED Upgrade
If you replaced an old incandescent or halogen bulb with another of the same type, you might be changing it again in a year or two. LED pool bulbs, while a higher initial investment, offer significant benefits:
- Longevity: LEDs last significantly longer, often tens of thousands of hours, compared to hundreds for traditional bulbs.
- Energy Efficiency: They use far less electricity, saving you money on your utility bills.
- Color Options: Many LED bulbs offer a spectrum of colors and light shows, allowing you to customize your pool’s ambiance.
Just remember to ensure any LED upgrade is compatible with your existing fixture and power supply.
Regular Inspection
When you’re doing your regular pool maintenance, take a quick look at the light fixture. Check for any visible cracks in the lens or unusual discoloration. Early detection of issues can prevent bigger problems down the line.
Keep Spare Parts
If you know your pool light model, consider keeping a spare gasket on hand. That way, when a bulb goes out, you’re not scrambling to find the right part.
When to Call a Professional
While learning how to change pool light bulb is a great skill, there are times when it’s best to call in a professional pool technician or a licensed electrician:
- If you find extensive corrosion or damage inside the fixture.
- If the light doesn’t work even after a proper bulb and gasket replacement.
- If you suspect wiring issues or problems with the transformer.
- If you’re uncomfortable at any point with the electrical aspects of the job.
- If you have an older, unusual, or hard-to-access light fixture.
Conclusion
Learning how to change pool light bulb is a rewarding and practical skill for any pool owner. By following our detailed guide, prioritizing safety, and paying close attention to the sealing of the fixture, you can confidently replace your old bulb and restore your pool’s inviting nighttime glow. Remember, the key is to be thorough, patient, and always put safety first. Enjoy your beautifully illuminated pool!
🎥 Related Video: Replace a pool light #pool #diy #shorts
📺 Rosco Reviews
Full video here: Replace a Swimming Pool light Underwater Video https://youtu.be/ywq8LlHpNuA You can replace a pool light …
Frequently Asked Questions
How often should I change my pool light bulb?
The frequency depends heavily on the type of bulb. Incandescent and halogen bulbs might last anywhere from 500 to 2,000 hours, meaning you might replace them every 1-3 years with regular use. LED pool lights, however, can last 20,000 to 50,000 hours, potentially for a decade or more.
What if the retaining screw is stripped or corroded?
If the screw is stripped or heavily corroded, try using a screw extractor kit or a pair of pliers if enough of the screw head is exposed. As a last resort, careful drilling might be necessary. It’s crucial to replace any damaged screws with new, stainless steel ones to prevent future corrosion.
Can I use a standard house light bulb in my pool light?
Absolutely not. Pool light bulbs are specifically designed and sealed to withstand being submerged in water and operate safely in a wet environment. A standard household bulb is not watertight and would pose a severe electrical shock hazard and would quickly short out.
How do I know if my pool light fixture is 12V or 120V?
You can usually find the voltage stamped on the existing bulb itself or on a label inside the light fixture housing. If you can’t find it there, check your pool equipment’s manual or look for a transformer near your pool’s electrical panel. If there’s a transformer, your light is likely low voltage (12V or 24V); if the wires go directly to the breaker, it’s probably 120V.
What type of silicone lubricant should I use for the gasket?
Use a silicone-based lubricant specifically designed for O-rings, gaskets, or plumbing applications. Avoid petroleum-based lubricants, as they can degrade rubber and plastic components over time, compromising the seal. Many pool supply stores sell small tubes of suitable silicone grease.
Is it worth upgrading to an LED pool light?
Yes, for most pool owners, upgrading to an LED pool light is definitely worth it. While the initial cost is higher, LEDs consume significantly less energy, saving you money on electricity bills, and they last much longer, reducing the frequency of bulb changes. Many also offer vibrant color-changing features that can enhance your pool’s ambiance.