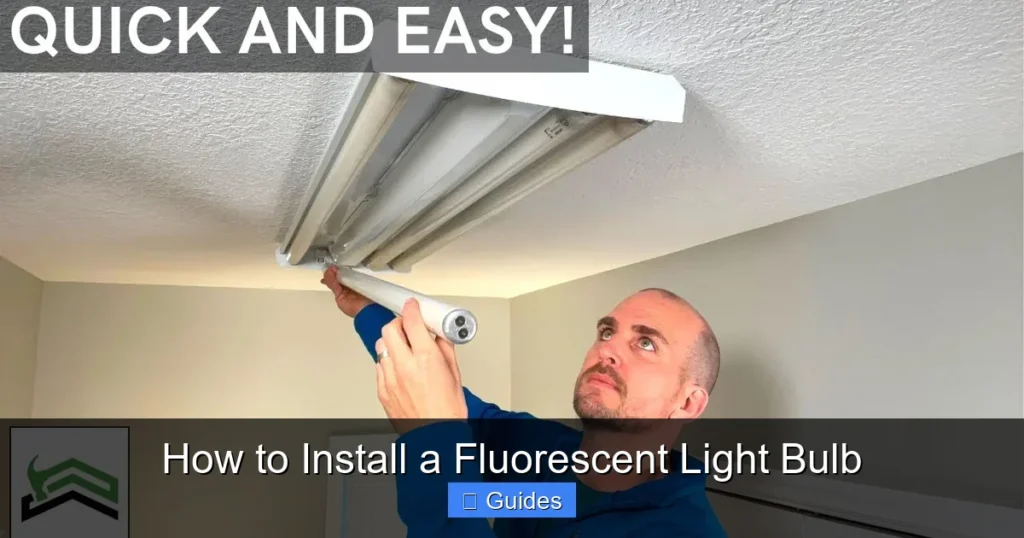
Installing a fluorescent light bulb can be a straightforward DIY task if you follow proper safety procedures and understand your fixture. Always start by turning off the power at the circuit breaker to prevent electric shock, then carefully remove the old bulb and insert the new one, ensuring a secure connection. This guide provides all the steps you need for a successful, bright outcome.
There’s nothing quite like the sudden darkness when a fluorescent light bulb decides it’s had enough. One moment, your garage, workshop, or kitchen is bathed in bright, efficient light; the next, you’re fumbling in the dim, trying to figure out what went wrong. For many, the thought of tackling a light fixture, especially a fluorescent one, can feel a bit daunting. After all, they look more complex than a standard incandescent bulb, with their long tubes and multiple pins.
But here’s a little secret: learning how to install a fluorescent light bulb is far simpler than you might imagine. It’s a common household task that, once mastered, can save you time and the expense of calling an electrician for a quick bulb swap. With the right preparation, a few basic tools, and a clear understanding of the steps involved, you can confidently bring light back into your space. This guide is designed to walk you through every step, from ensuring your safety to troubleshooting common hiccups, making you a pro at fluorescent light bulb installation in no time.
So, if you’ve got a flickering bulb, one that’s gone dark, or you’re simply upgrading your lighting, get ready to roll up your sleeves. We’ll demystify the process of how to install a fluorescent light bulb, ensuring your DIY project is safe, successful, and brightly illuminated. Let’s get started!
Key Takeaways
- Safety First: Always turn off the power at the circuit breaker before beginning any work on a light fixture to prevent electric shock.
- Identify Your Bulb Type: Fluorescent bulbs come in various types (T8, T12, T5) and pin configurations (bi-pin, single-pin, circular, U-bend). Knowing your bulb type is crucial for correct replacement.
- Gentle Removal and Installation: Fluorescent bulbs are delicate. Use a gentle but firm twisting or pulling motion to remove old bulbs and insert new ones to avoid breakage and ensure proper connection.
- Inspect Your Fixture: Before installing a new bulb, visually inspect the fixture for any signs of damage, corrosion, or loose wiring, which could indicate a deeper electrical issue.
- Proper Disposal is Key: Fluorescent bulbs contain mercury and should be disposed of responsibly at designated recycling centers, not in regular household trash.
- Troubleshooting Common Issues: If a new bulb doesn’t light up, check for loose pin connections, ensure the bulb type matches the ballast, or consider a faulty ballast as a potential cause.
Quick Answers to Common Questions
How do I know what type of fluorescent bulb to buy?
Check the markings on your old bulb, which usually indicate its T-type (T8, T12, T5) and wattage. You can also measure the diameter and length. Always aim for an exact match unless you plan to replace the ballast as well.
Can I replace a T12 bulb with a T8 bulb?
Not directly. T12 and T8 bulbs require different ballasts. To switch from T12 to T8, you generally need to replace the fixture’s ballast with one compatible with T8 bulbs, which is a more complex electrical task.
Why is my new fluorescent bulb flickering or dim?
Flickering or dimness can be caused by a loose connection, an incompatible bulb/ballast, very cold temperatures, or a failing ballast. Ensure the bulb is securely seated, verify compatibility, and check for signs of ballast issues.
Do fluorescent bulbs contain mercury?
Yes, all traditional fluorescent bulbs contain a small amount of mercury, which is why they must be disposed of properly at designated recycling centers or household hazardous waste facilities, not in regular trash.
Is it safe to touch the metal ends of a fluorescent bulb?
When the power is off at the circuit breaker, it is generally safe to touch the metal pins of a fluorescent bulb. However, handling bulbs by their ends can leave oils from your skin on the glass, potentially shortening the bulb’s life. It’s best to handle them by the glass body with clean hands or gloves.
📑 Table of Contents
Safety First: Your Essential Preparations
Before you even think about touching that old, dead bulb, safety needs to be your absolute top priority. Working with electricity, even for something as seemingly simple as changing a light bulb, carries risks if not approached carefully. Taking a few moments to prepare properly can prevent electric shocks, injuries, and damage to your fixture.
The Absolute Must: Cutting the Power
This is the golden rule for any electrical work: always turn off the power. Don’t rely on just flipping the wall switch; that only cuts power to one part of the circuit and doesn’t guarantee the fixture is completely de-energized. Here’s what you need to do:
- Locate Your Circuit Breaker Box: This is usually in your basement, garage, utility closet, or a hidden panel in a hallway.
- Identify the Correct Breaker: Look for labels that indicate the room or area where the fluorescent light fixture is located (e.g., “Garage Lights,” “Kitchen”). If labels are unclear, you might need to flip breakers one by one until the light goes out. It’s helpful to have someone observe the light or use a non-contact voltage tester on the fixture itself to confirm the power is off.
- Flip the Breaker to the “OFF” Position: Once identified, firmly switch the breaker off. You might want to place a piece of tape over it or a “DO NOT TOUCH” sign to prevent anyone from accidentally turning it back on while you’re working.
- Test the Light Switch: After turning off the breaker, flip the wall switch for the light fixture to the “ON” position. If the light does not come on, you’ve successfully cut the power. Keep the wall switch in the “ON” position during installation; this way, when you restore power at the breaker, you’ll immediately see if the new bulb works.
Gathering Your Gear
Having the right tools on hand makes the job much smoother and safer. You won’t need much to install a fluorescent light bulb:
- Your New Fluorescent Light Bulb(s): Make sure you have the correct type and size (more on this in the next section!).
- A Sturdy Step Ladder or Stool: Never stand on a shaky chair or an unstable surface. Ensure your ladder is properly set up and stable.
- Gloves (Optional but Recommended): Cotton or nitrile gloves can protect your hands from glass shards if a bulb breaks and keep fingerprints off the new bulb, which can prolong its life.
- Safety Glasses (Recommended): Protect your eyes from dust, debris, or potential bulb breakage.
- Screwdriver (If Needed): Some fixtures might have a protective cover held by screws that needs to be removed before you can access the bulbs.
- Rag or Paper Towels: For cleaning the fixture or wiping away dust.
A Quick Look: Inspecting Your Fixture
While the power is off, take a moment to visually inspect the fluorescent light fixture. Look for any obvious signs of damage, such as:
- Burn Marks or Scorching: These indicate potential electrical problems.
- Corrosion or Rust: Especially around the bulb sockets (tombstones).
- Cracked or Frayed Wires: Never proceed if you see exposed wiring.
- Loose Components: Ensure the bulb sockets are firmly attached.
If you notice significant damage or exposed wires, it’s best to stop and consult a qualified electrician. It might be a sign that the fixture itself needs repair or replacement, beyond just learning how to install a fluorescent light bulb.
Getting to Know Your Fluorescent Bulbs
Before you even think about how to install a fluorescent light bulb, you need to understand the kind of bulb you’re working with. Fluorescent lighting isn’t a one-size-fits-all situation. There are different types of tubes and pin configurations, and knowing them ensures you buy the correct replacement and install it properly.
Visual guide about How to Install a Fluorescent Light Bulb
Image source: media.rs-online.com
Decoding Fluorescent Tube Types (T8, T12, T5)
The “T” in fluorescent tubes refers to their tubular shape, and the number indicates the diameter of the bulb in eighths of an inch. So, a T8 bulb is 8/8ths of an inch (1 inch) in diameter, a T12 is 12/8ths of an inch (1.5 inches), and a T5 is 5/8ths of an inch. Why does this matter?
- T12 Bulbs: These are older, larger diameter bulbs (1.5 inches). They are less energy-efficient and are being phased out. If you have T12 bulbs, your fixture likely has a magnetic ballast.
- T8 Bulbs: These are the most common type found today (1 inch in diameter). They are more energy-efficient than T12s and usually require an electronic ballast. Many older T12 fixtures can be retrofitted to use T8 bulbs with a ballast replacement.
- T5 Bulbs: These are the smallest diameter (5/8ths of an inch) and offer excellent energy efficiency and lumen output. They are often used in newer, more compact fixtures or for task lighting.
It’s crucial to replace a fluorescent bulb with the same T-type. You generally cannot mix and match without changing the ballast, as each bulb type requires a specific ballast to operate correctly. Always check the markings on your old bulb or the fixture itself for the correct type when you’re planning to install a fluorescent light bulb.
Pin Configurations: Bi-pin vs. Single-pin
Beyond the diameter, the way the bulb connects to the fixture is also important:
- Bi-pin Bulbs: These are the most common, featuring two pins at each end of the tube. They are found on T8, T12, and T5 bulbs. Installation involves inserting the pins into the socket slots and twisting.
- Single-pin Bulbs: Less common but still around, these have a single, recessed pin at each end. Installation usually involves pushing the bulb into spring-loaded sockets.
- Circular and U-Bend Bulbs: These specialty bulbs have their own unique pin configurations, often a single four-pin connector or two sets of bi-pins on a single end for U-bend.
The Ballast Basics: What You Need to Know
A ballast is an essential component of a fluorescent light fixture. It regulates the current to the bulb, providing the initial voltage “kick” to start the light and then limiting the current to sustain the arc once the bulb is lit. There are two main types:
- Magnetic Ballasts: Older, heavier, and often cause a slight hum and flicker upon startup. They are primarily found in T12 fixtures.
- Electronic Ballasts: Lighter, more energy-efficient, silent, and provide instant-on, flicker-free operation. They are standard for T8 and T5 fixtures.
The key takeaway here is that the ballast must be compatible with the type of fluorescent bulb you are using. Trying to install a fluorescent light bulb that doesn’t match the ballast will result in it not lighting up, or worse, damaging the ballast or bulb. If you’re upgrading from T12 to T8 bulbs, you’ll almost certainly need to replace the ballast as well, which is a more complex electrical task best left to a professional unless you have significant electrical experience.
The Art of Removal: Taking Out the Old Bulb
With safety measures in place and your understanding of fluorescent bulbs solid, it’s time to remove the old, defunct bulb. Remember, fluorescent tubes are made of glass and can break, so handle them with care. Even if the bulb is dead, it still contains a small amount of mercury, so avoid breaking it.
Gently Twisting: Bi-pin Bulbs
Most common fluorescent tubes are bi-pin. Here’s how to remove them:
- Support the Bulb: With both hands (if it’s a long bulb) or one hand near the socket, firmly but gently grasp the fluorescent tube.
- Rotate 90 Degrees: Twist the bulb about a quarter turn (90 degrees) in either direction. You should feel the pins disengage from the slots in the tombstone (socket).
- Slide Out: Once the pins are disengaged, gently lower or pull the bulb straight out of the sockets. It should come out easily without force.
If the bulb feels stuck, check if it’s fully rotated. Never try to force it, as this can break the glass or damage the sockets.
Straight Pull: Single-pin Bulbs
Single-pin bulbs typically require a different approach:
- Support and Pull: Gently push the bulb towards one end of the fixture. This will compress the spring-loaded socket at that end.
- Disengage and Lower: Once the spring is compressed, the single pin at the other end should clear its socket. Lower that end first, then carefully pull the entire bulb out.
Handling Specialty Bulbs (U-bend, Circular)
For U-bend or circular fluorescent bulbs, the removal process can vary:
- U-Bend Bulbs: These usually have bi-pins on one end. Treat them like a standard bi-pin bulb, rotating the pins out of the socket. You might need to gently maneuver the U-bend shape around the fixture’s frame.
- Circular Bulbs: These often have a single four-pin connector that plugs into a central socket. Gently pull the connector straight out from the socket. The bulb itself might be held in place by small clips that need to be unlatched.
Eco-Friendly Disposal of Old Bulbs
Do not throw old fluorescent light bulbs into your regular trash. They contain a small amount of mercury, which is harmful to the environment. Instead:
- Check Local Regulations: Look for household hazardous waste facilities, recycling centers, or even some retail stores (like Home Depot, Lowe’s, or Batteries Plus Bulbs) that accept fluorescent bulb recycling.
- Store Safely: Until you can dispose of them, store old bulbs in their original packaging or a sturdy box to prevent breakage.
How to Install a Fluorescent Light Bulb: Step-by-Step
Now for the main event: learning how to install a fluorescent light bulb! This is where you bring the brightness back. The process is essentially the reverse of removal, but with extra emphasis on proper alignment and a gentle touch.
Inserting Bi-pin Tubes with Confidence
Most fluorescent fixtures use bi-pin tubes. Here’s how to install a fluorescent light bulb of this type:
- Align the Pins: Take your new fluorescent light bulb. Notice the two pins at each end. Look at the sockets (tombstones) on your fixture – they will have slots. Align the pins on one end of the bulb with the slots in one socket.
- Insert Gently: Push the pins into the slots on one side. Don’t force them. They should slide in smoothly about a quarter of an inch.
- Repeat on the Other Side: While holding the first end in place, align the pins on the other end of the bulb with the slots in the second socket. Gently push them in.
- Rotate to Lock: Once both ends are inserted, gently twist the fluorescent light bulb a quarter turn (90 degrees) until you feel the pins lock into place. They should now be perpendicular to the slots. The bulb should feel secure and not sag.
Pro Tip: Handle the bulb by its ends or wear gloves to avoid leaving fingerprints on the glass. Oils from your skin can create hot spots that reduce bulb life. When you install a fluorescent light bulb, make sure the pins are clean.
Securing Single-pin Tubes
For single-pin fluorescent tubes, the installation is a straightforward push-and-slide motion:
- Insert One End: With the spring-loaded socket on one side, align one end of the new bulb’s single pin with the fixed socket on the other side. Insert the pin fully.
- Compress and Slide: Gently push the bulb towards the fixed socket, compressing the spring in the spring-loaded socket.
- Release into Place: Once the other end of the bulb clears the spring-loaded socket’s opening, guide the single pin into the socket and slowly release the pressure. The spring will extend, securing both ends of the bulb.
Installing Circular and U-Bend Bulbs
When you need to install a fluorescent light bulb that’s circular or U-bend, follow these steps:
- Circular Bulbs: If your old bulb had a central four-pin connector, ensure the new one does too. Align the pins on the bulb’s connector with the holes in the central socket. Gently push the connector straight in until it’s firmly seated. Re-attach any clips that hold the bulb in place.
- U-Bend Bulbs: These generally install like bi-pin tubes, but you might need to maneuver them into position more carefully due to their shape. Align the two pins on one end with the slots, insert, then align and insert the pins on the other end. Finally, twist to lock.
A Final Check: Ensuring a Snug Fit
Before restoring power, give your newly installed fluorescent light bulb a gentle wiggle. It should feel secure, not loose or wobbly. Ensure both ends are properly seated and rotated into their locking position (for bi-pin bulbs). A loose connection is a common reason a new bulb might not light up.
Turning it On: Testing and Troubleshooting Common Glitches
You’ve successfully learned how to install a fluorescent light bulb – now for the moment of truth! After all your careful work, it’s time to see your efforts shine. But what if it doesn’t light up? Don’t worry, we’ll cover the common scenarios and how to fix them.
Power On and Initial Test
With the new fluorescent light bulb securely in place and the wall switch for the fixture in the “ON” position:
- Return to the Breaker Box: Go back to your circuit breaker panel.
- Restore Power: Flip the circuit breaker for the light fixture back to the “ON” position.
- Observe: Head back to the light fixture. If all went well, your new fluorescent light bulb should illuminate immediately (for electronic ballasts) or with a slight flicker and hum (for magnetic ballasts).
Congratulations! You’ve successfully completed the process of how to install a fluorescent light bulb.
Why Won’t It Light Up? Common Problems
If your new bulb isn’t lighting up, don’t panic. Most issues are easily fixable:
- Loose Connections: This is the most common culprit. Go back, ensure the power is off at the breaker, and re-check that the bulb’s pins are firmly seated and twisted (for bi-pin) into the sockets. Sometimes, a slight adjustment is all it takes.
- Wrong Bulb Type: Did you match the T-type (T8, T12, T5) and pin configuration exactly? An incompatible bulb won’t work with your ballast. Double-check your old bulb or fixture labels.
- Faulty New Bulb: While less common, new bulbs can sometimes be defective. If you have another compatible bulb, try swapping it out to see if the issue is with the bulb itself.
- Worn-Out Sockets (Tombstones): Over time, the plastic sockets that hold the bulb can become brittle, cracked, or corroded. Visually inspect them (with power off!). If they look damaged, they might not be making good contact with the bulb pins. Replacing sockets is usually a simple task, but if you’re uncomfortable, call an electrician.
- Ballast Failure: If the above steps don’t resolve the issue, the ballast might be faulty. Signs of a failing ballast include humming, flickering, slow starting, or a noticeable burning smell. A ballast replacement is a more involved electrical repair and, for safety and expertise, is best handled by a professional electrician.
- No Power to Fixture: Double-check the breaker to ensure it hasn’t tripped again. Test the wall switch to make sure it’s functioning.
When DIY Ends: Calling a Pro
While learning how to install a fluorescent light bulb is empowering, know your limits. If you encounter any of the following, it’s time to call a licensed electrician:
- You see sparks, smoke, or smell burning.
- Wiring is exposed, frayed, or damaged.
- The circuit breaker keeps tripping after you’ve restored power.
- You’ve tried all troubleshooting steps, and the issue persists, especially if it points to a faulty ballast or fixture wiring.
Your safety is paramount. When in doubt, call a professional.
Keeping Your Fluorescent Lights Happy: Maintenance Tips
Now that you’re an expert on how to install a fluorescent light bulb, a few simple maintenance practices can help extend the life and efficiency of your fluorescent lighting, saving you money and hassle in the long run.
Regular Cleaning for Brightness
Dust and grime accumulate on fluorescent tubes and reflective surfaces over time, dimming their output. A simple cleaning can significantly restore brightness:
- Power Off: Always turn off power at the circuit breaker first.
- Dusting: Use a soft, dry cloth or a duster to gently wipe down the fluorescent tubes.
- Cleaning Fixture: Clean the inside of the fixture, especially the reflector and diffuser cover, with a damp cloth and mild soap solution, then dry thoroughly.
Do this every 6-12 months, or more often in dusty environments, to maximize light output.
Choosing the Right Replacement Bulbs
When it comes time to install a fluorescent light bulb again, make informed choices:
- Match Exactly: Always replace a bulb with one of the same T-type, length, and wattage unless you are deliberately upgrading the fixture and ballast.
- Color Temperature (Kelvin): Fluorescent bulbs come in different color temperatures, from warm white (2700K-3000K) to cool white (3500K-4100K) to daylight (5000K-6500K). Choose a Kelvin rating that suits the desired ambiance of the room. Consistency is key if you have multiple bulbs in one fixture.
- LED Retrofit Options: Consider converting to LED tubes. Many LED tubes are “plug-and-play” with existing fluorescent ballasts (ballast-compatible) or can be wired directly to line voltage (ballast-bypass). LED tubes offer even greater energy efficiency and a much longer lifespan, reducing how often you’ll need to install a fluorescent light bulb. Always check compatibility carefully!
Ballast Longevity: What to Watch For
The ballast is a critical, and often the most expensive, component of a fluorescent fixture. Taking care of it can prolong its life:
- Avoid Overheating: Ensure the fixture has proper ventilation. If it’s enclosed, ensure the enclosure isn’t trapping excessive heat.
- Correct Bulb Matching: As discussed, using the wrong bulb type can stress and prematurely kill a ballast.
- Listen for Hum: An excessive or new humming sound can indicate a ballast nearing its end.
- Slow Startup or Flickering: While bulbs can cause this, it’s also a sign of a failing ballast, especially if it happens with new bulbs.
Addressing these signs early can sometimes prevent a full ballast failure, although once a ballast begins to fail, replacement is usually the only long-term solution.
Learning how to install a fluorescent light bulb is a practical skill that empowers you to maintain your home’s lighting efficiently and safely. By following the steps outlined in this guide – from crucial safety precautions to careful removal and precise installation, and finally, smart troubleshooting and maintenance – you’ll ensure your fluorescent fixtures keep shining brightly for years to come. Remember, proper preparation and a little patience are your best tools for a successful DIY lighting project. Now, go enjoy your brightly lit space!
Frequently Asked Questions
What tools do I need to install a fluorescent light bulb?
To install a fluorescent light bulb, you primarily need the new bulb itself, a sturdy step ladder or stool for reaching the fixture, and potentially gloves and safety glasses for protection. A screwdriver might be necessary if your fixture has a protective cover.
How do I safely dispose of old fluorescent bulbs?
Old fluorescent bulbs contain mercury and should never be thrown in household trash. They need to be recycled at specific collection sites, such as local household hazardous waste facilities, some hardware stores, or community recycling events. Check your local regulations for the nearest drop-off point.
What is a ballast, and why is it important for fluorescent lights?
A ballast is an electrical component within the fluorescent light fixture that regulates the current flowing to the bulb. It provides the initial high voltage to start the lamp and then limits the current to ensure stable operation. Without a compatible ballast, a fluorescent bulb will not light up or will operate incorrectly.
Can I convert my fluorescent fixture to LED?
Yes, many fluorescent fixtures can be converted to use LED tubes. There are “plug-and-play” LED tubes that work with your existing fluorescent ballast, or “ballast-bypass” LED tubes that require direct wiring to the main power (bypassing or removing the ballast). Always check the LED tube’s specifications and your ballast’s compatibility.
My fluorescent bulb makes a buzzing sound. What does that mean?
A buzzing sound from a fluorescent light fixture often indicates an aging or failing magnetic ballast. Older magnetic ballasts can naturally hum, but an unusually loud or new buzzing usually suggests it’s time for a replacement. Electronic ballasts are typically silent, so a buzz from one suggests a fault.
How long do fluorescent light bulbs typically last?
The lifespan of a fluorescent light bulb varies depending on its type, quality, and usage patterns. On average, traditional fluorescent tubes can last anywhere from 10,000 to 20,000 hours, significantly longer than incandescent bulbs. Frequent on-off cycling can reduce their lifespan.