Replacing a fluorescent light bulb doesn’t have to be a daunting task. This comprehensive guide walks you through every step, from understanding different bulb types and gathering the right tools to executing the replacement safely and efficiently. Prioritizing safety, proper bulb identification, and correct disposal will ensure a smooth, successful light fixture revival.
Let’s face it, walking into a room only to flick a light switch and be met with a flickering, dim, or completely dark fluorescent fixture can be frustrating. What was once a source of bright, efficient illumination now feels like a challenge waiting to be tackled. But don’t worry, replacing a fluorescent light bulb is a common household task that, with the right knowledge and precautions, anyone can do.
This isn’t just about swapping out a dead bulb; it’s about understanding your lighting system, ensuring your safety, and maybe even considering an upgrade along the way. Whether you’re dealing with a long tube light in your garage, a circular bulb in your kitchen, or a compact fluorescent in your office, the principles remain largely the same. We’re here to guide you through every step, making sure your space is bright and functional once more. So, grab a cup of coffee, get ready to learn, and let’s bring some light back into your life!
Key Takeaways
- Safety First: Always turn off power at the circuit breaker and use a stable ladder to prevent electrical shock and falls.
- Identify Your Bulb Type: Fluorescent bulbs come in various sizes (T8, T12, etc.) and shapes; knowing your current bulb’s specifications is crucial for purchasing the correct replacement.
- Gather Essential Tools: You’ll need gloves, safety glasses, a sturdy ladder, and potentially a screwdriver or pliers, depending on your fixture.
- Gentle Removal and Installation: Fluorescent bulbs are fragile. Handle them carefully, twisting gently to remove and insert them into the fixture pins.
- Consider LED Upgrades: While replacing fluorescent bulbs, consider upgrading to energy-efficient LED tubes, which offer longer life and lower energy consumption, often requiring a ballast bypass.
- Proper Disposal is Key: Fluorescent bulbs contain mercury and should never be thrown into regular trash. Locate local recycling centers or hazardous waste facilities for environmentally responsible disposal.
- Troubleshoot Common Issues: If a new bulb doesn’t work, check the ballast, starter (if applicable), or wiring, but always ensure the power is off before investigating.
Quick Answers to Common Questions
How often should fluorescent bulbs be replaced?
Fluorescent bulbs typically last 7,000 to 15,000 hours, depending on the type and usage. They should be replaced when they start flickering excessively, dimming significantly, or fail to light up.
Can I replace a T12 bulb with a T8 bulb?
You cannot directly swap a T12 bulb with a T8 bulb in an old T12 fixture because they require different ballasts. To switch to T8s, you would need to replace the fixture’s ballast with a T8 compatible one, or upgrade to LED.
What is the humming sound from my fluorescent light?
A humming sound usually indicates an older magnetic ballast. As ballasts age, they can become louder. If the humming is excessive, it might be a sign the ballast is failing and needs replacement.
Do I need to turn off the power at the breaker to replace a fluorescent bulb?
Yes, absolutely. Always turn off the power at the circuit breaker to the fixture before starting any work. This prevents electrical shock and is the most crucial safety step.
What is the white powder inside a broken fluorescent bulb?
The white powder inside a fluorescent bulb is phosphorescent coating. It glows when exposed to ultraviolet light from the mercury vapor arc inside the bulb, producing visible light.
📑 Table of Contents
- Understanding Fluorescent Lights: Types and Components
- Safety First: Essential Precautions Before You Start
- Gathering Your Tools and Supplies
- Step-by-Step Guide: How to Replace a Fluorescent Light Bulb
- Troubleshooting Common Issues
- Disposal and Environmental Considerations
- Considering an Upgrade: Fluorescent to LED
Understanding Fluorescent Lights: Types and Components
Before you even think about how to replace a fluorescent light bulb, it’s helpful to understand what you’re working with. Fluorescent lighting systems are a bit more complex than your average incandescent bulb, but knowing the basics will make the replacement process much smoother.
The Many Shapes and Sizes of Fluorescent Bulbs
Fluorescent bulbs come in a surprising variety, and identifying yours is the first step to a successful replacement. The most common types are tubular, often seen in lengths from 1 to 8 feet. These are usually identified by a “T” followed by a number, which indicates the diameter in eighths of an inch.
- T12 Bulbs: These are older, 1.5-inch diameter tubes. They consume more energy and are becoming less common.
- T8 Bulbs: The most common modern fluorescent tube, with a 1-inch diameter. They are more energy-efficient than T12s.
- T5 Bulbs: Smaller, 5/8-inch diameter tubes, known for their compact size and high efficiency, often found in under-cabinet lighting.
- U-Bend and Circline Bulbs: These are specialized shapes, often used in decorative fixtures or where space is limited.
- Compact Fluorescent Lamps (CFLs): These are often screw-in bulbs designed to replace incandescent bulbs, but technically they are also fluorescent. We’ll focus primarily on the tube-style bulbs here.
Always check the markings on your existing bulb to ensure you buy the correct replacement. These markings typically include the wattage, color temperature (e.g., 3500K for cool white, 2700K for warm white), and the “T” size.
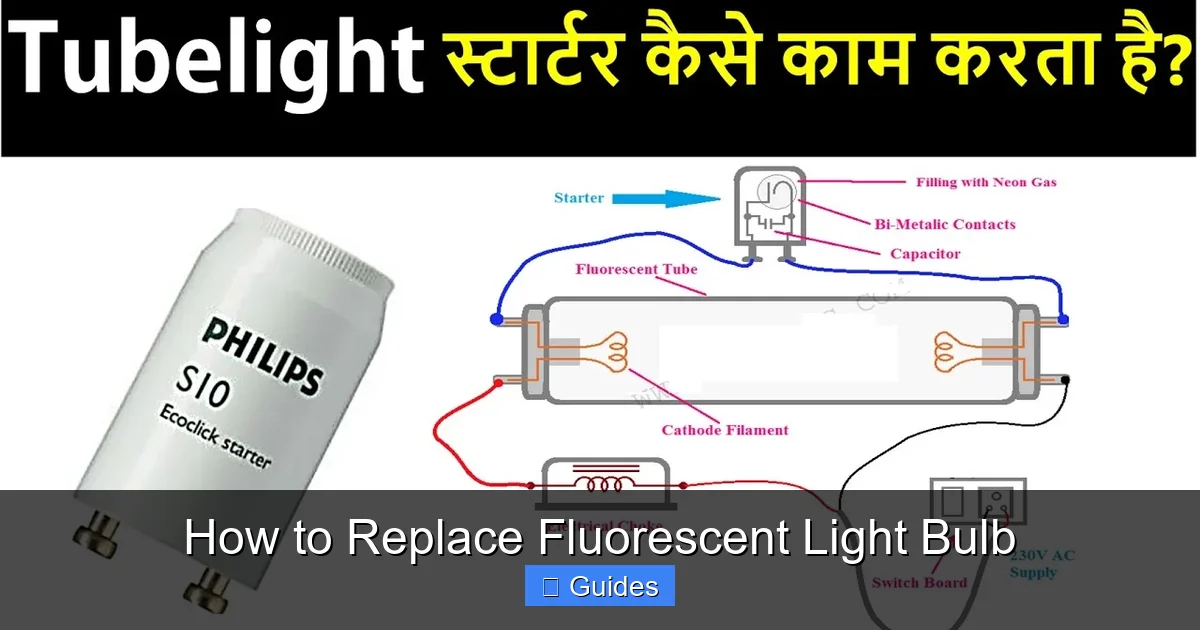
The Role of the Ballast and Starter
Unlike incandescent bulbs, fluorescent lights require a ballast to operate. The ballast is a crucial component within the light fixture itself that regulates the electrical current to the bulb. Without it, the bulb would draw too much current and burn out instantly.
- Ballast: This device provides the initial voltage surge to ignite the gases in the bulb and then limits the current to sustain the arc. Modern ballasts are typically electronic, making them more efficient and quieter. Older fixtures might have magnetic ballasts.
- Starter (older fixtures): Some older fluorescent fixtures, especially those with magnetic ballasts, also use a small cylindrical starter. This component helps to preheat the bulb’s cathodes and initiate the arc. If your fixture has a starter and the bulb isn’t lighting, sometimes replacing the starter is all that’s needed. Modern electronic ballasts usually integrate the starting function, so you won’t find a separate starter.
Knowing these components is important for troubleshooting. If a new fluorescent bulb doesn’t work, the ballast or starter might be the culprit, not the bulb itself.
Safety First: Essential Precautions Before You Start
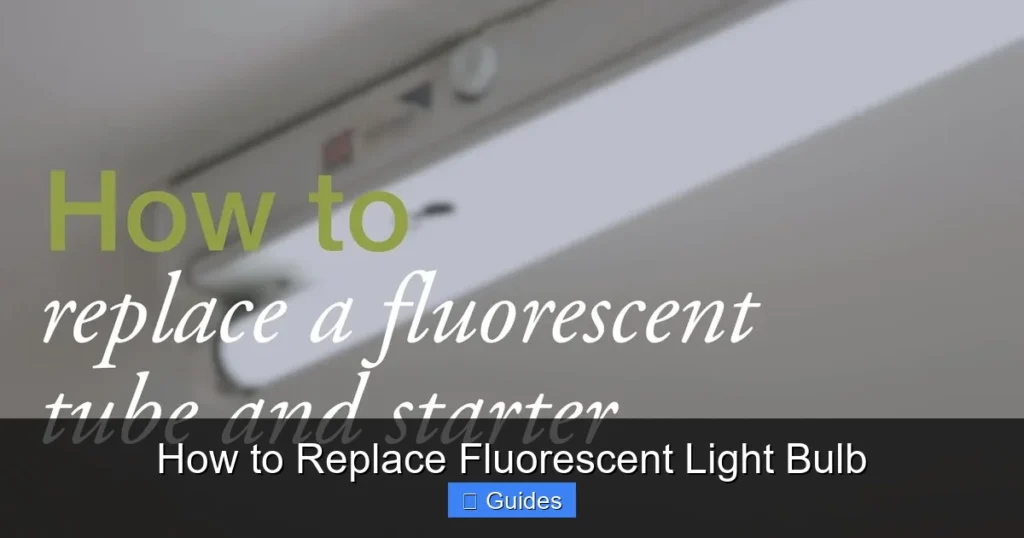
Visual guide about How to Replace Fluorescent Light Bulb
Image source: i.ytimg.com
Working with electricity always demands respect and caution. When you replace a fluorescent light bulb, safety should be your absolute top priority. Skipping these steps can lead to serious injury or worse.
Power Down!
This is the single most critical step.
- Turn off the Wall Switch: While a good first step, this isn’t enough. A wall switch only interrupts the “hot” wire; the fixture may still have power.
- Locate the Circuit Breaker: Go to your electrical panel (usually in a basement, garage, or utility closet). Find the breaker that controls the light fixture you’re working on. It’s often labeled, but if not, you might need to flip breakers one by one until the light goes out.
- Flip the Breaker to “Off”: Once identified, firmly switch the breaker to the “off” position. Consider tagging it or placing a note to prevent anyone from accidentally turning it back on while you’re working.
- Verify No Power: Before touching anything, use a non-contact voltage tester to confirm that there is no power flowing to the fixture. Touch the tester to the fixture’s metal components or the wires if accessible. No beeping or flashing light means it’s safe.
Stable Footing and Protective Gear
Most fluorescent fixtures are mounted on ceilings, requiring you to work at a height.
- Use a Sturdy Ladder: Never stand on a shaky chair, stool, or anything unstable. A proper step ladder or extension ladder is essential. Ensure it’s placed on a level surface and that all four feet are stable. Have someone spot you if possible.
- Wear Safety Glasses: Fluorescent bulbs are made of glass and can shatter if dropped or handled improperly. Eye protection will shield you from broken glass shards.
- Wear Work Gloves: Gloves protect your hands from sharp edges of the fixture, potential broken glass, and keep skin oils off the new bulb, which can shorten its lifespan.
Gathering Your Tools and Supplies
Having everything ready before you start will make the job quicker and more efficient. No one wants to be halfway through a replacement only to realize they need to climb down the ladder to find a tool!
What You’ll Need:
- New Fluorescent Bulb(s): Make sure it’s the correct type, length, wattage, and color temperature to match your old bulb or your desired aesthetic. Bring the old bulb to the store if you’re unsure.
- Sturdy Ladder: As mentioned, for safe access to ceiling-mounted fixtures.
- Work Gloves: For protection and grip.
- Safety Glasses: To protect your eyes.
- Non-Contact Voltage Tester: Essential for confirming the power is off.
- Soft Cloth or Paper Towels: For cleaning the fixture and safely handling the old bulb.
- Plastic Bag or Old Newspaper: For wrapping the old bulb for disposal.
- Optional: Screwdriver (Phillips or flathead) or Pliers: Some fixtures might have covers secured with screws, or stubborn pins that need a gentle nudge.
Step-by-Step Guide: How to Replace a Fluorescent Light Bulb
Now that you’re prepared and safe, let’s get down to the actual process of replacing that old fluorescent bulb.
Step 1: Accessing the Bulb
Many fluorescent fixtures have a protective cover or diffuser that needs to be removed.
- Remove the Diffuser/Cover: This can vary widely by fixture.
- Some covers simply slide out.
- Others might have clips on the sides that you squeeze or release.
- Some might have small screws holding them in place, requiring a screwdriver.
Be gentle, as these covers are often made of fragile plastic. Once removed, set it aside in a safe place where it won’t get damaged.
Step 2: Removing the Old Bulb
This step requires a delicate touch. Fluorescent bulbs contain a small amount of mercury vapor and can break.
- Grip the Bulb Firmly but Gently: With gloved hands, grasp the fluorescent tube towards one end.
- Rotate the Bulb 90 Degrees: Twist the bulb a quarter turn (90 degrees). You should feel the pins at the ends of the bulb disengage from the sockets. For U-bend or circline bulbs, they often have a single central connection or rotate slightly within clips.
- Carefully Pull Down and Out: Once rotated, gently pull the bulb straight down from the fixture. For longer tubes, you might need to slightly angle one end down first, then the other, to clear the sockets. Avoid bending the bulb, as this can cause it to snap.
- Immediate Disposal Prep: As soon as the bulb is out, wrap it in newspaper or slide it into a protective bag. This prevents accidental breakage and makes transport for proper disposal safer.
Step 3: Cleaning the Fixture (Optional but Recommended)
While the fixture is open, it’s a great time for a quick clean.
- Wipe Down Reflectors and Sockets: Dust and grime can accumulate on the fixture’s reflectors and inside the sockets, diminishing light output and potentially affecting connections. Use a dry cloth to wipe these areas clean.
- Inspect Sockets: Look for any signs of corrosion or damage on the pin sockets. If they look severely corroded or broken, it might indicate a deeper problem with the fixture or ballast, and professional help may be needed.
Step 4: Installing the New Bulb
This is essentially the reverse of removal.
- Orient the New Bulb: Ensure the pins on both ends of the new bulb are lined up with the slots in the fixture’s sockets.
- Insert the Pins: Gently push the pins of the bulb into the socket slots. Do not force them.
- Rotate the Bulb 90 Degrees: Once the pins are fully seated in the slots, rotate the bulb a quarter turn (90 degrees) until it locks into place. You should feel a slight click or resistance, indicating the bulb is securely held. Ensure both ends are properly engaged.
- Double-Check Connection: Give the bulb a very gentle tug to confirm it’s seated firmly and won’t fall.
Step 5: Replace the Cover and Restore Power
You’re almost done!
- Reinstall the Diffuser/Cover: Carefully place the cover back onto the fixture, securing any clips or screws you removed earlier.
- Restore Power at the Breaker: Go back to your electrical panel and flip the circuit breaker back to the “on” position.
- Test the Light: Turn on the wall switch. Your new fluorescent bulb should now illuminate brightly!
Troubleshooting Common Issues
Sometimes, despite your best efforts, the new fluorescent bulb might not light up. Don’t despair! Here are a few common issues and how to troubleshoot them. Remember to always turn off the power at the circuit breaker before investigating!
New Bulb Doesn’t Light Up at All
- Check Bulb Seating: Is the bulb fully rotated and seated correctly in the sockets? Gently re-adjust and twist if necessary.
- Faulty Bulb: Even new bulbs can sometimes be defective. If you have another compatible bulb, try swapping it out.
- Bad Ballast: This is a common culprit. If the ballast is old, it might have failed. Signs of a bad ballast include humming, flickering, or the bulb simply not lighting. Replacing a ballast is a more complex electrical task and often requires an electrician, though some DIYers are comfortable with it.
- Bad Starter (older fixtures): If your fixture uses a separate starter, try replacing it. They are inexpensive and easy to swap out.
- No Power to Fixture: Double-check the circuit breaker. Use your non-contact voltage tester to confirm power is reaching the fixture (after turning the breaker back on, of course, and before touching anything directly).
Flickering or Dim Light
- Cold Temperature: Fluorescent bulbs perform less efficiently in very cold environments, leading to dimness or flickering.
- Aging Ballast: A ballast on its way out can cause flickering before complete failure.
- Incorrect Bulb: Ensure you have the correct wattage and type for your fixture. Using an incompatible bulb can lead to poor performance.
- Loose Connections: Ensure the bulb is fully seated in the sockets.
Humming Noise
- Magnetic Ballast: Older magnetic ballasts are known to hum. This is normal but can become louder as they age.
- Loose Components: Sometimes the ballast itself or other parts of the fixture might be vibrating against the housing. Tightening screws can sometimes help.
- Aging Electronic Ballast: While electronic ballasts are usually silent, a failing one might start to hum.
Disposal and Environmental Considerations
This is a critical, often overlooked, aspect of replacing fluorescent light bulbs. Fluorescent bulbs contain small amounts of mercury vapor, which is a hazardous substance. They should never be thrown into regular household trash.
Why Proper Disposal Matters
When a fluorescent bulb breaks, mercury vapor can be released into the air. While the amount in a single bulb is very small, cumulative exposure and environmental contamination from widespread improper disposal can be harmful. Recycling these bulbs prevents mercury from entering landfills and water systems.
How to Dispose of Fluorescent Bulbs Responsibly
- Local Recycling Centers: Many municipal recycling centers or hazardous waste facilities accept fluorescent bulbs for free or a small fee. Check your local city or county waste management website for details.
- Retailer Take-Back Programs: Some large hardware stores (like Home Depot, Lowe’s) or specialized lighting stores offer take-back or recycling programs for fluorescent bulbs. Call ahead to confirm.
- Mail-Back Programs: For businesses or individuals with large quantities, there are mail-back recycling services where you ship bulbs to a specialized facility.
- Safe Storage: Until you can dispose of them properly, store used bulbs in their original packaging or a sturdy box to prevent breakage.
Considering an Upgrade: Fluorescent to LED
While you’re going through the effort to replace your old fluorescent bulb, it might be the perfect time to consider upgrading to LED technology. LEDs offer significant advantages:
- Energy Efficiency: LEDs consume significantly less energy, leading to lower electricity bills.
- Longer Lifespan: LED tubes last much longer than fluorescent bulbs, reducing the frequency of replacements.
- Instant On: LEDs turn on instantly with full brightness, unlike some fluorescents that flicker or take time to warm up.
- No Mercury: LEDs do not contain mercury, making them safer and easier to dispose of.
- Better Light Quality: Many LEDs offer excellent color rendering and a wider range of color temperatures.
Types of LED Retrofits
If you decide to make the switch, there are a few options for replacing a fluorescent light bulb with an LED:
- Plug-and-Play (Ballast-Compatible) LEDs: These are the easiest to install, as they work with your existing fluorescent ballast. Simply swap out the old fluorescent tube for the new LED tube. However, if your ballast eventually fails, you’ll still need to replace it or switch to a different LED type.
- Ballast-Bypass (Direct Wire) LEDs: These tubes require you to remove or bypass the existing ballast and directly wire the fixture to line voltage. This is more involved and requires electrical knowledge, but it eliminates the need for a ballast (a common point of failure) and often results in higher efficiency.
- Fixture Replacement: For the most seamless and often most efficient solution, you can replace the entire fluorescent fixture with a new, integrated LED fixture.
Always consult the manufacturer’s instructions for any LED replacement tubes, as installation procedures can vary. If you’re uncomfortable with electrical wiring, especially for ballast-bypass options, it’s best to consult a qualified electrician.
Replacing a fluorescent light bulb is a straightforward task when approached with care and the right knowledge. By following these steps, you can safely and effectively restore proper lighting to your space. Remember to prioritize safety, identify your bulb correctly, handle with care, and always dispose of old bulbs responsibly. Happy lighting!
Frequently Asked Questions
What tools do I need to replace a fluorescent bulb?
You’ll primarily need a sturdy ladder, work gloves, safety glasses, and the new fluorescent bulb. A non-contact voltage tester is highly recommended to ensure the power is off, and a soft cloth for cleaning the fixture. Some fixtures might also require a screwdriver for cover removal.
How do I know which type of fluorescent bulb to buy?
Look at the markings on your existing bulb. It will usually specify the “T” size (e.g., T8, T12), wattage, length, and color temperature (e.g., 3500K). It’s best to bring the old bulb with you to the store to ensure you purchase an exact match.
Can I just throw old fluorescent bulbs in the trash?
No, fluorescent bulbs contain a small amount of mercury and are considered hazardous waste. They should not be thrown in regular trash. You need to take them to a local recycling center, hazardous waste facility, or check if retailers offer take-back programs for proper disposal.
My new fluorescent bulb flickers. What could be wrong?
Flickering in a new bulb can be caused by several factors, including cold temperatures in the room, a faulty or aging ballast, or loose connections in the sockets. Ensure the bulb is seated correctly, and if flickering persists, the ballast might be nearing the end of its life.
What’s the difference between a ballast and a starter?
A ballast is an essential component that regulates current to the bulb, providing initial voltage and then limiting it to sustain the light. A starter, found in older fixtures, is a separate small device that helps preheat the bulb to initiate the arc. Modern electronic ballasts often integrate the starter function, so a separate starter isn’t needed.
Is it worth upgrading to LED tubes instead of replacing fluorescent bulbs?
Yes, upgrading to LED tubes is often a very worthwhile investment. LEDs offer significantly better energy efficiency, much longer lifespans, instant-on functionality, and do not contain mercury. While the initial cost may be higher, the savings on energy bills and reduced replacement frequency typically make them a cost-effective choice in the long run.