Learning how to test a light bulb with a multimeter is a simple yet powerful skill for any homeowner or DIY enthusiast. This guide walks you through the essential safety precautions, proper multimeter setup, and step-by-step instructions for testing incandescent, LED, CFL, and halogen bulbs. By understanding these techniques, you can accurately diagnose whether a bulb is faulty or if the problem lies elsewhere in your lighting fixture.
<h2>How to Test a Light Bulb with a Multimeter</h2>
Have you ever had a light go out and found yourself staring at the bulb, wondering if it’s truly dead or if there’s a deeper, more complicated electrical problem at play? It’s a common dilemma. Replacing a bulb only to find the light still doesn’t work can be frustrating and a waste of money. What if you could definitively tell if the bulb itself is the culprit before spending a dime on a new one or calling an electrician?
Well, you absolutely can! Learning how to test a light bulb with a multimeter is a game-changer for anyone who wants to confidently troubleshoot their home lighting. A multimeter is a versatile electronic measuring instrument that can test voltage, current, and resistance, making it an indispensable tool for diagnosing electrical issues, including whether your light bulb has truly burned out. This guide will walk you through everything you need to know, from safety precautions to specific testing methods for different types of bulbs, all in simple, easy-to-understand language.
<h2>Why Learn How to Test a Light Bulb with a Multimeter?</h2>
Knowing how to test a light bulb with a multimeter offers several significant advantages. First and foremost, it saves you time and money. Imagine you have a multi-bulb fixture, and one light goes out. Instead of replacing all of them in hopes of hitting the right one, a quick test tells you exactly which bulb is faulty. This prevents unnecessary purchases and ensures you’re not spending money on bulbs you don’t need.
Beyond immediate savings, understanding how to test a light bulb with a multimeter empowers you. It demystifies electrical issues and gives you the confidence to perform basic diagnostics yourself. This skill is invaluable for DIY enthusiasts, homeowners, or anyone who wants to maintain their living space efficiently. It’s also a foundational step if you ever decide to delve into more complex electrical troubleshooting around your home. So, let’s get ready to shed some light on this essential skill!
<h2>Safety First: Essential Precautions Before You Begin</h2>
Before we even think about touching a multimeter or a light bulb, safety must be your absolute top priority. Working with electricity, even low voltages, carries risks. Taking proper precautions can prevent shocks, injuries, or damage to your equipment. Please read these steps carefully and follow them every single time you attempt to test a light bulb with a multimeter.
<h3>Disconnect the Power Source</h3>
This is the most critical step. Never test a light bulb while it’s still connected to a live power source.
<ul>
<li><strong>Turn off the light switch:</strong> This is a good first step, but it’s often not enough to ensure complete safety, as some fixtures might have residual current or faulty wiring.</li>
<li><strong>Unplug the fixture or turn off the breaker:</strong> For lamps, simply unplug the lamp from the wall socket. For ceiling lights or permanent fixtures, go to your home’s electrical panel (breaker box) and switch off the circuit breaker that supplies power to the fixture you are working on. If you’re unsure which breaker it is, it’s always safer to turn off the main breaker for your home.</li>
<li><strong>Verify power is off:</strong> Use a non-contact voltage tester to confirm that no power is flowing to the fixture before proceeding. This is an extra layer of protection.</li>
</ul>
<h3>Handle Bulbs with Care</h3>
<ul>
<li><strong>Allow cooling:</strong> Hot bulbs can cause burns. Give the bulb time to cool down completely before you touch it.</li>
<li><strong>Wear gloves:</strong> Especially for halogen bulbs, oils from your skin can create hot spots and shorten the bulb’s life. Also, if a bulb breaks, gloves offer a layer of protection.</li>
<li><strong>Protect your eyes:</strong> Safety glasses are always a good idea when dealing with glass objects that could break.</li>
</ul>
<h3>Understand Your Multimeter</h3>
Before you try to test a light bulb with a multimeter, take a moment to familiarize yourself with your specific device. Read its manual if you’re new to it. Know where the probes connect, how to select different modes, and what the display readings mean.
By strictly adhering to these safety guidelines, you ensure a safe and successful experience when you test a light bulb with a multimeter.
<h2>Getting Started: Setting Up Your Multimeter</h2>
Now that safety is covered, let’s prepare your multimeter for action. Don’t worry, it’s simpler than it sounds! The goal is to set up your multimeter to measure either continuity or resistance, which are the primary ways we’ll determine if a light bulb is good or bad.
<h3>Connecting the Probes</h3>
Your multimeter will typically have two test leads (probes): one black and one red.
<ul>
<li><strong>Black Lead:</strong> This always connects to the “COM” (common) jack on your multimeter. This is the negative lead.</li>
<li><strong>Red Lead:</strong> For testing light bulbs, you’ll usually connect the red lead to the jack labeled with an “Ω” (omega symbol for ohms, resistance), or sometimes “VΩmA” (for voltage, resistance, and milliamps). Make sure it’s not connected to the “A” or “10A” jack, which is for high current measurements.</li>
</ul>
<h3>Selecting the Right Mode</h3>
The rotary dial on your multimeter allows you to select different measurement functions. For testing light bulbs, you have two main options:
<h4>Continuity Mode (Recommended)</h4>
<p>This is often the easiest and quickest way to check if a simple circuit (like an incandescent bulb’s filament) is complete. Look for a symbol that resembles a speaker or a diode symbol (an arrow pointing at a line) with a small sound wave.</p>
<ul>
<li><strong>How it works:</strong> When you touch the probes together in continuity mode, the multimeter should beep, indicating a continuous circuit (very low resistance). If there’s a break in the circuit, it won’t beep.</li>
<li><strong>What to expect:</strong> A good bulb will cause the multimeter to beep. A bad bulb will produce no beep.</li>
</ul>
<h4>Resistance Mode (Ohms, Ω)</h4>
<p>If your multimeter doesn’t have a continuity mode, or if you want a more precise reading, you can use the resistance (ohms) mode. Look for the “Ω” symbol.</p>
<ul>
<li><strong>Setting the range:</strong> If your multimeter is manual ranging, start with a low resistance range, like 200 ohms (200Ω). If it’s auto-ranging, you usually just select the “Ω” mode, and it will adjust automatically.</li>
<li><strong>How it works:</ol>When you touch the probes together, the display should show a very low resistance value, close to zero ohms. This indicates a good connection.</li>
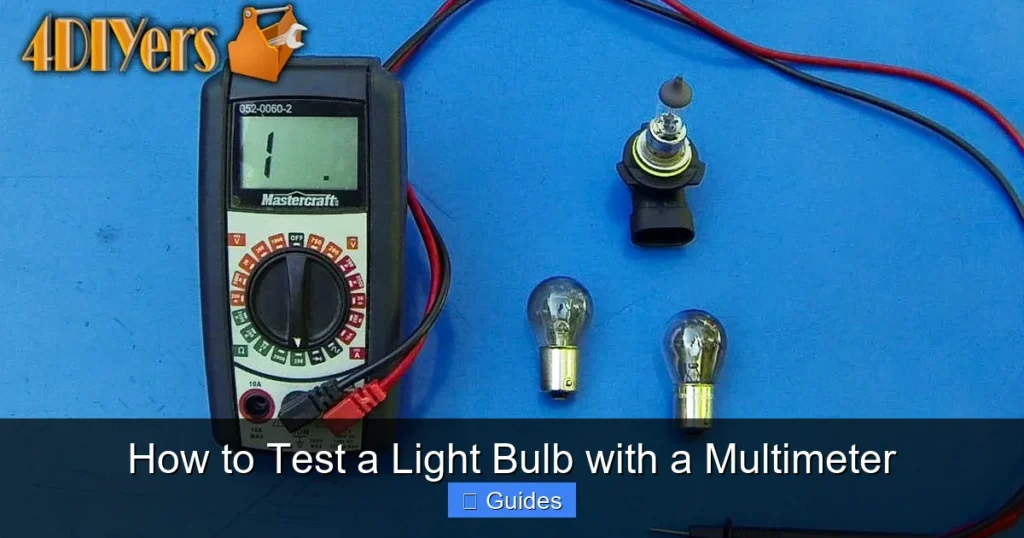
<li><strong>What to expect:</strong> A good bulb will show a low resistance reading (e.g., 10-100 ohms, depending on the bulb’s wattage). A bad bulb (open circuit) will display “OL” (Over Limit) or “1” (meaning infinite resistance) on the screen, indicating a break in the circuit.</li>
</ul>
Now that your multimeter is set up, you’re ready to learn how to test a light bulb with a multimeter, regardless of its type!
<h2>Step-by-Step Guide: Testing Different Bulb Types</h2>
Testing light bulbs with a multimeter is straightforward once you understand the basic principles. However, different types of bulbs have different internal structures, which slightly alters how you interpret the readings. Here’s how to test a light bulb with a multimeter for the most common types.
<h3>Testing Incandescent and Halogen Bulbs</h3>
Incandescent and halogen bulbs are the easiest to test because their operation relies on a simple filament that either conducts electricity or breaks.
<ol>
<li><strong>Remove the bulb:</strong> Carefully unscrew the bulb from the fixture after ensuring the power is off and it has cooled down.</li>
<li><strong>Locate the contacts:</strong> An incandescent bulb has two main electrical contacts:
<ul>
<li><strong>The metal screw base:</strong> This is the outer threaded part that screws into the socket.</li>
<li><strong>The small metal tip:</strong> This is the contact point at the very bottom center of the screw base.</li>
</ul></li>
<li><strong>Place the multimeter probes:</strong> Touch one multimeter probe (either red or black, polarity doesn’t matter for resistance/continuity) to the metal screw base of the bulb. Touch the other probe to the small metal tip at the bottom center of the bulb.</li>
<li><strong>Interpret the reading:</strong>
<ul>
<li><strong>Good Bulb (Continuity Mode):</strong> The multimeter will beep, indicating a complete circuit through the filament.
<li>&strong>Good Bulb (Resistance Mode):</strong> The multimeter will display a low resistance reading, typically between 10 to 100 ohms. The exact value depends on the bulb’s wattage (higher wattage usually means lower resistance).</li>
<li><strong>Bad Bulb (Continuity Mode):</strong> The multimeter will remain silent.
<li>&strong>Bad Bulb (Resistance Mode):</strong> The multimeter will display “OL” or “1” (open circuit/infinite resistance), meaning the filament is broken.</li>
</ul></li>
</ol>
<p><em>Tip:</em> Sometimes, you can visually inspect an incandescent bulb for a broken filament, which looks like a thin, dark wire snapped in two. However, the multimeter test is definitive.</p>
<h3>Testing LED and CFL Bulbs</h3>
LED (Light Emitting Diode) and CFL (Compact Fluorescent Lamp) bulbs are more complex than incandescent bulbs. They contain internal electronic circuitry (drivers, rectifiers, etc.) in their base, which makes a simple continuity or resistance test of the entire bulb less straightforward and often inconclusive. You’re essentially trying to test the entire complex circuit, not just a simple filament.
<h4>Basic Test (Continuity/Resistance)</h4>
You can still perform a basic continuity test on an LED or CFL bulb, similar to an incandescent bulb, to check for a complete circuit through its primary contacts.
<ol>
<li><strong>Remove the bulb:</strong> Ensure power is off and the bulb is cool.</li>
<li><strong>Locate the contacts:</strong> Just like an incandescent bulb, touch one probe to the metal screw base and the other to the small metal tip at the bottom center.</li>
<li><strong>Interpret the reading:</strong>
<ul>
<li><strong>Good Bulb (Continuity/Resistance Mode):</strong> Some working LED/CFL bulbs might briefly beep or show a fluctuating low resistance (a few hundred ohms to several thousand ohms) as the multimeter’s internal battery tries to push current through the electronics. It might not be a steady low resistance like an incandescent.</li>
<li><strong>Bad Bulb (Continuity/Resistance Mode):</strong> If the bulb is dead due to an internal open circuit, the multimeter will display “OL” or “1” (infinite resistance) or remain silent. This is a strong indicator of a faulty bulb.</li>
</ul></li>
</ol>
<p><em>Important Note:</em> A successful continuity or resistance reading on an LED or CFL bulb <em>does not guarantee</em> that it will light up. The internal electronics might be partially damaged, preventing it from illuminating even if the basic circuit shows some continuity. Conversely, a good LED bulb might not show a clear continuity path due to its driver circuit design when tested with a standard multimeter. For these types of bulbs, visual inspection often provides more reliable clues.</p>
<h4>Visual Inspection for LED and CFL Bulbs</h4>
Since electrical testing with a multimeter can be tricky for LED and CFLs, visual cues are often more reliable for initial diagnosis.
<ul>
<li><strong>Burn marks/discoloration:</strong> Look for darkened areas, especially around the base or the glass spiral of a CFL.</li>
<li><strong>Bulges or cracks:</strong> A bulging base on an LED might indicate failed internal components. Cracks in a CFL spiral are also a sign of damage.</li>
<li><strong>Flickering before failure:</strong> If the bulb was flickering or taking a long time to warm up before it died, it’s likely faulty.</li>
</ul>
When you test a light bulb with a multimeter, especially an LED or CFL, combining the basic continuity test with a thorough visual inspection gives you the best chance of accurate diagnosis.
<h2>Interpreting Your Multimeter Readings</h2>
Understanding what your multimeter is telling you is key to confidently diagnosing your light bulb issues. When you test a light bulb with a multimeter, the readings fall into a few clear categories.
<h3>What a “Good” Bulb Looks Like (Electrically)</h3>
<ul>
<li><strong>In Continuity Mode:</strong> The multimeter will emit a clear beep, and its display might show a very small numerical value (often close to zero, or a stable number indicating low resistance) or simply light up an indicator. This means there’s an unbroken path for electricity to flow through the bulb’s filament or internal circuit.</li>
<li><strong>In Resistance (Ohms) Mode:</strong> You will see a relatively low resistance reading, typically ranging from a few ohms to a couple of hundred ohms for incandescent bulbs. For example, a 60-watt incandescent bulb might show around 20-30 ohms. The exact value isn’t as important as seeing <em>any</em> low, stable number rather than an open circuit indication. This signifies that the electrical path within the bulb is intact.</li>
</ul>
<h3>What a “Bad” Bulb Looks Like (Electrically)</h3>
<ul>
<li><strong>In Continuity Mode:</strong> The multimeter will remain silent, and the display will likely show “OL” (Over Limit), “1,” or simply stay blank, indicating no continuity. This means there’s an open circuit – a break in the electrical path, such as a burnt-out filament.</li>
<li><strong>In Resistance (Ohms) Mode:</strong> The multimeter will display “OL” or “1” (sometimes accompanied by a message like “OPEN”). This indicates infinite resistance, meaning electricity cannot flow through the bulb because the circuit is broken.</li>
</ul>
<h3>Important Considerations for LED/CFL Bulbs</h3>
As mentioned, LED and CFL bulbs have complex internal electronics. When you test a light bulb with a multimeter that is an LED or CFL, don’t be surprised if the resistance reading is higher or fluctuates more than an incandescent. Sometimes, you might not get a clear continuity beep even from a working LED bulb due to its internal driver circuit. For these bulbs, the primary goal of the multimeter test is to <em>rule out a complete open circuit</em>. If you get a definitive “OL” or silence in continuity mode, it’s almost certainly a dead bulb. If you get some kind of reading or beep, but the bulb doesn’t work, the problem is likely in its internal electronics, which are not easily diagnosed with basic multimeter functions. In such cases, replace the bulb.
<h2>Troubleshooting Common Issues and Beyond</h2>
You’ve successfully learned how to test a light bulb with a multimeter. What happens if your bulb tests “good” but still won’t light up? Or what if you’ve replaced a faulty bulb, and the light still isn’t working? This means the problem lies elsewhere, and your trusty multimeter can help you track it down.
<h3>If the Bulb Tests Good, but No Light</h3>
If you test a light bulb with a multimeter and it shows good continuity or low resistance, but it fails to light up in the fixture, consider these possibilities:
<ul>
<li><strong>Fixture Issues:</strong> The problem might be with the light fixture itself.
<ul>
<li><em>Loose connection:</em> Check the wire connections within the fixture. Ensure they are tight and secure.</li>
<li><em>Corroded contacts:</em> The metal contacts inside the bulb socket can become corroded or pushed in too far, preventing good electrical contact. With the power off, gently pry up the small metal tab at the bottom of the socket to ensure it makes contact with the bulb’s center tip.</li>
<li><em>Internal wiring fault:</em> There could be a break in the internal wiring of the fixture. This might require more advanced troubleshooting or professional help.</li>
</ul></li>
<li><strong>Switch Malfunction:</strong> The wall switch controlling the light might be faulty. You can test a switch for continuity (with power off!) by connecting your multimeter probes across its terminals when it’s in the “ON” position. A good switch will show continuity. If it shows “OL” or no beep, the switch is bad.</li>
<li><strong>Wiring in the Wall:</strong> Less common, but possible, there could be an issue with the wiring inside the wall leading to the fixture or switch. This usually requires professional diagnosis.</li>
<li><strong>Power Supply Problem:</strong>
<ul>
<li><em>Tripped Breaker:</em> Double-check your circuit breaker box. A tripped breaker will cut power to that entire circuit. Flip it completely off, then back on.</li>
<li><em>Outlet/GFI issue:</em> If it’s a lamp, try plugging it into a different outlet. If the outlet is controlled by a GFCI (Ground Fault Circuit Interrupter) or AFCI (Arc Fault Circuit Interrupter) outlet, ensure it hasn’t tripped (push the “Reset” button).</li>
</ul></li>
</ul>
<h3>Using Your Multimeter for Further Diagnostics</h3>
Once you’re comfortable with how to test a light bulb with a multimeter, you can expand your skills:
<ul>
<li><strong>Voltage Checks:</strong> With the power on (and extreme caution!), you can use your multimeter in AC voltage mode (V~ or VAC) to check if there’s power reaching the light fixture’s socket. Place one probe on the hot terminal (usually the smaller slot in an outlet, or the black wire in a fixture) and the other on the neutral terminal (larger slot or white wire). You should get a reading of approximately 120V (in North America) or 230V (in Europe/other regions). <em>Only do this if you are confident in your abilities and have taken all safety precautions. If unsure, call a professional.</em></li>
<li><strong>Continuity in Wiring:</strong> If you suspect a break in a specific wire (with power OFF!), you can test that wire for continuity.</li>
</ul>
Learning how to test a light bulb with a multimeter is a fantastic first step into understanding basic electrical diagnostics. It empowers you to tackle common household issues with confidence and precision.
<h2>Conclusion</h2>
Congratulations! You’ve successfully navigated the world of multimeters and light bulbs. By following the steps outlined in this guide, you now possess the knowledge and confidence to test a light bulb with a multimeter, accurately determining whether a bulb is truly dead or if the problem lies deeper within your electrical system.
Remember, the cornerstone of any electrical work is safety. Always disconnect the power before handling bulbs or performing any tests. Familiarize yourself with your multimeter, choose the correct settings (continuity or resistance), and interpret the readings with understanding. Whether you’re dealing with a simple incandescent filament or the more complex electronics of an LED, knowing how to test a light bulb with a multimeter is an invaluable skill that saves you time, money, and unnecessary frustration. So go ahead, shine a light on your next electrical mystery with the power of your trusty multimeter!
Key Takeaways
- Safety First: Always disconnect power to the fixture and unplug the bulb before attempting any tests to prevent electrical shock.
- Multimeter Modes: Use your multimeter’s continuity mode (often indicated by a speaker icon) or resistance mode (ohms, Ω) to test light bulbs effectively.
- Incandescent Bulbs: These are easiest to test. A good bulb will show continuity (a beep or near-zero resistance), while a bad one (broken filament) will show no continuity or infinite resistance.
- LED and CFL Bulbs: Testing these requires more nuance due to their internal electronics. While continuity can indicate a functional circuit, a lack of continuity often points to a failed bulb. Advanced testing involves checking components or looking for visual cues.
- Interpreting Readings: A “good” bulb typically registers continuity or a very low resistance reading. “Bad” bulbs show an open circuit (no continuity, OL or infinite resistance).
- Beyond the Bulb: If your bulb tests good, the issue might be with the fixture’s wiring, switch, or power supply, requiring further investigation.
- Practice Makes Perfect: Familiarize yourself with your multimeter and practice on known good and bad bulbs to build confidence in your testing abilities.
Quick Answers to Common Questions
<h3>Which multimeter setting is best for testing light bulbs?</h3>
<p>The continuity mode (often indicated by a speaker symbol) is generally the easiest and quickest setting to test a light bulb, as it beeps to indicate a complete circuit. If your multimeter doesn’t have continuity mode, use the resistance (ohms, Ω) mode.</p>
<h3>What should a good incandescent bulb read on a multimeter?</h3>
<p>In continuity mode, a good incandescent bulb will make the multimeter beep. In resistance mode, it will display a low resistance value, typically between 10 to 100 ohms, indicating an unbroken filament.</p>
<h3>Can I test an LED bulb with a multimeter the same way as an incandescent?</h3>
<p>You can perform a basic continuity test, but LED bulbs have complex internal electronics. A “good” LED might not give a clear continuity beep or stable low resistance. The absence of continuity (OL/no beep) usually indicates a dead LED, but a positive reading doesn’t guarantee it will light up.</p>
<h3>What does “OL” or “1” mean on a multimeter when testing a bulb?</h3>
<p>”OL” (Over Limit) or “1” (often displayed as the first digit on the left) indicates an open circuit or infinite resistance. When testing a light bulb, this means there’s a break in the electrical path (e.g., a broken filament), and the bulb is faulty.</p>
<h3>What if my bulb tests good but doesn’t light up?</h3>
<p>If your bulb tests good, the problem likely lies elsewhere. Check the light fixture’s wiring, ensure the socket contacts are clean and making proper connection, test the wall switch, or verify that the circuit breaker hasn’t tripped.</p>
🎥 Related Video: Using a Multimeter to check a light bulb
📺 Bill Eaglerunner
Checking a common light bulb using a multimeter on the ohm scale. Testing to see if it is good or bad. Also watch: Using a …
Frequently Asked Questions
<h3>Is it safe to test a light bulb with a multimeter while it’s still in the fixture?</h3>
<p>No, it is not safe. Always remove the bulb from the fixture and ensure all power to the fixture is disconnected before attempting to test a light bulb with a multimeter. This prevents electrical shock and ensures accurate readings without interference from the live circuit.</p>
<h3>Do I need a special multimeter to test light bulbs?</h3>
<p>No, a standard digital multimeter that has continuity and/or resistance (ohms) modes is perfectly suitable for testing light bulbs. You don’t need a high-end or specialized device for this basic diagnostic task.</p>
<h3>How can I tell if my incandescent bulb’s filament is broken without a multimeter?</h3>
<p>You can often visually inspect an incandescent bulb for a broken filament. Look inside the glass for a thin, dark wire that appears snapped or disconnected. Sometimes, shaking the bulb gently will reveal a loose piece of filament rattling inside.</p>
<h3>Why do LED and CFL bulbs not give a clear resistance reading like incandescent bulbs?</h3>
<p>LED and CFL bulbs contain complex electronic components like drivers, rectifiers, and capacitors, which manage the flow of electricity. These internal circuits don’t behave like a simple resistive filament, making a direct resistance measurement across the main contacts less straightforward and often less indicative of the bulb’s overall health.</p>
<h3>Can a multimeter test if a bulb is just dim or flickering?</h3>
<p>A basic continuity or resistance test with a multimeter is primarily for determining if the bulb has an open circuit (i.e., completely dead). It cannot reliably diagnose issues like dimming, flickering, or poor color rendition, as these often relate to partial component failure in LED/CFL drivers or minor filament issues in incandescents that still maintain a circuit.</p>
<h3>What’s the best way to safely dispose of a dead light bulb after testing?</h3>
<p>Incandescent bulbs can typically be disposed of in regular household trash. However, CFLs contain small amounts of mercury and should be recycled at designated collection points (e.g., hardware stores, municipal recycling centers). LEDs are electronic waste and should also be recycled responsibly, as they contain valuable materials and sometimes hazardous substances. Check local regulations for specific disposal guidelines.</p>