Dealing with a broken light bulb can be tricky, but it’s a manageable task with the right approach and safety precautions. This guide provides clear, step-by-step instructions on how to unscrew a broken light bulb using common household items like potatoes, pliers, or corks, ensuring your safety throughout the process. Always prioritize cutting the power and wearing protective gear before you begin.
Oh no, it happened again! You go to change a light bulb, give it a gentle twist, and *CRACK!* The glass part comes away in your hand, leaving the metal base stubbornly stuck in the socket. It’s a frustrating, and frankly, a bit intimidating situation. Your first thought might be, “How on earth do I unscrew a broken light bulb without hurting myself or damaging the fixture?” Well, you’ve come to the right place. This guide is designed to walk you through the process step by step, making it safe, simple, and successful.
Dealing with a broken light bulb doesn’t have to be a stressful ordeal. With the right tools (some you likely already have in your kitchen!) and a calm, methodical approach, you can easily remove that pesky base and get your light fixture working again. We’re going to cover everything from essential safety precautions to several effective methods for removal, ensuring you know exactly how to handle this common household hiccup.
Key Takeaways
- Safety First is Paramount: Always turn off the power at the circuit breaker and wear safety glasses and gloves before attempting to unscrew a broken light bulb to prevent electric shock and cuts.
- Assess the Damage: Different methods are suitable for different types of breaks. Identify if you’re dealing with a shattered glass bulb with an exposed base, or a base with some glass remaining.
- Potato or Apple Method: An effective and surprisingly safe technique for exposed metal bases. Press a raw potato or apple firmly onto the base to create a grip, then twist counter-clockwise.
- Pliers (Needle-Nose) Method: Ideal when there’s enough of the metal base lip exposed to grip. Carefully twist the base out, taking care not to crush it further into the socket.
- Cork or Rubber Stopper Method: Useful for bases with a slightly wider opening or remaining fragments, allowing the cork to wedge inside and provide purchase for twisting.
- Patience and Gentle Force: Avoid excessive force, which can strip the socket threads or break the bulb base further. Work slowly and methodically.
- Thorough Clean-Up: After successful removal, carefully clean up any remaining glass fragments from the socket and surrounding area using a vacuum cleaner and damp cloth.
Quick Answers to Common Questions
Can I use super glue to remove a broken light bulb?
No, using super glue is generally not recommended. It can permanently bond the bulb base to the socket, making removal impossible and potentially ruining the fixture. It also carries the risk of glue getting into the electrical contacts.
What if the broken light bulb base is corroded?
If the base is corroded, it can be extra challenging. Try applying a small amount of penetrating oil (like WD-40, sparingly and carefully avoiding electrical contacts) to the threads and letting it sit for a few minutes before attempting removal with pliers or a potato. Ensure power is completely off.
Is it safe to use water to clean the socket after removing a broken bulb?
Absolutely not. Never use water or any liquid directly on an electrical socket, even if the power is off. It can cause short circuits, corrosion, or an electrical hazard when the power is restored. Use a vacuum and a dry cloth instead.
What if I accidentally damage the socket threads?
If the socket threads are damaged, you might not be able to screw in a new bulb properly. In this case, the safest and most reliable solution is to replace the entire light fixture. Attempting to force a new bulb into a damaged socket can create a fire hazard.
How can I tell if the power is truly off before I start?
After flipping the circuit breaker, try flipping the light switch on and off. If the light remains off, the power is likely cut. For absolute certainty, you can use a non-contact voltage tester (available at hardware stores) to confirm no current is flowing to the socket.
📑 Table of Contents
- Safety First: Essential Precautions
- Assessing the Damage: What Kind of Broken Bulb Are We Dealing With?
- Method 1: The Potato/Apple Technique (For Exposed Bases)
- Method 2: Pliers or Needle-Nose Pliers (For Bases with Some Lip)
- Method 3: Cork/Rubber Stopper (For Slightly Damaged Bases/Shallow Breaks)
- Method 4: The Screwdriver/Needle-Nose Pliers Combo (For Stubborn Bases)
- Post-Removal Clean-Up and Prevention
- Conclusion
Safety First: Essential Precautions
Before you even think about touching that broken light bulb, safety must be your absolute top priority. You’re dealing with electricity and sharp glass, a potentially dangerous combination. Rushing this step could lead to electric shock, deep cuts, or further damage to your fixture. Let’s make sure you’re properly prepared.
Cutting the Power
This is non-negotiable. You absolutely must turn off the power to the light fixture before you begin. Simply flipping the light switch off isn’t enough; someone could accidentally flip it back on. The safest way is to go to your home’s main electrical panel (often in a basement, garage, or utility closet) and locate the circuit breaker that controls the room or fixture in question. Flip it to the “OFF” position. If you’re unsure which breaker it is, it’s always safer to turn off the main breaker for your entire home. Better safe than sorry!
- Locate the Breaker: Find your electrical panel.
- Identify the Circuit: Look for labels or test by flipping breakers until the light goes out (after confirming it’s on).
- Turn OFF: Flip the correct breaker to the “OFF” position.
- Double-Check: Try flipping the light switch on and off to confirm the power is indeed cut.
Gearing Up for Safety
Now that the electricity is out of the picture, it’s time to protect yourself from the sharp glass. Think of this as your personal protective equipment (PPE) for light bulb extraction.
- Safety Glasses or Goggles: Glass shards can fly unexpectedly. Protect your eyes from any tiny pieces that might break loose during the process.
- Heavy-Duty Work Gloves: Regular household gloves might not be enough. Opt for thick leather work gloves or specialized cut-resistant gloves to shield your hands from sharp edges.
- Sturdy Footwear: In case any glass falls, you don’t want it landing on bare feet or flimsy shoes.
- Step Stool or Ladder: Ensure you have a stable platform if the fixture is out of arm’s reach. Never stand on wobbly chairs or precarious stacks of books.
Clear the Workspace
Make sure the area directly beneath the light fixture is clear of anything fragile or valuable. Lay down an old towel or a drop cloth to catch any falling glass pieces, making clean-up easier and safer later on.
Assessing the Damage: What Kind of Broken Bulb Are We Dealing With?
Not all broken light bulbs are created equal. The method you use to unscrew a broken light bulb will depend heavily on how it broke. Take a moment to look closely at the remnants in the socket.
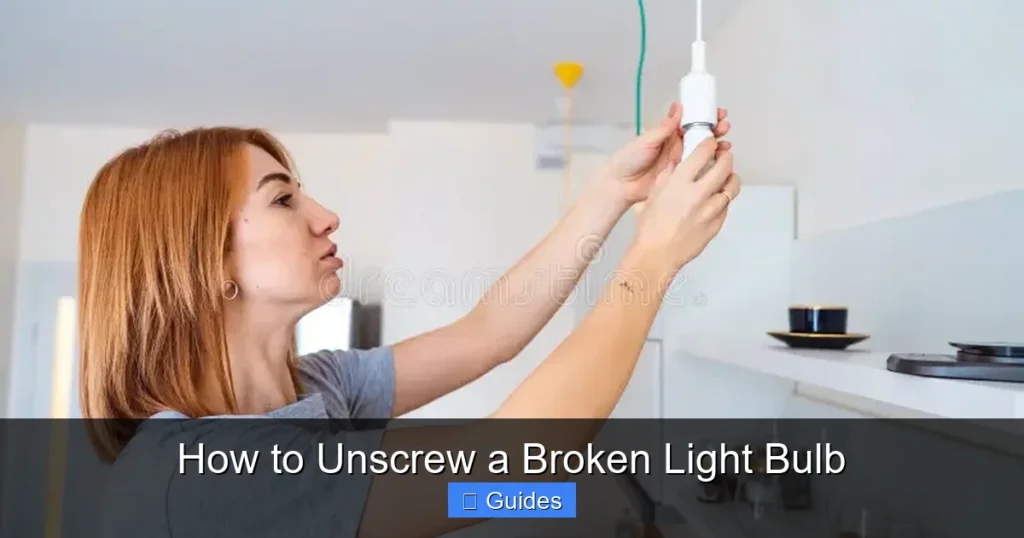
Visual guide about How to Unscrew a Broken Light Bulb
Image source: img.freepik.com
Glass Shattered, Base Intact
This is the most common scenario. The glass bulb itself has broken away, leaving the entire metal screw-in base firmly lodged in the socket. The inside of the base might be empty or have a few small shards of glass. This is the scenario most of our methods will address.
Base Stuck, Glass Gone
Sometimes, the glass breaks off, and then a piece of the base also snaps or crumbles, leaving an irregular, jagged edge of metal or plastic. This can be trickier, but still manageable with the right tools.
Glass Intact, Filament Broken (Not Our Focus Here)
If the glass bulb is fully intact but the light isn’t working, you don’t have a broken bulb in the context of this guide. You simply have a burnt-out bulb that can be twisted out normally. This guide focuses on physically broken bulbs.
Method 1: The Potato/Apple Technique (For Exposed Bases)
This might sound a bit unconventional, but the potato or apple method is surprisingly effective and often the safest first attempt for how to unscrew a broken light bulb, especially when the metal base is completely exposed and empty of large glass shards.
When to Use This Method
- The glass bulb has shattered cleanly, leaving only the metal screw-in base in the socket.
- The inside of the metal base is relatively clear of large glass fragments.
- You can easily reach the socket without straining.
Step-by-Step Guide
- Select Your Tool: Grab a medium-sized raw potato or a firm apple. You want one that’s large enough to comfortably hold and that has a relatively flat, firm surface.
- Prepare the Potato/Apple: If using a potato, you might want to cut one end flat for a better contact surface. For an apple, the natural curve is usually fine.
- Firmly Press: With your gloves on, press the cut end of the potato/apple firmly into the center of the exposed metal base of the broken light bulb. Apply enough pressure so the potato/apple “grips” the edges of the base. The starchy/fibrous material will conform slightly to the shape, creating friction.
- Twist Counter-Clockwise: While maintaining firm pressure, slowly and gently twist the potato/apple counter-clockwise (lefty loosey). The goal is for the potato/apple to turn the metal base.
- Observe and Repeat: If it starts to turn, keep going until the base is completely free. If it slips, re-adjust your grip and try again. Don’t force it aggressively.
- Remove and Inspect: Once the base is out, inspect it for any remaining glass. Carefully dispose of the base and the potato/apple.
Tips for Success
- Don’t Rush: Apply steady, consistent pressure and twist slowly.
- Deep Cut (Optional): For some bases, if the potato isn’t gripping well, you can cut a shallow cross (X) into the potato where it will contact the base. This can increase grip.
- Alternative: A large, firm rubber eraser could also work in a similar fashion.
Method 2: Pliers or Needle-Nose Pliers (For Bases with Some Lip)
If the potato method doesn’t work, or if there’s a bit of the metal base sticking out that you can grab onto, pliers are your next go-to tool for how to unscrew a broken light bulb. Needle-nose pliers are often preferred due to their precision.
When Pliers Are Your Best Friend
- The metal base is still in the socket, but there’s a noticeable lip or edge you can get a good grip on.
- The potato method failed to create enough friction.
- You need more leverage to twist the stubborn base.
Step-by-Step Guide
- Choose the Right Pliers: Needle-nose pliers are ideal for their fine tips and control. Regular pliers can work, but be careful not to crush the base too much.
- Grip the Base: With your gloves on, carefully insert the tips of the pliers into the inside edge of the metal base. Try to open the pliers slightly to expand against the inner walls of the base, creating an outward pressure and a better grip. Alternatively, if there’s an outer lip, grip the very edge of the base firmly.
- Twist Counter-Clockwise: With a firm but gentle grip, slowly twist the pliers counter-clockwise. You want to apply enough torque to turn the base without deforming it or breaking it further inside the socket.
- Wiggle and Pull: As you twist, you might need to slightly wiggle the base to help loosen it. Once it starts to turn, keep twisting until it comes completely free.
- Careful Removal: Once loose, carefully pull the base straight out of the socket.
Important Considerations
- Avoid Crushing: The biggest risk here is crushing the base too tightly with the pliers, which can make it even harder to remove or damage the socket threads. Apply just enough pressure to grip, not to deform.
- Patience is Key: If it’s very tight, take small twists rather than one big forceful turn.
- No Direct Contact with Threads: Ensure the pliers are gripping the bulb base itself, not the electrical contacts or the socket threads directly.
Method 3: Cork/Rubber Stopper (For Slightly Damaged Bases/Shallow Breaks)
This method is similar to the potato technique but uses a different material that offers excellent grip and can be more durable if the base has some jagged edges. It’s another great option for how to unscrew a broken light bulb.
The Cork Advantage
A wine cork or a rubber stopper provides a firm, yet flexible surface that can wedge into irregular shapes and create a strong friction grip. It’s less likely to slip than a potato if there are small glass shards still present.
How to Do It
- Find a Cork: A standard wine cork works well. A firm rubber stopper from a lab kit or even a wine bottle stopper can also be used.
- Prepare (Optional): If the cork is too large to fit into the bulb base, you might need to trim it down slightly with a utility knife to create a tapered end that can be inserted.
- Insert and Twist: With your gloves on, push the cork firmly into the opening of the broken light bulb’s base. Once it’s snugly wedged, twist the cork counter-clockwise, applying consistent pressure.
- Remove: Continue twisting until the base loosens and can be easily pulled out.
Alternative Uses
If you don’t have a suitable cork, a small piece of dense rubber (like from an old shoe sole or a thick rubber mat) can sometimes be cut and shaped to fit for a similar effect.
Method 4: The Screwdriver/Needle-Nose Pliers Combo (For Stubborn Bases)
This method is a bit more aggressive and should be used with extra caution, preferably as a last resort before considering professional help. It’s for those truly stubborn bases that refuse to budge.
The Last Resort (Before Professional Help)
If previous methods have failed, and you’re confident in your ability to be extremely careful, you can try this. This method involves carefully breaking the porcelain insulator inside the bulb base to gain purchase, or prying it out.
Careful Execution
- Access the Insulator: With your safety gear on, carefully use a small flathead screwdriver or the tips of needle-nose pliers to break and remove the small porcelain insulator disc at the very bottom center of the bulb base. This is the electrical contact, and it will likely crumble easily. This creates a cavity.
- Pry or Grip: Once the insulator is removed, you’re left with a hollow metal base.
- Prying Method: Carefully wedge the flathead screwdriver into the side of the metal base, aiming to get it between the base and the socket threads. Gently try to pry the base away from the socket while simultaneously twisting counter-clockwise.
- Expansion Grip Method: Insert the needle-nose pliers into the hollow base and open them as wide as possible, pressing against the inner walls of the metal base. This creates an outward pressure. While maintaining this pressure, twist the pliers counter-clockwise to unscrew the base.
- Extreme Caution: Be incredibly careful not to let the screwdriver or pliers slip and damage the socket threads. This could render the fixture unusable.
Warning: This method has the highest risk of damaging the socket or causing injury. Proceed with extreme caution. If you are uncomfortable, it’s always best to call a qualified electrician.
Post-Removal Clean-Up and Prevention
Congratulations, you’ve successfully learned how to unscrew a broken light bulb! Now, it’s time for safe clean-up and a few tips to prevent this headache in the future.
Safe Glass Disposal
Even small shards of glass can be dangerous. Use a vacuum cleaner to thoroughly clean the area, especially beneath the fixture. Then, wipe down the area with a damp paper towel. Double-bag all glass fragments and the old bulb base in a sturdy bag before placing them in the trash.
Inspect the Socket
Before installing a new bulb, visually inspect the socket. Make sure there are no remaining glass shards, no bent metal tabs inside, and no damage to the threads. If the threads look stripped or damaged, it might be time to replace the entire light fixture.
Preventing Future Broken Bulbs
- Don’t Overtighten: Light bulbs only need to be hand-tight. Overtightening can fuse the base to the socket or make them incredibly difficult to remove, increasing the chance of breakage.
- Use a Rag for Grip: When changing bulbs, especially smooth ones, use a dry rag or cloth to get a better grip.
- Let Bulbs Cool: Always allow a bulb to cool completely before attempting to remove it. Hot glass is more fragile and can burn you.
- Check for Quality: Sometimes cheaper bulbs have thinner glass or poorly attached bases. Investing in good quality bulbs can reduce the risk of them breaking during removal.
- Lubricate Threads (Carefully): For very stubborn or old fixtures, a tiny amount of dielectric grease applied to the new bulb’s base threads (avoiding the tip contact) can prevent sticking in the future. Use sparingly!
Conclusion
Successfully learning how to unscrew a broken light bulb is a valuable skill for any homeowner or renter. While it might seem daunting at first, by following these step-by-step instructions and, most importantly, prioritizing safety, you can tackle this common problem with confidence. Remember to always cut the power, protect yourself with gloves and safety glasses, and choose the method that best suits the type of broken bulb you’re facing.
With a little patience and the right technique, that stubborn broken bulb base will be a thing of the past, and your light fixture will be shining brightly again in no time. Keep this guide handy, and you’ll be prepared for any future cracked bulb mishaps!
Frequently Asked Questions
What is the most important step when dealing with a broken light bulb?
The most important step is always to turn off the power to the light fixture at your home’s circuit breaker before you do anything else. This prevents the risk of electric shock, which can be very dangerous.
What tools do I need to unscrew a broken light bulb?
You’ll need safety glasses, heavy-duty gloves, and potentially common household items like a raw potato or apple, needle-nose pliers, a wine cork or rubber stopper, or a flathead screwdriver for more stubborn bases.
Can I just leave the broken bulb base in the socket?
No, you should never leave a broken bulb base in the socket. It poses an electrical hazard, prevents you from using the light fixture, and could potentially corrode over time, making future removal even more difficult.
What if the broken base still has glass shards inside?
If there are glass shards inside the base, wear extra-thick gloves and use needle-nose pliers to carefully pick out any larger pieces before attempting any of the methods. You want the inside of the base as clear as possible for a better grip and to prevent further cuts.
How tight should a new light bulb be?
New light bulbs should only be hand-tightened until snug. Overtightening can make them incredibly difficult to remove later, increasing the chance of the glass breaking and leaving the base stuck, leading to another situation where you need to unscrew a broken light bulb.
When should I call a professional electrician?
If you’ve tried the recommended methods and the broken base still won’t budge, or if you’ve accidentally damaged the socket threads or any part of the fixture, it’s time to call a qualified electrician. They have specialized tools and expertise to safely handle complex situations.