Changing a light bulb might seem simple, but knowing the right steps ensures safety and prolongs your lighting’s life. This guide breaks down how to change a light bulb safely, covering everything from choosing the correct replacement and preparing your workspace to the simple act of screwing in a new bulb and testing it. Always prioritize safety by turning off the power and allowing the old bulb to cool before handling.
How to Change a Light Bulb
There’s a simple truth about homeownership and living in general: at some point, a light bulb is going to burn out. It might be in your cozy living room lamp, the bright kitchen overhead, or even that tricky fixture in the garage. When it happens, it’s easy to feel a tiny flicker of annoyance, but here’s the good news: learning how to change a light bulb is one of the most fundamental and empowering skills you can master around the house. It’s a task that almost everyone will encounter, and knowing how to do it correctly and safely can save you time, money, and a potential headache.
This isn’t just about unscrewing an old bulb and screwing in a new one. While that’s the essence of it, there are crucial safety precautions, smart preparation steps, and subtle tricks that can make the process smooth, efficient, and entirely safe. Whether you’re a seasoned DIY enthusiast or someone who’s never touched a light bulb before, this comprehensive guide will walk you through every step. We’ll cover everything from turning off the power to choosing the perfect replacement, making sure you feel confident and capable the next time darkness strikes.
So, let’s shed some light on this essential household chore. Get ready to illuminate your space once more with our friendly, step-by-step guide on how to change a light bulb!
Key Takeaways
- Safety First: Always turn off the power to the fixture at the switch or circuit breaker before attempting to change a light bulb to prevent electrical shock.
- Let It Cool: Allow old bulbs, especially incandescent or halogen types, to cool down completely before touching them, as they can get extremely hot and cause burns.
- Choose the Right Bulb: Match the new bulb’s wattage, base type, and lumens to the old one or the fixture’s specifications to ensure proper fit, brightness, and safety.
- Handle with Care: Avoid touching the glass of new halogen or LED bulbs with bare hands, as oils from your skin can create hot spots and shorten the bulb’s lifespan. Use a clean cloth or gloves.
- Don’t Overtighten: Screw the new bulb in just until it feels snug. Overtightening can damage the socket, the bulb’s base, or make it difficult to remove in the future.
- Use Proper Tools: A sturdy stepladder or stool is essential for reaching high fixtures safely. For recessed lights or tricky fixtures, specialized bulb changers might be helpful.
- Dispose Responsibly: Incandescent and halogen bulbs can usually go in regular trash, but CFLs (compact fluorescent lamps) contain mercury and should be recycled at designated collection points.
Quick Answers to Common Questions
What’s the very first thing I should do before changing a light bulb?
Always turn off the power to the light fixture, either by flipping the light switch off or, for added safety, by turning off the corresponding circuit breaker at your home’s electrical panel.
How do I know what kind of replacement bulb to buy?
Check the old bulb for its wattage, lumens, color temperature, and most importantly, its base type (e.g., E26, E12, GU10). You can also look at the fixture’s maximum wattage rating, often printed inside the socket or on the fixture itself.
Is it okay to touch a new LED bulb with bare hands?
While less critical than with halogen bulbs, it’s generally best practice to avoid touching the glass or plastic cover of any new bulb with bare hands. Oils from your skin can create hot spots, potentially shortening the bulb’s lifespan.
What should I do if the old bulb breaks while I’m trying to remove it?
First, ensure the power is completely off at the circuit breaker. Then, use needle-nose pliers to carefully grasp the metal base of the broken bulb still in the socket and twist it counter-clockwise to remove. Use a broom and dustpan for glass shards.
Why is my new light bulb flickering?
Flickering can be caused by a loose bulb, an incompatible dimmer switch, a faulty bulb (even new ones can be defective), or a problem with the fixture’s wiring. Start by ensuring the bulb is tightened securely and consider trying a different bulb or checking your dimmer’s compatibility.
📑 Table of Contents
- Safety First: Essential Precautions Before You Start
- Gathering Your Tools: What You’ll Need
- Identifying the Right Replacement Bulb
- Step-by-Step Guide: How to Safely Remove the Old Bulb
- Step-by-Step Guide: How to Safely Install the New Bulb
- Testing and Troubleshooting: Making Sure It Works
- Conclusion: Let There Be Light!
Safety First: Essential Precautions Before You Start
Before you even think about touching that old, burnt-out bulb, safety must be your absolute top priority. Electricity is incredibly useful, but it demands respect. A casual approach to changing a light bulb can lead to nasty shocks, burns, or even falls. Let’s make sure you’re safe and sound.
Turn Off the Power – No Exceptions!
This is the single most critical step. Never try to change a light bulb while the power is still flowing to the fixture.
- At the Switch: Start by flipping the light switch to the “off” position. This is usually sufficient for most standard fixtures.
- At the Circuit Breaker: For an extra layer of safety, especially if you’re working with outdoor lights, wet locations, or a fixture that is difficult to reach, it’s best to turn off the power at your home’s main electrical panel. Find the circuit breaker that controls the room or area you’re working in and flip it to the “off” position. If you’re unsure which breaker it is, it’s safer to turn off the main breaker for your entire home – just be prepared for temporary darkness!
- Test for Power: If you have a non-contact voltage tester (a handy, inexpensive tool), briefly touch it to the light fixture or the socket before you begin. If it beeps or lights up, there’s still power, and you need to investigate further before proceeding.
Let the Bulb Cool Down
Many types of light bulbs, especially traditional incandescent and halogen bulbs, can get incredibly hot when in use. Touching a hot bulb can cause severe burns.
- Wait It Out: Give the bulb at least 10-15 minutes (or longer for very high-wattage bulbs) to cool down after turning off the power.
- Use Protection: If you’re in a hurry and suspect the bulb might still be warm, wear thick work gloves or use a dry cloth or paper towel to handle it.
Use Appropriate Stepping Tools
Reaching for a light fixture from an unstable chair or by stretching too far is a recipe for an accident.
- Stepladder or Sturdy Stool: Always use a stable stepladder or a sturdy, approved stool. Ensure it’s placed on a level surface.
- Have a Spotter: If you’re using a tall ladder or feeling unsteady, ask a friend or family member to hold the base of the ladder for added stability.
- Avoid Makeshift Solutions: Never stand on wobbly chairs, stacks of books, or anything that isn’t designed for safe elevation. A fall can lead to serious injury.
Wear Protective Gear
While not always strictly necessary, a little extra protection never hurts.
- Gloves: Work gloves protect your hands from heat, sharp edges (if a bulb breaks), and can improve your grip.
- Safety Glasses: If you’re working with older, fragile bulbs or in a position where glass shards could potentially fall (like overhead), safety glasses are a good idea.
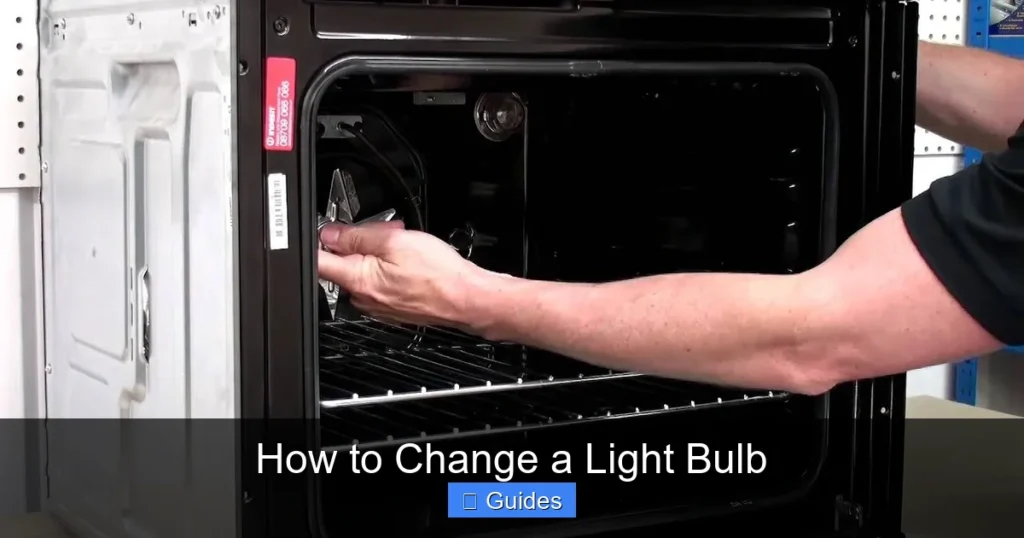
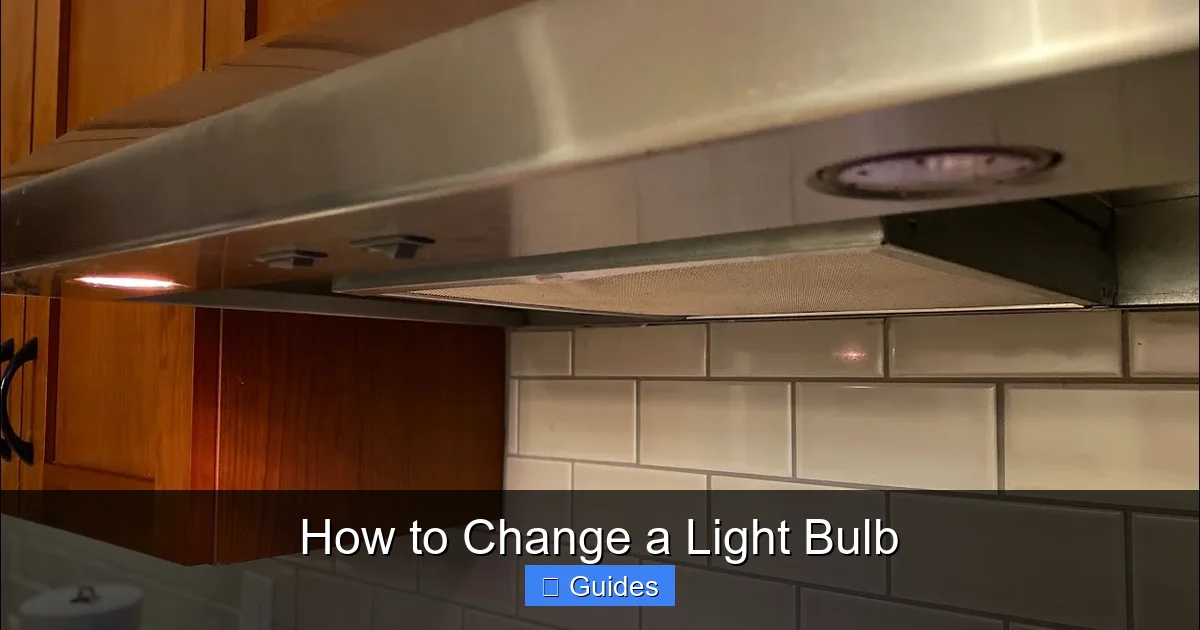
Gathering Your Tools: What You’ll Need
Visual guide about How to Change a Light Bulb
Image source: i.ytimg.com
Before you climb that ladder or even unplug a lamp, it’s smart to have everything you need within arm’s reach. A little preparation goes a long way when you’re learning how to change a light bulb efficiently and safely.
The New Light Bulb (The Right Kind!)
This is, of course, the star of the show! We’ll go into detail about choosing the right type in the next section, but make sure you have it ready. Don’t start the process only to realize you don’t have a replacement.
Stepladder or Sturdy Stool
As mentioned in the safety section, this is non-negotiable for high fixtures. Make sure it’s clean and stable.
Gloves (Optional, but Recommended)
Cotton work gloves or even disposable latex/nitrile gloves are great. They protect your hands from potential heat, sharp glass (if a bulb breaks), and keep natural oils from your skin off the new bulb’s surface (more on this later!).
Clean Cloth or Paper Towels
These are useful for handling old bulbs, cleaning the fixture, and protecting new bulbs.
Screwdriver (Sometimes Needed)
Some light fixtures, especially recessed lights or decorative overhead lights, might have a cover that needs to be unscrewed before you can access the bulb. Keep a basic Phillips head and flathead screwdriver handy.
Non-Contact Voltage Tester (Highly Recommended)
This small device can confirm if a circuit is dead or live, providing peace of mind after you’ve flipped a switch or breaker. It’s a small investment for a significant safety boost.
Small Trash Can or Bag
Have something ready for the old bulb. If it’s a CFL (compact fluorescent lamp), you’ll need a special bag or container for proper disposal.
Identifying the Right Replacement Bulb
Choosing the correct replacement bulb is just as important as the physical act of changing it. A wrong bulb can lead to poor lighting, energy waste, damage to the fixture, or even fire hazards. When you’re figuring out how to change a light bulb, knowing your bulbs is key!
Wattage, Lumens, and Color Temperature
These are the three main numbers you’ll see on a bulb’s packaging:
- Wattage (W): This measures how much energy the bulb consumes. More importantly, your fixture will have a maximum wattage rating. Never exceed this rating, as it can cause overheating and fire. With modern LED bulbs, wattage is less about brightness and more about consumption; an LED bulb might only be 10W but provide the brightness of a 60W incandescent.
- Lumens (lm): This is the true measure of a bulb’s brightness. Instead of matching wattage, try to match lumens for similar light output. For example, a common 60-watt incandescent bulb produces about 800 lumens.
- Color Temperature (K – Kelvin): This describes the “warmth” or “coolness” of the light.
- Warm White (2700K-3000K): Creates a cozy, yellowish glow, similar to traditional incandescent bulbs. Great for living rooms, bedrooms.
- Cool White/Bright White (3500K-4100K): A more neutral, whiter light. Good for kitchens, bathrooms, workspaces.
- Daylight (5000K-6500K): Mimics natural daylight, very bright and slightly bluish. Ideal for task lighting, garages, or areas where high visibility is needed.
Choose a color temperature that suits the room’s purpose and your preference.
Base Type
The base is the part of the bulb that screws into or plugs into the fixture. It must match!
- Edison Screw Bases: These are the most common screw-in types.
- E26/E27: Standard or medium screw base, common in North America and many other regions.
- E12: Candelabra base, smaller, often found in decorative fixtures, chandeliers, and nightlights.
- E17: Intermediate base, less common, between E12 and E26.
- Bi-Pin Bases: Two pins that push into the socket.
- GU10: Common for track lighting and some recessed lights, has two short, thick pins with flat tops.
- GU24: Energy-efficient twist-and-lock base, often required in California.
- MR16/GU5.3: Small halogen or LED spotlights with two thin pins.
- Fluorescent Tube Bases: Various pin configurations (G13 for T8/T12, G5 for T5, etc.).
The easiest way to determine the base type is to look at the old bulb’s base or the fixture’s instructions.
Bulb Shape and Size
Bulbs come in many shapes (A19, BR30, PAR38, G25, B10, etc.) and sizes. The shape might affect how the light spreads, and the size needs to fit within the fixture or its cover. Make sure the new bulb isn’t too large to fit in the fixture or behind a lampshade.
LED, CFL, or Incandescent?
Knowing how to change a light bulb also means understanding the types:
- LED (Light Emitting Diode): Energy-efficient, long-lasting (25,000+ hours), cool to the touch, and dimmable options available. Best choice for most applications due to low running costs and durability.
- CFL (Compact Fluorescent Lamp): More energy-efficient than incandescent, but contain mercury and take time to warm up. Lifespan is good but less than LED. Require special disposal.
- Incandescent: Oldest technology, inefficient (most energy wasted as heat), short lifespan (1,000 hours), hot to the touch. Being phased out in many regions.
- Halogen: A type of incandescent, slightly more efficient and brighter, but still very hot and short-lived.
For most purposes, upgrading to an LED bulb is the best long-term decision, even if the initial cost is slightly higher.
Step-by-Step Guide: How to Safely Remove the Old Bulb
Now that you’re prepared and know your bulb types, it’s time for the actual task. This section focuses on the careful removal of the old bulb.
1. Confirm Power is Off
Double-check! Flip the switch off. If you went to the circuit breaker, ensure that circuit is dead. Use your non-contact voltage tester one last time if you have one. Safety first, always.
2. Access the Bulb (If Necessary)
Many fixtures have covers or globes that need to be removed first.
- Unscrew or Unclip: Some covers screw off, while others might have small clips or thumbscrews. Gently remove these and set them aside in a safe place where they won’t roll away or get lost.
- Be Gentle: Glass covers can be fragile. Support them from below as you unfasten them.
- Clean as You Go: This is a great opportunity to quickly wipe down the cover and inside of the fixture with a damp cloth to remove dust and insects.
3. Grasp the Old Bulb Firmly but Gently
Once the cover is off and the bulb has cooled, you can directly access it.
- Use a Cloth or Gloves: If you’re unsure if the bulb is cool enough, or if it feels slippery, use a dry cloth or wear gloves. This also protects your hands if the bulb breaks.
- Hold the Glass: Grasp the bulb’s glass portion (not the base) firmly enough to get a good grip, but don’t squeeze too hard, especially with older, brittle bulbs.
4. Twist Counter-Clockwise to Unscrew
This is the moment of truth for changing a light bulb!
- Lefty Loosey: Rotate the bulb counter-clockwise. For most standard screw-in bulbs, it will simply unscrew from the socket.
- Be Patient: If it’s stiff, don’t force it with excessive strength. Apply steady, even pressure. Older bulbs can sometimes be a bit stubborn.
- For Pin-Base Bulbs: If you have a GU10 or similar pin-base bulb, you might need to push it in slightly and then twist counter-clockwise to unlock it before pulling it straight out. Consult your fixture’s manual if unsure.
5. Handle Broken Bulbs Safely (If It Happens)
Sometimes, despite your best efforts, a bulb can break, especially if it’s old or overtightened.
- Stop Immediately: If the glass shatters, stop what you’re doing.
- Ensure Power is OFF: This is absolutely critical now. If you haven’t already turned off the circuit breaker, do it immediately.
- Remove Shards: Use pliers (needle-nose work best) to grasp the metal base of the broken bulb still in the socket. Twist it counter-clockwise to remove it. Be extremely careful not to touch the metal part of the socket itself, even with the power off.
- Clean Up: Use a broom and dustpan (not your hands!) to collect any glass shards. For tiny fragments, a piece of bread or a damp paper towel pressed onto the area can pick them up effectively.
- Dispose Safely: Wrap broken glass in newspaper or place it in a separate, sealed bag before putting it in the trash to prevent injury to others.
Step-by-Step Guide: How to Safely Install the New Bulb
With the old bulb safely removed, the path is clear for your new light source. This is the satisfying part of learning how to change a light bulb!
1. Inspect the Socket and Fixture
Before inserting the new bulb, take a moment to look at the socket.
- Check for Debris: Ensure there are no broken pieces of the old bulb, rust, or dust inside the socket. Gently clean if necessary (with the power still off!).
- Look for Damage: If the socket looks corroded, warped, or cracked, it might be a sign of a deeper electrical issue. In such cases, it’s best to consult a qualified electrician.
2. Handle the New Bulb Correctly
How you touch your new bulb can impact its lifespan.
- Avoid Touching Glass with Bare Hands (Especially Halogen/LED): For halogen bulbs and some types of LEDs, the oils from your skin can create hot spots on the glass surface when the bulb heats up, leading to premature failure. Hold the bulb by its base or use a clean cloth or gloves. For traditional incandescent or most frosted LEDs, this isn’t as critical, but it’s a good habit to adopt.
- Be Gentle: Bulbs are fragile. Don’t drop them or bump them forcefully against the fixture.
3. Align the Bulb and Twist Clockwise
Time to bring on the light!
- Screw-in Bases: Carefully align the base of the new bulb with the socket. Gently turn the bulb clockwise. You should feel it catch the threads. Continue to screw it in until it’s snug.
- Pin-Base Bulbs: For GU10 or similar, align the pins with the holes, push gently into the socket, and then twist clockwise to lock it into place.
- Don’t Overtighten: This is a common mistake. Stop screwing once you feel resistance and the bulb is securely seated. Overtightening can strip the socket threads, damage the bulb’s base, or make it extremely difficult to remove next time. It’s snug, not Herculean!
4. Replace Fixture Covers (If Any)
If you removed a cover or globe, now’s the time to put it back.
- Reverse the Process: Carefully reattach any screws, clips, or globes you removed earlier.
- Ensure Secure Fit: Make sure the cover is securely fastened but again, don’t overtighten.
Testing and Troubleshooting: Making Sure It Works
You’ve done the hard work of learning how to change a light bulb and installing the new one. Now for the moment of truth!
1. Restore Power and Test
After everything is securely in place, and you’re no longer touching the fixture, it’s safe to restore power.
- Flip the Switch/Breaker: Turn the light switch back to the “on” position. If you turned off a circuit breaker, flip it back on.
- Check for Light: Hopefully, your new bulb illuminates the room beautifully!
2. Troubleshooting: What if it Doesn’t Work?
Sometimes, despite following all the steps, the light doesn’t come on. Don’t panic! Here are common issues and solutions:
- Loose Bulb: The most common culprit. Turn the power off again (at the switch), and gently tighten the bulb a quarter turn or so. Then, restore power and test.
- Wrong Bulb Type/Wattage: Did you double-check the base type and fixture’s maximum wattage? If the bulb doesn’t fit or is too powerful, it won’t work or could trip a breaker. Turn off power, replace with the correct bulb.
- Faulty Bulb: Even new bulbs can sometimes be defective. Turn off the power, remove the bulb, and try it in a different, known-working fixture. If it still doesn’t light up, you likely have a dud. Exchange it for a new one.
- Tripped Circuit Breaker: If the power for that entire area is out, check your electrical panel. A tripped breaker will be halfway between “on” and “off,” or fully “off.” Flip it completely “off” and then back “on.” If it keeps tripping, there’s a deeper electrical issue, and you should call an electrician.
- Faulty Fixture/Socket: If you’ve tried all the above with multiple bulbs and confirmed power is reaching the fixture (using a voltage tester), the problem might be with the fixture itself. Worn-out sockets, faulty wiring within the fixture, or a loose connection could be the cause. This often requires an electrician to diagnose and repair.
3. Proper Disposal of Old Bulbs
The final step in learning how to change a light bulb correctly is responsible disposal.
- Incandescent/Halogen: These can generally be thrown in your regular household trash.
- CFLs (Compact Fluorescent Lamps): These contain a small amount of mercury and should NOT go into regular trash. Many hardware stores, home improvement centers, or local recycling centers offer free CFL recycling. Check with your local waste management services for proper disposal instructions in your area.
- LEDs: While LEDs don’t contain mercury, they do contain electronic components. Many communities and retailers offer electronics recycling. It’s best practice to recycle them rather than tossing them in the regular trash.
Conclusion: Let There Be Light!
Congratulations! You’ve just mastered the essential skill of how to change a light bulb. What might have seemed like a daunting or trivial task is now a simple, safe, and empowering chore you can confidently handle. From understanding crucial safety steps like turning off the power and letting bulbs cool, to selecting the perfect replacement and executing the removal and installation with finesse, you’re now equipped with comprehensive knowledge.
Remember, every small home maintenance task you learn and accomplish builds your confidence and self-reliance. So the next time a bulb flickers and fades, you won’t be left in the dark – you’ll be ready to bring the light back with skill and ease. Keep these tips handy, and enjoy your brightly lit home!
Frequently Asked Questions
How long should I wait for a light bulb to cool down?
For most incandescent or halogen bulbs, waiting at least 10-15 minutes after turning off the power should be sufficient for them to cool down enough to handle safely. LED bulbs, by contrast, produce very little heat and can usually be handled immediately.
Can I use a higher wattage bulb than what my fixture recommends?
No, you should never exceed the maximum wattage rating listed on your light fixture. Using a bulb with a higher wattage than recommended can cause the fixture to overheat, potentially leading to damaged wiring, a tripped circuit breaker, or even a fire hazard.
How should I dispose of old fluorescent (CFL) bulbs?
CFL bulbs contain a small amount of mercury, so they should not be thrown into regular household trash. Many hardware stores, home improvement centers, and local recycling facilities offer free collection programs for CFLs. Check with your local waste management services for proper disposal instructions in your area.
My new LED bulb isn’t dimming properly. What’s wrong?
Many LED bulbs require a specific type of dimmer switch designed for LED technology. Older dimmer switches made for incandescent bulbs might not be compatible, leading to flickering, buzzing, or inconsistent dimming. Ensure your LED bulb is dimmable and that your dimmer switch is LED-compatible.
What if the light socket looks corroded or rusty?
If the light socket appears corroded, rusty, or otherwise damaged, it’s best not to insert a new bulb. This could indicate an electrical issue or a damaged fixture. For safety, it’s recommended to have an electrician inspect and repair or replace the fixture.
Can I use an indoor light bulb for an outdoor fixture?
It depends on the outdoor fixture and the bulb. Outdoor fixtures often require bulbs rated for damp or wet locations to withstand moisture and temperature fluctuations. Using a standard indoor bulb outdoors, especially in an exposed fixture, could lead to premature failure or pose a safety risk. Always check the bulb’s rating (e.g., “suitable for wet locations”).