Dealing with a broken light bulb can seem daunting, but it’s a common household problem with safe solutions. This comprehensive guide walks you through the essential safety precautions and several effective methods, like using a potato or pliers, to remove broken light bulb fragments safely from its socket. Remember to always prioritize your safety by powering down and wearing protective gear before attempting any removal. With the right tools and steps, you’ll have that socket clear and ready for a new bulb in no time.
Ever reached up to change a light bulb, only for it to shatter, leaving the metal base stubbornly screwed into the socket? It’s a common, frustrating, and potentially hazardous situation that most homeowners will face at some point. The sight of broken glass and exposed electrical components can be intimidating, leading many to wonder, “Now what? How do I safely remove a broken light bulb?”
Fear not! You’re not alone, and tackling this task is absolutely doable with the right approach, a bit of patience, and, most importantly, a strict adherence to safety. This guide will walk you through everything you need to know to safely and effectively remove a broken light bulb from its socket, transforming a daunting chore into a simple fix. We’ll cover essential safety measures, the tools you’ll need, and multiple step-by-step methods to ensure you can get that socket clear and ready for a new bulb.
So, take a deep breath. We’re about to demystify the process of how to remove a broken light bulb. By the end of this article, you’ll be equipped with the knowledge and confidence to handle this tricky situation like a pro, ensuring your home stays bright and, most importantly, safe.
Key Takeaways
- Safety is Paramount: Always turn off the power at the breaker or switch and wear protective gear like safety glasses and thick gloves before attempting to remove a broken light bulb.
- Assess the Damage: Different methods apply depending on whether just the glass is broken or if the base is also damaged or stuck.
- The Potato/Apple Method: A surprisingly effective and safe technique for extracting a broken bulb base with exposed edges, using a raw potato or apple to grip and twist.
- Pliers are Your Friend: Needle-nose pliers or rubber-tipped pliers are excellent for gripping the metal base of a broken bulb, especially when the potato method isn’t suitable or if the base is slightly recessed.
- Avoid Direct Hand Contact: Never touch broken glass or the metal base directly with your bare hands, as this can lead to severe cuts or electrical shock.
- Thorough Cleanup: After removal, carefully clean up all glass shards using a broom and dustpan or a vacuum cleaner, and dispose of them safely.
- Know When to Call a Pro: If the base is severely stuck, the socket is damaged, or you encounter any electrical issues, it’s best to stop and contact a qualified electrician.
Quick Answers to Common Questions
What’s the most important safety step when removing a broken light bulb?
The absolute most important step is to turn off the power to the fixture at the circuit breaker and then confirm it’s off using a non-contact voltage tester before touching anything.
Can I remove a broken light bulb with just my bare hands?
No, absolutely not. Never touch broken glass or the metal base of a broken light bulb with your bare hands, as this poses a severe risk of cuts and electrical shock.
What if the potato method doesn’t work for a broken bulb?
If the potato method doesn’t provide enough grip, your next step should be to use needle-nose pliers or regular pliers to grip the metal base and twist it out counter-clockwise, ensuring you avoid the center tab.
How do I dispose of the broken glass safely?
Collect all glass shards with a broom and dustpan or a vacuum. Wrap them securely in several layers of newspaper or cardboard, place them in a sealed plastic bag, and label it “BROKEN GLASS” before disposing of it in the trash.
When should I call an electrician for a broken light bulb?
You should call an electrician if the bulb base is severely stuck and you can’t remove it, if you notice any sparks, burning smells, or damage to the socket, or if you simply feel uncomfortable or unsure about performing the task yourself.
📑 Table of Contents
- Safety First: Your Non-Negotiable Priority
- Assessing the Damage: What Kind of Broken Bulb Are We Dealing With?
- Method 1: The Potato or Apple Trick (For Bases with Exposed Edges)
- Method 2: Pliers or Needle-Nose Pliers (For Bases with Metal Edges)
- Method 3: Rubber-Tipped Pliers or Corkscrew (For More Stubborn Bases)
- What to Do If All Else Fails (and When to Call a Pro)
- Cleaning Up Safely and What Comes Next
- Conclusion
Safety First: Your Non-Negotiable Priority
Before you even think about touching that broken bulb, your personal safety must be the absolute top priority. Electricity and broken glass are a dangerous combination. Skipping any of these steps could lead to serious injury or electrical shock. Please read this section carefully and follow every instruction.
Power Down Completely
This is the single most critical step. Do NOT rely solely on the wall switch.
- Locate the Breaker: Go to your home’s main electrical panel (breaker box).
- Identify the Circuit: Find the circuit breaker that controls the power to the light fixture in question. If it’s not labeled, you might need to flip breakers one by one until the light (if it still has power) turns off, or test the outlet near the light with a non-contact voltage tester.
- Flip the Breaker: Turn the identified breaker to the “OFF” position.
- Test for Power: Before touching anything, use a non-contact voltage tester to confirm that no power is flowing to the light fixture. Hold the tester near the socket. If it remains silent or doesn’t light up, the power is off. If it beeps or lights up, recheck your breaker.
- Inform Others: If anyone else is in the house, let them know you’ve turned off power to a specific area and why. You might even tape a note over the breaker box so no one accidentally turns it back on.
Essential Personal Protective Equipment (PPE)
Once the power is confirmed off, gather your protective gear.
- Safety Glasses or Goggles: Small glass shards can fly unexpectedly. Eye protection is non-negotiable.
- Thick Work Gloves: Leather or heavy-duty rubberized gloves will protect your hands from sharp edges and provide a better grip. Do NOT use thin latex or dishwashing gloves.
- Long Sleeves: If working overhead, consider wearing a long-sleeved shirt to protect your arms from falling glass.
Clear Your Workspace
Ensure you have a stable platform (a sturdy step stool or ladder, not a wobbly chair) and a clear area around you. Remove any tripping hazards or anything fragile that could be hit by falling glass. Have a small container (like a plastic tub or thick paper bag) ready to collect any falling glass fragments.
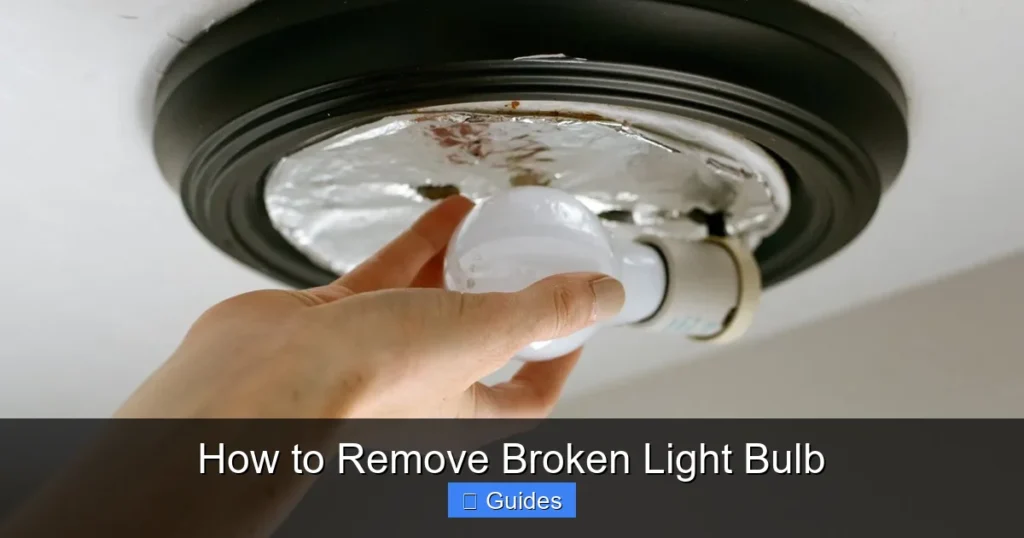
Assessing the Damage: What Kind of Broken Bulb Are We Dealing With?
Visual guide about How to Remove Broken Light Bulb
Image source: thespruce.com
The method you choose to remove a broken light bulb will depend largely on how it’s broken. Take a moment to look closely at the socket.
Only the Glass Bulb is Broken, Base Intact
This is the most common scenario. The glass globe has shattered, but the metal screw-in base is still firmly lodged in the socket, usually with its edges exposed. This is the ideal situation for the “potato” method.
The Glass Bulb is Broken, Base is Cracked/Wobbly
Sometimes the impact breaks the glass and also slightly damages or loosens the metal base. This might require a more delicate touch or the use of pliers. If the base seems very loose, be extra careful not to damage the socket’s internal wiring.
The Entire Bulb and Base are Stuck (Less Common but Possible)
In rare cases, the bulb might have been screwed in too tightly, or corroded, making even the intact base difficult to budge. If the glass has broken, and the base seems exceptionally stuck or corroded, you’ll need a method that provides a strong grip.
Method 1: The Potato or Apple Trick (For Bases with Exposed Edges)
This method might sound unconventional, but it’s surprisingly effective and often the safest first approach, especially when the metal base has enough exposed edge to grip.
What You’ll Need
- A medium-sized raw potato (or a firm apple)
- Your safety glasses and thick gloves
- A small container for glass fragments
Step-by-Step Guide
- Ensure Power is OFF: Reconfirm no power to the fixture using your voltage tester.
- Wear PPE: Put on your safety glasses and thick gloves.
- Prepare the Potato: Cut one end of the potato flat, creating a clean, firm surface. The goal is to create a surface that can make good contact with the broken bulb base.
- Firmly Press the Potato: Carefully but firmly press the cut end of the potato into the exposed metal base of the broken bulb. Apply enough pressure so the potato embeds itself slightly into the metal, creating a secure grip. Ensure the potato completely covers the metal base, extending slightly beyond it if possible, to avoid direct contact with any remaining glass shards.
- Twist Counter-Clockwise: Once you have a firm grip, slowly and steadily twist the potato counter-clockwise (to the left). You should feel the base begin to loosen. Continue twisting until the entire base is unscrewed from the socket.
- Remove and Inspect: Carefully pull the potato with the attached base away from the socket. Inspect the socket for any remaining glass or debris.
Tips for Success
- Choose a Firm Potato: A soft or old potato might crumble. A fresh, firm one works best.
- Don’t Rush: Apply steady, consistent pressure and twist slowly to avoid damaging the base further or having the potato slip.
- If it Doesn’t Grip: If the potato doesn’t seem to get a good hold, try cutting a slightly smaller or larger section, or switch to an apple if you have one. If still no luck, move to the pliers method.
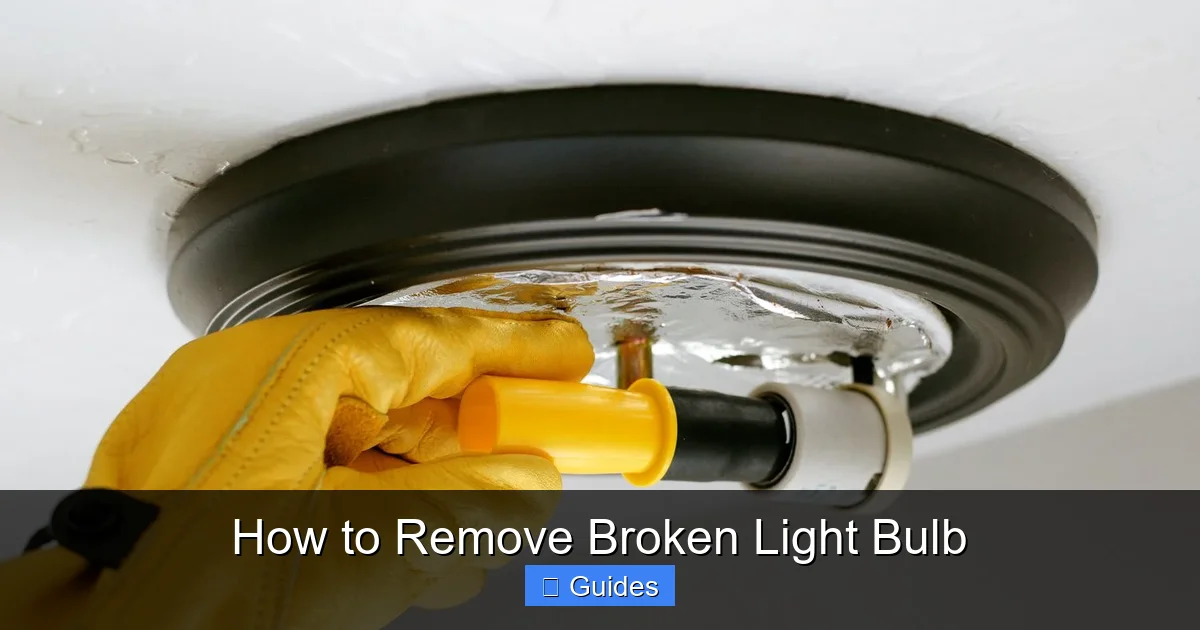
Method 2: Pliers or Needle-Nose Pliers (For Bases with Metal Edges)
If the potato method doesn’t work, or if the metal base is more recessed or difficult to grip, a pair of pliers can be your next best friend. Needle-nose pliers are often preferred for their precision.
What You’ll Need
- Needle-nose pliers or regular pliers (with insulated handles, if possible)
- Your safety glasses and thick gloves
- A small container for glass fragments
Step-by-Step Guide
- Ensure Power is OFF: Double-check the power is off. This cannot be stressed enough when working with metal tools near an electrical socket.
- Wear PPE: Put on your safety glasses and thick gloves.
- Grip the Metal Edge: Carefully insert the tips of the needle-nose pliers into the broken bulb’s metal base. Try to grip the inside edge of the metal base firmly. If there’s a small rim of metal protruding, you can also try gripping that. The goal is to get a secure hold on the metal itself, avoiding the ceramic center of the socket.
- Twist Counter-Clockwise: Once you have a firm grip, apply gentle but firm pressure and slowly twist the pliers counter-clockwise. You may need to readjust your grip several times as the base loosens.
- Extract the Base: Continue twisting until the base is completely unscrewed. Pull it gently away from the socket.
- Inspect the Socket: Check for any remaining glass shards, metal fragments, or damage.
Cautions and Best Practices
- Avoid the Center Tab: Be extremely careful not to damage the small metal tab at the very bottom center of the socket. This tab is essential for electrical contact. Bending or breaking it can damage the fixture.
- Insulated Pliers: While the power should be off, using pliers with insulated handles adds an extra layer of protection.
- Small Bites: If the base is really stuck, you might need to grip a small section of the metal, twist it slightly, then re-grip another section, slowly working your way around the base until it loosens.
- Don’t Force It: If the base isn’t budging, don’t apply excessive force that could damage the socket or strip the metal base further.
Method 3: Rubber-Tipped Pliers or Corkscrew (For More Stubborn Bases)
For those really stubborn broken light bulb bases that resist the potato and standard pliers, you might need a bit more grip or a different approach.
What You’ll Need
- Rubber-tipped pliers (or pliers with rubber bands wrapped around the jaws for extra grip) OR a wine corkscrew (the type with a pointed screw)
- Your safety glasses and thick gloves
- A small container for glass fragments
Step-by-Step Guide (Rubber-Tipped Pliers)
- Ensure Power is OFF and Wear PPE: Always start here.
- Grip with Rubber: Use the rubber-tipped pliers to grip the outer rim of the broken bulb base. The rubber provides superior friction.
- Twist Counter-Clockwise: Twist firmly and slowly counter-clockwise until the base unscrews.
Step-by-Step Guide (Corkscrew Method – Use with Extreme Caution!)
This method should be considered a last resort before calling a professional and requires exceptional care to avoid damaging the socket’s center tab.
- Ensure Power is OFF and Wear PPE: Absolutely critical.
- Insert Corkscrew: Carefully insert the tip of the corkscrew into the ceramic or metal part of the broken bulb base, *avoiding the very center electrical contact tab*. You want to get it into the body of the screw base, not past it.
- Screw In Slightly: Gently twist the corkscrew clockwise a few turns, just enough to embed it firmly into the base. Do not over-tighten, as you could crack the socket or further damage the base.
- Twist and Pull: Once the corkscrew is secure, apply gentle outward pressure and twist the corkscrew (and thus the bulb base) counter-clockwise to unscrew it.
- Remove and Inspect: Once loosened, carefully remove the base and inspect the socket for damage.
When to Consider This Method
The rubber-tipped pliers are great for bases that are very smooth or just need extra grip. The corkscrew method is for bases that are severely stuck and offer no good gripping points for traditional pliers. Use the corkscrew with extreme caution, as improper use can damage the fixture permanently.
What to Do If All Else Fails (and When to Call a Pro)
Sometimes, despite your best efforts, a broken light bulb just won’t come out. Or worse, you might encounter new problems. Knowing when to stop and call for professional help is a sign of good judgment, not failure.
Persistent Stuck Base
If you’ve tried all the methods and the base simply won’t budge, or if you’re worried about applying too much force and damaging the fixture, it’s time to consider professional help. An electrician has specialized tools and expertise to handle extremely stubborn situations without causing further damage.
Electrical Damage or Sparks
If at any point during the process you notice sparks, hear crackling sounds, smell burning, or if the socket appears to be melted or corroded, STOP IMMEDIATELY. Do not proceed. This indicates a potentially dangerous electrical issue. Ensure the power is off at the breaker and call a licensed electrician without delay. Never attempt to use a damaged or sparking socket.
If You’re Uncomfortable or Unsure
There’s no shame in admitting you’re not comfortable with a task involving electricity and sharp objects. If you feel any hesitation or uncertainty at any point, it’s always safer to err on the side of caution and call a qualified electrician. They can safely remove the broken light bulb and inspect the fixture for any underlying issues.
Cleaning Up Safely and What Comes Next
Once you’ve successfully managed to remove a broken light bulb, your job isn’t quite finished. Proper cleanup and inspection are crucial.
Glass Shard Disposal
Broken glass is sharp and dangerous.
- Collect All Shards: Use a broom and dustpan (not your gloved hands!) to sweep up all visible glass pieces. For tiny fragments, a vacuum cleaner is excellent.
- Wet Paper Towel Trick: Lightly dampen a paper towel and dab the area. Tiny, invisible shards will stick to it.
- Safe Disposal: Wrap all collected glass shards securely in several layers of newspaper or cardboard before placing them in a sealed plastic bag. Label the bag “BROKEN GLASS” to alert sanitation workers. Do not just throw loose glass into the trash.
Inspecting the Socket
After the base is out and the area is clean, carefully inspect the inside of the socket.
- Check for Damage: Look for any signs of cracks, charring, melted plastic, or bent metal tabs. The small metal tab at the bottom center of the socket should be intact and slightly springy.
- Clear Debris: Ensure there are no lingering metal fragments or glass shards inside the socket. You can use a small, stiff brush or even canned air (with power still off!) to dislodge any stubborn bits.
Testing the Socket (Carefully!)
Once you’re confident the socket is clear and undamaged:
- Install a New Bulb: Screw in a new, working light bulb of the appropriate wattage and type.
- Restore Power: Go back to your breaker box and flip the circuit breaker back to the “ON” position.
- Test the Light: Turn on the light switch. If the new bulb illuminates, congratulations, you’ve successfully tackled how to remove a broken light bulb!
Installing a New Bulb
When putting in a new bulb, remember these tips:
- Don’t Overtighten: Screw the bulb in until it’s snug, but don’t force it. Overtightening can make it harder to remove next time and can even cause the bulb to break prematurely.
- Choose the Right Wattage: Always use a bulb with a wattage rating equal to or less than the fixture’s maximum specified wattage.
- Clean Hands: Avoid touching halogen or some LED bulbs directly with your bare hands, as oils from your skin can create hot spots and shorten the bulb’s life. Use a cloth or gloves.
Conclusion
Dealing with a broken light bulb can be a bit intimidating, but by following these safety guidelines and practical methods, you now know how to remove a broken light bulb safely and effectively. Remember, the key is always to prioritize your safety by cutting off power and wearing protective gear. Whether you opt for the humble potato, precise pliers, or the specialized corkscrew method, patience and care will be your best allies.
You’ve learned to assess the damage, gather the right tools, execute the removal, and perform a thorough cleanup, empowering you to handle this common household nuisance with confidence. If ever in doubt, or if you encounter electrical issues, don’t hesitate to call a professional. Stay safe, stay bright, and keep those light fixtures working perfectly!
Frequently Asked Questions
Is it really necessary to turn off the power at the breaker?
Yes, absolutely. Turning off the power at the breaker ensures that no electricity is flowing to the fixture, eliminating the risk of electrical shock when you’re working with metal tools and a potentially exposed electrical socket. The wall switch only interrupts one side of the circuit and isn’t enough for complete safety.
Can I use any type of glove to remove a broken light bulb?
No, you should use thick, sturdy work gloves made of leather or heavy-duty rubberized material. Thin latex, nitrile, or dishwashing gloves do not offer adequate protection against sharp glass shards or potential electrical contact if power were accidentally to be restored.
What if some tiny glass shards fall into the socket?
After removing the base, ensure the power is still off, then use a small, stiff brush or a can of compressed air to dislodge any tiny glass shards or debris from inside the socket. Always inspect the socket carefully before installing a new bulb.
My light bulb always seems to break when I try to unscrew it. Why?
Light bulbs can break when unscrewing for several reasons, including being overtightened, corroded, or if the glass is weakened by age or heat. Using too much force, especially if the bulb is stuck, can also cause it to shatter. Consider using a bulb gripper for easier removal next time.
Should I lubricate the socket threads before installing a new bulb?
It’s generally not recommended to lubricate socket threads, as lubricants can attract dust and debris, or potentially interfere with electrical contact. Instead, ensure the socket is clean and dry, and screw the new bulb in gently until it’s snug, but don’t overtighten it.
What if the socket itself feels loose or wobbly after removing the broken bulb?
If the socket feels loose or wobbly, it could indicate that the fixture is not securely mounted or that internal wiring is compromised. In such a case, do not install a new bulb. Ensure the power remains off and contact a qualified electrician to inspect and repair or replace the fixture for safety.