Changing a tail light bulb is a simple, DIY task that can save you money and keep your vehicle safe. This comprehensive guide walks you through the process, from identifying the right bulb and gathering tools to the step-by-step replacement and troubleshooting common issues. You’ll gain the confidence to perform this essential car maintenance yourself, ensuring your lights are always functional and helping you avoid potential tickets.
How to Change Tail Light Bulb
Have you ever noticed that one of your car’s tail lights looks a little dim, flickers, or perhaps has gone out completely? It’s a common issue, but one that’s crucial to address quickly. Not only are working tail lights essential for your safety on the road, making your vehicle visible to others, but they’re also a legal requirement in most places. Driving with a burnt-out tail light can lead to a police stop and even a costly ticket.
Many people tend to put off fixing this, thinking it’s a complicated repair best left to a mechanic. They imagine expensive shop fees and long waits. But here’s a secret: learning how to change a tail light bulb is actually one of the simplest DIY car maintenance tasks you can tackle. It requires minimal tools, a little patience, and this guide to walk you through every step. You don’t need to be a seasoned mechanic; if you can use a screwdriver, you’re halfway there!
This comprehensive guide will empower you to confidently change your tail light bulb, saving you time and money. We’ll cover everything from identifying the right bulb for your car and gathering the necessary tools, to a detailed step-by-step process for removal and installation, and even some troubleshooting tips. By the end of this article, you’ll be able to quickly and efficiently replace your tail light bulb, ensuring your vehicle is safe, legal, and ready for the road. Let’s get started and learn how to change a tail light bulb like a pro!
Key Takeaways
- Safety First: Always ensure your vehicle is parked safely with the engine off and parking brake engaged before starting any work on your car’s electrical system.
- Right Bulb Matters: Accurately identify the correct replacement bulb for your specific vehicle by checking your owner’s manual, the old bulb, or using an auto parts store lookup.
- Gather Your Tools: Most tail light bulb changes only require basic tools like screwdrivers, a trim removal tool (optional), and gloves, so prepare them beforehand.
- Gentle Handling: When changing a tail light bulb, especially a new one, avoid touching the glass with bare hands as oils can create hot spots and shorten bulb life.
- Test Before Reassembly: Always test the new tail light bulb (and brake lights, turn signals) before fully reassembling the housing and trim panels to save yourself extra work.
- Don’t Be Afraid to Ask for Help: If you encounter seized screws, complex wiring, or feel unsure, it’s always best to consult a professional mechanic rather than risk damage.
Quick Answers to Common Questions
How long does it typically take to change a tail light bulb?
For most vehicles, changing a tail light bulb is a quick process, usually taking only 10-30 minutes, especially once you know what you’re doing.
Can I touch the glass of the new tail light bulb?
No, it’s best to avoid touching the glass part of a new incandescent bulb with your bare hands. The oils from your skin can create hot spots on the bulb, leading to premature failure. Always handle it by its plastic or metal base, or wear gloves.
Do I need to disconnect the car battery before changing a tail light bulb?
While generally not strictly necessary for a simple bulb replacement, it’s always a good safety practice to turn off the engine and remove the key. Disconnecting the battery’s negative terminal is an extra precaution for any electrical work, but for a tail light bulb, it’s typically optional unless you’re uncomfortable or there are exposed wires.
What if my new tail light bulb still doesn’t work?
If the new bulb doesn’t light up, first recheck that it’s properly seated in the socket and the socket is securely twisted into the housing. Next, verify you have the correct bulb type. If it still fails, check the fuse for your tail lights (consult your owner’s manual) and examine the socket contacts for corrosion or damage. If all these checks fail, the issue might be a wiring problem or a faulty new bulb.
Can a burnt-out tail light bulb cause an indicator light on my dashboard?
Yes, many modern vehicles are equipped with a bulb-out detection system that will illuminate a warning indicator on your dashboard if a tail light bulb, or any other exterior light, burns out or malfunctions.
📑 Table of Contents
Why Your Tail Lights Are Important & When to Check Them
Your tail lights do so much more than just make your car look complete. They play a vital role in road safety, protecting you and everyone around you. Understanding their importance and knowing when to check them is the first step in maintaining your vehicle.
Visibility and Safety
The primary function of your tail lights is visibility. They make sure drivers behind you can see your vehicle, especially in low light conditions, during rain, fog, or at night. Your brake lights, which are often integrated into the tail light assembly, tell drivers when you’re slowing down or stopping, preventing rear-end collisions. Your turn signals, also part of the assembly, clearly communicate your intentions to change lanes or turn, reducing confusion and accidents. A malfunctioning tail light significantly compromises these safety features.
Legal Requirements
In nearly every jurisdiction, it’s a legal requirement to have fully functioning tail lights, brake lights, and turn signals. Driving with a burnt-out bulb isn’t just a minor inconvenience; it can lead to a traffic citation. Police officers frequently pull over vehicles with non-functioning lights because they pose a safety hazard. Replacing a tail light bulb yourself is far cheaper and less time-consuming than paying a ticket!
Signs of a Failing Tail Light Bulb
How do you know when it’s time to change a tail light bulb?
- Completely Out: This is the most obvious sign. If you or a friend notice a dark spot where a light should be, it’s definitely time.
- Dim or Flickering: Sometimes a bulb won’t go out entirely but will become noticeably dimmer or start flickering. This usually means the filament is on its last legs.
- Dashboard Warning Light: Many modern cars have a “bulb out” indicator on the dashboard. This little light is your car’s way of telling you that it’s detected an issue with one of your exterior lights.
- Visual Inspection: Make it a habit to do a quick walk-around check of your car’s lights periodically, especially before long trips. Have a friend stand behind the car while you press the brake pedal and activate your turn signals.
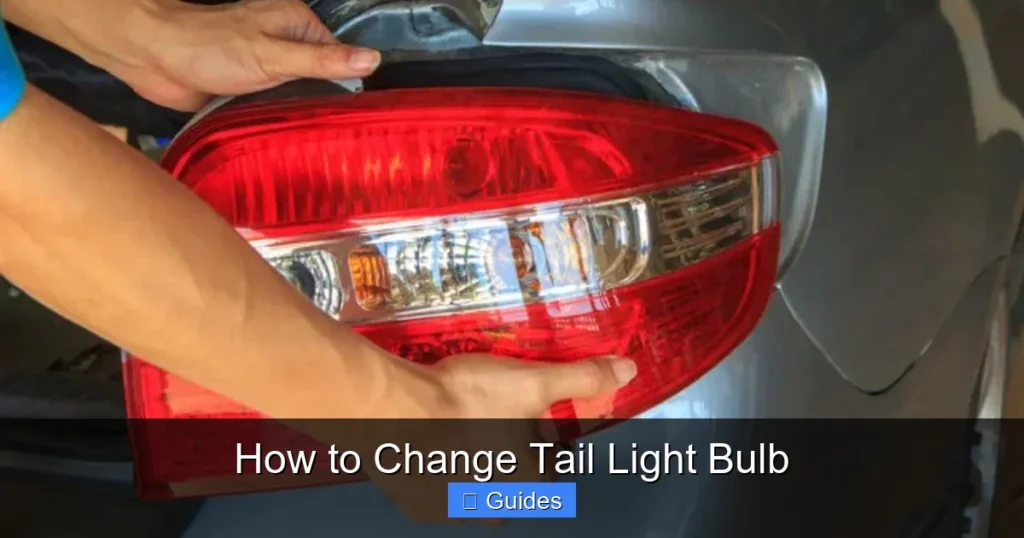
Gathering Your Tools and Identifying the Right Bulb

Visual guide about How to Change Tail Light Bulb
Image source: backyardmechanic.org
Before you dive into learning how to change a tail light bulb, you need to prepare. Having the right tools and, most importantly, the correct replacement bulb, will make the job smooth and stress-free.
Essential Tools for the Job
You’ll be surprised how few tools you actually need for most tail light bulb replacements.
- Screwdrivers: A Phillips head screwdriver and potentially a flathead screwdriver are usually sufficient. Some vehicles might use Torx bits, so a multi-bit screwdriver set can be handy.
- Pry Tool / Trim Removal Tool: For cars with internal trunk lining or trim panels that need to be removed to access the tail light assembly, a plastic trim removal tool is invaluable. It prevents scratching or damaging the plastic.
- Gloves: Latex or nitrile gloves are highly recommended. Not only do they keep your hands clean, but they also prevent oils from your skin from transferring to the new bulb’s glass, which can create hot spots and shorten its lifespan.
- Clean Rag: Useful for wiping away dirt or moisture.
- Small Tray or Magnetic Dish: A great tip is to have a small container to hold any screws or clips you remove. This prevents them from rolling away and getting lost!
How to Find the Correct Replacement Bulb
This is perhaps the most critical step when you want to change a tail light bulb. Using the wrong bulb can lead to electrical issues, poor performance, or even damage to your car’s system.
- Check Your Owner’s Manual: Your car’s owner’s manual is a treasure trove of information. It will list the specific bulb numbers for all exterior lights, including your tail lights, brake lights, and turn signals.
- Inspect the Old Bulb: Once you’ve removed the old, burnt-out bulb, you’ll often find a series of numbers and letters printed on the metal or plastic base of the bulb (e.g., 3157, 7443, 1157). Take this number to an auto parts store.
- Auto Parts Store Lookup: Most auto parts stores have computer systems where you can input your vehicle’s year, make, and model to find the correct bulb. The staff are usually very knowledgeable and can assist you.
Types of Bulbs: Incandescent vs. LED
Most older vehicles use traditional incandescent bulbs. These have a filament that glows when electricity passes through it. Many newer vehicles, however, come with LED (Light Emitting Diode) tail lights.
- Incandescent: These are usually straightforward to replace. They come in various shapes and sizes, often with a twist-and-lock or push-in base.
- LED: If your car has LED tail lights, individual bulbs are rarely replaceable. Often, the entire LED assembly or circuit board needs to be replaced. This is a more complex and expensive task, usually best handled by a professional. This guide primarily focuses on how to change incandescent tail light bulb. If you have LEDs, check your owner’s manual to confirm if individual bulbs are replaceable.
Safety First – Before You Start
Safety should always be your number one priority when working on any part of your vehicle. Taking a few simple precautions before you begin to change a tail light bulb will prevent accidents and ensure a smooth repair.
Park Safely
Choose a flat, level surface away from traffic. Your driveway or a garage is ideal. Avoid working on a busy street or an uneven incline.
Turn Off Engine & Lights
Make absolutely sure your car’s engine is off. Remove the key from the ignition to prevent anyone from accidentally starting the car. Turn off all lights, including the headlights and interior lights. This prevents accidental shocks and also allows any hot bulbs to cool down.
Use Parking Brake
Engage your car’s parking brake (handbrake) firmly. This secures the vehicle and prevents it from rolling, even on a slight incline.
Wear Gloves
As mentioned earlier, gloves are crucial. They protect your hands from dirt, grime, and any sharp edges, and they prevent skin oils from damaging the new bulb.
Let Things Cool Down
If your tail light bulb has just gone out, it might still be hot, especially if it was on for a while. Give it a few minutes to cool down before touching it to avoid burns.
Step-by-Step Guide to Changing Your Tail Light Bulb
Now that you’re prepared, let’s get into the practical steps of how to change a tail light bulb. This process is generally similar across most vehicles, but there might be minor variations.
Accessing the Tail Light Assembly
This is often the trickiest part, as manufacturers design this differently.
Opening the Trunk/Tailgate
The tail light assembly is almost always accessed from the rear of the vehicle, often through the trunk or tailgate opening. Open your trunk or tailgate fully.
Removing Trim Panels (if necessary)
Some vehicles have carpeted or plastic trim panels inside the trunk that cover the back of the tail light assembly.
- Look for fasteners: These panels are usually held in place by plastic clips, screws, or sometimes just friction.
- Use a trim removal tool: If there are plastic clips, gently pry them out with your trim removal tool. For screws, use the appropriate screwdriver. Keep all fasteners in your tray so they don’t get lost.
- Fold back or remove: Once the fasteners are out, you might be able to simply fold the panel back to expose the tail light, or you may need to completely remove it.
Unscrewing the Tail Light Housing
In many cars, the entire tail light housing needs to be removed from the outside of the vehicle, or unfastened from the inside.
- External Access: Look for 2-4 screws on the *outside* perimeter of the tail light lens, often visible when the trunk is open. Unscrew these. Once screws are removed, the entire light assembly often wiggles free or has clips that release it when gently pulled away from the vehicle.
- Internal Access: Other vehicles have bolts or nuts *inside* the trunk (once the trim panel is removed) that secure the tail light assembly to the body. Unscrew these. Once loosened, the tail light housing can usually be pulled straight back and out of the vehicle.
- Gentle Wiggling: Sometimes the housing will feel a bit stuck due to dirt or sealant. Gently wiggle it while pulling straight back. Don’t force it to avoid breaking clips or mounting points.
Locating and Removing the Old Bulb
With the tail light housing free, you can now get to the bulb.
Twisting the Socket
Behind the tail light housing, you’ll see several bulb sockets, often round and made of plastic, with wires leading to them. Each socket usually contains a specific bulb (e.g., brake light, turn signal, tail light). Identify the socket for the bulb you need to replace. It’s usually a specific color or position. To remove the socket, twist it counter-clockwise (about a quarter turn) until it unlocks, then pull it straight out from the housing.
Pulling or Twisting the Bulb Out
Once the socket is out, the bulb itself is easily accessible.
- Push-and-Twist: Many bulbs (like 1157, 1156) have a bayonet-style base. You’ll need to gently push the bulb into the socket, twist it counter-clockwise, and then pull it straight out.
- Pull Straight Out: Other bulbs (like 3157, 7443, or smaller wedge bulbs) simply pull straight out from their socket. Be firm but gentle.
Dispose of the old bulb properly.
Installing the New Bulb
This is where your new bulb and gloves come in handy.
Handling the New Bulb
Put on your gloves if you haven’t already. Carefully remove the new bulb from its packaging. Crucially, avoid touching the glass part of the bulb with your bare fingers. Skin oils can create hot spots on the glass, causing the bulb to burn out prematurely. Hold it by its plastic or metal base.
Inserting into the Socket
Insert the new bulb into the empty socket.
- Push-and-Twist: If it’s a bayonet-style bulb, push it in and twist clockwise until it locks into place.
- Push Straight In: For wedge bulbs, simply push it straight into the socket until it’s snug. Make sure it’s fully seated.
Twisting the Socket Back In
Align the tabs on the bulb socket with the corresponding slots in the tail light housing. Push the socket in and twist it clockwise until it locks securely into place. You should feel a distinct click or resistance.
Testing the New Bulb
Before you put everything back together, it’s vital to test the new bulb to ensure it’s working correctly.
Turn on Lights
Turn your car’s ignition to the “on” position (without starting the engine) and turn on your headlights/parking lights. Visually check the new tail light bulb. It should illuminate brightly.
Check Brake Lights (with helper or reflection)
If the bulb you replaced also serves as a brake light, have a friend press the brake pedal while you confirm it lights up. If you’re alone, you can back your car up to a reflective surface (like a garage door or large window) and press the brake pedal to see the reflection.
Check Turn Signals
Activate your turn signal for the side you just worked on. Ensure it flashes at a normal rate. If it flashes rapidly, it might indicate another bulb is out in that circuit or an incorrect bulb type.
Reassembling the Tail Light
If the new bulb is working perfectly, you can now reassemble everything.
Aligning the Housing
Carefully guide the tail light housing back into its mounting position on the vehicle. Make sure all clips and alignment pins line up correctly. It should fit snugly without having to force it.
Securing Screws/Clips
Reinstall any screws or nuts that hold the tail light housing in place. Don’t overtighten them, as this can crack the plastic. Just snug is enough.
Replacing Trim Panels
Finally, reattach any interior trim panels you removed. Ensure all clips and screws are put back in their original positions.
Congratulations! You’ve successfully learned how to change a tail light bulb!
Troubleshooting Common Issues After Replacement
Sometimes, even after you’ve diligently followed the steps to change a tail light bulb, things don’t quite go as planned. Don’t worry, many common issues have simple solutions.
New Bulb Not Lighting Up
- Incorrect Bulb Type: Double-check that you used the exact bulb number specified in your owner’s manual or on the old bulb. Different bulbs have different wattages or filament configurations.
- Improper Seating: The bulb might not be fully seated in its socket, or the socket might not be fully twisted and locked into the housing. Remove, inspect, and reinstall the bulb and socket, ensuring good contact.
- Bent or Corroded Contacts: Look inside the bulb socket. Are the metal contacts clean and making good contact with the bulb? If they’re bent, gently try to reshape them. If corroded, a small wire brush or electrical contact cleaner can help.
- Blown Fuse: If multiple lights on the same side are out, or if you accidentally shorted something, you might have blown a fuse. Consult your owner’s manual for the location of your fuse box and the specific fuse for your tail lights. Replace a blown fuse with one of the identical amperage.
- Defective New Bulb: Although rare, a new bulb can sometimes be faulty right out of the box. If all else fails, try another new bulb.
Flickering Bulb
A flickering bulb often indicates a loose connection. Re-seat the bulb in its socket and ensure the socket is firmly twisted into the housing. Check the wiring harness leading to the socket for any signs of damage or loose connections.
Indicator Light Still On
If your dashboard “bulb out” indicator remains lit after changing the tail light bulb, it could be for a few reasons:
- Another Bulb Is Out: You might have another bulb on the same circuit (like a license plate light or another tail light) that’s also out.
- Incorrect Bulb Resistance: Some vehicles are sensitive to bulb resistance. If you used a bulb with a different wattage or resistance, the car’s computer might still register an error.
- System Reset: On some cars, the system might need a drive cycle or a few ignition cycles to clear the error. If it persists after a day of driving, further investigation might be needed.
Difficult Reassembly
If the tail light housing isn’t fitting back into place, don’t force it.
- Check Alignment: Ensure all mounting tabs, pins, and screw holes are perfectly aligned.
- Wiring: Make sure no wires are pinched or obstructing the housing from seating correctly.
- Obstructions: Check for any debris or foreign objects preventing a flush fit.
When to Call a Professional
While learning how to change a tail light bulb is a rewarding DIY task, there are times when it’s best to call in the experts. Knowing your limits can save you from bigger headaches or costly mistakes.
Complex Wiring Issues
If you’ve replaced the bulb, checked the fuse, and ensured all connections are secure, but the light still doesn’t work, it could be a deeper electrical issue. Problems like a broken wire in the harness, a faulty ground connection, or a malfunctioning body control module (BCM) are beyond the scope of a simple bulb replacement and require diagnostic tools and expertise.
Seized Screws or Broken Components
Sometimes, screws can become seized with rust, or plastic clips can become brittle and break when you try to remove them. If you’re struggling to remove components without risking further damage, a professional can often extract seized fasteners or handle delicate repairs without causing more problems.
Advanced LED Systems
If your vehicle has factory-installed LED tail lights, and the entire assembly is sealed (meaning individual bulbs aren’t meant to be replaced), then a professional should handle it. Replacing these often involves replacing the entire light unit, which can be complex and expensive, sometimes requiring reprogramming of the car’s computer.
Lack of Confidence
If at any point you feel overwhelmed, unsure, or uncomfortable with the process, it’s perfectly fine to stop and seek professional help. Your safety and the integrity of your vehicle are paramount. A mechanic can quickly diagnose and fix the issue, ensuring everything is done correctly and safely. There’s no shame in knowing when to hand it over to someone with more specialized tools and experience.
Conclusion
And there you have it! You’ve learned how to change a tail light bulb from start to finish. What might have seemed like a daunting task is actually a straightforward piece of car maintenance that almost anyone can do with a little guidance. By following the steps outlined in this guide – from gathering the right tools and identifying the correct bulb, to carefully removing the old and installing the new, and finally testing – you’ve gained a valuable skill.
You’ve saved yourself money on mechanic fees, avoided potential traffic tickets, and most importantly, ensured your vehicle is safer for you and other drivers on the road. Remember, regularly checking your lights is a small habit that makes a big difference in preventing accidents. Don’t let a burnt-out bulb compromise your visibility or safety.
Keep this guide handy, and the next time you need to change a tail light bulb, you’ll tackle it with confidence. Congratulations on becoming a more self-reliant car owner! Drive safely!
🎥 Related Video: Remove brake light/turn signal bulb. Replace with new bulb. Installation is reverse of removal
📺 Mr. Delray
Frequently Asked Questions
How do I know what type of tail light bulb my car needs?
The easiest way to find the correct tail light bulb type is to check your car’s owner’s manual, which lists all bulb specifications. Alternatively, you can remove the old bulb and look for numbers printed on its base, or visit an auto parts store and have them look up the bulb based on your vehicle’s year, make, and model.
Is it legal to drive with a broken tail light?
No, driving with a broken or non-functioning tail light is illegal in most places and is a serious safety hazard. It can lead to a traffic stop and a costly fine, as it reduces your vehicle’s visibility to other drivers, especially at night or in bad weather.
Can I replace an incandescent tail light bulb with an LED bulb?
While physically possible in some cases, simply swapping an incandescent bulb for an LED bulb often leads to issues like “hyper-flashing” for turn signals or dashboard warning lights (due to different electrical resistance). Proper conversion typically requires installing load resistors or using specific “CANbus ready” LED bulbs designed to work with your car’s electrical system.
Do I need any special tools to change a tail light bulb?
For most tail light bulb replacements, you’ll only need basic hand tools like a Phillips head screwdriver, and possibly a flathead screwdriver or a plastic trim removal tool. Sometimes, no tools are needed at all if the bulb is easily accessible from the trunk. Wearing gloves is also recommended for handling the new bulb.
What if the tail light assembly is sealed and I can’t access the bulb?
If your tail light assembly appears sealed and you can’t access individual bulbs, it’s likely an integrated LED unit. In such cases, you typically cannot replace individual bulbs; the entire LED assembly or circuit board needs to be replaced. This is often a more complex and expensive repair best handled by a professional mechanic or a certified service center.
How often should I check my tail lights?
It’s a good habit to check your tail lights, brake lights, and turn signals at least once a month. You can do a quick walk-around inspection, or have a friend help you by checking the lights while you operate the brake pedal and turn signals. Regular checks help ensure your safety and avoid unexpected tickets.