Changing a recessed light bulb is a straightforward task anyone can master with the right guidance. This guide covers everything from essential safety precautions and identifying your bulb type to gathering the necessary tools and executing the replacement step-by-step. By following these simple instructions, you’ll be able to confidently refresh your home’s lighting, ensuring a brighter and more energy-efficient space in no time.
There’s nothing quite like the sleek, modern look of recessed lighting. It provides a clean, unobtrusive glow that can beautifully highlight features, brighten a room, or set a mood. But, just like any other light fixture, those handy recessed lights eventually need a new bulb. And when one goes out, it can feel a little daunting to figure out how to swap it out, especially if you’ve never done it before.
Don’t worry, you’re not alone! Many homeowners find themselves staring up at a dark recessed fixture, wondering if they need to call an electrician. The good news? Changing a recessed light bulb is a task that most people can easily tackle themselves with a few simple tools and a bit of know-how. This comprehensive guide will walk you through every step, ensuring you can confidently and safely bring the light back into your home. We’ll cover everything from safety precautions to identifying different bulb types and even choosing the perfect replacement.
So, if you’re ready to banish those dark spots and restore the full brilliance of your recessed lighting, let’s get started. By the end of this article, you’ll be a pro at swapping out any recessed light bulb, saving yourself time and money while keeping your home brightly lit and inviting.
Key Takeaways
- Safety First: Always turn off the power at the circuit breaker before attempting to change any recessed light bulb to prevent electrical shock.
- Identify Your Bulb Type: Recessed fixtures use various bulbs like screw-in (A-type, BR, PAR), bi-pin (GU10, MR16), or integrated LED units; knowing your type dictates the removal method.
- Gather the Right Tools: You might need a ladder, gloves, suction cup, or even a screwdriver, depending on the fixture and bulb type.
- Hands-On Approach: Most screw-in bulbs are removed by twisting counter-clockwise, while bi-pin bulbs often require a push-and-twist or spring clip release.
- Choose Wisely: When replacing, consider the bulb’s base type, wattage/lumens, color temperature (K), and beam angle to ensure compatibility and desired ambiance.
- Troubleshoot Smartly: If the new bulb doesn’t work, re-check the power, bulb seating, and ensure the bulb isn’t defective before assuming a bigger electrical issue.
Quick Answers to Common Questions
How often should I change recessed light bulbs?
The lifespan depends on the bulb type. Incandescent bulbs might last 750-1,000 hours, halogens 2,000-4,000 hours, CFLs 8,000-10,000 hours, and LEDs can last 25,000-50,000+ hours. LEDs last significantly longer, so you won’t change them as often.
Can I replace a halogen recessed light bulb with an LED one?
Yes, in most cases, you can! Just ensure the LED bulb has the same base type (e.g., GU10 to LED GU10, or E26 PAR30 to LED PAR30), the correct voltage, and if you have a dimmer, make sure the LED is dimmable and your dimmer is LED-compatible.
What if my recessed light fixture is integrated LED?
If your fixture is an integrated LED, you don’t change a “bulb.” Instead, the entire LED module or trim kit is replaced as a single unit when it fails. This usually involves twisting or clipping the entire fixture out and disconnecting a simple plug.
Why do my recessed lights flicker after changing a bulb?
Flickering often occurs when a non-dimmable LED bulb is used with a dimmer switch, or if an older dimmer switch isn’t compatible with the new LED technology. It can also be due to a loose connection or a faulty bulb.
Is it safe to change a recessed light bulb without turning off the power?
No, it is extremely unsafe. Always turn off the power at the circuit breaker before attempting to change any light bulb, especially recessed ones. This prevents the risk of electrical shock or injury.
📑 Table of Contents
Safety First: Essential Precautions Before You Begin
Before you even think about touching that recessed light bulb, safety must be your absolute top priority. Working with electricity, even at home, carries risks. Taking a few moments to ensure you’re safe can prevent accidents, shocks, or even fires. Think of this as the most important step in how to change recessed light bulb – don’t skip it!
Turn Off the Power at the Source
This is non-negotiable. Locate your home’s electrical panel (usually in a basement, garage, or utility closet). Find the breaker that controls the room or specific fixture where you’re working. Flip it to the “OFF” position. If your breakers aren’t clearly labeled, you can turn off the main breaker, but this will cut power to your entire home. A safer approach, if you’re unsure, is to turn on the light you plan to change, then flip breakers one by one until that light goes out. Once it’s off, you know you’ve found the right breaker. It’s also a good practice to place a piece of tape over the breaker switch with a “DO NOT TOUCH” note to prevent anyone from accidentally turning it back on while you’re working.
Allow the Bulb to Cool Down
Old incandescent or halogen recessed light bulbs can get incredibly hot. Touching a hot bulb can cause severe burns. Always wait at least 15-20 minutes after turning off the power for the bulb to cool down completely before handling it. Even LED bulbs can get warm, though typically not as hot as traditional bulbs.
Use a Sturdy Ladder and Work Safely
Recessed lights are usually in the ceiling, meaning you’ll need a ladder or step stool. Make sure your ladder is stable, on a level surface, and tall enough for you to comfortably reach the fixture without overextending. Have someone spot you if possible, especially on taller ladders. Avoid standing on chairs or wobbly objects.
Wear Protective Gear
While not always strictly necessary, wearing work gloves can protect your hands from sharp edges, hot surfaces (if you misjudged cooling time), or broken glass. Safety glasses are also a good idea to protect your eyes from any debris that might fall from the fixture, especially in older installations.
Identifying Your Recessed Light Bulb Type
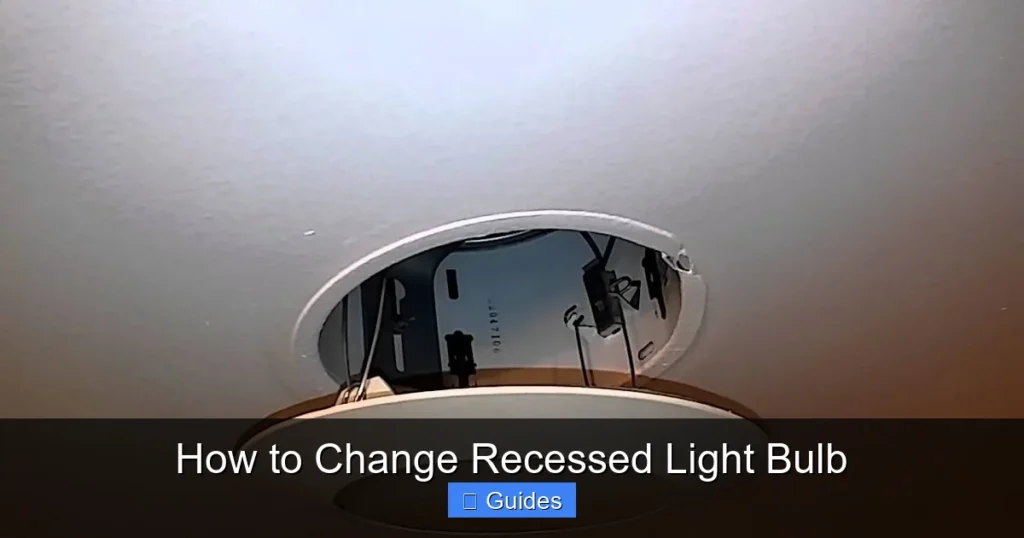
One of the biggest hurdles when trying to change a recessed light bulb is knowing what kind of bulb you actually have. Recessed fixtures are incredibly versatile, and there are several common bulb types, each with its own removal method. Don’t force anything! Let’s figure out what you’re dealing with.
Visual guide about How to Change Recessed Light Bulb
Image source: i.pinimg.com
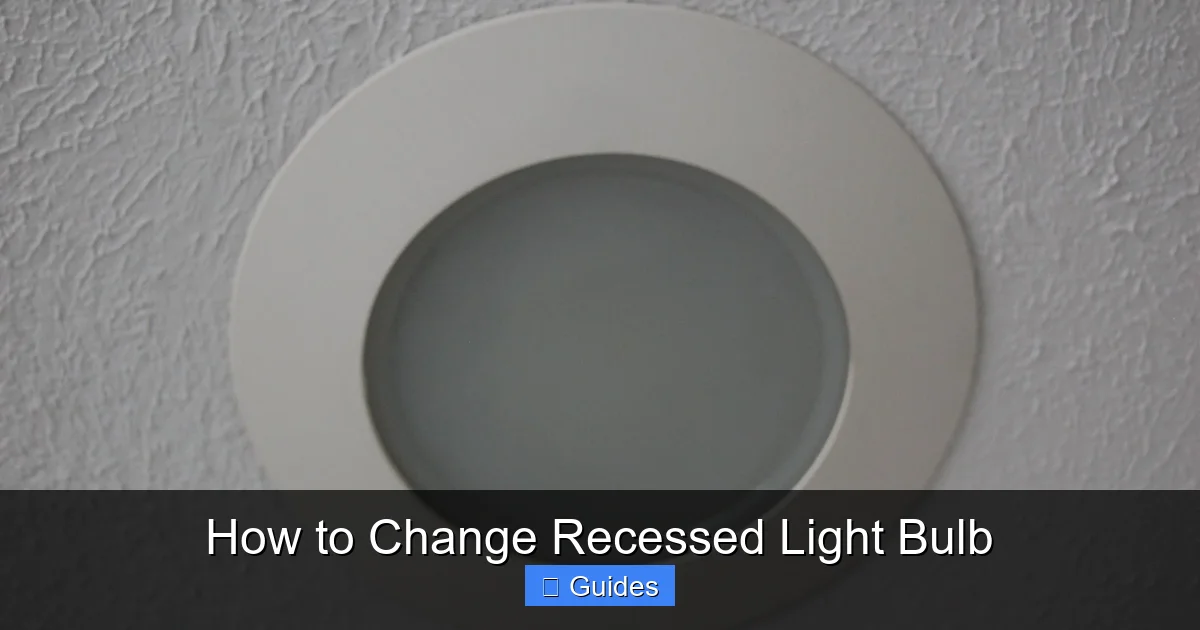
The Many Faces of Recessed Lighting Bulbs
When you look up at your recessed fixture, you might see just the bulb, or you might see a trim kit (the decorative ring around the bulb). Sometimes the bulb is completely exposed, other times it’s recessed even further back. Here are the most common types you’ll encounter:
- Standard Screw-In Bulbs (A-type, BR, PAR): These are probably the most straightforward. They have a familiar screw base (E26, E27) just like a traditional light bulb.
- A-type: Your classic, pear-shaped bulb. Less common in newer recessed fixtures, but still out there.
- BR (Bulged Reflector): These have a wider “shoulder” and a reflective coating inside, designed to spread light broadly. Often seen in general room lighting.
- PAR (Parabolic Aluminized Reflector): These are more intense, often with a tighter beam, making them good for accent lighting or task lighting. They look more like a spotlight.
- Bi-Pin Halogen or LED Bulbs (GU10, MR16): These bulbs don’t screw in; instead, they have two pins that push into a socket. They are commonly found in smaller, more focused recessed lighting.
- GU10: Recognized by two thick pins with flat tips, forming a “U” shape at the base. They often require a push-and-twist motion to remove.
- MR16: These have two thinner, sharper pins. They usually just pull straight out from the socket, often held in by a retaining clip or spring.
- Integrated LED Fixtures: This is a growing trend. With these, the LED light source is built directly into the trim kit, forming a single unit. You don’t change a “bulb” per se; you replace the entire trim/fixture. These often twist or clip into place within the can.
- Fluorescent Pin-Base Bulbs (CFLs): Less common in modern recessed lighting but sometimes found, especially in older energy-efficient installations. These have 2 or 4 pins at the base and usually twist and pull out.
What to Look For
Carefully observe the base of the bulb. Does it have threads? Are there two pins? Does it look like the entire circular piece is one sealed unit? Often, the bulb itself will have markings printed on it that indicate its type (e.g., “PAR30,” “GU10,” “E26”). Take a photo of the bulb and any markings for reference when buying a replacement.
Gathering Your Tools
Once you know what kind of recessed light bulb you’re dealing with, gathering the right tools is the next step. Most of what you’ll need you probably already have around the house. Having everything ready before you start will make the process smooth and quick.
Essential Tools You’ll Likely Need
- Sturdy Ladder or Step Stool: As mentioned in safety, this is crucial for reaching ceiling fixtures.
- Work Gloves: For protection against heat, sharp edges, or broken glass.
- Safety Glasses: To protect your eyes from falling debris.
Tools That Might Be Handy (Depending on Bulb Type)
- Soft Cloth or Paper Towel: To wipe down dusty fixtures or to help grip slippery bulbs.
- Bulb Changer Suction Cup Tool: This is a lifesaver for recessed light bulbs that are deep within the fixture or too hot to touch. It adheres to the flat face of the bulb, allowing you to twist it out without direct contact. Make sure you get one designed for recessed lights, as some are specific to floodlights.
- Small Flathead Screwdriver: Sometimes useful for gently prying down retaining clips on some bi-pin or integrated LED fixtures. Be gentle to avoid damaging the fixture.
- Needle-Nose Pliers: For stubborn pins or clips, but use with extreme caution to avoid damaging the socket.
- New Replacement Bulb: Obviously! Make sure you have the correct type, base, wattage/lumens, and color temperature.
Having these items ready before you climb the ladder will prevent multiple trips up and down, making the job much more efficient.
Step-by-Step Guide to Changing Recessed Light Bulbs
Now that you’ve got your safety measures in place, identified your bulb, and gathered your tools, it’s time for the main event: learning how to change recessed light bulb. We’ll break this down by common bulb types.
Changing a Standard Screw-In Recessed Light Bulb (A-type, BR, PAR)
This is generally the easiest type to replace.
- Confirm Power is Off: Double-check the circuit breaker.
- Let Cool Down: Ensure the old bulb is completely cool to the touch.
- Position Your Ladder: Place it securely directly beneath the fixture.
- Grip the Bulb:
- If the bulb is easily accessible, grip it firmly with your gloved hand.
- If it’s deep or slick, use a bulb changer suction cup tool. Press it firmly onto the face of the bulb to create a seal.
- Unscrew the Bulb: Rotate the bulb (or the suction cup tool) counter-clockwise until it detaches from the socket. It should turn freely after the initial resistance.
- Inspect the Socket: Briefly check the socket for any damage, corrosion, or debris. If it looks compromised, you might need a professional.
- Insert the New Bulb:
- Take your new replacement recessed light bulb.
- Carefully align its screw base with the socket.
- Gently turn it clockwise until it’s snug. Don’t overtighten, as this can damage the socket or the bulb. Just a gentle snugness is enough.
- Clean Up: Properly dispose of the old bulb.
- Restore Power: Go back to your circuit breaker and turn the power back on. Test your new light!
Changing a Bi-Pin Recessed Light Bulb (GU10, MR16)
These bulbs are a bit different because they don’t screw in. They often rely on tension or clips.
- Confirm Power is Off: Essential safety step.
- Let Cool Down: Halogen MR16s and GU10s get very hot.
- Position Your Ladder: Securely below the fixture.
- Access the Bulb:
- For GU10s: These often require a push-and-twist motion. You might see two small notches on the bulb’s face. If you have a suction cup tool designed for GU10s, it often has prongs that fit these notches. Push the bulb slightly into the fixture, then twist counter-clockwise about a quarter turn. It should then release and pull straight out. If no tool, you can try with gloved fingers, but be careful of the tight twist.
- For MR16s: These usually just pull straight out. They might be held by a metal retaining clip or spring. Gently push the clip aside or unhook it if present. Then, carefully pull the bulb straight out from the socket by gripping its sides or rim. Avoid pulling by the glass face.
- Inspect the Socket: Check the pin receptors for bends or damage.
- Insert the New Bulb:
- For GU10s: Align the new bulb’s pins with the holes in the socket. Push the bulb firmly into the socket, then twist clockwise about a quarter turn until it locks into place.
- For MR16s: Align the new bulb’s pins with the socket holes. Push the bulb straight in until it’s fully seated. If there was a retaining clip, re-engage it to hold the bulb securely.
- Clean Up: Dispose of the old bulb.
- Restore Power: Flip the breaker back on and enjoy your light.
Replacing an Integrated LED Recessed Fixture (Trim/Module Replacement)
When you have an integrated LED, you’re not changing a bulb; you’re replacing the entire visible part of the recessed light.
- Confirm Power is Off: Crucial for safety.
- Position Your Ladder: Underneath the fixture.
- Remove the Old Fixture:
- Most integrated LED trims are held in by tension clips or torsion springs (wire springs that clip into the can housing).
- Gently pull the trim straight down from the ceiling. You’ll likely feel resistance from the springs.
- Once you’ve pulled it down enough, you’ll see the electrical connector. This is usually a simple “twist-lock” or “push-in” connector. Twist or pull to disconnect it from the wiring inside the recessed can.
- If there are torsion springs, you might need to pinch them together to release them from their clips inside the can.
- Disconnect Old Fixture: Unplug the fixture from the junction box connector.
- Connect the New Fixture:
- Take your new integrated LED trim.
- Plug its electrical connector into the existing wiring connector inside the recessed can. Ensure it’s secure.
- Carefully guide the wiring back into the can.
- If using torsion springs, pinch them and guide them into the receptor brackets inside the can.
- Gently push the entire trim up into the ceiling until it sits flush. The tension clips or torsion springs will hold it in place.
- Restore Power: Turn the circuit breaker back on and test the light.
Choosing the Right Replacement Bulb
Replacing a recessed light bulb isn’t just about getting the old one out; it’s also about putting the right new one in. With so many options available today, it’s easy to get overwhelmed. Here’s what to consider to make an informed choice for your recessed lighting.
Key Factors for Selecting a New Recessed Light Bulb
When you’re shopping for a replacement, don’t just grab the cheapest option. Think about these aspects:
- Base Type: This is paramount for how to change recessed light bulb. Does your fixture require an E26/E27 screw base, a GU10 twist-lock, an MR16 bi-pin, or something else? Always match the base type of your old bulb.
- Bulb Shape and Size:
- BR (Bulged Reflector) or PAR (Parabolic Aluminized Reflector): These are common for recessed lighting. Make sure the new bulb’s diameter (e.g., BR30, PAR38) fits comfortably within your fixture and doesn’t protrude too much or too little. The number usually indicates the diameter in eighths of an inch (e.g., a BR30 is 3.75 inches in diameter).
- A-type: While you *can* use an A-type bulb in some recessed fixtures, it’s generally not recommended for optimal light distribution or heat management unless specifically designed for it.
- Wattage/Lumens:
- Wattage: For traditional incandescent or halogen bulbs, match the wattage or go lower to save energy. Crucially, *never* exceed the maximum wattage rating of your fixture (usually marked inside the can).
- Lumens: This is the actual measure of brightness. If switching to LED, look at the lumens to match the brightness of your old incandescent bulb (e.g., a 60W incandescent is roughly 800 lumens). LEDs consume far fewer watts for the same lumen output.
- Light Technology (LED, Halogen, CFL):
- LED (Light Emitting Diode): Highly recommended. LEDs are energy-efficient, long-lasting, and produce less heat. They are the best long-term investment.
- Halogen: More efficient than traditional incandescents, but still generate significant heat and use more energy than LEDs.
- CFL (Compact Fluorescent Lamp): Energy-efficient but can take time to warm up to full brightness and contain mercury. Less common now than LEDs.
- Color Temperature (K – Kelvin): This describes the “warmth” or “coolness” of the light.
- Warm White (2700K-3000K): Similar to traditional incandescent bulbs, creating a cozy, inviting atmosphere. Ideal for living rooms, bedrooms.
- Neutral White (3500K-4000K): A balanced, clean light, good for kitchens, bathrooms, offices.
- Cool White/Daylight (5000K-6500K): Bright, invigorating light, useful for task lighting or areas where high visibility is needed.
- Beam Angle: This determines how wide or narrow the light spread is.
- Flood (FL) or Wide Flood (WFL): A wider beam (e.g., 40-60 degrees) for general ambient lighting.
- Spot (SP) or Narrow Flood (NFL): A narrower beam (e.g., 10-30 degrees) for accent lighting, highlighting artwork, or task lighting.
- Dimmable vs. Non-Dimmable: If your recessed lighting is connected to a dimmer switch, make sure your new bulb is labeled “dimmable.” Using a non-dimmable bulb with a dimmer can cause flickering or premature bulb failure.
Taking a moment to understand these factors will not only ensure your new recessed light bulb fits but also helps you achieve the perfect lighting effect for your space.
Troubleshooting Common Issues After Changing a Recessed Light Bulb
You’ve gone through all the steps to change recessed light bulb, flicked the switch, and… nothing. Don’t panic! It’s usually a simple fix. Here are some common troubleshooting steps if your new recessed light isn’t working.
The Light Still Isn’t Turning On
- Check the Circuit Breaker (Again): It’s easy to forget to flip it back on or to accidentally flip the wrong one. Make sure the breaker for that specific fixture is firmly in the “ON” position.
- Ensure the Bulb is Seated Correctly:
- For screw-in bulbs: Gently tighten the bulb a little more. Sometimes they aren’t quite making contact with the socket. Avoid overtightening.
- For bi-pin bulbs (GU10, MR16): Make sure the pins are fully inserted and, for GU10s, that the bulb is twisted completely into the locked position. For MR16s, ensure any retaining clips are holding it securely.
- For integrated LEDs: Ensure the electrical connector is firmly plugged in and the unit is fully seated in the can.
- Test the Bulb in Another Fixture: If you have another working recessed light fixture that uses the same bulb type, try swapping the new bulb into it. If it works there, your issue is with the original fixture or wiring. If it doesn’t, you likely have a defective new bulb.
- Inspect the Socket: With the power OFF, carefully examine the inside of the socket. Look for any bent or broken tabs, corrosion, or debris that might be preventing good contact. If you see bent tabs, you might be able to gently bend them back with needle-nose pliers, but be very careful and ensure the power is off.
- Check for Damage: Did you accidentally drop or bang the new bulb? Even a small impact can damage delicate filaments or internal components.
The Light is Flickering or Dim
- Dimmable vs. Non-Dimmable Bulb: If your fixture is on a dimmer switch, ensure your new bulb is explicitly labeled as “dimmable.” Using a non-dimmable bulb on a dimmer will almost always result in flickering or poor performance.
- Incompatible Dimmer Switch: Some older dimmer switches aren’t compatible with newer LED bulbs. If you’ve switched from incandescent to LED and are experiencing flickering, you might need to upgrade your dimmer switch to an LED-compatible one.
- Loose Connection: The bulb might not be fully tightened or seated, causing intermittent contact. Re-tighten or re-seat the bulb.
- Voltage Fluctuations: While less common for a single bulb, significant voltage fluctuations in your home’s electrical system can cause flickering. If other lights are also acting up, this might be the case.
The Bulb Blew Out Immediately
- Wrong Wattage/Voltage: Double-check that you didn’t install a bulb with a higher wattage than your fixture can handle, or a bulb with the wrong voltage (e.g., a 12V bulb in a 120V circuit without a transformer). Always match the fixture’s requirements.
- Defective Bulb: Sometimes, you just get a lemon. Try another new bulb.
- Socket Issue: A short in the socket could cause a bulb to blow immediately. If multiple bulbs blow quickly in the same fixture, you’ll need to call an electrician.
Most of these issues are minor and easily resolved. If you’ve tried all the troubleshooting steps and the light still isn’t working, or if you suspect a more serious electrical problem, it’s always best to call a qualified electrician to diagnose and fix the issue safely.
Congratulations! You’ve successfully navigated the world of recessed lighting maintenance. Changing a recessed light bulb might have seemed like a daunting task at first, but with the right information and a methodical approach, it’s a simple and satisfying DIY project. From prioritizing safety by cutting the power to identifying the correct bulb type and carefully installing its replacement, you’re now equipped with the knowledge and confidence to keep your home brilliantly lit.
Remember, attention to detail, especially regarding safety and bulb compatibility, is key. By following the steps outlined in this guide, you’ll not only save yourself the cost of a service call but also gain a valuable skill that contributes to the ongoing care and comfort of your home. So, next time a recessed light dims, you’ll know exactly how to change recessed light bulb and restore that perfect glow!
Frequently Asked Questions
How do I know if my recessed light bulb is dimmable?
Look for explicit labeling on the bulb’s packaging or on the bulb itself that says “dimmable.” If it doesn’t say “dimmable,” assume it is not, especially for LED bulbs, as using a non-dimmable bulb with a dimmer can cause flickering or damage.
What does “color temperature” mean for a light bulb?
Color temperature, measured in Kelvin (K), describes the visual appearance of the light. Lower Kelvin numbers (e.g., 2700K) produce a warm, yellowish light like traditional incandescents, while higher numbers (e.g., 5000K-6500K) produce a cool, bluish-white light similar to daylight.
Can I use any wattage bulb in my recessed fixture?
No, you should never exceed the maximum wattage rating of your recessed fixture. This rating is typically found on a label inside the can housing and is crucial to prevent overheating and fire hazards. When switching to LEDs, you’ll find they consume far fewer watts for the same brightness, so matching lumens is more important than matching old incandescent wattage.
My recessed light bulb broke while I was trying to remove it. What should I do?
First, ensure the power is OFF at the circuit breaker. If it’s a screw-in base, use needle-nose pliers to carefully grip the metal base (avoiding glass shards) and twist it counter-clockwise to remove it from the socket. If necessary, use a potato or apple half pushed onto the broken glass to help twist the base out, but wear thick gloves and eye protection.
Why are some recessed lights so hard to remove?
Recessed lights can be difficult to remove for a few reasons: they might be very hot, deep within the fixture making them hard to grip, or simply very old and stuck due to heat cycles. Using a rubber glove or a specialized suction cup tool can provide better grip and make removal easier.
Should I upgrade all my recessed lights to LED?
Upgrading to LED recessed light bulbs is highly recommended. LEDs offer significant energy savings, a much longer lifespan, and produce less heat than traditional bulbs, which can reduce your utility bills and maintenance efforts. While the initial cost might be higher, the long-term benefits typically outweigh it.